
Clouded Leopard ROC TIFV CM-32/33
When I was asked to review this kit, I have to admit to feeling a bit daunted. I have only done a handful of modern armor pieces, and even those were really restricted to IDF tanks and vehicles. There’s not a whole lot of information out there on this specific vehicle either—a cursory Google search brings up primarily pictures of the actual animal known as the Clouded Leopard.
So to quote the introduction from the instruction sheet, after having used second-hand armored half-tracks and Vietnam War-weary V-150s, the Republic of China (ROC: Taiwan) engineers were urged by the US to receive training on designing their own wheeled IFVs. In 1992 as a result of this, the prototype six-wheeled CM31 was born. In the course of this, however, it was soon realized that eight-wheeled IFVs were the new norm. So using the CM31 as a base, development of a more versatile eight-wheeled IFV began in 2001. In 2005, the new design- the CM32, was finalized and given the name “Clouded Leopard”. Production began in 2007 and featured an automatic 40mm grenade launcher and coaxial 7.62mm machine gun. Various versions have been created and production of the CM32/33 totaled 368 units.
The Kit
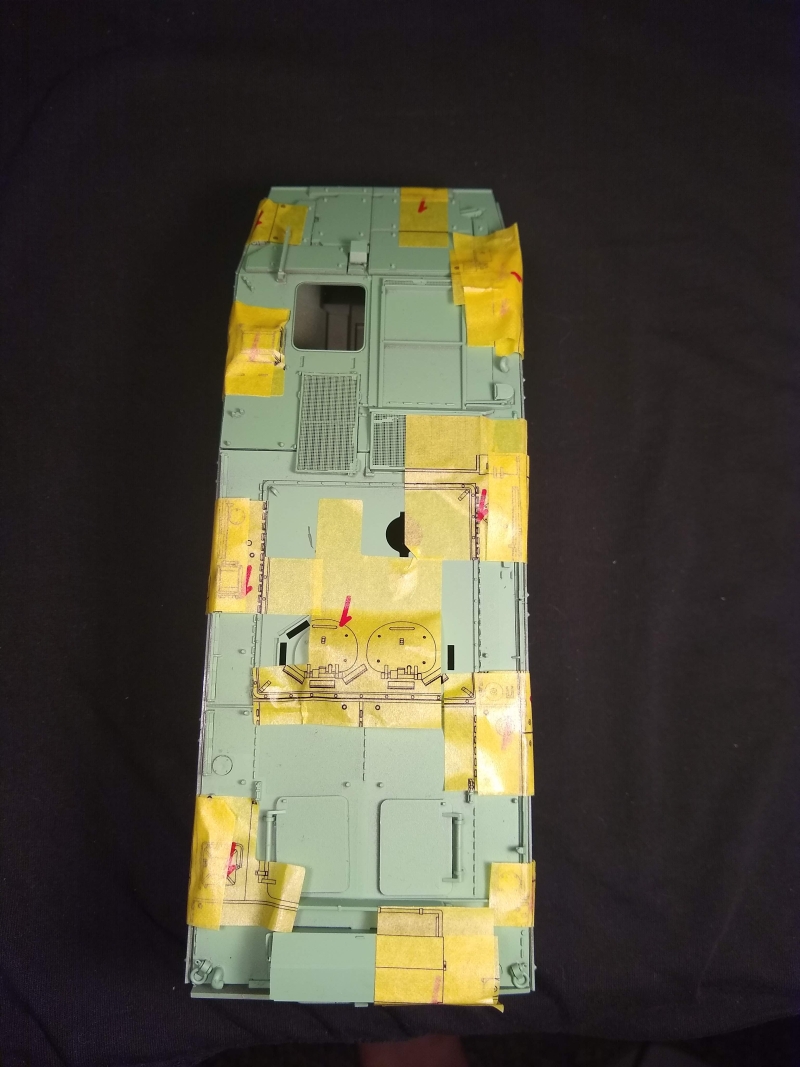
First off—what’s inside the box. There are seven sprues of dark green styrene parts, a large lower hull part, one sprue of clear parts, a soft rubber sprue for the ammo belts, two PE frets, a set of eight rubber tires and styrene hubs, and a decal sheet.
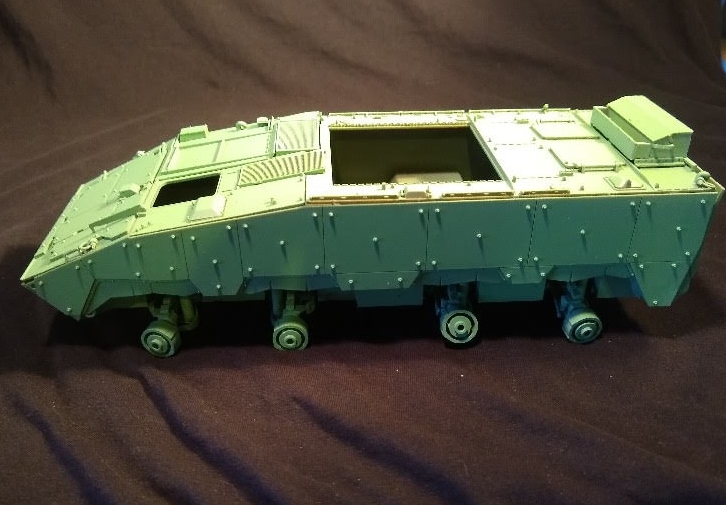
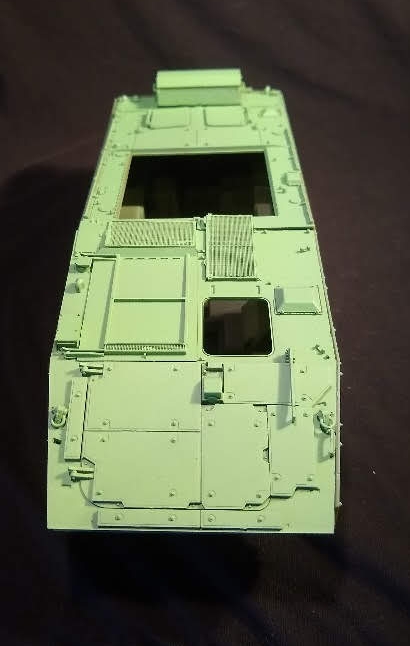
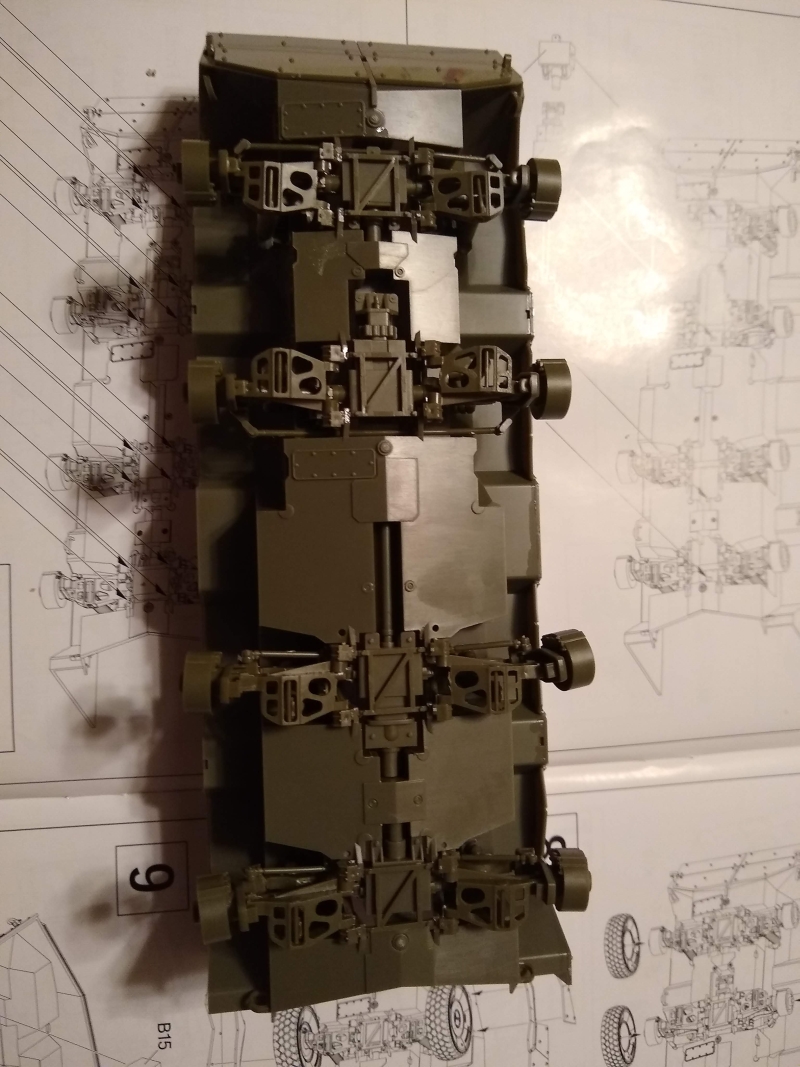
Assembly begins with the lower hull and suspensions. From there, the linkages for four pairs of wheels continues. Each of these four assemblies are made up of approximately twenty parts. The fit is pretty spot-on, however, so despite being just a bit tedious, it all came together pretty well. After adding a few extra parts to these installed assemblies, and the addition of the hubs and tires, we move on to the addition of the protective armor plates to the hull sides.
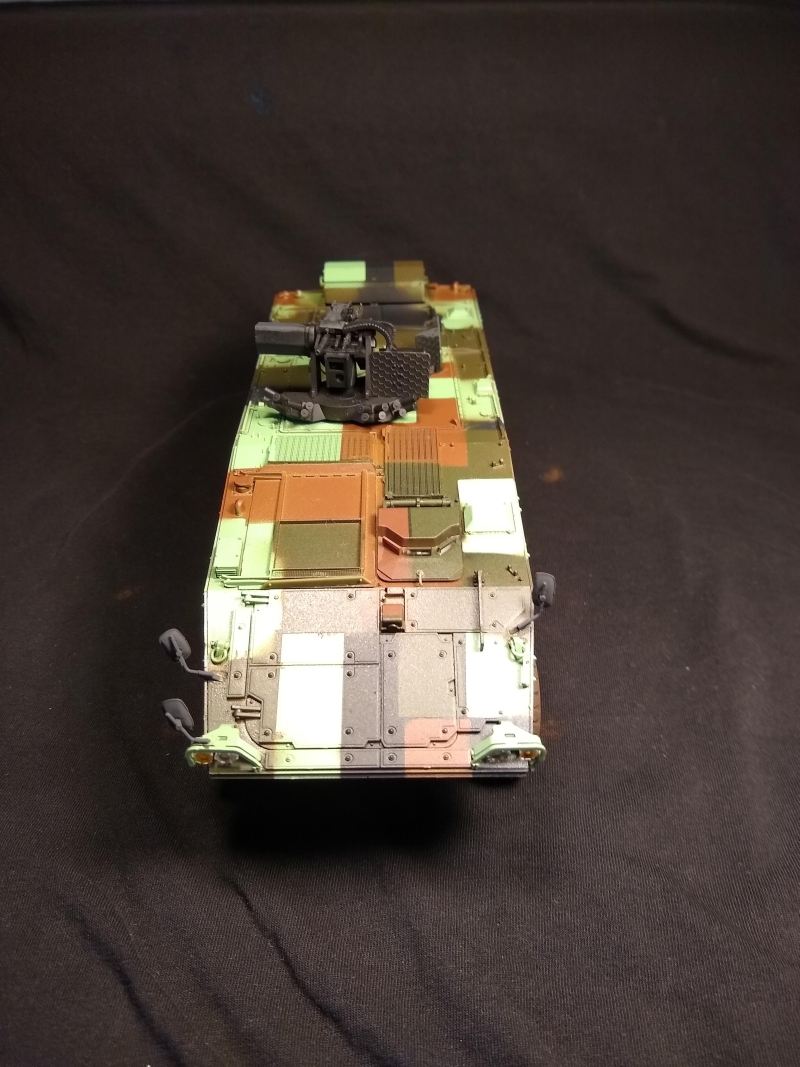
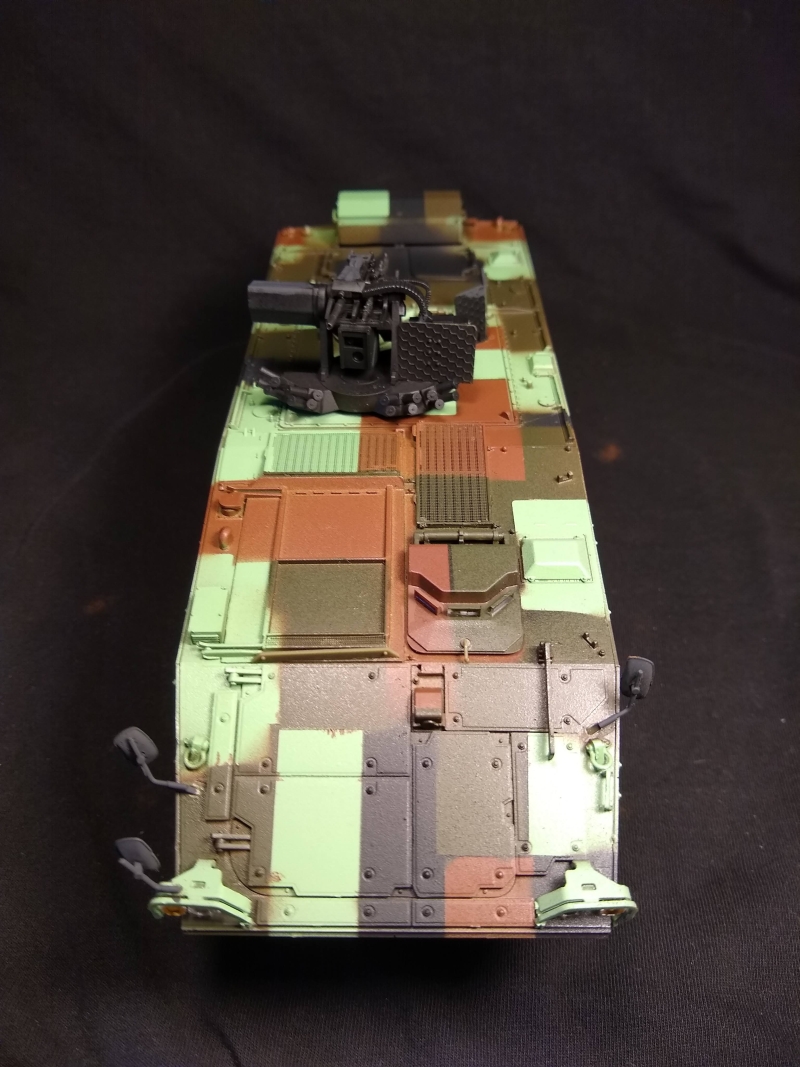
At this point, assembly shifts to the rear side, adding the jerry cans, tools, phone box, lights, and doors to the plate. After adding this all to the back of the lower hull, we move to the top side plate with more added armor, hatches, and PE grills. Steps 15 carries on to two pages of all the different variations of radio antenna configurations for the different variants included in the kit. Unfortunately, in every case for me, the antenna bases were snapped into 3-4 parts so I was unable to use them. We move on to more top deck details, including the addition of the ceramic shields for the gun mounts. Everything to this point went together extremely well. The last step involves adding the three side mirrors and headlight assemblies. I am very pleased to report that the headlight guards are one solid piece instead of multi-piece assemblies- thank you AFV Club!!! Everything went together without a hitch and now I had to move on to the challenging paint stage.
Paint and Weathering
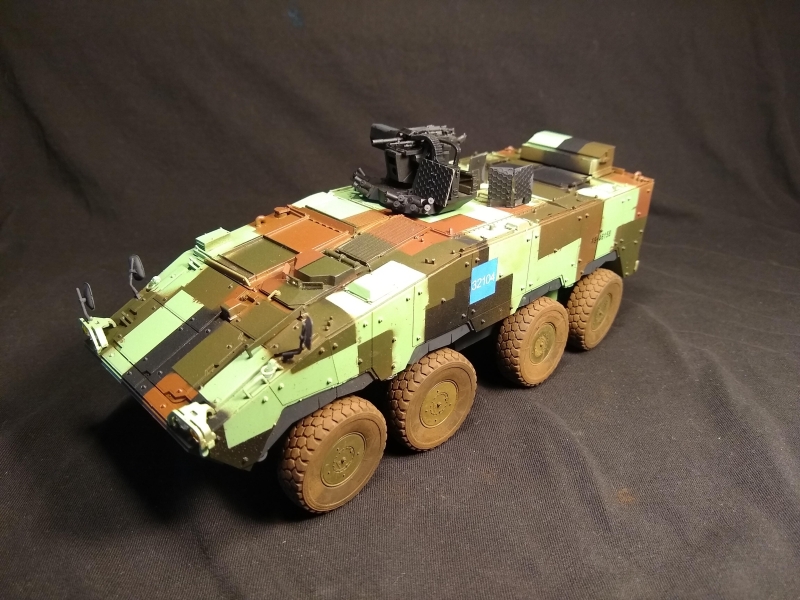
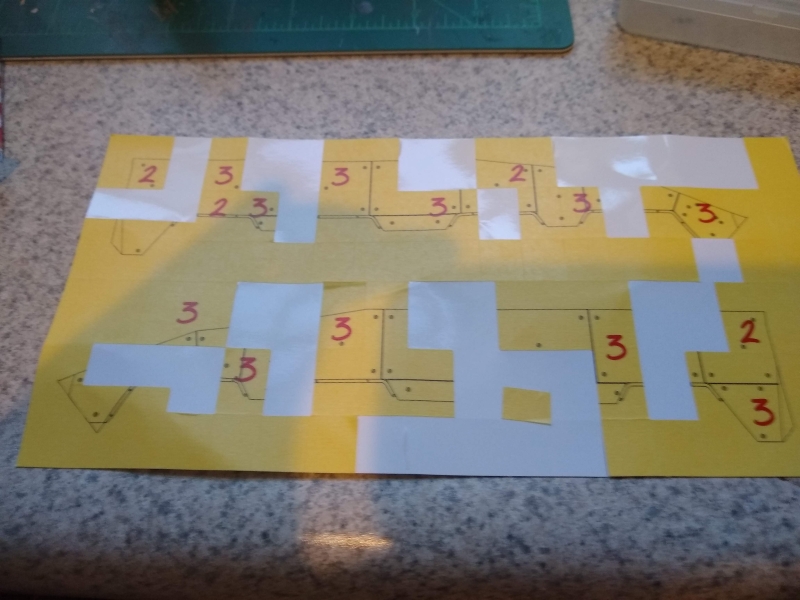
There are about a half dozen options for different markings for the CM-33 armored personnel carrier variants listed in the various paint schemes. Included in the kit was a masking set that proved extremely helpful. The masking set was numbered. After spraying the initial Russian Green base color, you add the “1” masks using the instructions as a helpful placement guide. From there, you spray the Leather Brown color. Next, after adding all of the “2” masks, is the Bronze Green color. Finally, after the “3” masks have been added, the Tar Black color is added. It wasn’t until after I had painted that I realized way back, in the beginning, was a guide to these colors with Lifecolor and Mr. Color references for them. I ended up using Vallejo “Green Sky” for the base Russian Green color and feel it is a pretty close match. Two other schemes in the box include a CM-32 Command vehicle scheme and a CM-32 Presidential Emergency Evacuation Armoured Vehicle. I’d love to know the origins of that latter one. Minimal weathering was done as I know so very little of these—but I did use a friend’s “bag of dirt” method for dirtying up the rubber tires.
Conclusion
After having built the Sho’t Kal tank last year from AFV Club, I was a little gun shy to be taking another kit on. However, this one assembled overall pretty quickly, despite the complicated wheel assemblies. The hardest obstacle to overcome is definitely the involved painting- so I heartily recommend the masks if they don’t come with your kit. And as helpful as they were, care must be taken around the complex angles of the kit to ensure there is no bleed-through between the four colors of the scheme. I am extremely grateful to AFV Club, Stevens International, and IPMS USA for the opportunity to build something I definitely would not have attempted on my own.


Comments
Add new comment
This site is protected by reCAPTCHA and the Google Privacy Policy and Terms of Service apply.
Similar Reviews