
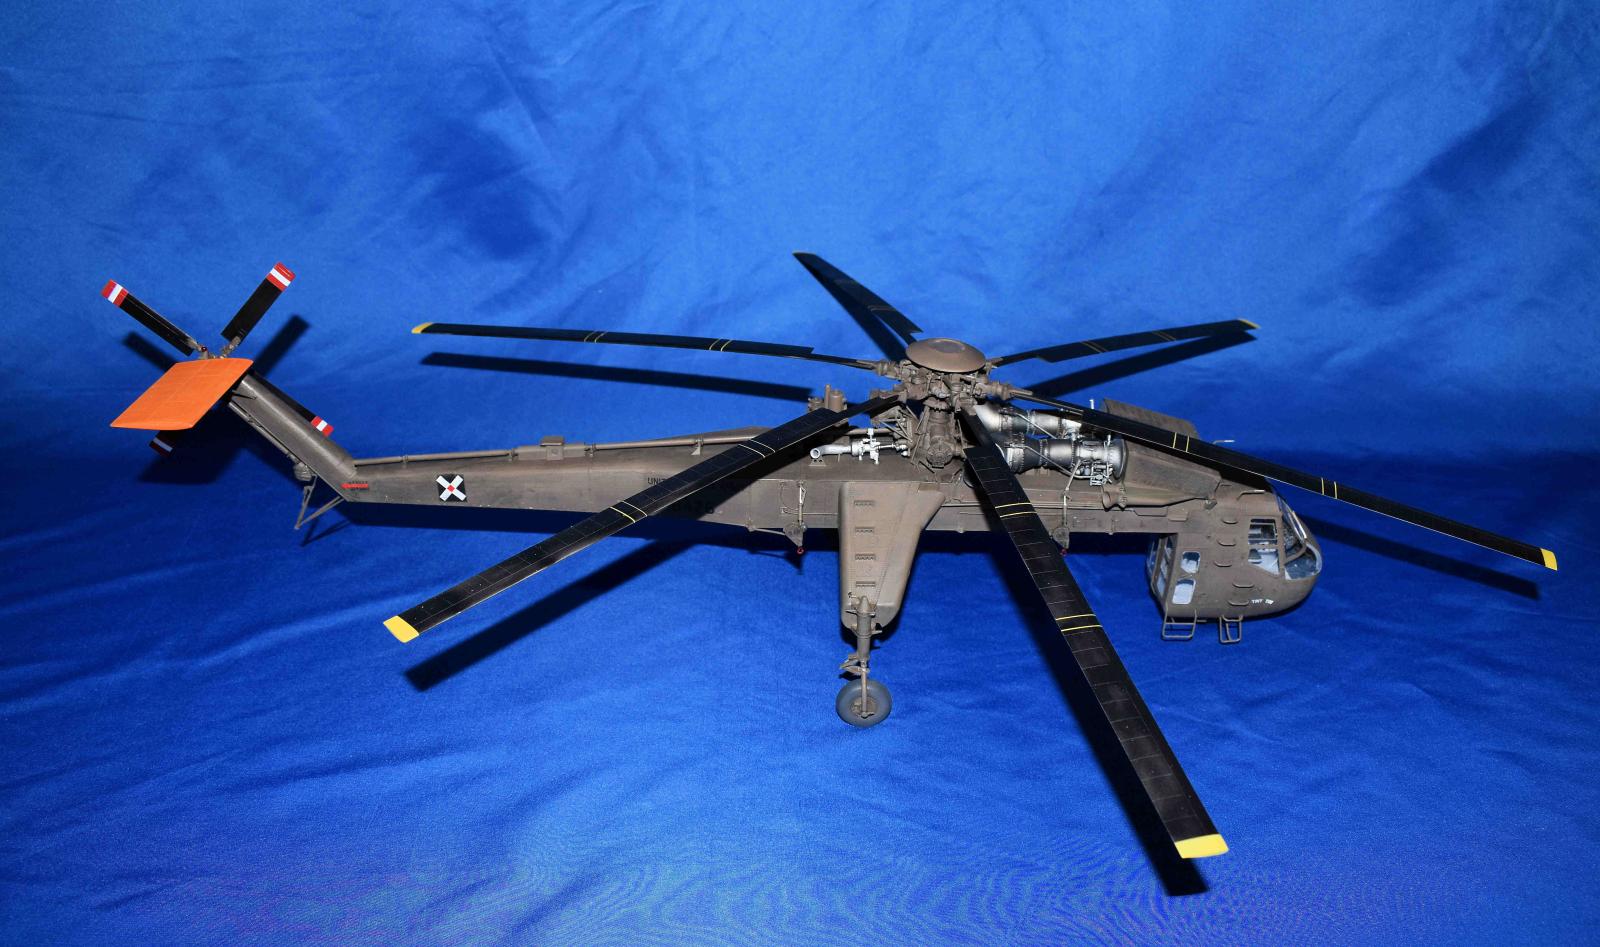
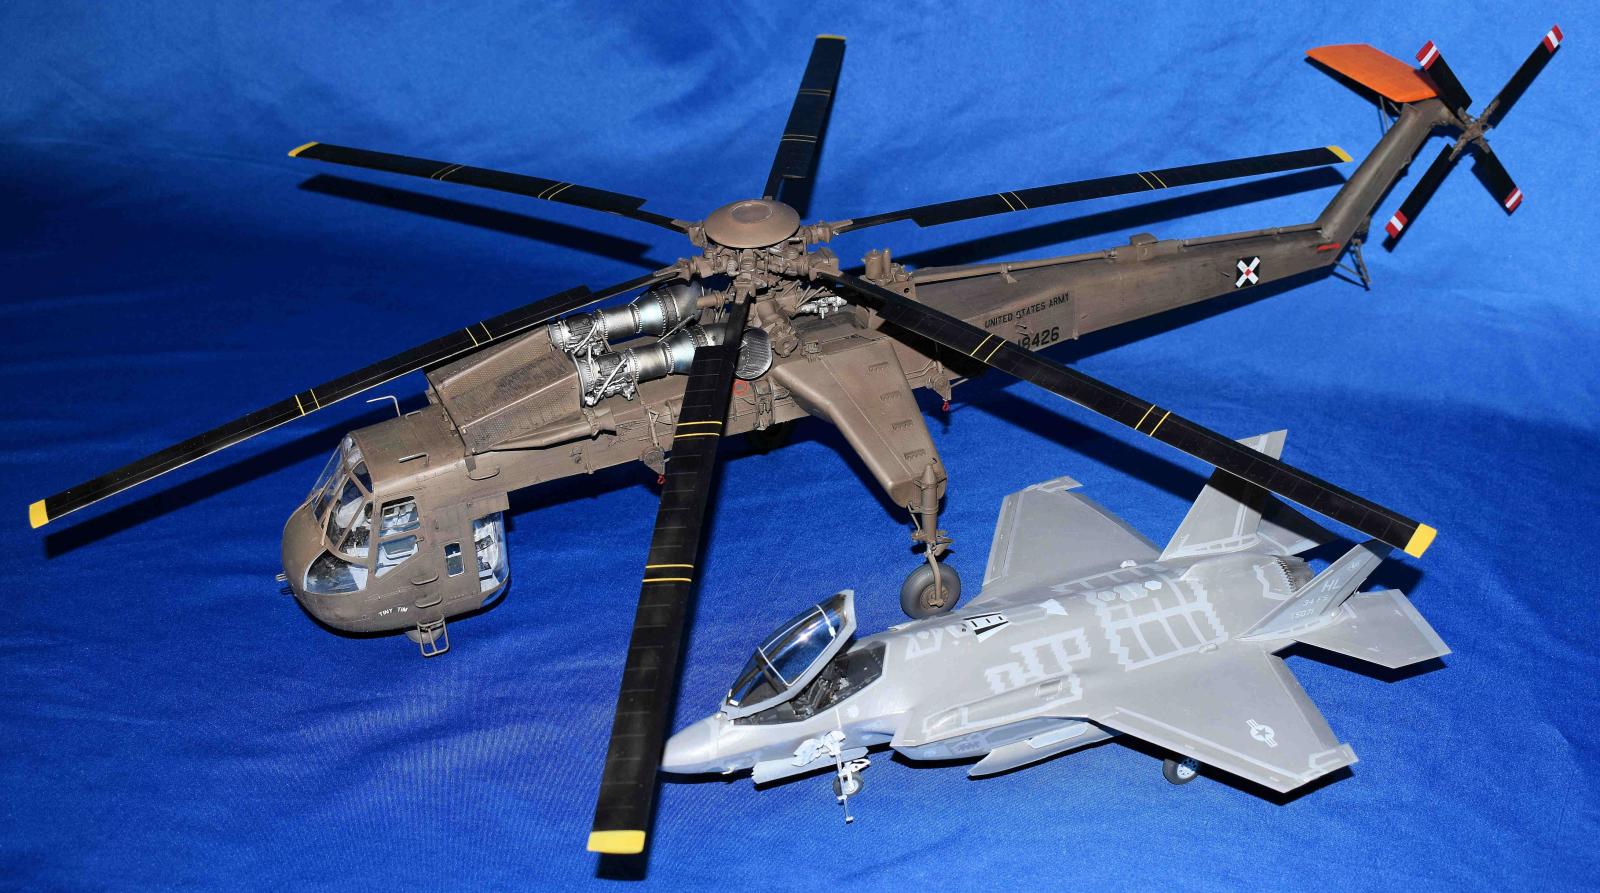
CH-54A Tarhe US Heavy Lift Helicopter
When ICM announced and started showing drawings of a new CH-54A Tarhe (more commonly called a skycrane), people were excited and then realized, it was in large, glorious 1/35 scale too. When the opportunity to review it came up, I begged for it and was lucky enough to get the opportunity.
Inside the box are 14 sprues of grey plastic and one sprue of clear. Decals are also included. The sprues are well done as there are multiples of sprue H. This is the one with wheels, and engine parts and there are four total which includes some spares. Sprue J are the rotor blades and there are three with two blades each. One of the first things to notice is the very petit and well-done rivets. This helicopter was not built for speed but strength and there are hundreds of rivets all duplicated very well. The clear parts are very thin and clear. Overall, we have 534 parts to assemble with some options mentioned below. By the way, both markings are for Vietnam War variants.
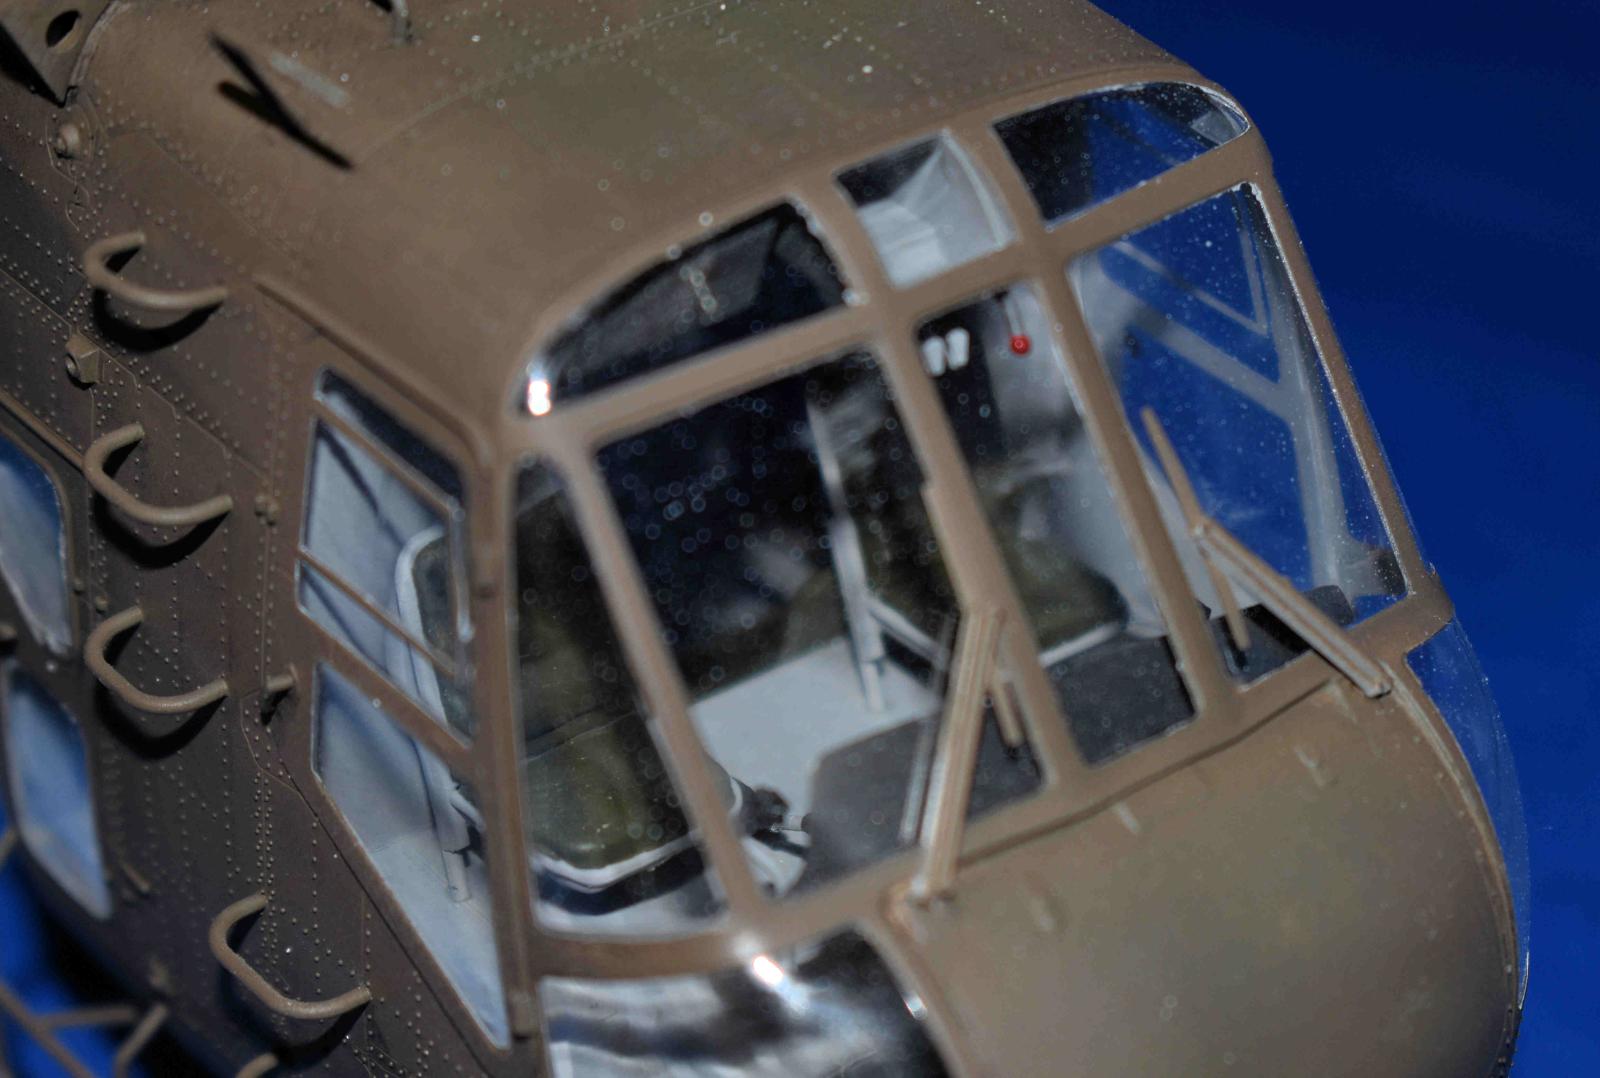
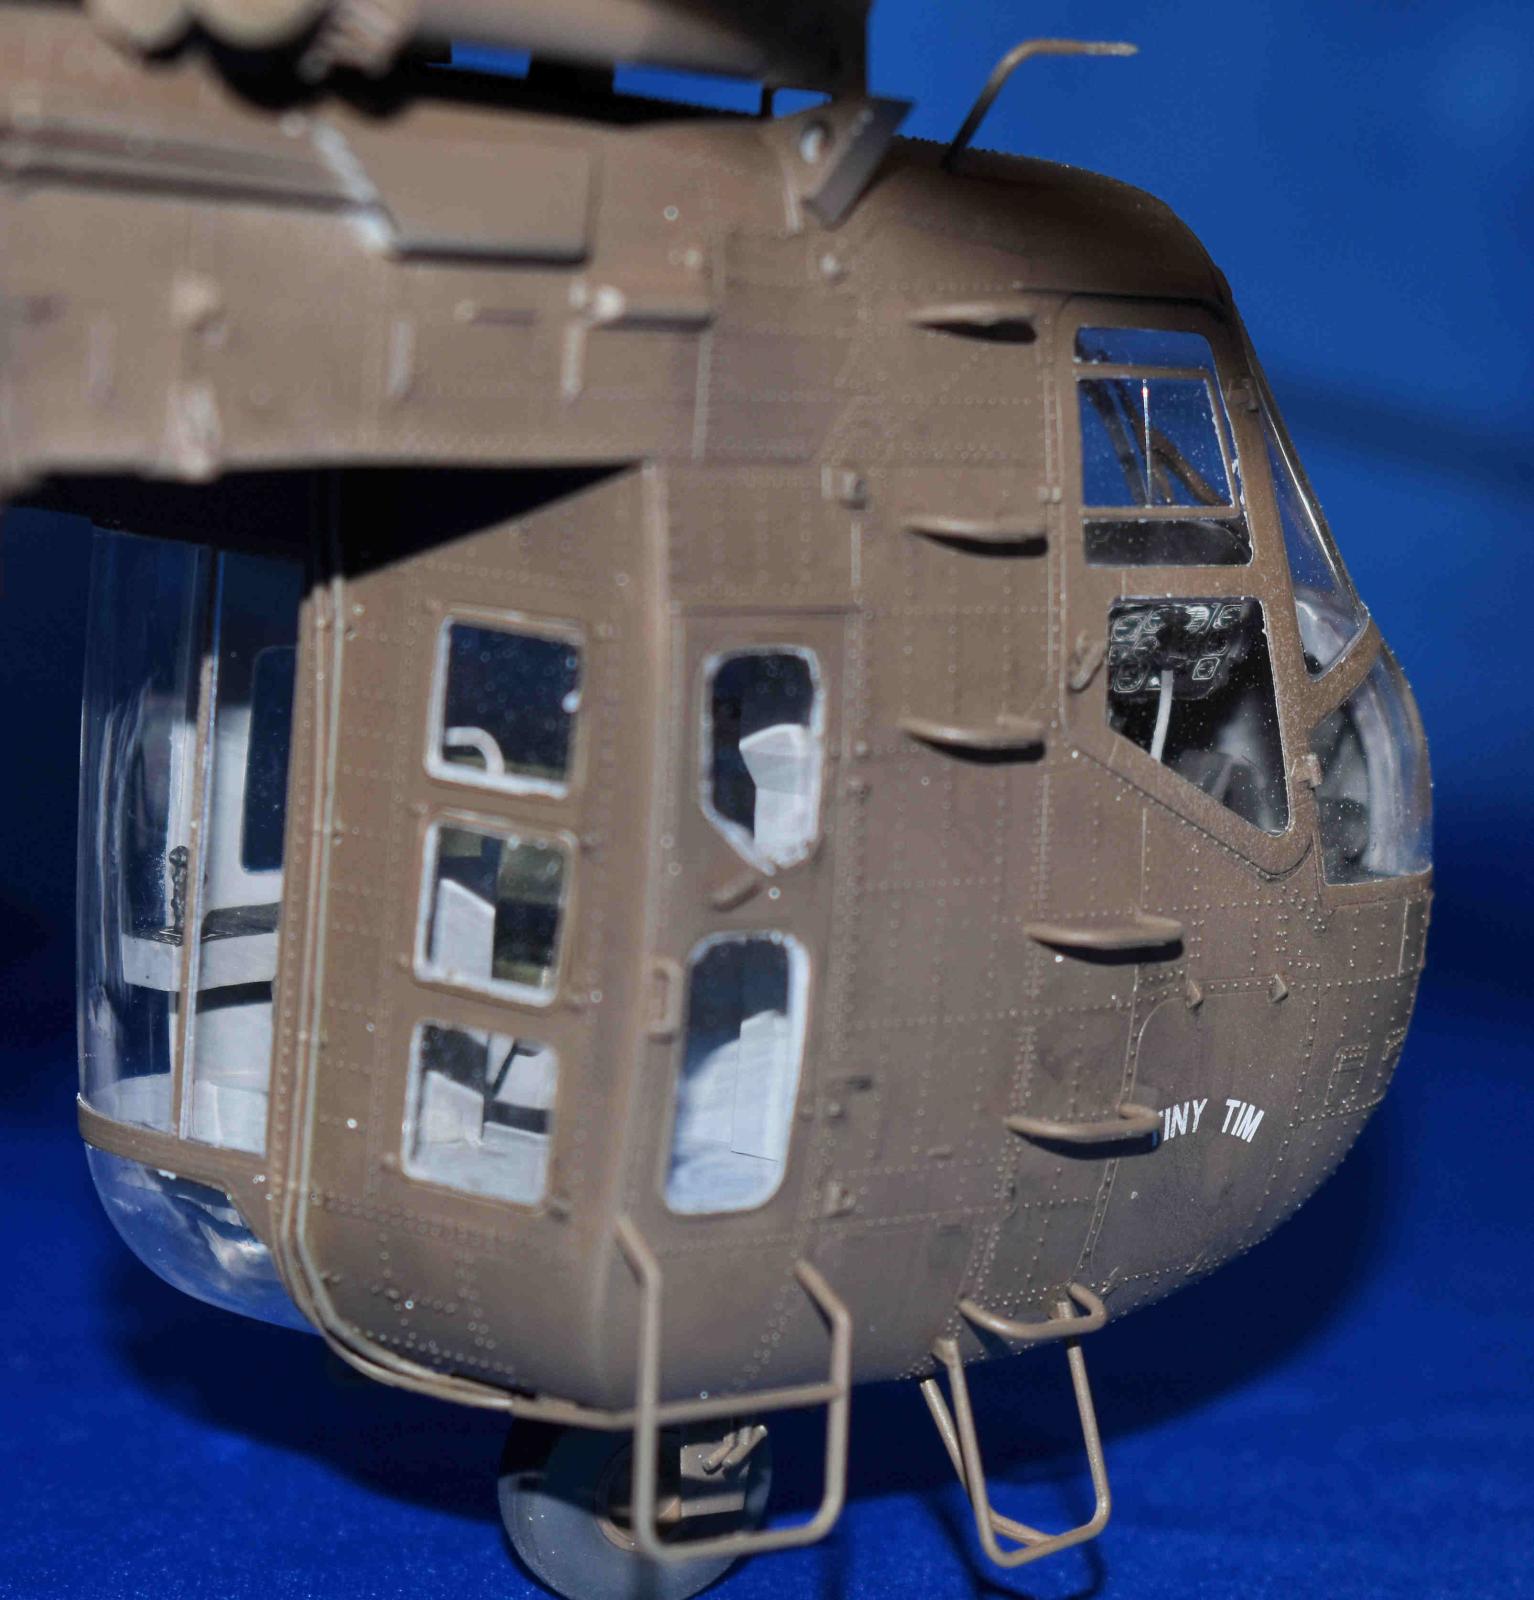
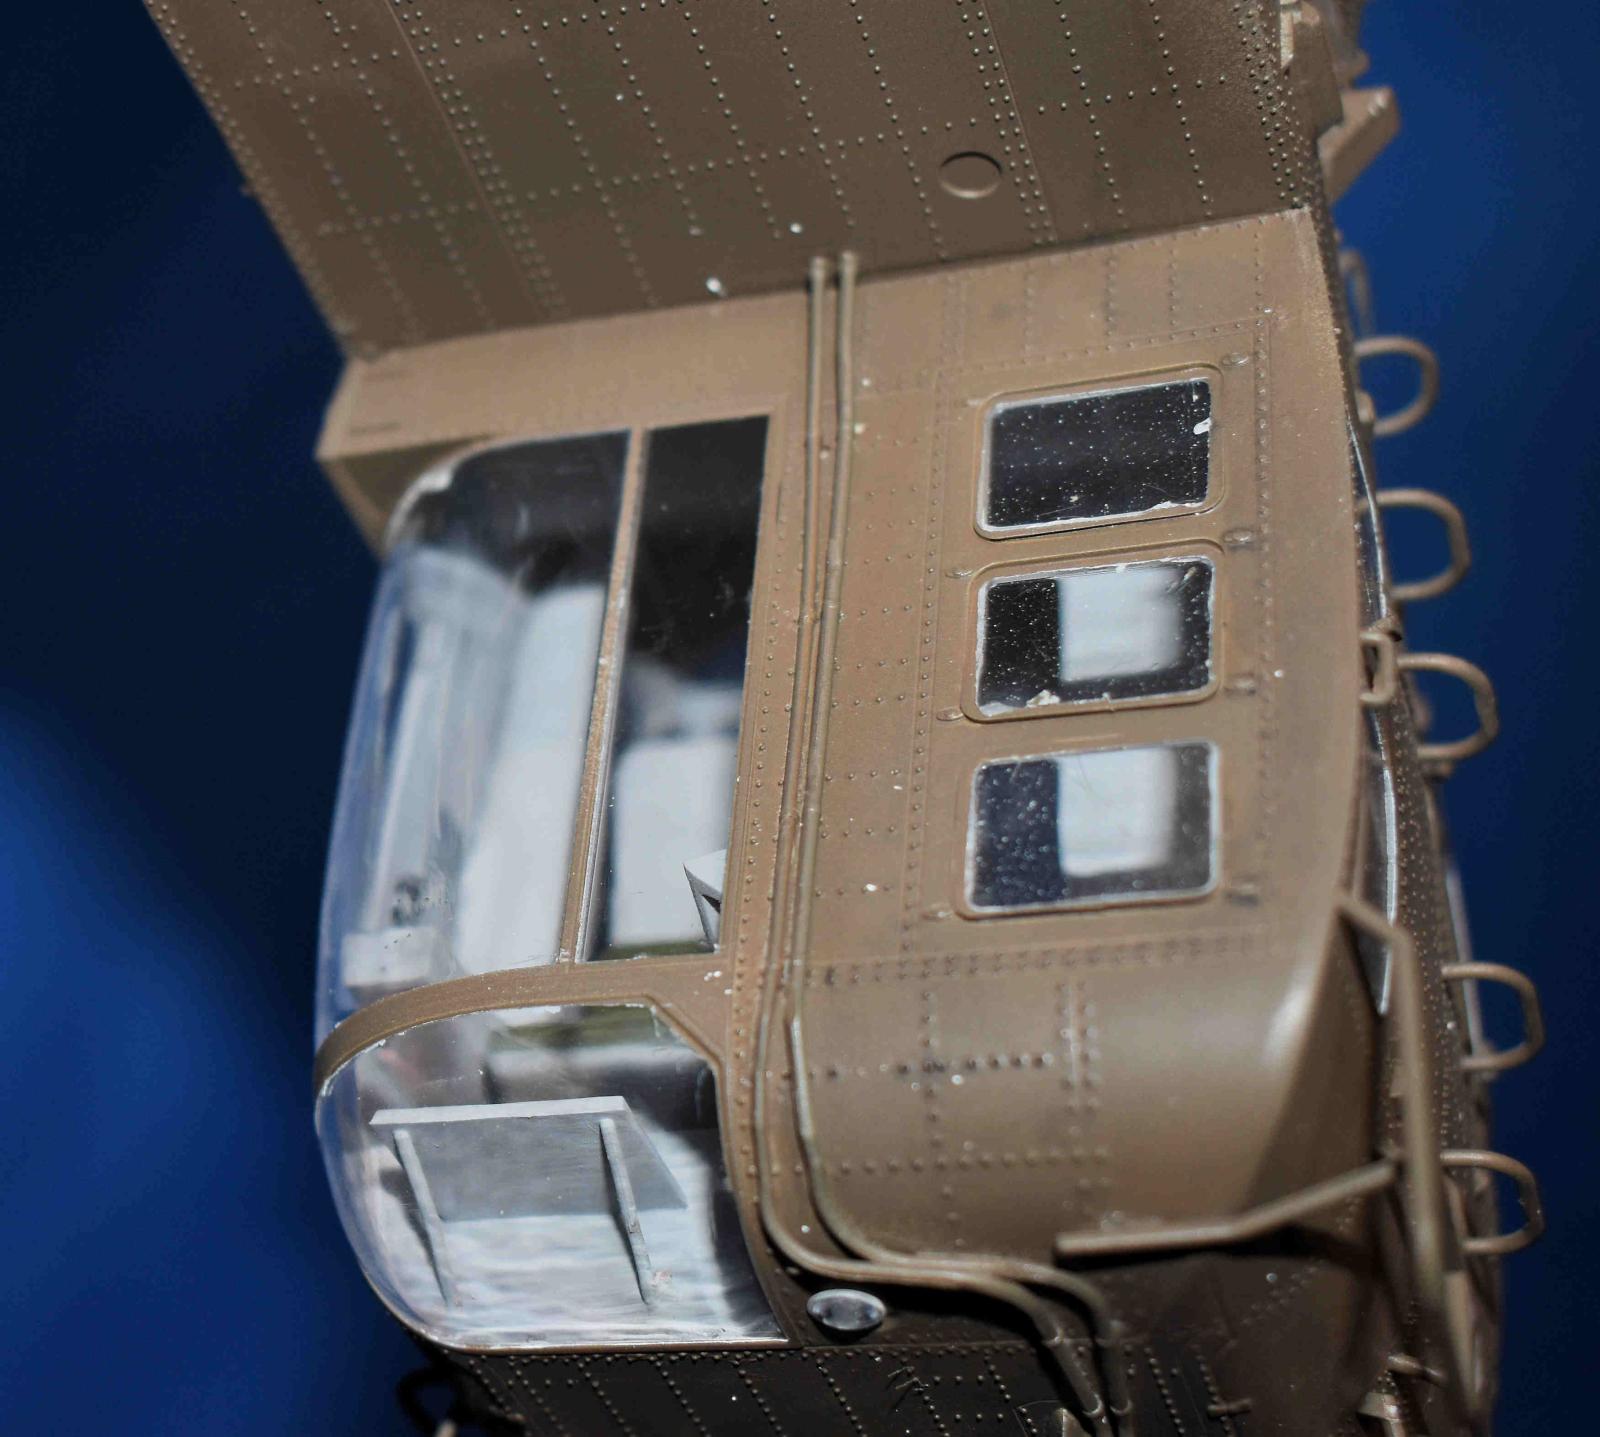
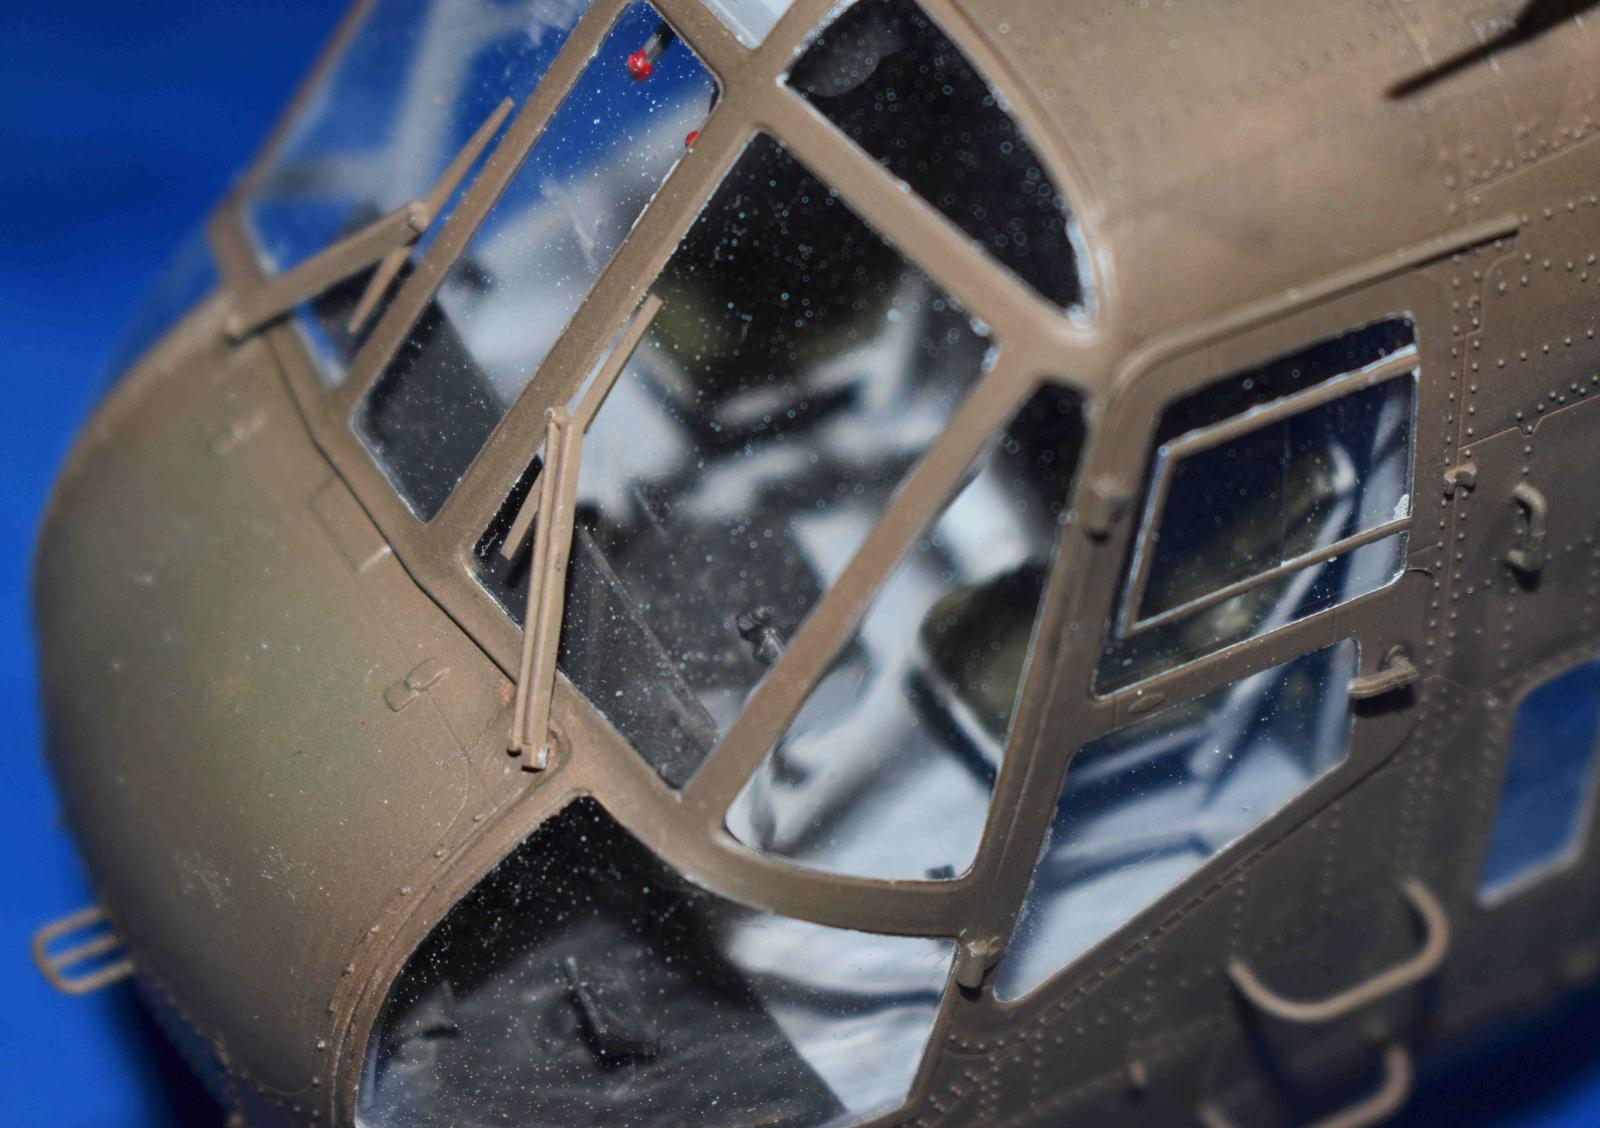
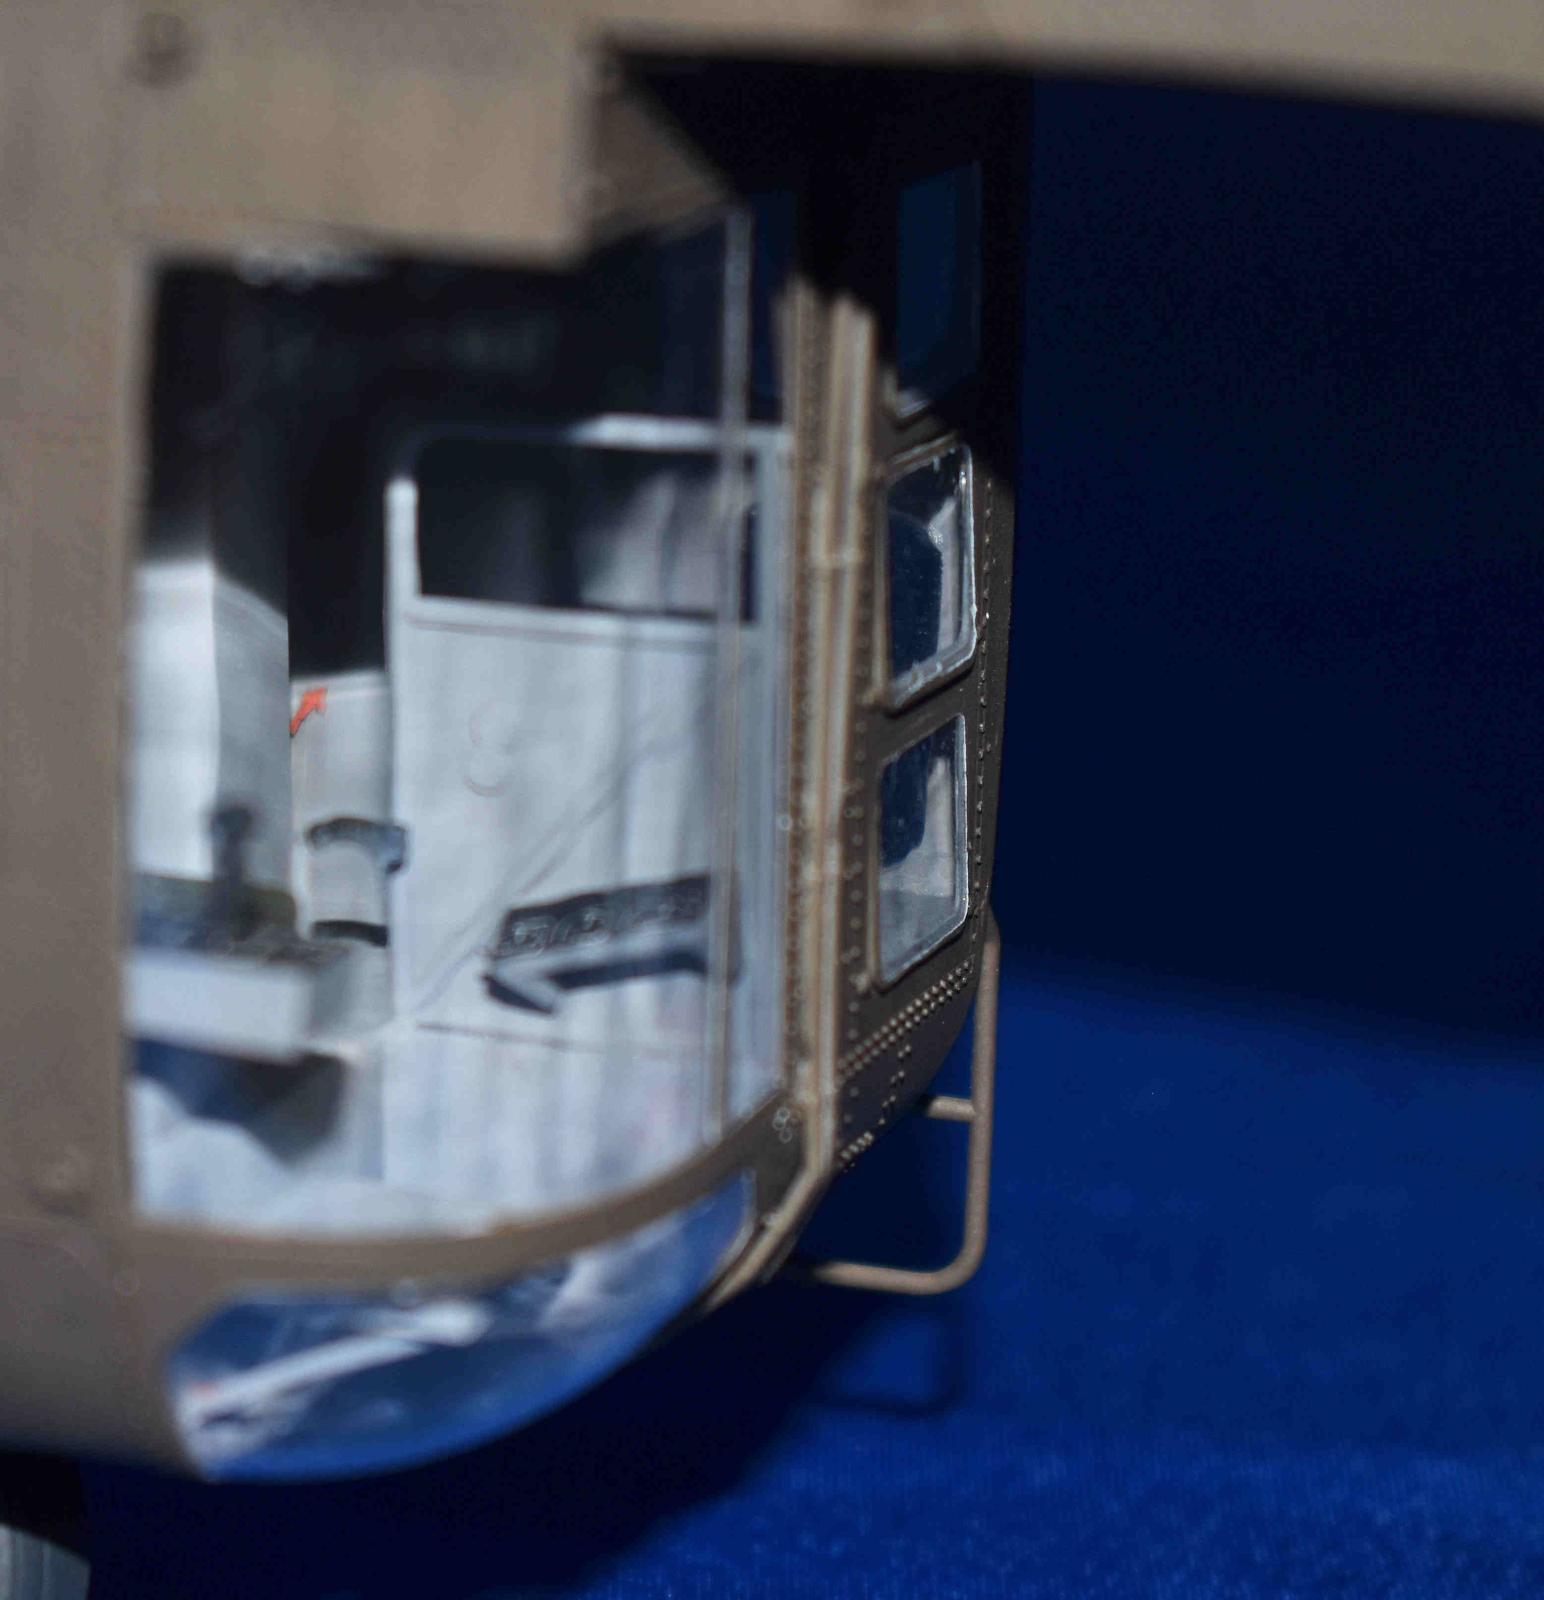
Construction starts with the cockpit and crane operators’ station. Detail is good but looking at pictures of the real thing, there is room for the aftermarket companies to add all sorts of bits to the mix like the many boxes and wiring inside both areas, seat belts, and other general items. There is a lot of glass on this helicopter so for those so inclined, there is room for scratch building also. The overall front of the helicopter is built by skinning the cockpit. Take your time and check fit and glue. I followed the instructions (oh the horror) and the parts fit extremely well. Also, I invested in a masking set as there was a lot of handling to come and I wanted the glass good. There are several available and worth it. At the end of step 21 (there are 208!), the front was done and moved onto the main airframe.
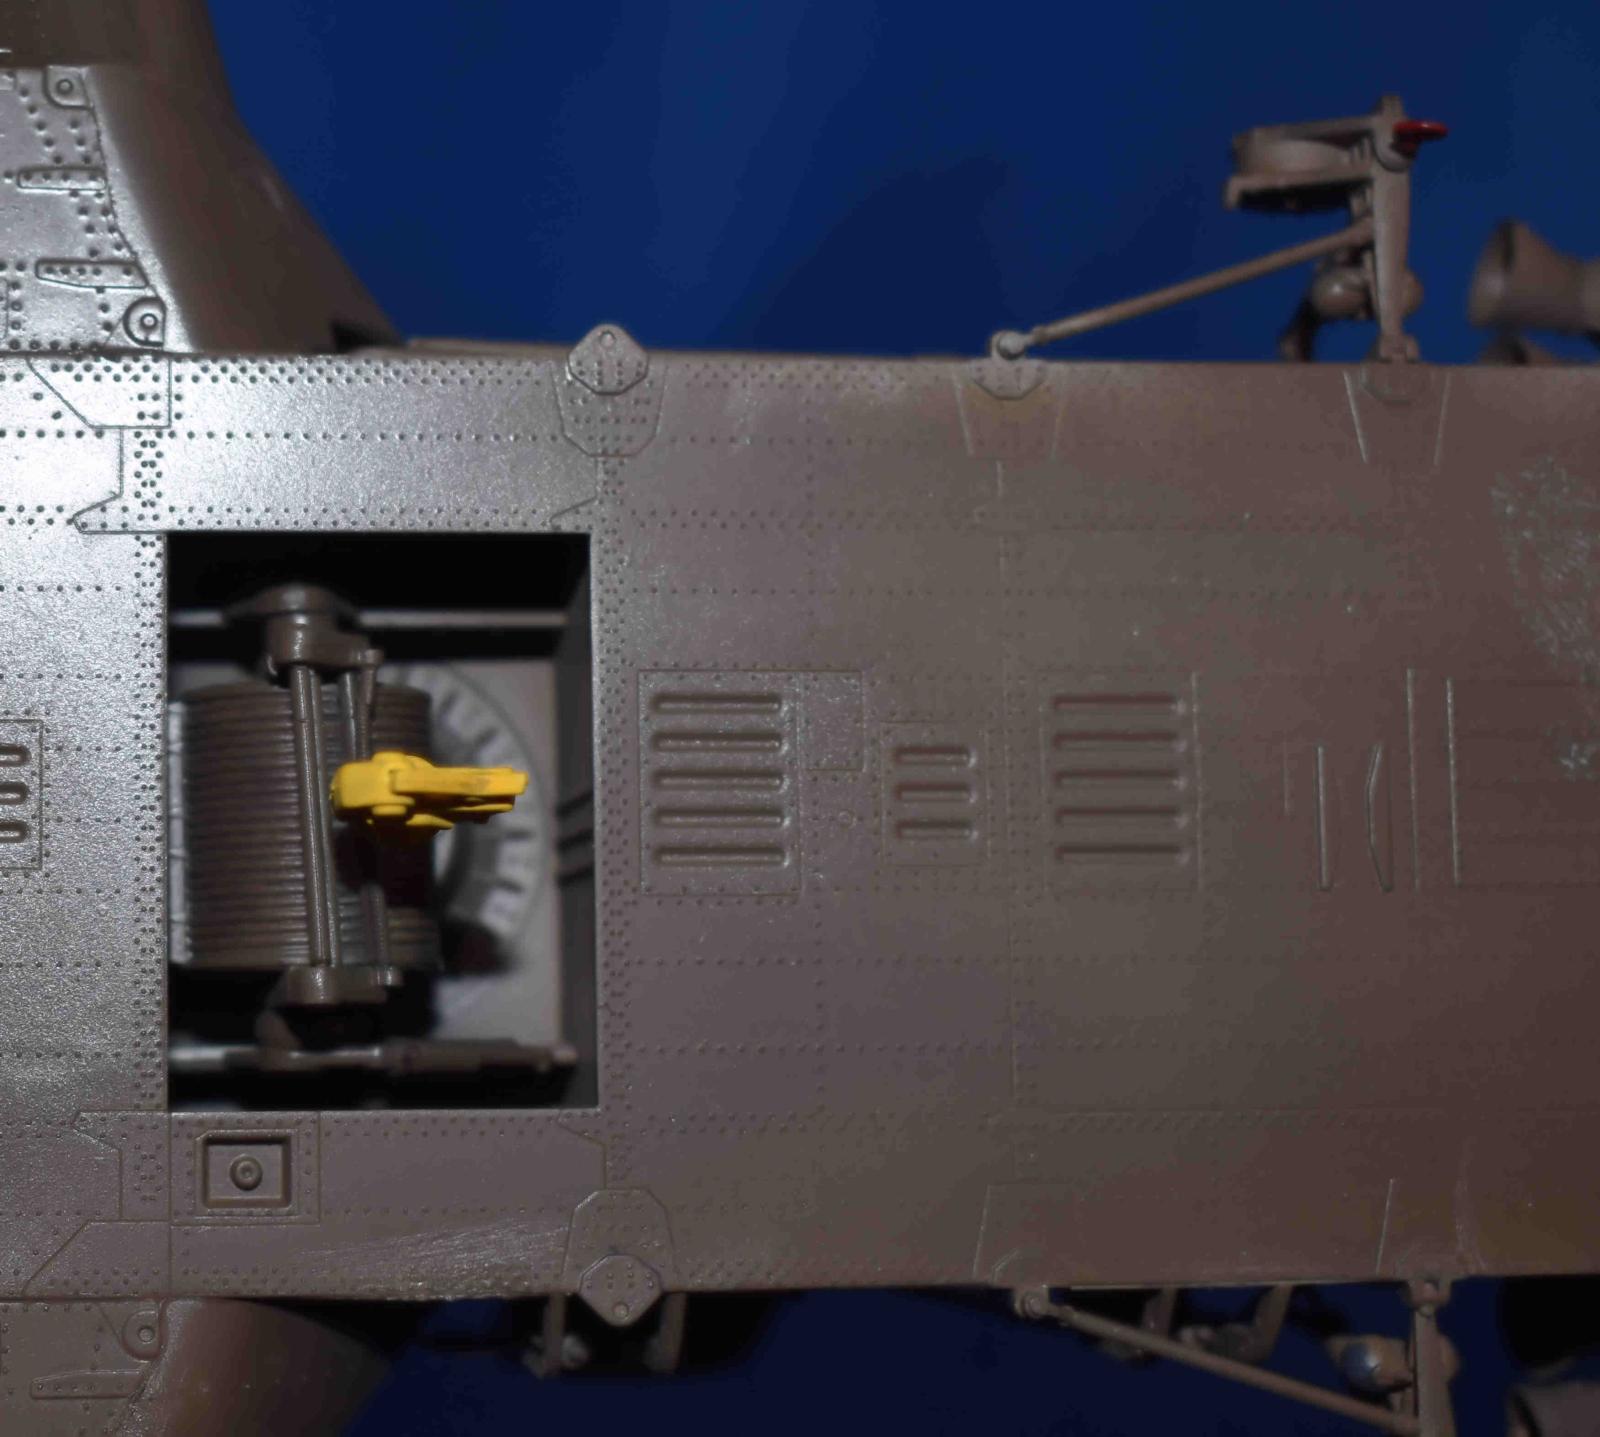
The main airframe is assembled next and runs from the cockpit back to the tail rotor (with wheel fairings on each side). Assembly starts by making a sturdy box by assembling multiple stringers. One warning here; make this straight and true as it aligns all the panels going forward. Also at this point, you install the main winch. I aligned the bottom skin on a very flat surface to ensure its flat alignment. The stringers were then added. These also support the main wheels. This continues until the entire box is built and then the sides and top are added. Take your time and sand a little back as needed to make sure the fit is good and you will be rewarded by none to almost no putty needed
The fuselage and cockpit are combined. The rest of the skinning is complete and the cockpit glass can be added. Why I recommend a masking set as there are 160 steps left after the glass is added. The next steps add the landing gear and a multitude of details such as piping and frames on the front fuselage.
A note about the landing gear. It needs to be sturdier. The front gear of mine is broken and repaired and the main gear is wobbly. This is not an indictment of the kit. It is large and heavy and strength is called for. Hopefully, we will see some more mainstream come out soon. The addition of the gear and small detail take the next 50 steps are so.
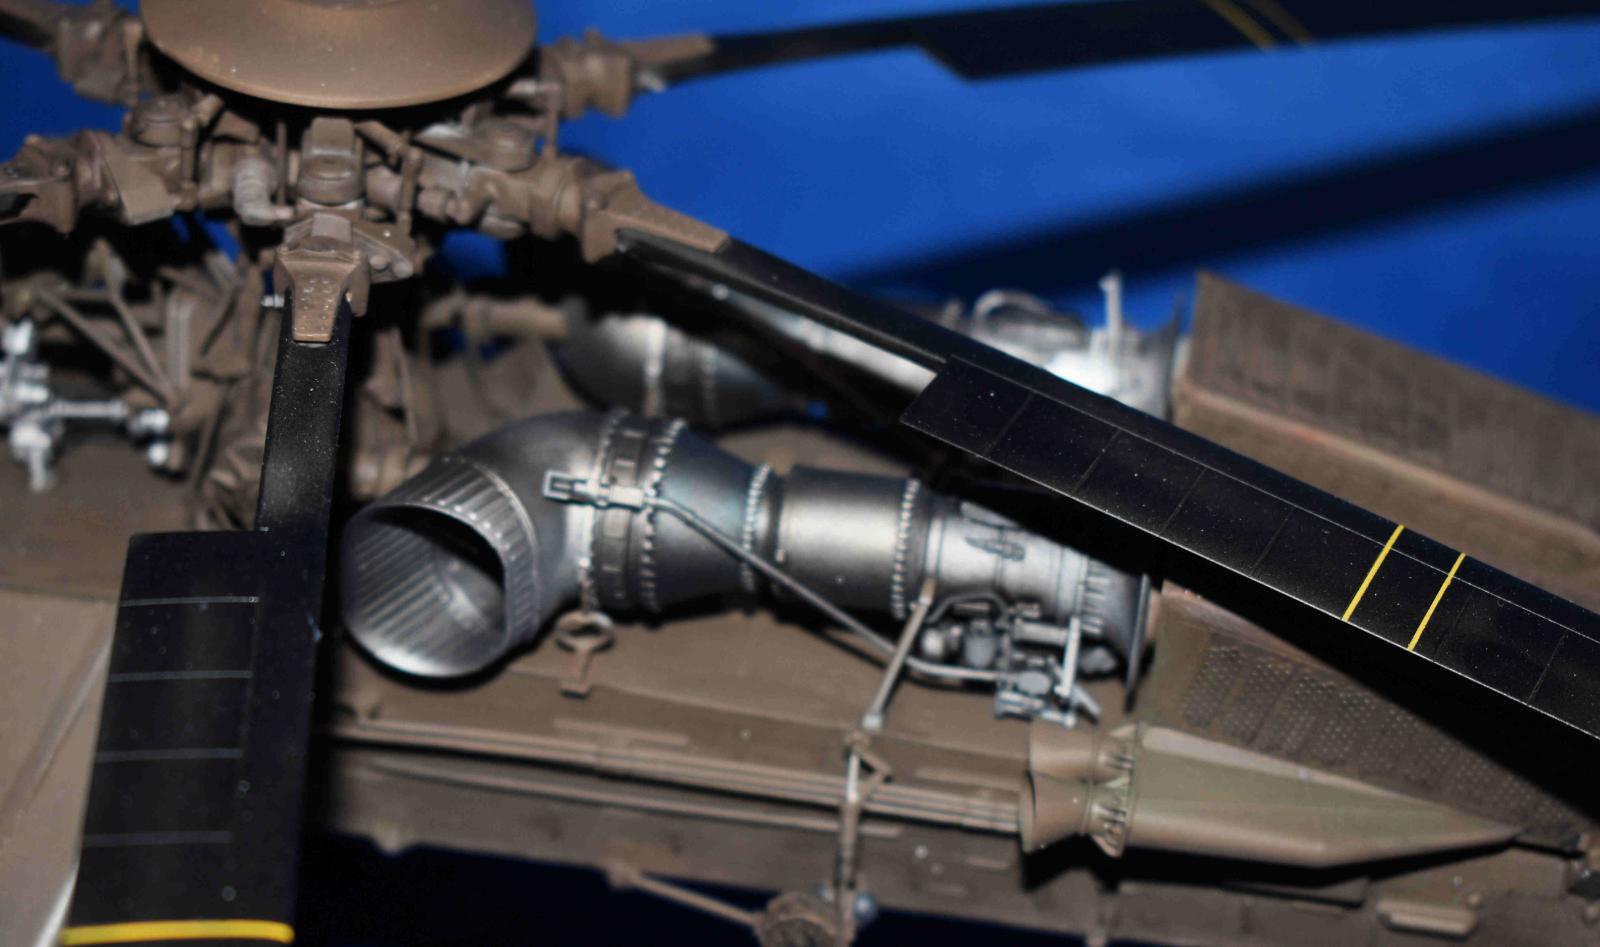
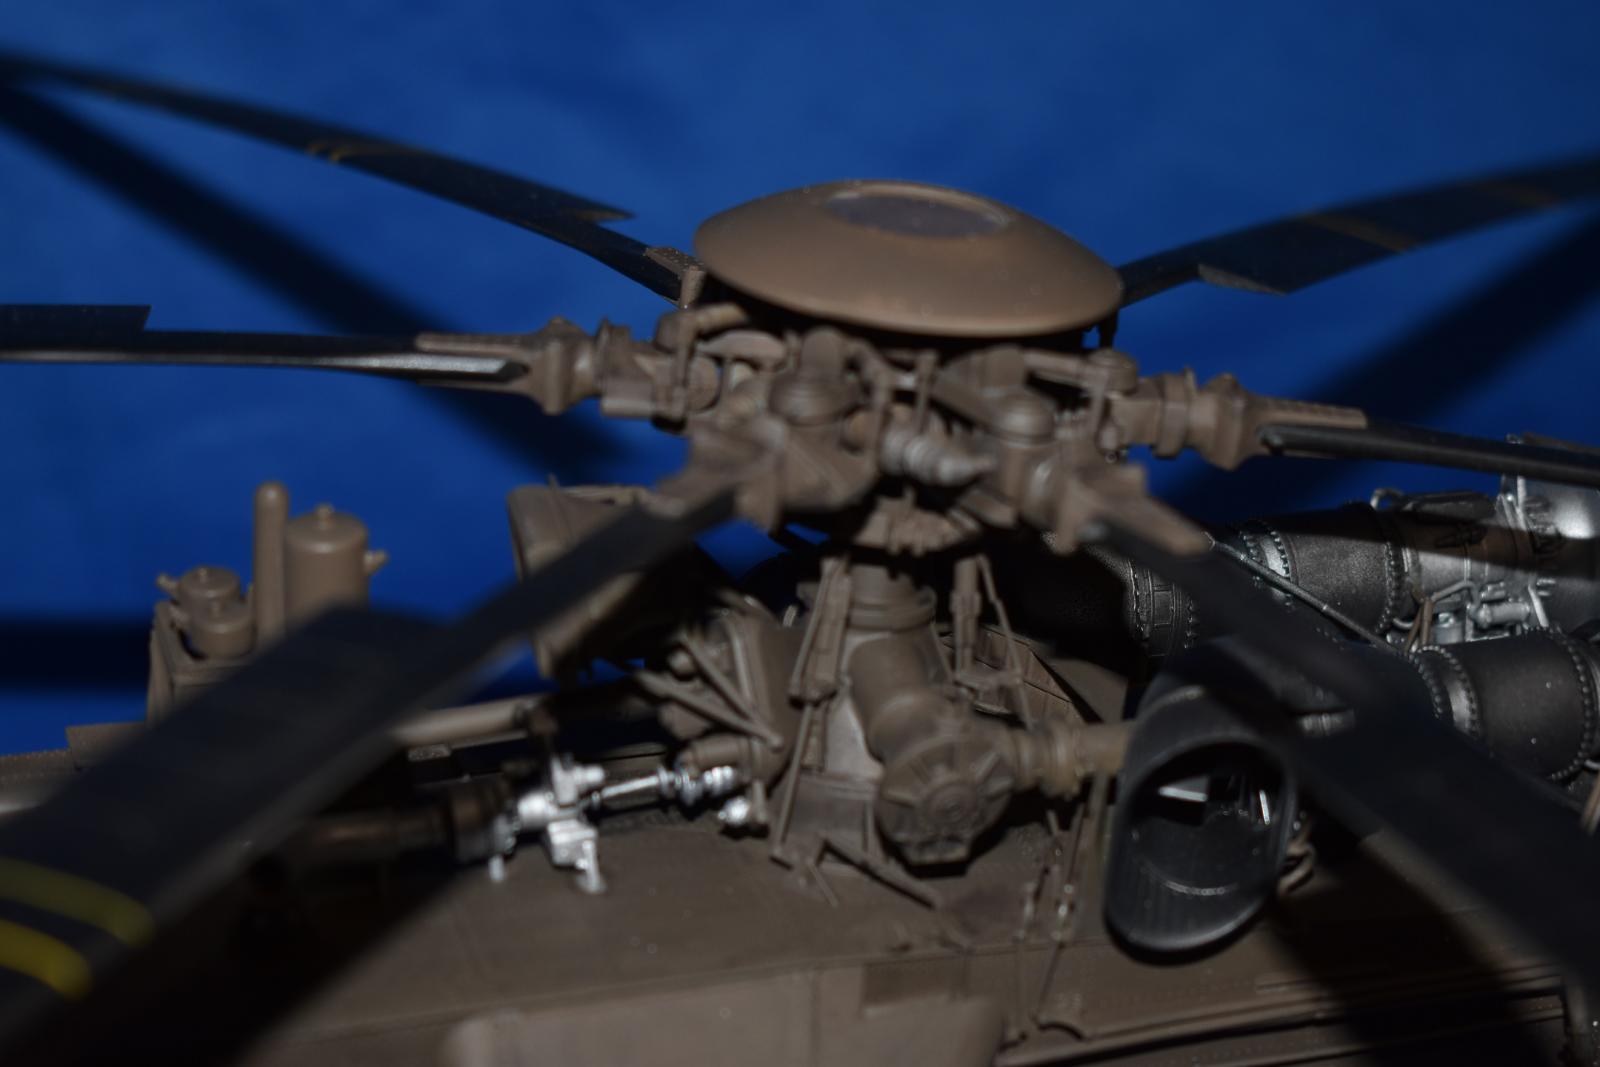
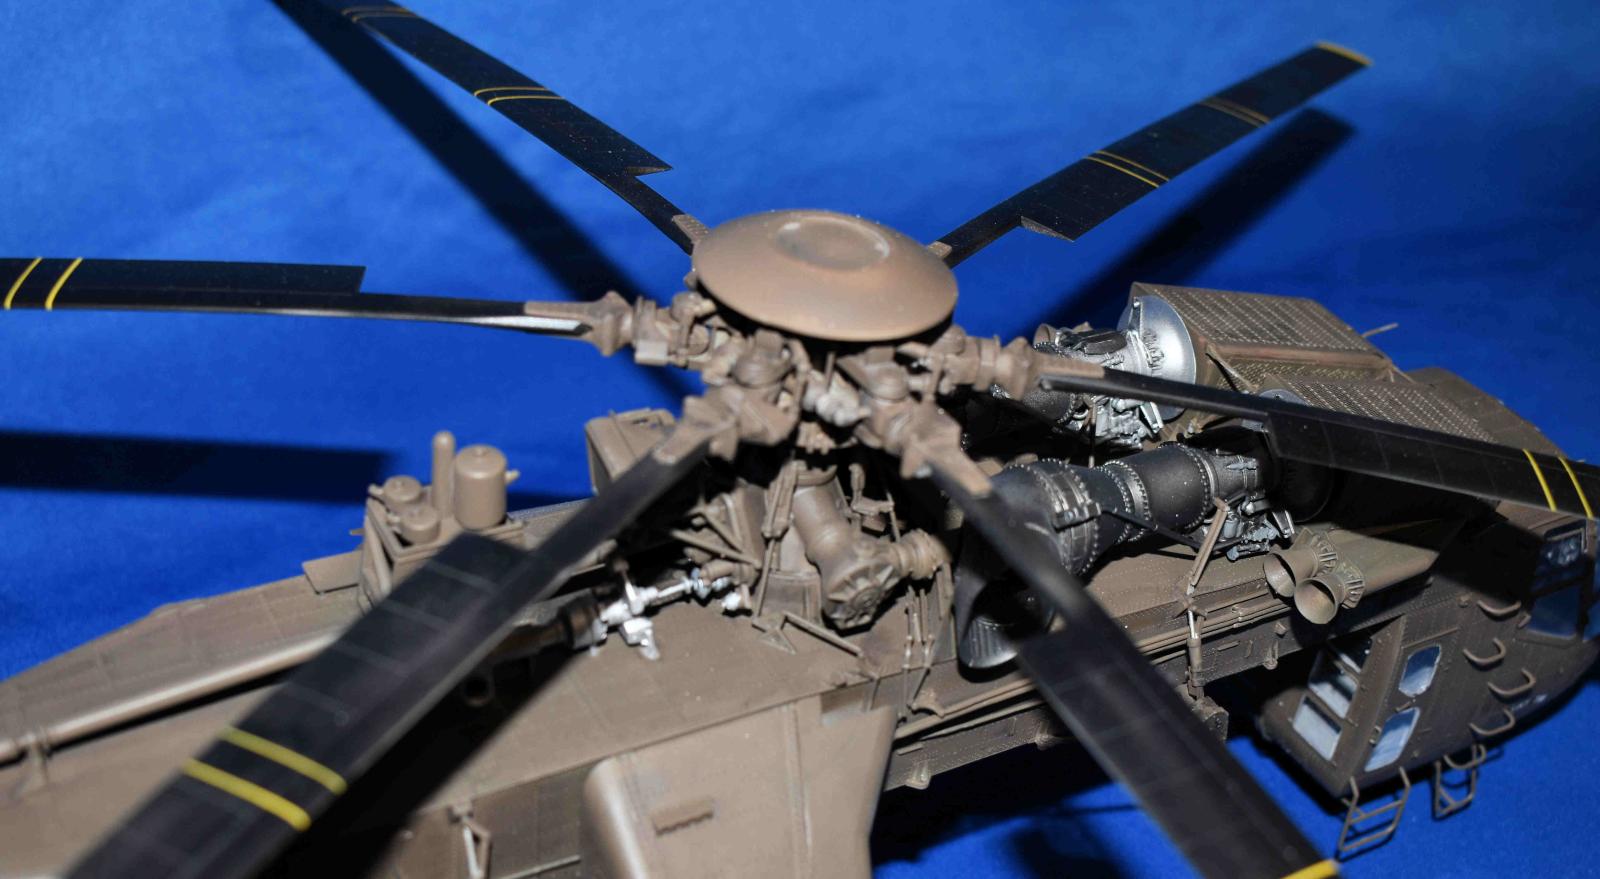
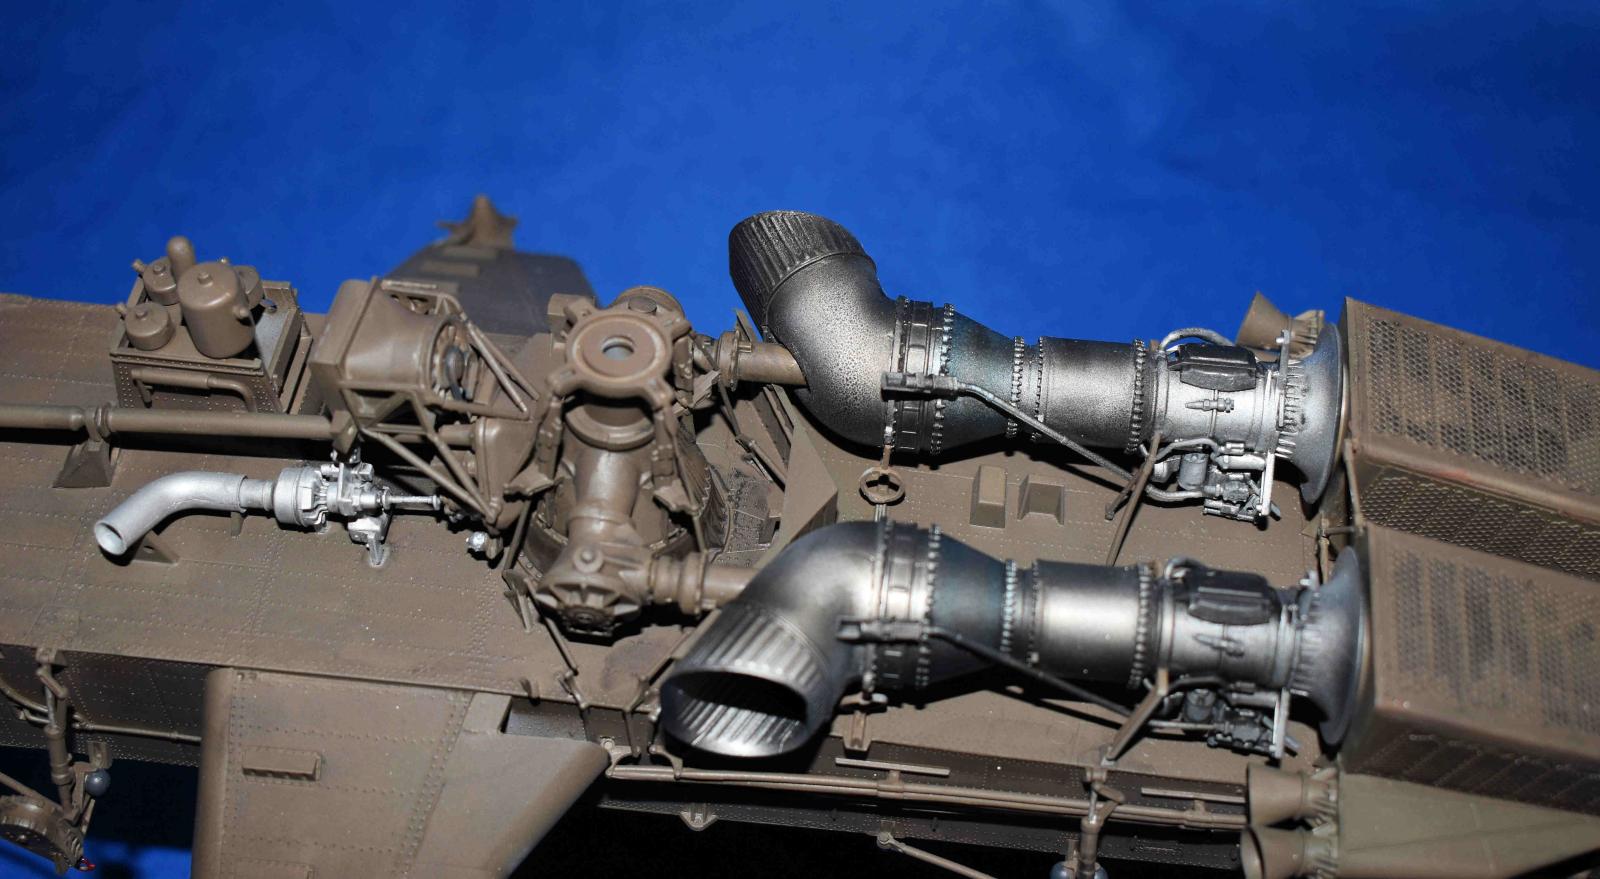
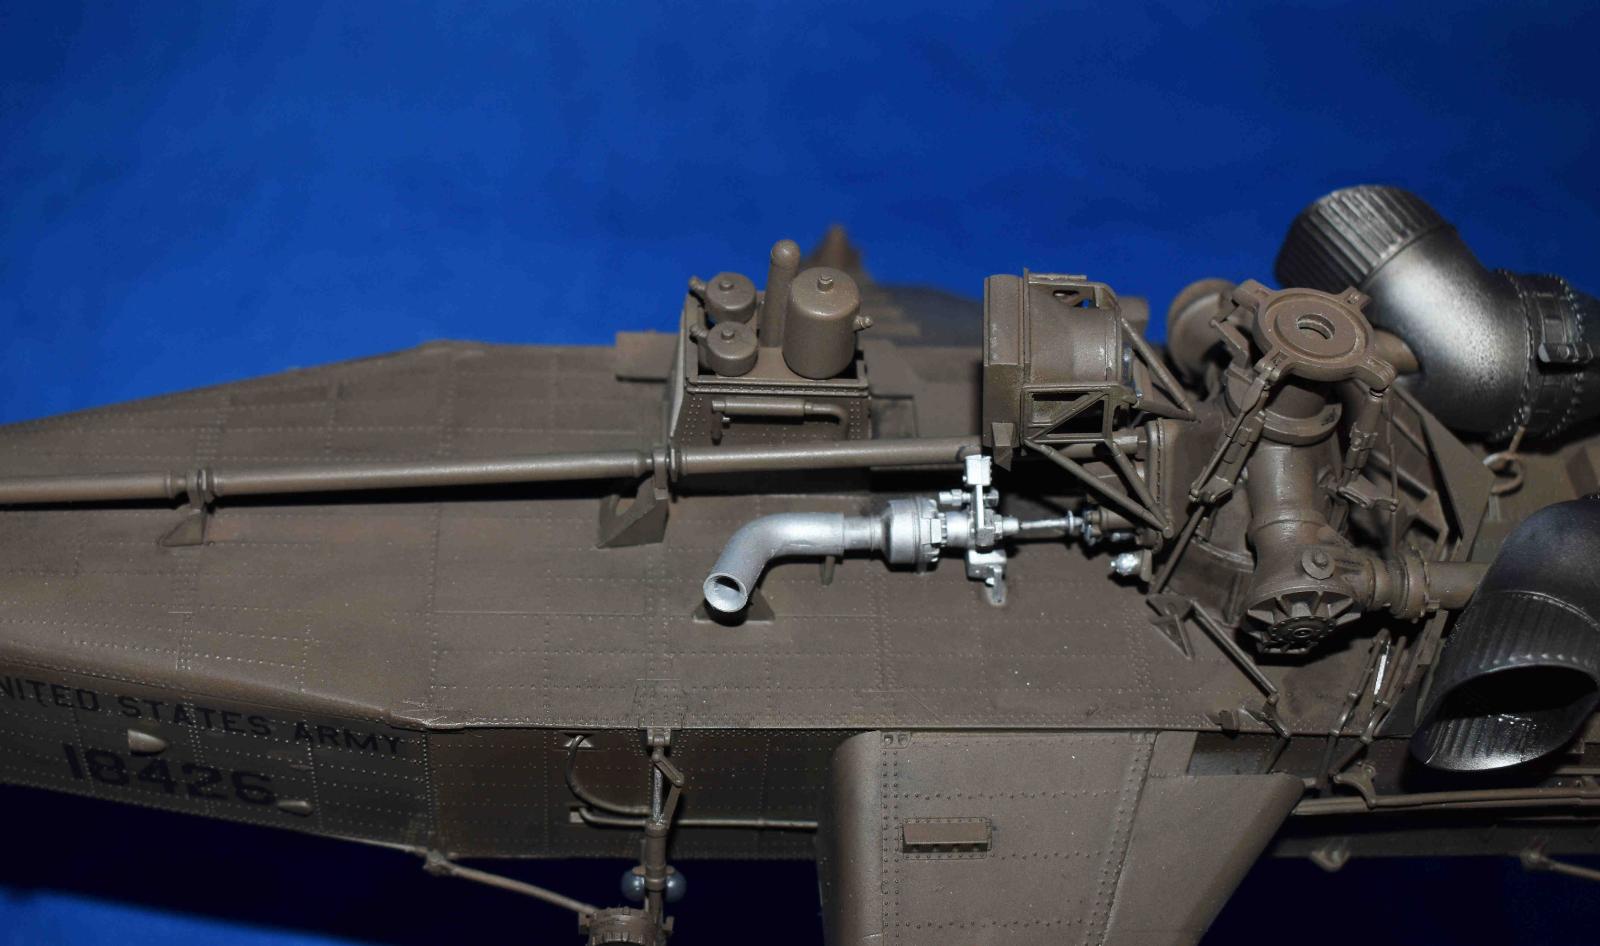
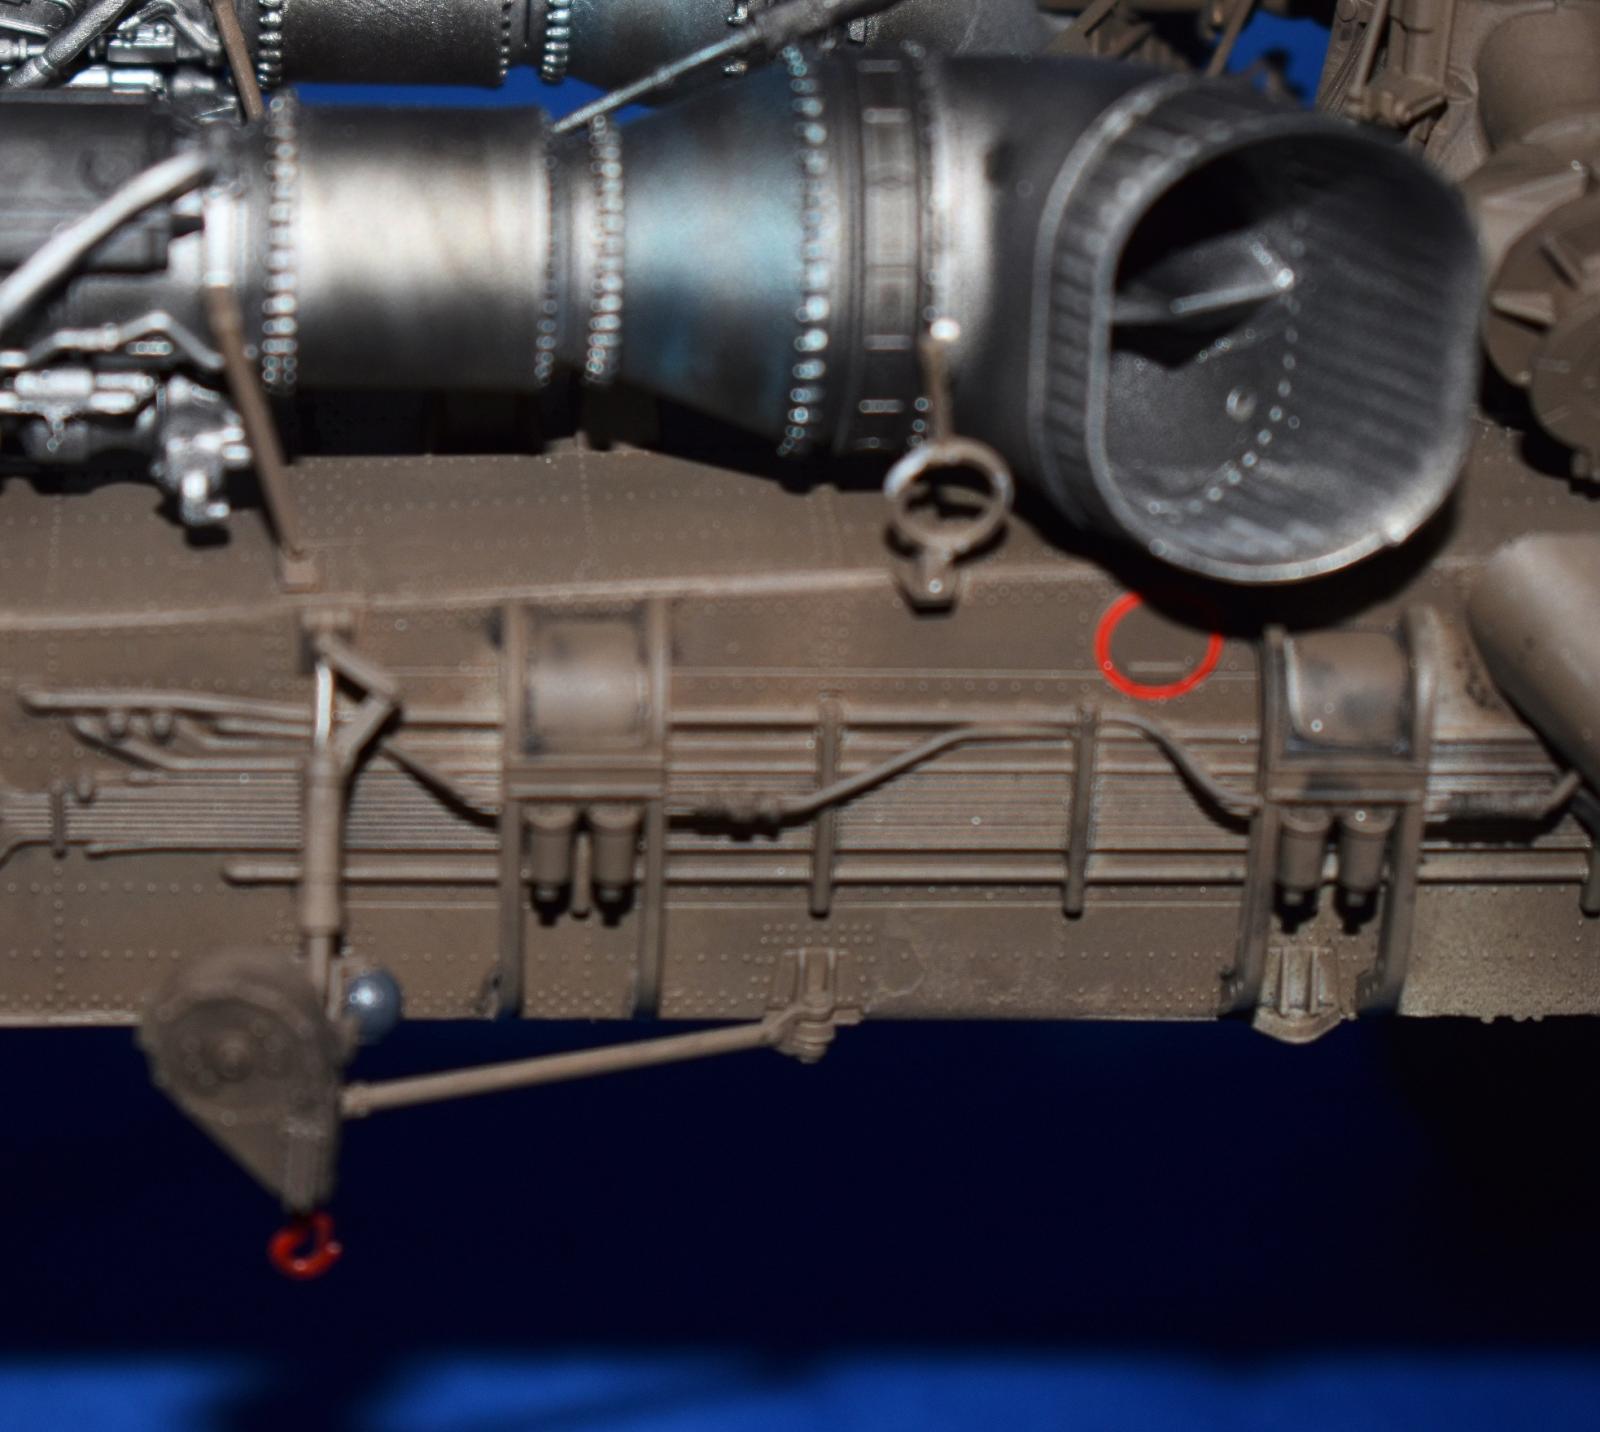
We then move to the transmissions and cooling system on top which takes another 35 steps or so. The detail is very good. Detailers can add piping and wiring. The engines are handed left and right so watch the instructions. The detail is again good. And the engines can be left off until the painting is done. The engines are a lot of parts and are metallic so time spent here getting seams gone and polished pays off. You have a choice of adding the air filters or not. I did as the kit makings I chose showed them installed.
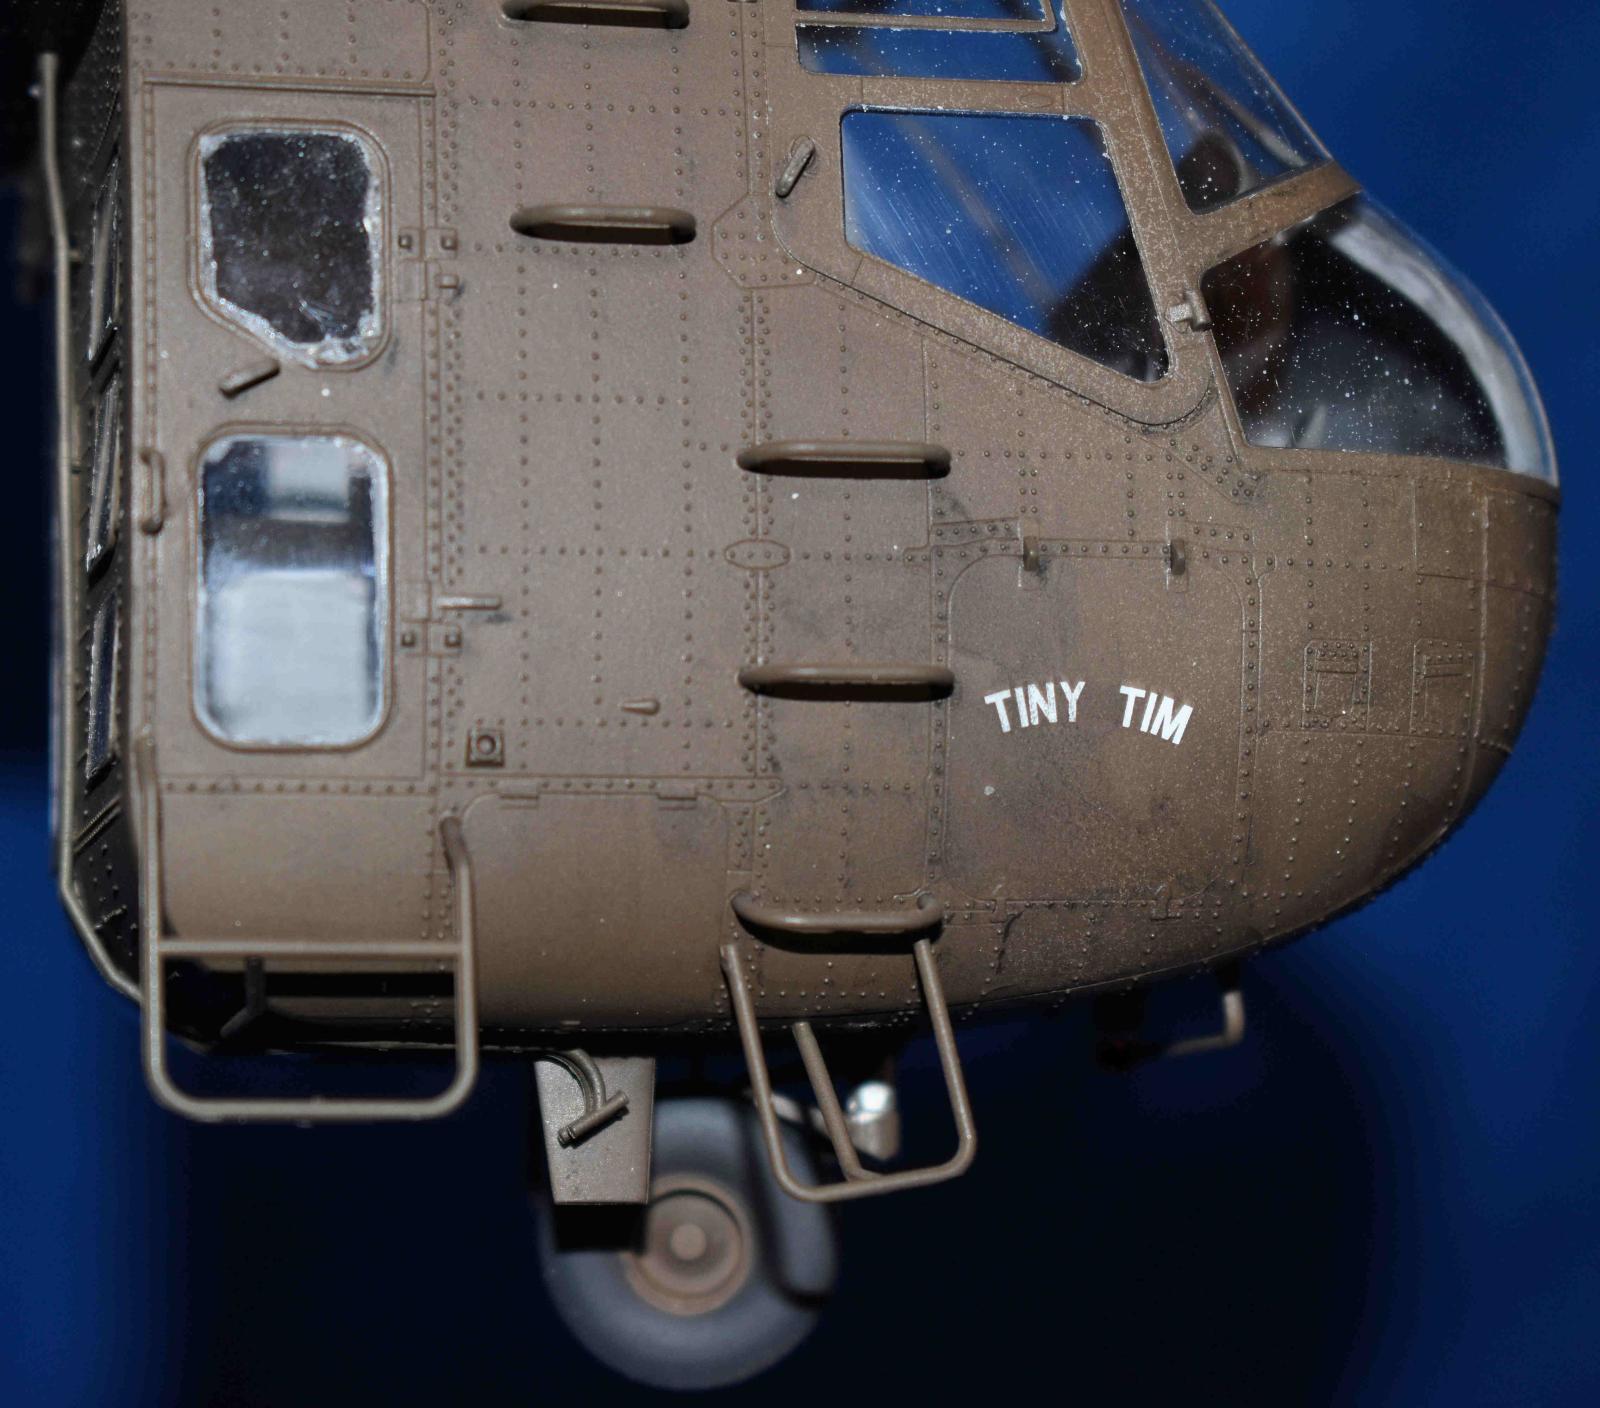
To finish off the fuselage, the four separate hoists are added, and then all the handles around the cockpit and plumbed lines also. Tail skids are added as well as small details like antennas. The instructions add the horizontal tail but I left it off for ease of painting.
The main rotor is built out of over 60 parts and assemblies very well. More hydraulic lines could be added here also. The tail rotor is assembled at this point.
Now onto the painting. The kit calls for us dark green. After some looking around, I used Mission Models 34088. Still looks a little dark to be but not bad. There are a lot of little details to paint and are well called out in the instructions. I used gloss black and several types of metallics for the engines. I then gloss-coated the model in preparation for decals and here I did run into issues.
Several of the decals folded over on themselves-they are admirably thin but fussy, especially on such a big subject. I replaced the US Army logos. The yellow stripes on the rotors had to be painted as the decals had all sorts of issues. I will say, once applied the decals that did apply settled well and look great. Hopefully, some more options for aftermarket and civil will come out.
I used dull coats and black washes to highlight areas. I added the tail rotor, and blades, then removed the masking on the clear parts. Lastly, I added the lights and beacons and was done.
Wow, just wow! The fit is great and the subject is too cool. It is huge! I was hoping for a 1/48th scale but this is a real eye-catcher. I made some errors but overall fit is good. Super detailers will want to address the piping, wiring, and cockpit details. And metal gear will be a must. Out of the box, it is great.
Congrats to ICM for the effort and vision to go big and pull it off so wonderfully.
My thanks to ICM and IPMS USA for the chance to review this lovely kit.


Comments
Nice build!
I have considered investing in this kit, but the old bugbeaer "where to put it?" is foremost... that and the fact at my age do I want to put a year into this magnificent effort? (not to mention the aftermarket that would about break me in the end... the cockpit appears a bit sparse). Not to mention all the tubing outside on the engines and other systems like the rotor head. (I have a bunch of reference from static displays that give me the "lead wire" willies). Just wanted to congratulate you on this build, well done!
Add new comment
This site is protected by reCAPTCHA and the Google Privacy Policy and Terms of Service apply.
Similar Reviews