
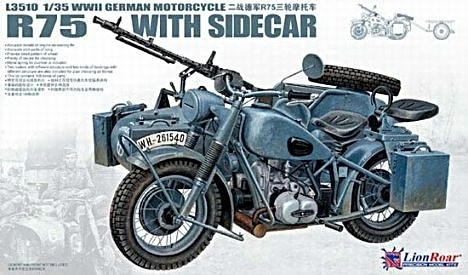
BMW R75 with Sidecar
History
The BMW R75 along with the Zundapp KS 750 was developed in response to a request from the German Army during World War II. It was powered by a 750 cc horizontally opposed, two cylinder engine based on the R12 gasoline engine featuring overhead valves. The rear wheel featured a locking differential (with two gear ratios for road or off road) and power take off (PTO) for a driven sidecar wheel.
BMW and Zündapp upon the urging of the Wehrmacht, agreed upon standardization of parts for both machines. The standardization program meant that machines that were produced by BMW and Zündapp used almost 70% of the same components. This simplifies the supply of spare parts for these vehicles, many of which are still in the hands of historic motorcycle enthusiasts. These vehicles are desirable as collector's items because of their complex and durable technology. Many well restored examples can be found on the road today.
The BMW and its rival Zündapp were both widely used by the Wehrmacht in the Eastern Front and North African Campaign.
The Kit
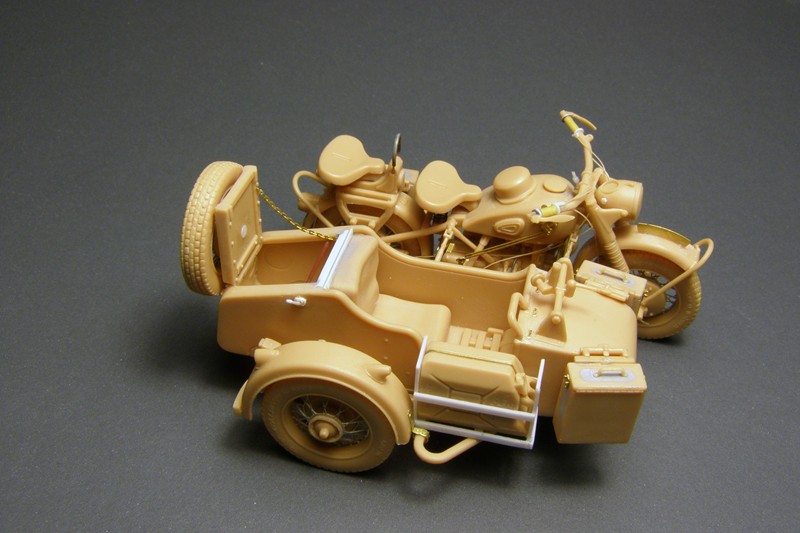
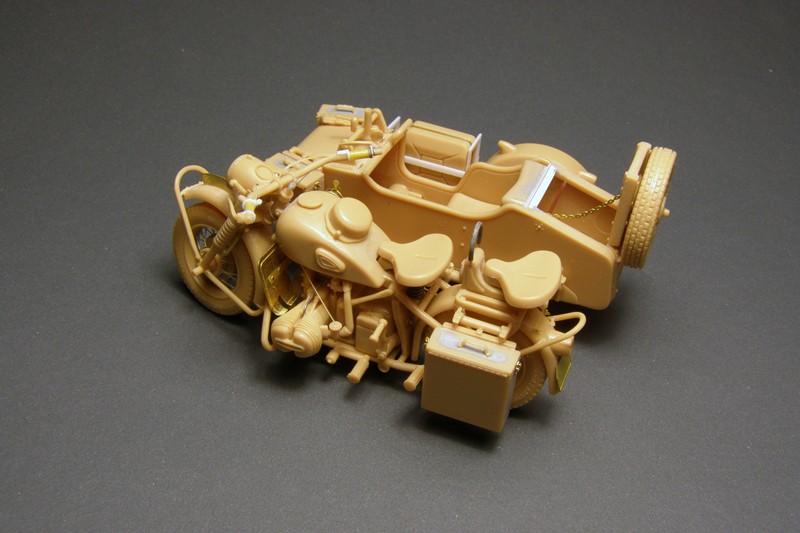
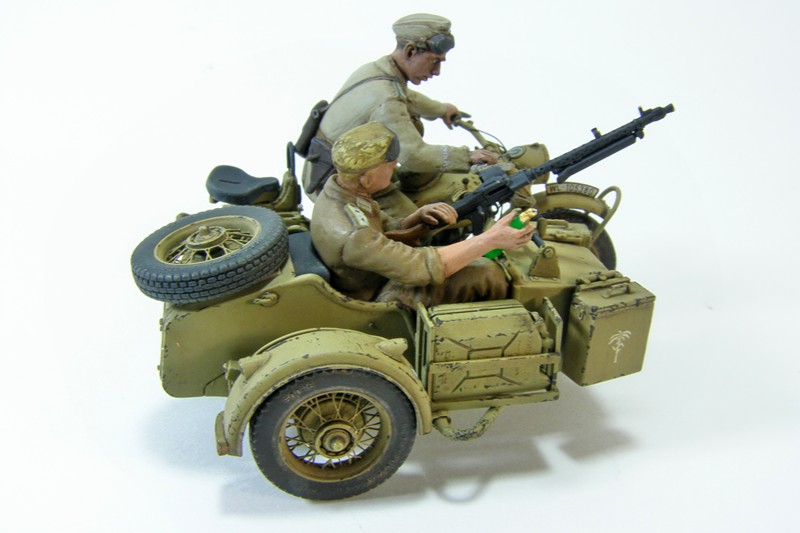
The Lion roar kit of the BMW R75 like the Zundapp KS750 is highly detailed and features preformed photo etch wire wheels for all tires to include the spare tire. Many parts are tiny and very fiddly to get into place. This kit features many of the same sprues as included in the Zundapp KS750 kit. To this end I would have you refer to my build up of the Zundapp kit as it features all the same intricacies and idiosyncrasies as the BMW kit.
Assembly started with the engine as unlike the Zundapp kit you must install the engine prior to the assembling the frame. The front forks assy. was the fiddly part of the build. I learned from the KS750 build to use Tenax 7R and a lot of patience. First assemble the forks along with the upper and lower triple trees. While gently holding the parts in position, apply Tenax and allow it to set. Then test fit the assembled front tire assy. To ensure everything is all aligned and square. Assembly of the rest of the kit was as straight fwd as they come. Although not a Tamiya “shake and bake” it can be built up into a gorgeous kit with a little forethought and plenty of patience.
One thing I did was at the beginning, after assembling the engine to the frame, I mounted the model on a handle. This thing is SMALL and is festooned with lots of small parts. This makes handling a pain! So I superglued the bike, under the transmission, to the top of an old paintbrush handle. This allows you to hold the model and not damage any of the fragile parts like foot pegs and levers. With the KS750 build I spent a lot of time fixing and repairing damage due to normal handling. The handle makes assembly very easy and you can keep it on the handle all the way thru the painting and weathering step! Control cables were added using stretched sprue. I scratch built a jerry can rack from styrene strip.
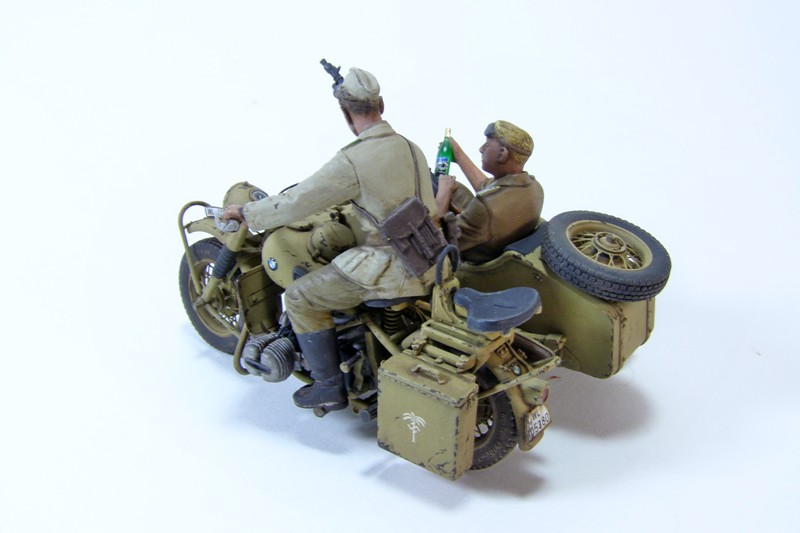
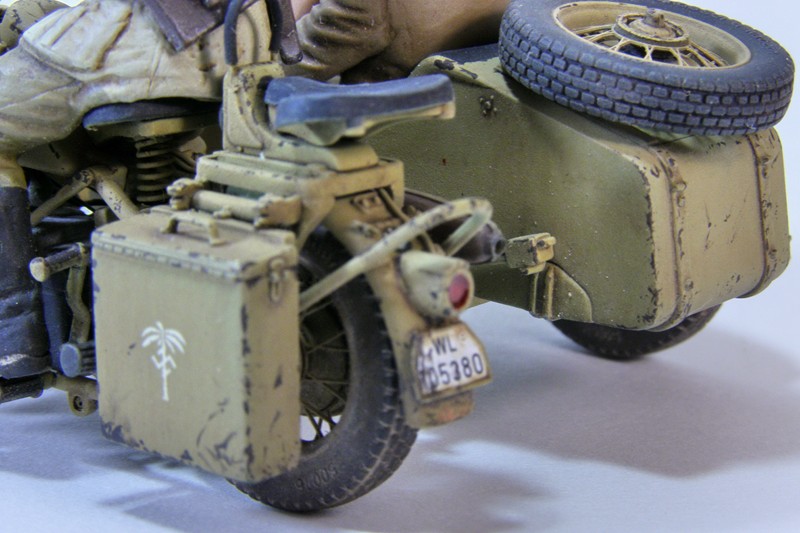
The assembly of the side car and frame was uneventful. Only thing to look out for is that the bottom of the frame is even with the frame of the bike. There is enough play in the support struts to get this aligned correctly. The seam between the bottom and the sides is supposed to be there! Just sand it to even up the sides and get rid of any step between the body panels.
The in progress shots show the trunk opened but I later opted to close if for some unknown reason.
Painting
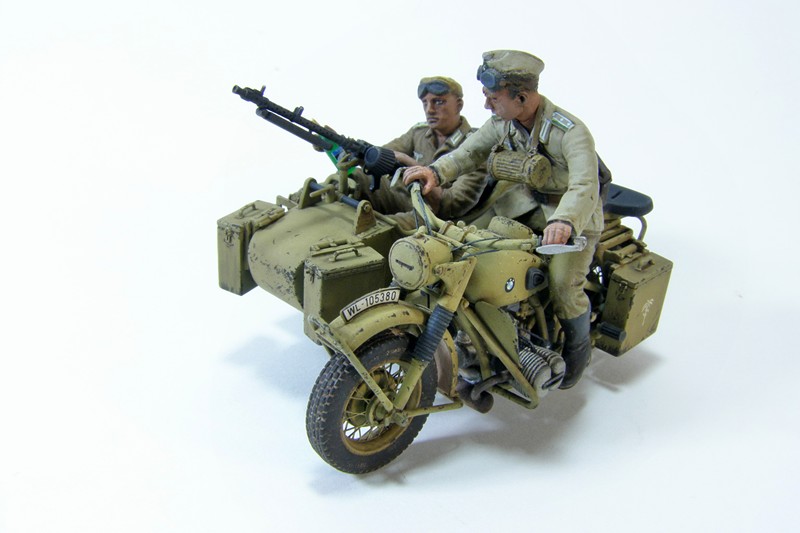
I finished the R75 as being in a DAK Luftwaffe unit. I custom mixed DAK desert yellow using Testor’s Acrylics. The entire model was pre shaded with Tamiya flat black. I then painted the desert yellow. I also highlighted main body parts with a lightened version of the base color. The engine was hand painted Citadel Mithral Silver. Tires were masked off and painted Tamiya NATO black. Details were picked out with a brush using various Tamiya and Testor’s acrylics. Markings came from the kit and were applied after depositing a drop of Future and pressing the decal in place with a cotton swab.
The model was then given a wash of Rembrandt Sepia and Burnt umber artist oils and Turpenoid brand thinner. Dry brushing was accomplished with a custom mix of yellow ochre, sepia and titanium white. I then added paint chipping using Vallejo German camouflage black- brown applied with a 5/0 brush and a piece of foam.
Figures
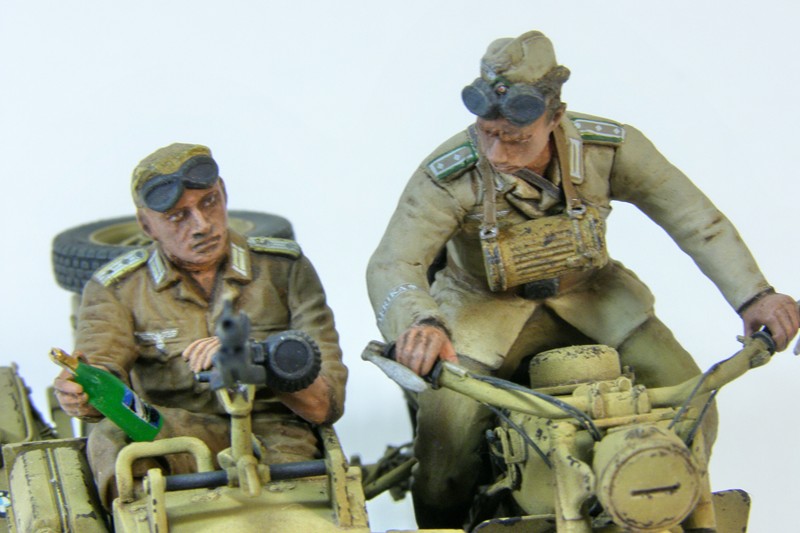
The figures although not a part of the kit, were added to give the model a sense of scale and add a bit of life to the subject. I used a set of figures from Master Box and slightly modified to fit the Lion Roar kit. Beautifully sculpted in styrene, these little gems are some of the best figures done in plastic in a very long time. I replaced the riders head with one from Alpine Miniatures.
As for colors, I was way out on a fence when it came to what would be correct colors. A fellow modeler loaned me a very concise book “Afrika Corps” by Robert Kurtz. After leafing though this tome I decided on two different uniform types to add color and diversity to the uniforms. Fading and coloration differences made for a very wide range of types of uniforms with no real consistency within the unit on the wear of the uniforms. They were painted in various colors from Testor’s and Vallejo. The rider was given an overall coat of Testor’s Acrylic Brown #4. The rider was given a tunic painted with a custom mix of Testor’s Acrylics and Vallejo Khaki grey trousers. Collar insignia and epaulets were added with Archer dry transfers applied using the “wet” method.
Pros
Exquisite, petite detail. Photo-etch spokes for the wheels.
Cons
No real attachment points for most parts made for fiddly assembly. Very fragile, made handling almost impossible.
Thanks to Dragon models and IPMS/USA for the review sample.


Comments
Add new comment
This site is protected by reCAPTCHA and the Google Privacy Policy and Terms of Service apply.
Similar Reviews