
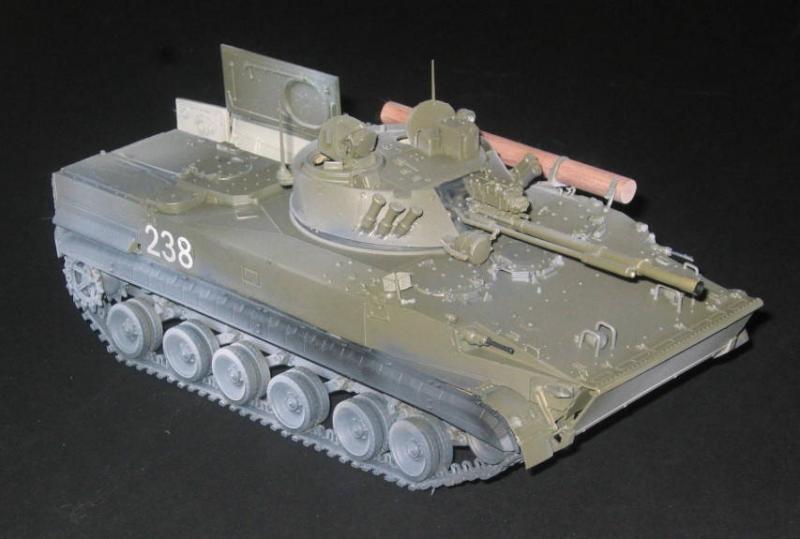
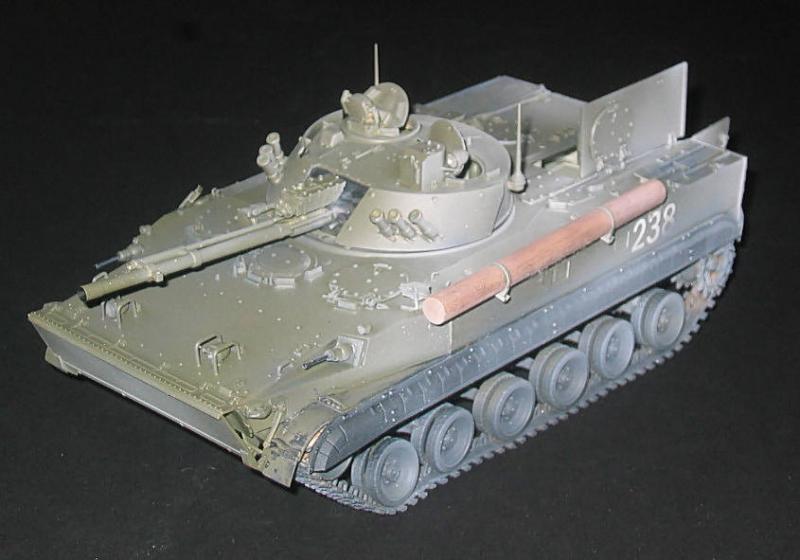
BMP-3 MICV Early Version
Thanks first to Stevens International for providing this kit. Once again, we are blessed with excellent review opportunities through their gracious provision!
I am an occasional armor modeler. Having built BMP 1 and 2 versions from DML many years ago, I was interested in what Trumpeter have provided. Let's move on to the build and see…
When you open the box you are greeted by 13 parts trees (sprues to some), 12 in tan and one clear for the lights and laser sighting windows. Everything is packed in separate bags… no lost parts or broken bits! One photo-etch fret for details, including a grill to go over the kit engine intake, and bags of track parts. We’re talking BAGS. Three bag sets of pad/growser bar assemblies, and 2 trees of “U” shaped parts for the wheel alignment teeth. These were a bit imposing; I love repetition like I like to slam my hand in a car door, but this is a review, so I sacrifice to the minor gods of modeling and press on… Also included was a small decal sheet with numbers. And there was a tree of clear parts for the headlight, spotlight, and (unused in this kit) laser designators.
The upper and lower hull assemblies are one-piece items. Excellent detailing, and no motorization holes on the bottom. The main turret frame is also one piece, to which you attach external armor and all the things that make up a turret. Cupolas, spotlights, actuator arms, antennae…
Step 1: The build starts with the road wheels, two-part items with excellent tire detailing. The drive sprocket is keyed so you don’t have tooth misalignment. The return roller is also keyed as a two-part item. Lower running gear, the torsion bars and idler rollers are cemented in place. It was here I ran into some numbering problems; They have you make three each of AA and BB; maybe it was me, but when I tried to attach the shock assemblies in accordance with the instructions, they would not fit into their respective holes. I swapped parts around, and was able to get everything into place. You also install the lower forward skid plate/glacis in place during this step.
Step 3: The next instruction step shows installation of the road wheels, after which Step 4 shows a diagram of track installation. I waited until the end of the build for installing tracks; I find that works better for me.
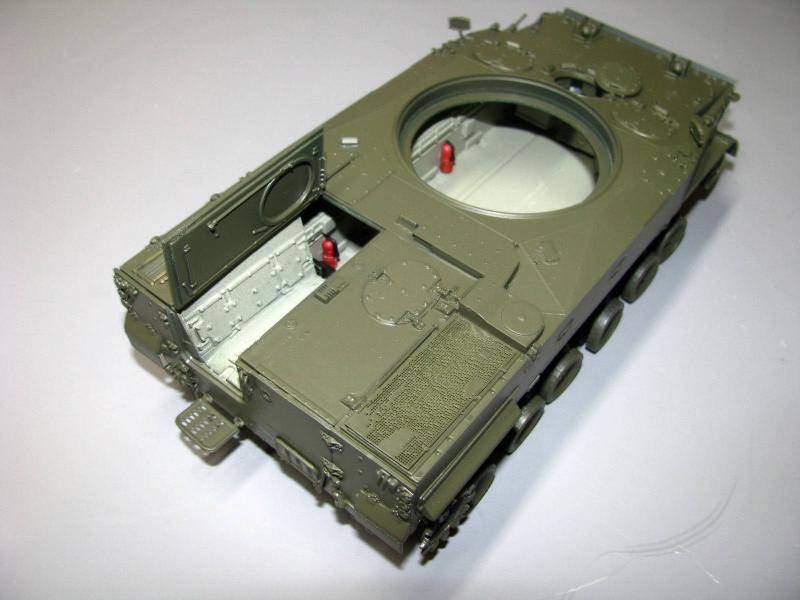
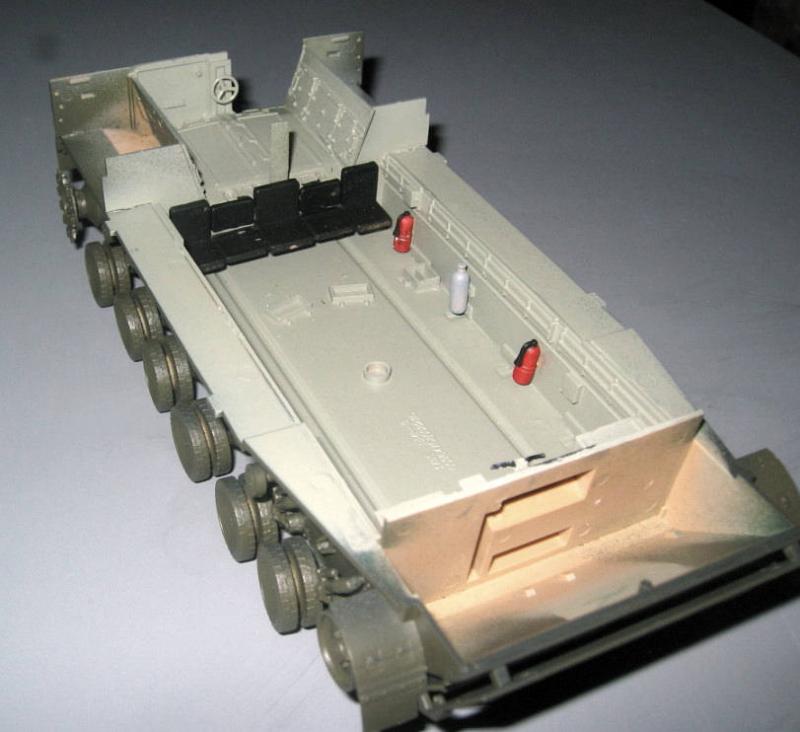
Step 5 is the beginning of the interior. Sidewall detail holds fire extinguishers and pressure bottles, along with rear bulkhead seats. No details, belts, etc., but I don’t know about these. Never rode in one (and no desire to! Too many A-10’s around)
Step 6 is fore and aft bulkhead details and installation. There appears to be a place for a foot pedal but none is included. Interior sidewall installation and aft exit tunnel panels are installed next.
Step 7 has more interior detail and seats installed, along with the rear armor and door access frames. There are nicely perforated steps that may be installed up or down depending on your desires. I left one side open to show this feature
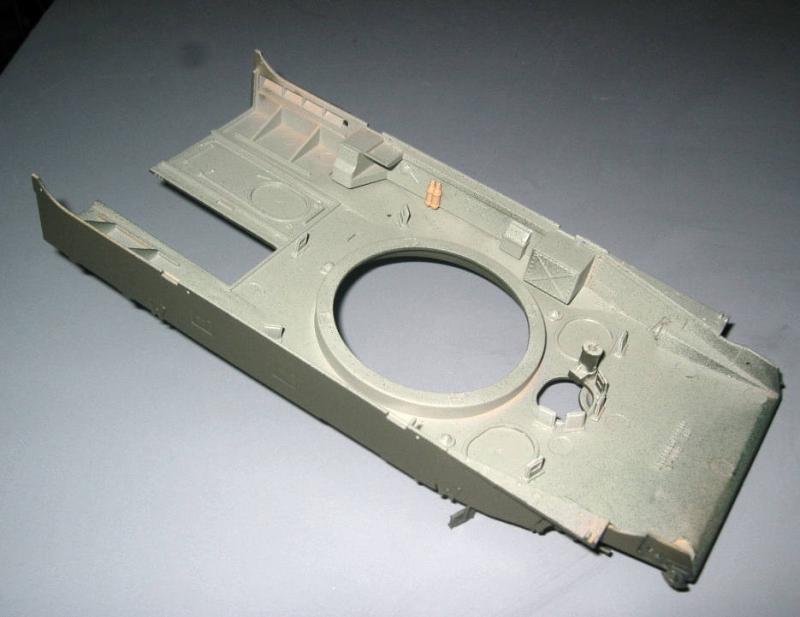
Step 8 is more interior detail for the upper hull section; with periscopes and sidewalls.
Step 9 is upper hull exterior detailing; lots of hatches, hinge points, headlights, and eyebrow automatic weapon barrel installations. As stated before, I left one side of the entry hatch assembly open. This is unique; top opening, providing some armor protection as the soft body parts exit the vehicle while being shot at… wa-hoo!
This is also where some of the PE parts are installed around the engine filter assembly. I messed up the main grate, so tossed it in the bin. There is also the breaching log, ”Get me out of the mud” assembly, with two PE brackets to mount to the model
Step 10 is assembly of the upper and lower hull assemblies to each other. Simple!
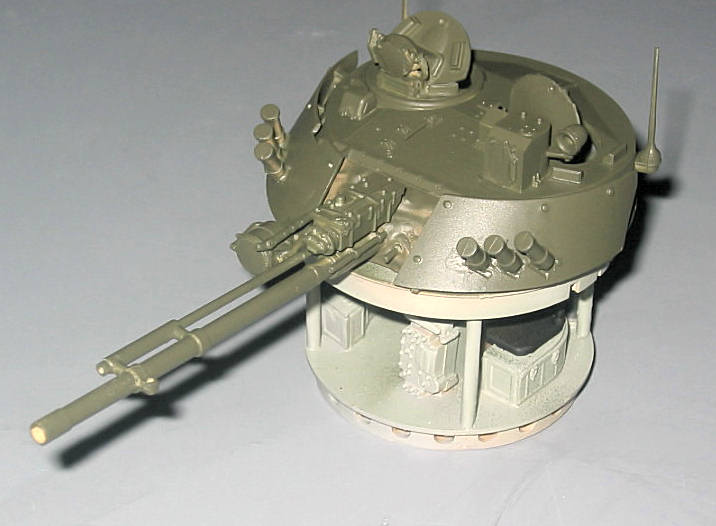
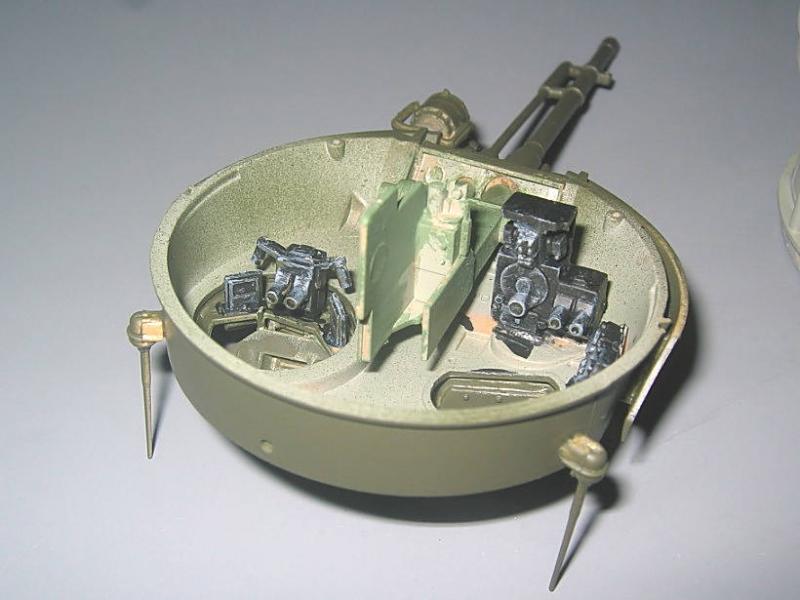
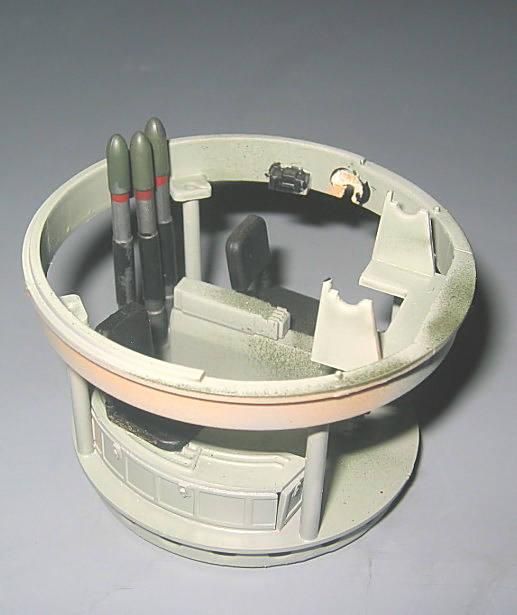
Step 11 and 12 are lower turret interior detail assemblies (Lots of control boxes, seats, and three RP AT rounds) and installation of upper outer turret details. There are PE caps for the smoke grenade launchers… a nice touch. The main rocket launcher “gun” barrel is two parts, but fits well. Assemble, let dry, give a swipe with a sanding stick and done… then the sighting tube is attached and you have a strong assembly to attaché to the forward turret mantlet. The mantlet is covered with simulated fabric, I painted it black along with the co-ax automatic weapon. (OK, “machine gun”).
At this point I masked the previously painted interior parts, and painted my BMP in basic Tamiya Olive Drab; it looked a lot better than the dark green I had tried before. There is the marking option of a three-tone camouflage, but I was ready to finish this one without going crazy with the airbrush.
It was at this point I assembled the track parts using my favorite Ambroids liquid cement. Two consecutive nights spent here; about four hours total. Lay the pads on a metal ruler, slide them into place, and use liquid cement. Tweezers and ½ hour for the track teeth, use a knife blade to release the whole thing from the metal ruler, and thread everything into place around the wheels and tires. I used more liquid cement to fasten everything, then proceeded to step 13, which is installation of the debris skirts, drop the turret in place, and complete. The decals were simple; I used the future wet coat method, and had no silvering or “standing proud” issues with the decals.
I then cheated by painting the tracks and tire assemblies scale black, with a heavy coat of dust. Hey, that’s armor modeling; no pristine models here! And I didn’t have to mask the tires. (That’s insanity to me)… and a non-Dullcoat requirement for finishing. In the end: one each BMP 3 to sit next to my T-80. I am a happy clam.
Thanks again to Stevens International… We certainly appreciate their support!


Comments
Add new comment
This site is protected by reCAPTCHA and the Google Privacy Policy and Terms of Service apply.
Similar Reviews