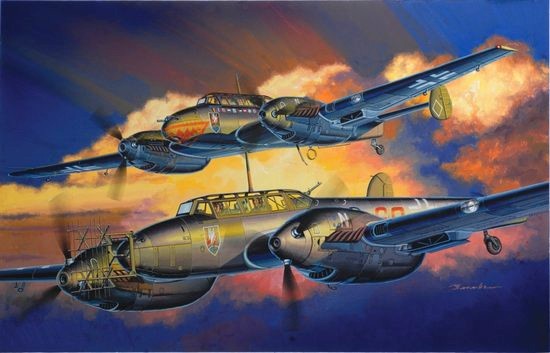
Bf110D/E Night Fighter ~ Wing Tech (2 in 1)
Part 1. First Look
Before I get onto reviewing this model, I would like to give a little background information about this aircraft.
The Messerschmitt Bf110 served in the Luftwaffe throughout WWII. Even though it wasn’t very popular with the German pilots at that time it was developed into a successful night fighter, in spite of its poor handling characteristics. Later on it was found that it would make a great night-fighter and then became the backbone of the German Luftwaffe night fighter wing of WWII. Some of these units were formed as early as 1940.
In August/September 1943, Bf110 aircraft shot down over 2700 RAF bombers. Also, in just one night without fighter cover, these aircraft destroyed at least 120 RAF bombers. The Bf110D was a long-range heavy fighter and/or fighter-bomber, while the improved and up-armored Bf110E was designed primarily as a fighter-bomber.
The Kit
Dragon has already released a Bf110C in its 1/32 scale Wing Tech series, but they took it one step further and followed it up with the BF110D/E which is a 2-in-1 kit configured as a night fighter. Modelers thus have the choice of building a 1/32-scale Bf110D or E aircraft equipped for night flying. The appearance of these night fighters is quite different from the Bf110C, because of the radar antenna fitted on Bf110D's nose. In this kit the modeler has a choice of using the antenna photo-etched parts or the standard plastic parts that are already molded to exact detail. Special parts are further provided for the Bf110E, including new nose and rear wheels, a newly tooled machine gun and nose antenna and so much more. Modelers can also choose to have a camera-equipped Bf110E aircraft. Whichever version of the aircraft you choose to build, you can be assured of the highest quality and level of detail in Dragon’s Wing Tech Series. I am choosing the Bf110E to build as there are newly tooled parts that are awesome and I already have two Bf110s earmarked to build as a 110C & a 110D in 1/48 scale with all aftermarket parts bought and planned for.
When the box arrived I was amazed at the size of it. It was huge for only one model. As I took off the top cover and saw all those sprues, along with the level of detail, I realized that this kit deserved a lot of attention. With that in mind I resolved myself to build it very close to OOB to try to give it a fairer review. I did however add wires and drilled out lightening holes and other small scratch built details, but nothing that alters the assembly in any way. These scratch details certainly will not have to be followed to build this kit into a great replica
When the build starts I thought that I would follow the instructions in the order that Dragon designated so as not to deviate in any way. I am also reviewing Eduard’s Interior Zoom set for this kit, so I incorporated it with this build. Installing the Eduard P.E. on this kit was just a matter of sanding down some detailing and sticking on the colored P.E. parts in place of the detail sanded off.
There are a few issues I want to mention just to get them out of the way so that they won’t have to be mentioned again. The first of these issues are the small nubs that are on every part. These need to be cut off very carefully then sanded smooth. These nubs are a pain in the neck but are necessary to push the sprue out of the mold without producing sinkholes and marks that can ruin the details. Secondly, there are also molded seams on most parts which need minor sanding. All of these issues can be very time consuming but necessary and a small price to pay for this glevel of detail. I have also assembled some parts out of order. These were simple to assemble but may have gaps to deal with after the assembly. These parts, such as bombs, stabilizers, rudders, etc can be glued together then sanded and the gaps filled, if necessary. This will not affect the actual order of assembly.
I am not going to list all the details and newly tooled items as there is way too much to list. These listed details and their pictures can be seen on Dragon’s website.
This concludes the “First Look”. I will break up this review into a few parts so as to show the full build with pix and comments. Part one will contain the Cockpit & Radio Compartment


Comments
Add new comment
This site is protected by reCAPTCHA and the Google Privacy Policy and Terms of Service apply.
Similar Reviews