
Bf-109K-4
The Kit
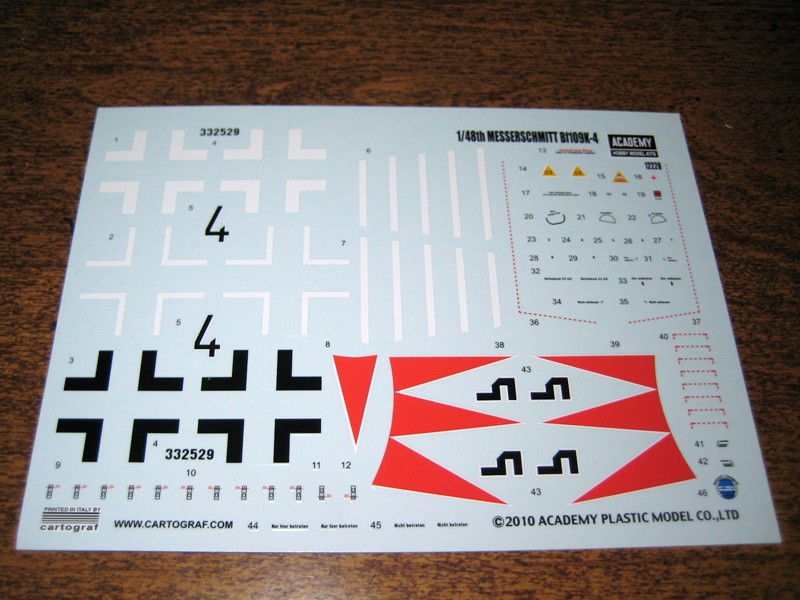
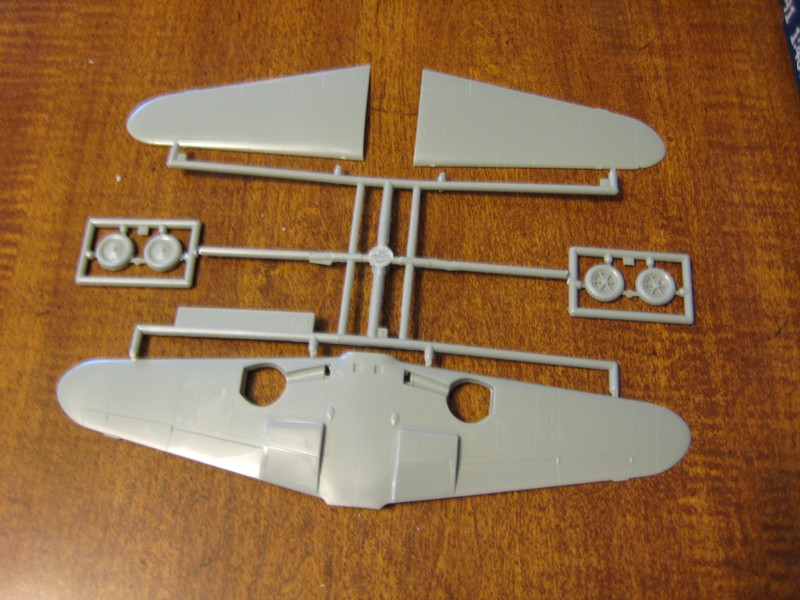
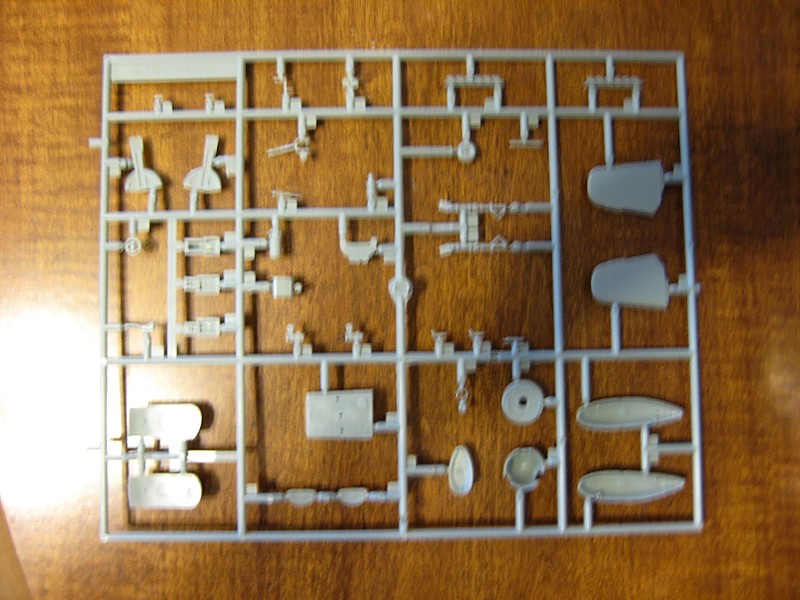
Academy provides you with six sprues of light grey plastic and two small clear plastic. The sprues are the same ones that were issued by Hobbycraft, but there is a difference. The difference is the inclusion of three additional items, two cowl guns and a pitot tube made out of turned brass. These items are little gems of work. The guns have hollowed out ends and look perfect. The decals are printed by Cartograf and provide markings for one colorful aircraft. Being from Cartograf they are in perfect register and suitably thin. In essence, perfect decals.
The instructions are easy enough to understand and broken down into twelve steps. The marking option provides a four view drawing that will help you mark your airplane.
The Build
Typical of most airplane models this one starts in the cockpit. The cockpit is simplistic but very representative of the K. Pay attention to some holes that have to be opened. For some reason Academy has you open a hole on the left side of the fuselage. I wouldn’t do that as you’ll just have to fill it again. Even out of the box the cockpit is nice enough. It just requires some seatbelts to make it look great.
Careful painting is easy enough with RLM 66 and some detail painting and the cockpit looks the part. A drop of Krystal Kleer was added to the gauges to replicate the glass.
The fuselage halves fit together really well and the cockpit can be added from the bottom.
I added the horizontal stabilizers but noticed that something was amiss. The right horizontal was slightly lower. This is easy enough to fix if you know about it beforehand. I had to break mine off and thin the mounting tab and slightly open the mounting hole and reattach. This alleviated the problem.
Make sure that you open the appropriate hole in the wings before assembly. Be careful of the opening on the wing for the blade antenna. Don’t open up the one as indicated on the instructions but the open a hole in the clear part. The fit of the wings was actually very good. So good so far, but when I offered up the wings to the fuselage there was a problem. The dihedral or lack thereof. I flat sanded the fuselage sides and the wings until I got the amount of angle that I liked. The wings were then added. Of course as is my normal for me I screwed it up and had to add styrene and Apoxy Sculpt to fair it in. This was my entire fault and not the kit. If you don’t do something there will be no dihedral.
Before I knew it I was ready to paint. A quick wash of warm water and grease cutting dish detergent and I was ready to paint.
The front canopy was difficult to remove from the sprue. I had to sand and polish the attachment points and then dip it in Future. This actually worked rather well. I masked off the canopy with Tamiya tape and painted it with RLM 66 prior to attaching them for painting.
The whole assembly was primed with Alclad Grey Primer and checked for flaws. I had to repair some spots and then it was ready to paint.
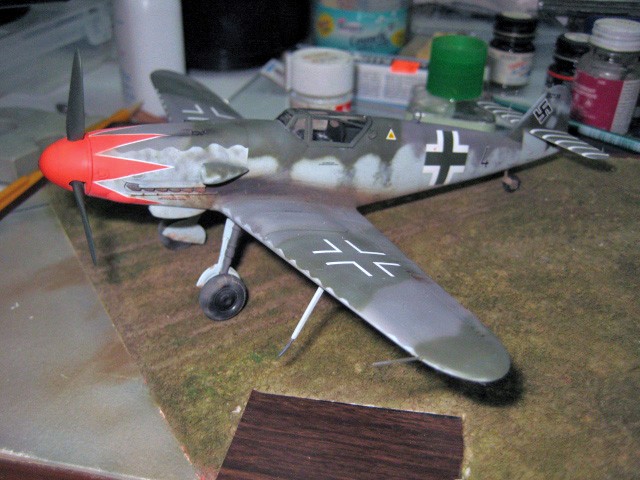
I like to pre-shade my models but I don’t just paint the panel lines. I build up areas on and around the panels as well. I used RLM 66 for the preshading. I used a mixture of Tamiya for RLM 76. I followed this up with Gunze RLM 75 and 83.
Adding the landing gear and some small pieces allowed me to spray a coat of Alcad Gloss in preparation for the decals. If you haven’t used this stuff yet it is great.
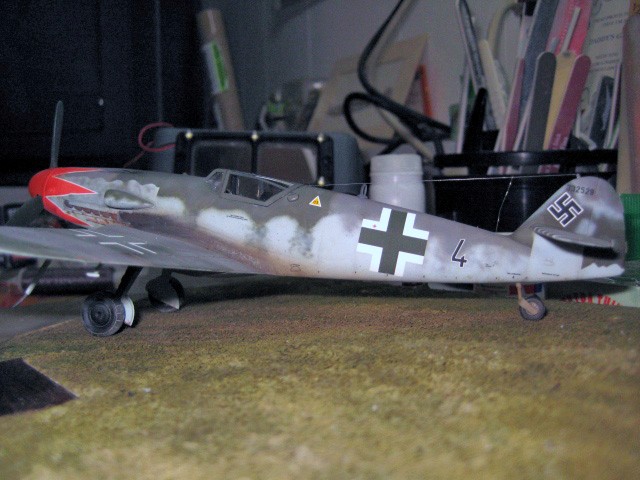
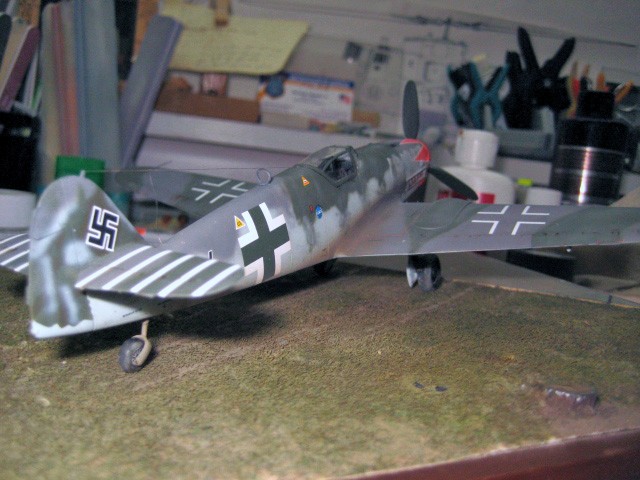
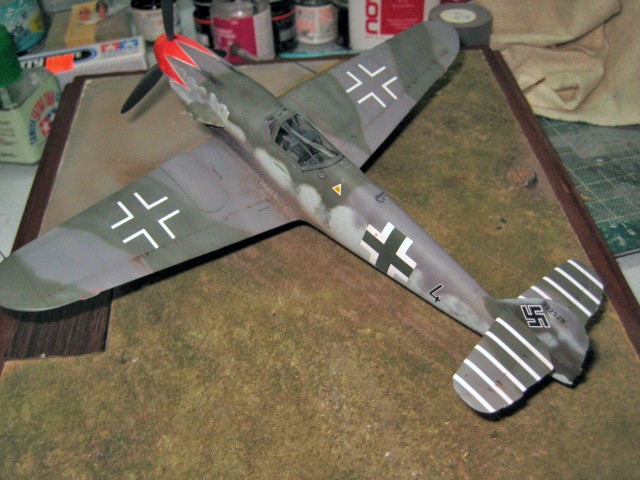
As expected the Cartograf decals worked flawlessly. The one issue I had was my being too fast and not aligning the tulip nose decals properly. Despite this the decals performed flawlessly as expected. The biggest issue was trying to match the spinner with the red decals. I got pretty close with a white undercoat and a coat of Testors Model Master Chevrolet Engine Red. A coat of flat sealed everything in.
The weathering started with a wash of burnt umber. This was followed up with some silver chipping with a silver pencil. Some Mig Pigments added some color to the wing roots. A highly thinned mix of Tamiya Flat Black and Dark Earth were added to the exhaust stains. A thinned flat coat set everything in place. I added an antenna anchor on the tail and ran some EZ-Line wire. The canopy was added in the closed position but I should have posed it open as it is slightly undersized. It wasn’t objectionable to me but may be to you. And with that the model was done.
Conclusion
It certainly is colorful and looks to me a Bf-109K-4 to me. Is it perfect? No, but what model is. I think this is a nice kit that any modeler can have fun with. The inclusion of the brass parts and the Cartograf decals makes this a really nice value. It is a quick build and if you take care of the issues that I mentioned you will end up with a really nice looking model. I’m happy with the end result.
Recommended
Thanks to MRC-Model Rectifier Corp., Academy and IPMS/USA for the review copy. You can obtain your copy at your local hobby shop or by contacting Academy at www.modelrectifier.com. Let them know that IPMS/USA sent you.


Reviewer Bio
Floyd S. Werner Jr.

Building models since the age of 7, I’ve become known for my Bf-109s and helicopters. I currently run Werner’s Wings. I was previously the ‘star’ of the Master Class Model Building Video series. I’ve been published numerous times on various website, including Hyperscale and ARC. My work has been in FSM and Great Scale Modeling 2001, as well as, numerous other model magazines. I’m a published author with my Squadron/Signal Walkaround book on the Kiowa Warrior. My models have continuously won many regional and national awards. My unique model photography gives my models instant recognition for their historical perspective.
I’m a retired from the Army after 21 years of flying Cobras and Kiowa Warriors, including tours in Iraq, Bosnia, Korea, and Germany. I’m also a retired Flight Officer for the Baltimore City Police and flew their helicopters chasing bad guys. I’m currently flying Cobras and Hueys with the Army Aviation Heritage Foundation.
I’ve been married to my high school sweetheart, Yvonne, for 42 years. Our daughters have blessed us with six grandchildren. My passions continue to be his family, friends, helicopters, models and airplanes, especially the Bf-109 and my beloved AH-1 Cobra. My motto has always been - MODELING IS FUN!
Comments
Add new comment
This site is protected by reCAPTCHA and the Google Privacy Policy and Terms of Service apply.
Similar Reviews