
Beer Wagon
"It’s Back!"
I was quite caught off-guard when I discovered that the Tom Daniels “Beer Wagon” was to be reissued by Monogram/Revell this summer. There had been nothing noted on any recent publications from Revell that this kit was to coming back out, but I am so happy it has resurfaced. Now, how many different variations to this kit can I build?
Historically this is the single kit that launched my interest in scale modeling. Not the first kit I ever built, but the first kit release from Monogram in 1967 under the Tom Daniel’s banner. Many more would follow of which I have built nearly 50 of the various Tom Daniels designs and have a collection of over 80 of the 80+ he is given credit for drafting.
As a young boy I had a great interest in show rods, hot rods, and automobile racing as well as the space program. It wasn’t until an article in the February 2000 Scale Model Enthusiast written by Terry Jessee that I discovered Tom Daniels was also a designer working on the Apollo space for North American Aviation drafting many of the capsule components.
Tom had significant influence in many other kits that were released prior to the Beer Wagon. The AMT Barris Munsters Koach and Dragula drawn in 1964 were sketches of Toms for which he was paid $200 with the actual vehicle and model design credit going to George Barris.
Parts Count
- 29 Yellow styrene plastic parts on four spure
- 40 Chrome styrene plastic parts on one spure
- 10 Brown styrene plastic parts on one spure
- 4 Vinyl rubber tires
- 1 2 1/2” by 2 ¼” Decal sheet
- 1 12 page, 9 step instruction booklet
All parts are in separate sealed plastic bags and appear to be free of any major flash. The chrome is bright and free of scratches. The molds for the rubber vinyl tires appear to be fresh and without flash or mutation. Decals are crisp and covered with protective wax paper.
The Build
For this review I will be using Tamiya green liquid cement, Tamiya white rattle can primer, Tamiya acrylic paints, and Alclad II metallic paint.
The 12 page instruction sheet from Monogram is typical of Revell with the first four pages an intro, basic instructions, paint guide and parts list by number and description. These instructions are given in three languages, English, French and Spanish.
I typically am a sub-assembly style of builder. It is much easier to assemble, fill seams, and paint parts as sub-assemblies and then later when mostly finished bring these parts together. That said, I immediately diverted from the assembly instructions.
The first thing I did is mask all the holes used for assembly in part 15, the chassis, using Aleene’s tacky glue. Doing so allows you to assemble these parts later by carefully picking out the little spots of glue, rather than tediously having to scrape out the paint from many holes. You can also place some Aleene’s in the floorboard holes where the shifter and steering wheel go, on the floor pan where the beer mugs go, against the headboard where the headrest goes, along the front cab where the C-cab will go and under the steak-bed where the beer keg gas cans go. All this will save tons of time later.
Next sub-assemble parts #10, 11, 13 and 14 which make up the Mack C-Cab and set aside for paint. Part #2 is now carefully tack glued to the chassis part #15 and also set aside. In doing so, I also recommend removing the two locating pins in the C-cab hood as they tend to push the hood off center. Part #37 the truck bed and parts #36 the beams can now be assembled as well and set aside. I leave parts #40, 41 and 42 on their spure runners for easy handling.
Now you are ready to airbrush or spray paint all of your basic components. Word of caution, the rear lamp holders on the main chassis stick out and are very easy to break off, be extra careful here. In the five Beer Wagons I have built, I have bent or broken these off many times.
With the major body and sub-assemblies drying we can turn our focus to the other minor sub-assemblies. In step 3 the components that make up the front axle assembly can be glued together and detail painted as one. Step 4, the exhaust headers can be put together, seams filled and sanded and painted along with the motor part #16. At this point I also glue on the velocity stacks to the motor and do a little detail painting. Don’t forget to drill out the tops of the velocity stacks for a more accurate appearance. Step 5 is mostly about the rear axle and drive assembly which can be accomplished off the chassis. As with the front axle assembly, be cautious with keeping things square and true.
The wheels and tires can be assembled at any point along this path. Two little things I do to make my wheels more realistic is to first chuck the rubber up in a little contraption I designed made of a 2” x 1/4” bolt, some appropriate sized washers and a nut. With the tire held snuggly in my mechanism, under the power of my Dewalt drill I carefully sand/buff the surface of the tires to obtain a more lifelike finish. With my handy #65 drill bit I drill a small hole in the appropriate location along the inside of the rim. Through this I install a tiny piece of soft wire to replicate an air valve stem. Bending the wire into an “L” makes holding and cementing it with superglue a breeze.
Some other items can be assembled and detail painted prior to final assembly such as the beer keg gas cans, rear tail lamps, and wood barrels. If you wish, Bare Metal Aluminum Foil can be used on the oak barrels once painted to replicate the steel straps. Detail painting can also be done on part #8 the steering wheel, part #4 the interior beer keg, parts #12 the head rest, and the motor and drive works on part #15 the chassis.
Once 99.99% of all the parts to this kit are prepared by either detail painting, sub-assembly or just cleaning the part up from its spure attachment point I will then begin the final stages of construction.
First I will carefully remove part #2 from #15 which I earlier tacked together prior to painting as a whole. The floor board part #1 can be glued inside part #2 and steering wheel, shifter, and beer mugs can now be installed as per instruction step 1. The seat, beer tap subassembly can also be glued into place prior to the C-cab being cemented over the top. Don’t forget the two little head board pads parts #12.
Going to step 4 in the instructions now, the engine can be installed to the chassis as well as the front and rear suspension. Leave the wheels off as this will help with the fitting of the C-Cab sub assembly back to the chassis where it was once tacked. Done correctly only a small touch up of paint along the front edge of the chassis to C-cab joint will be needed.
I chose to hand paint the stake bed floor with various shades of Tamiya paint and a home made wash of brown/black oils and turpenoid. The chains to the stake bed stakes were also hand painted with Tamiya steel and decals carefully applied per kit instructions. With the stakes attached to the bed this construction can be now cemented to the chassis.
Now in the final steps of assembly, the drive chains, tires, tail lights, keg gas tanks, license frame holder and wood barrels can be added to this major compilation.
Some additional detail painting is done to the running boards, tail lamps and headlights and I’m done.
I appreciate the fact that Monogram chose to surprise us with this kit release and thank Tom Daniels for the inspiration to build. It took roughly 15 hours to build this kit with the majority spent on prepping parts for paint and then painting. I love this kit! With decals released on e-bay there are literally dozens of beer wagons, soda wagons, donut wagons to be built.
Also, hats off to Revell/Monogram as their decals are so much easier to work with these days.Thanks to Monogram/Revell, Dick Montgomery, Dave Morressette, and the rest of the IPMS Reviewer Corp assistants and IPMS/USA for the chance to build and review this subject.
For further reading about Tom Daniel's career and models, please see the following:

Rear of beer wagon

Quarter-view of Budweiser version of beer wagon.
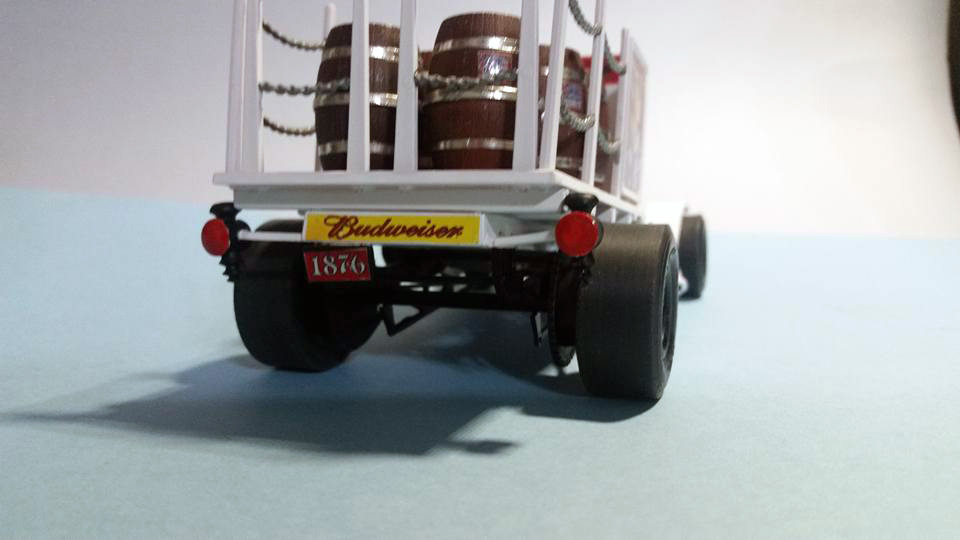
Rear view of the Budweiser beer truck.
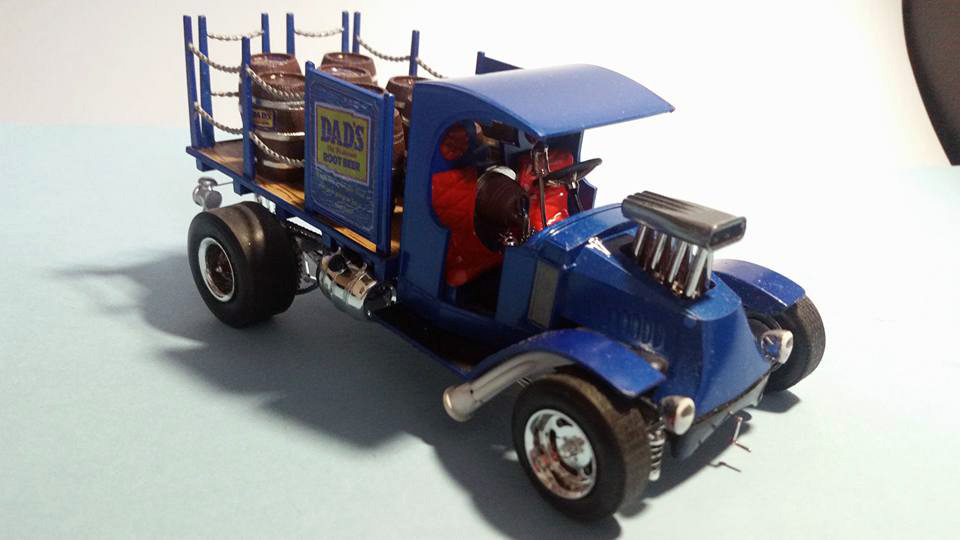
Front-quarter view of Dad's Rootbeer truck
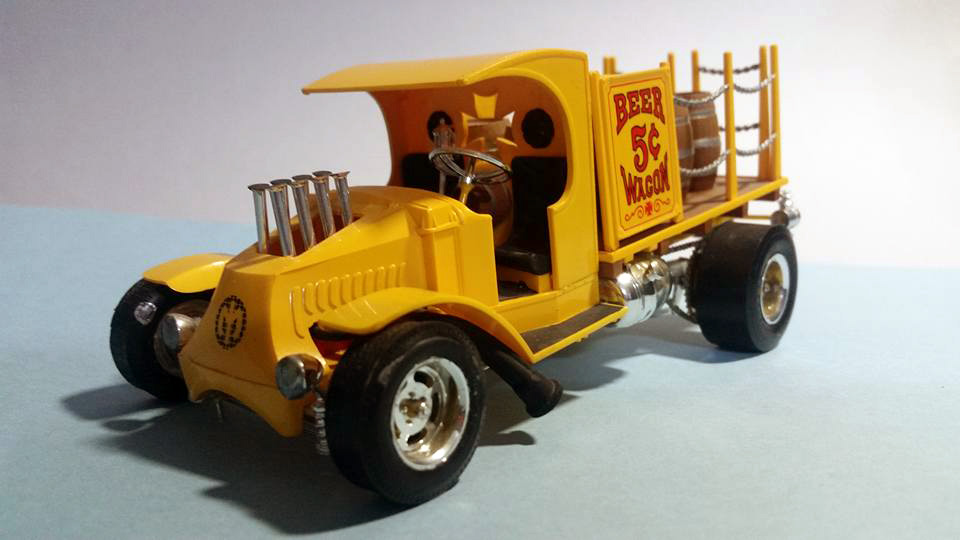
Front-quarter view of the beer wagon.
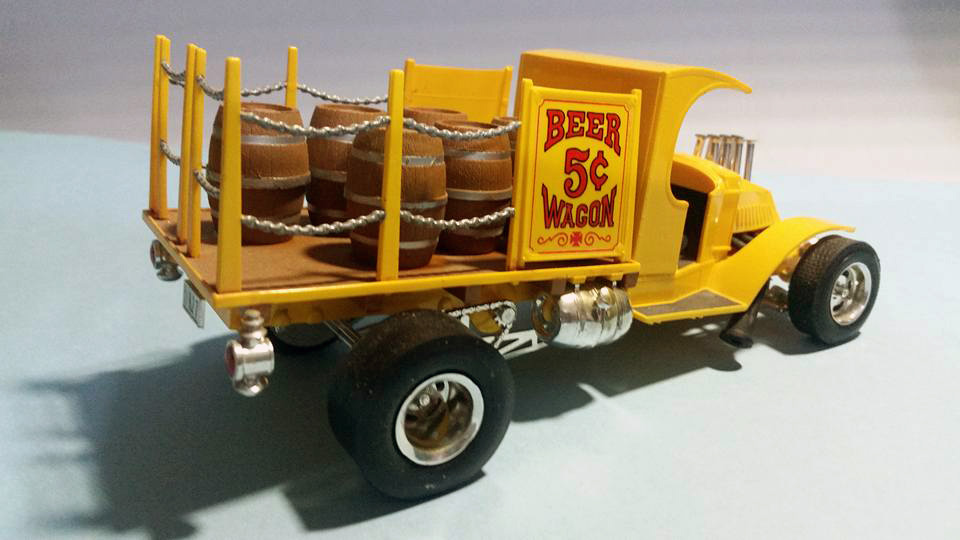
Side view of beer wagon

Rear-view of Dad's Rootbeer truck
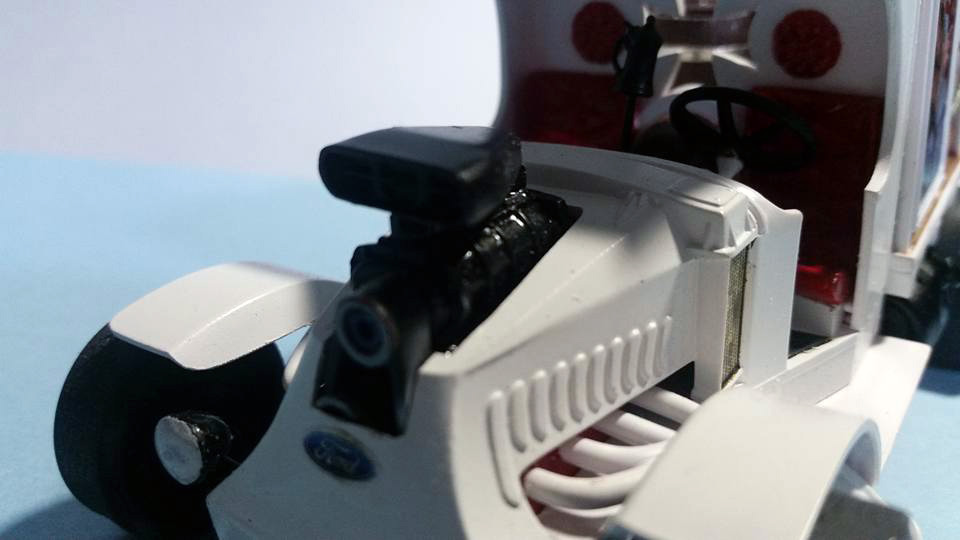
Closeup of engine of Busweiser truck
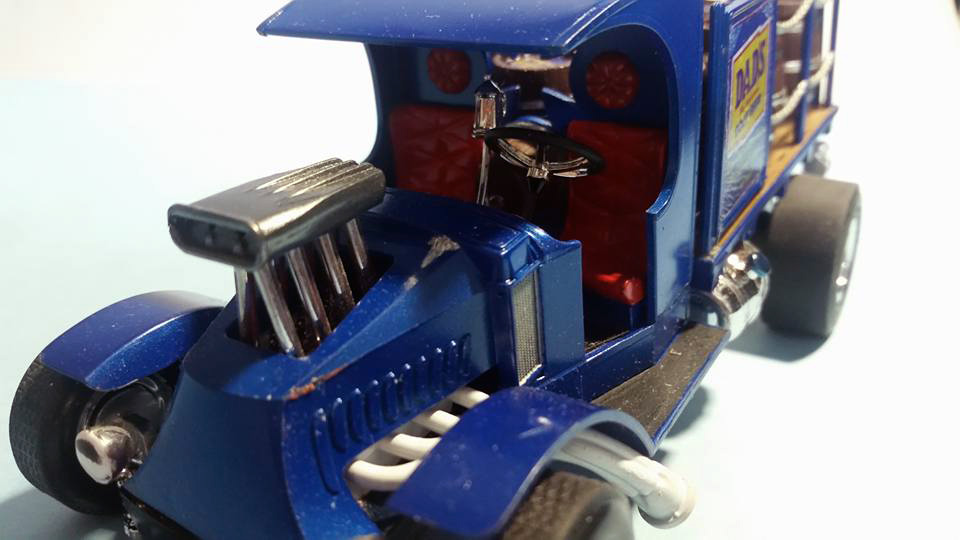
Closeup of engine of Dad's Rootbeer truck
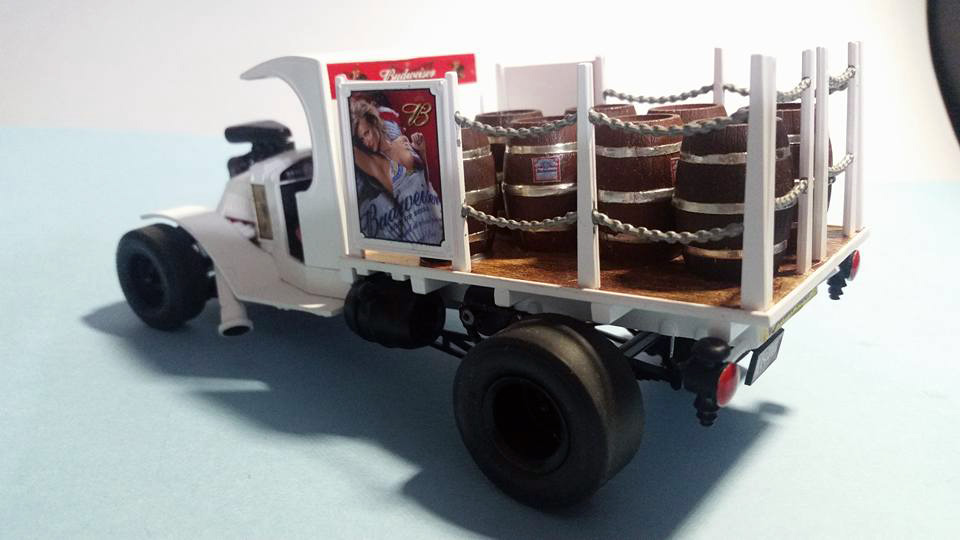
Side view of Budweiser beer truck
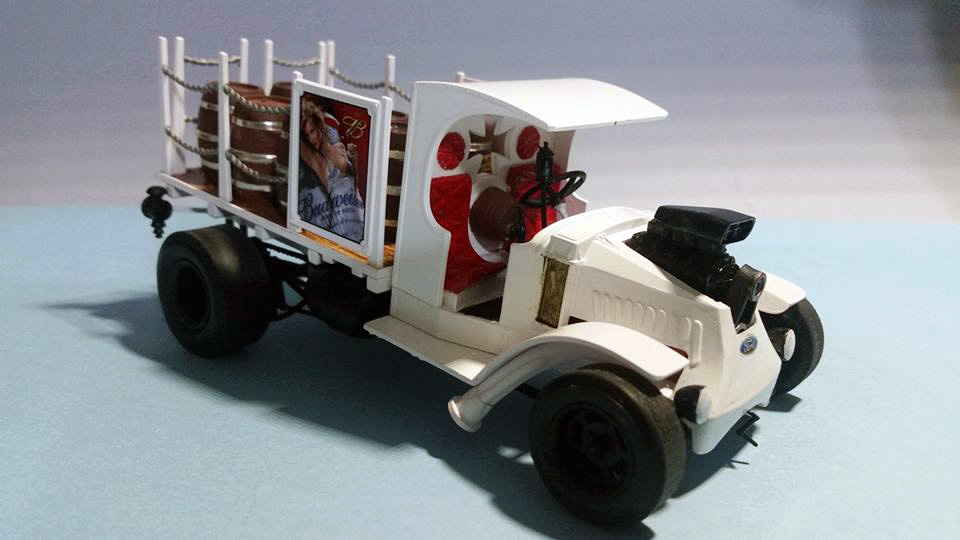
Front-side view of Budweiser beer truck
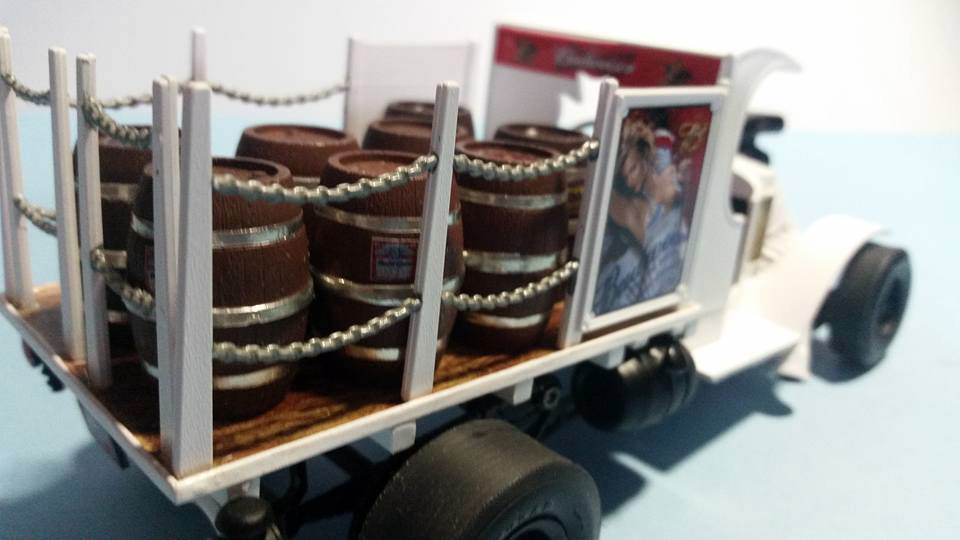
Closeup of cargo
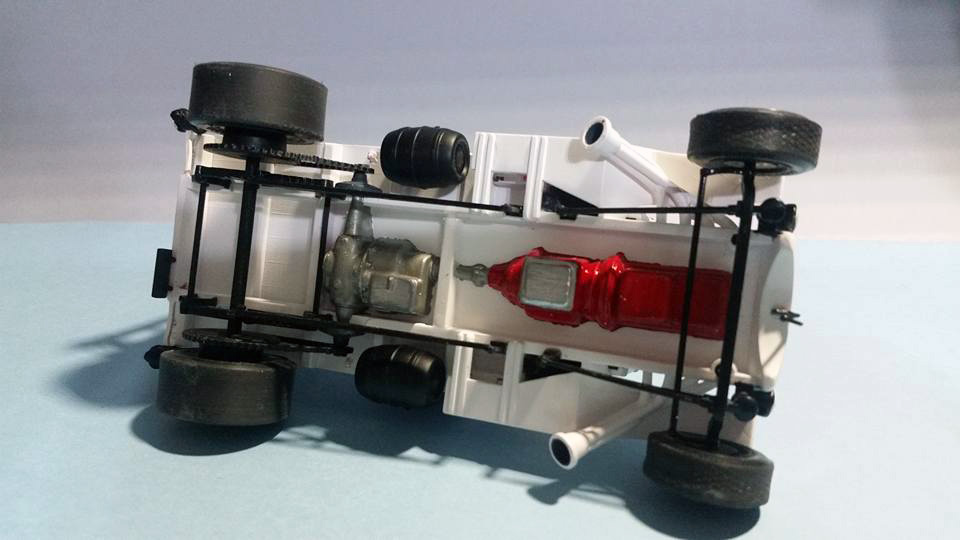
Underside of Budweiser truck

Comments
Tom Daniel beer wagon
Hi everybody, I have been looking high and low for a 43 Tom beer wagon diecast if anybody runs across one will you please contact me?
Add new comment
This site is protected by reCAPTCHA and the Google Privacy Policy and Terms of Service apply.
Similar Reviews