
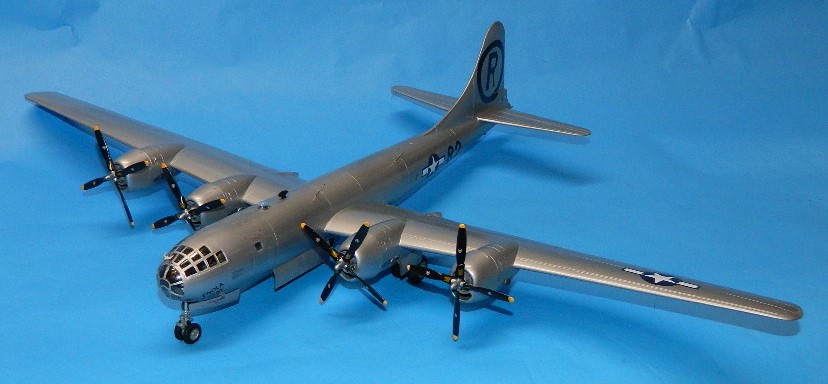
B-29 Enola Gay / Bocks Car
Sincere appreciation to Model Rectifier for providing yet another review item, and to the IPMS USA reviewer corps leaders for sending it to me!
The progeny of this kit goes back to 1992, when it was first released by Academy. It has been available on several occasions with different markings, and parts of it (Most notably the wings and stabilizers) have been re-released as a B-50 and a KC-97 with appropriate additional sprues to address the major differences on these aircraft. I originally reviewed this kit back then, and can say the same observations on that kit are valid today.
First, the overall condition of the kit parts is outstanding. There is NO flash to be found, and the panel detail is crisp and clean. The assembly of the kit showed the parts fit to be accurate, requiring just the seam and panel cleanup prior to applying an aluminum finish. I don’t know if this is a new, second generation CAD-developed duplicate mold from the original, but it’s impressive nonetheless. Parts fit are impeccable all around. The only areas I really dislike were the gun barrels, as the injection port is on the side, where it is very hard to clean such a mold mark.
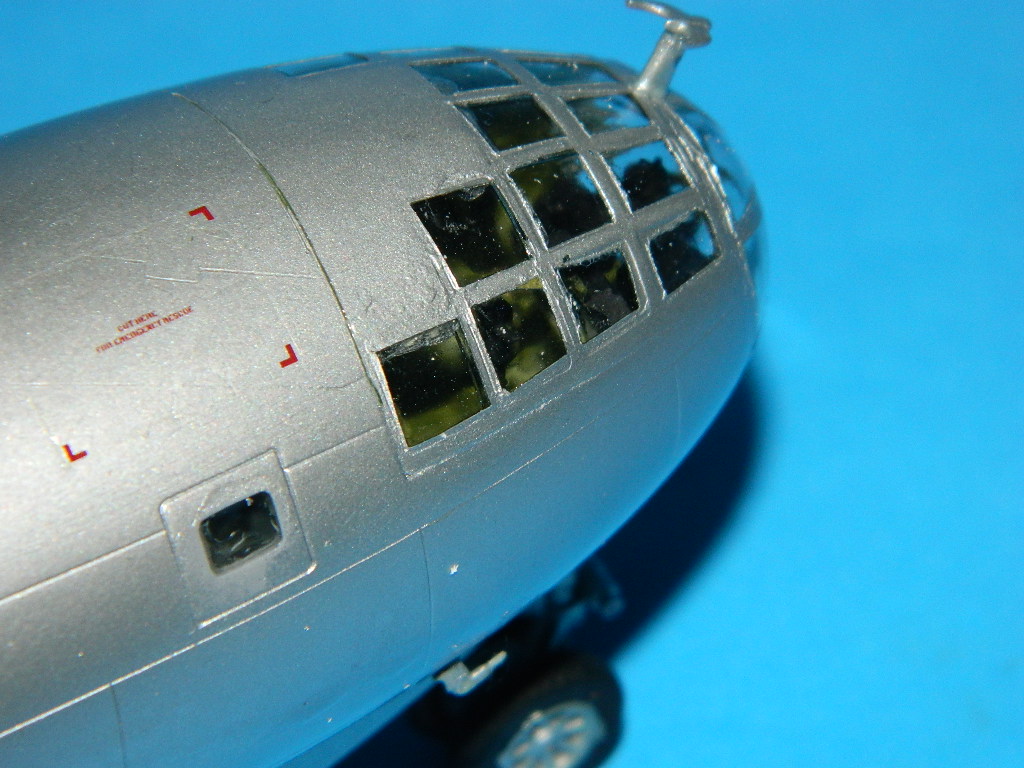
One minor error needs to be addressed before assembly: The tail gunner’s side windows need minor alteration. Specifically, the forward (toward the nose) smaller side windows have an angle on the top, like the aft windows. The aft windows are correct; the front windows should be parallel or squared off. The height on the aft portion of the window is correct, so you just need to shave some plastic from the top front (shorter or smaller side), and are equal distance from top to bottom on each side to be accurate. Essentially if you make the left side window equal distance from the hatch scribing, and follow the same approximation on the right side, you will be good. About two minutes with a #11 blade, and I had corrected the windows. I tried the “cut and install a new window with clear plastic” effort; next time I’ll just use micro Krystal clear.
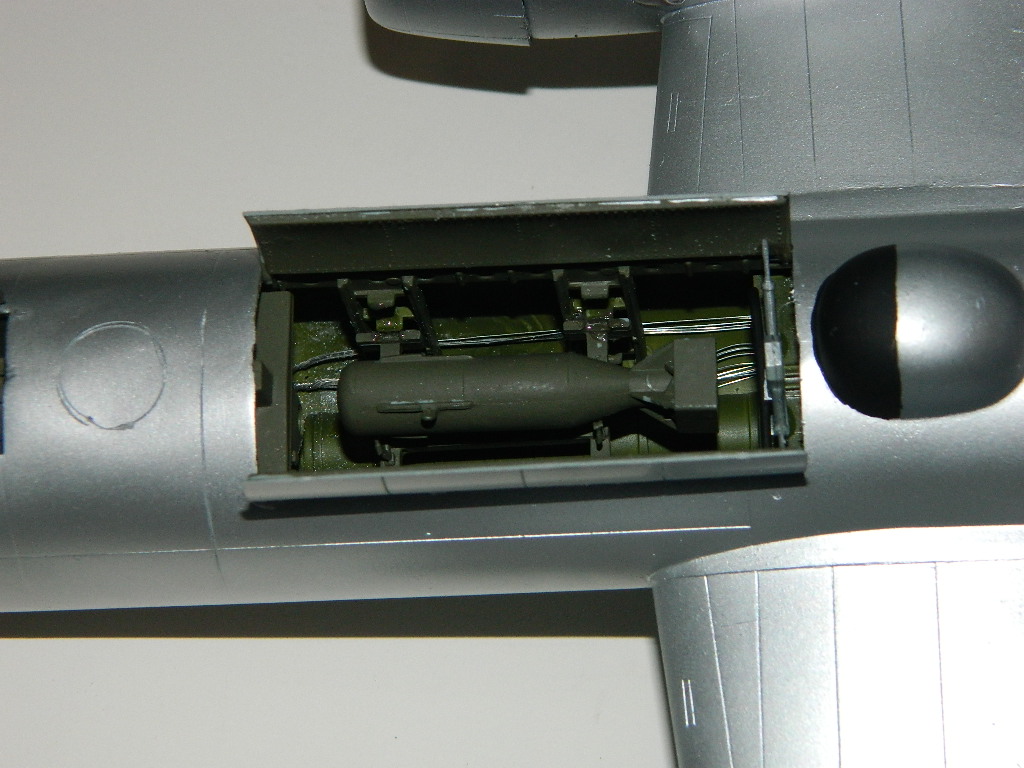
The kit assembles fast: The cockpit has a lot of detail for 1/72 scale, and decal instruments for the panels. I made up the prominent brake levers for the center console between the seats, and tape seat belts for the seat pans; after painting the belts, I called them good. This assembly fits into the fuselage half, along with the transit tube and aft bulkhead. I did not include the aft fuselage compartment details, as the “Silverplate” B-29’s had sheet metal plates inserted where the sighting blisters and gun turrets were installed. Only the tail gunner’s position remained, and this did not have the 20mm cannon installation, only the two .50 cal guns.
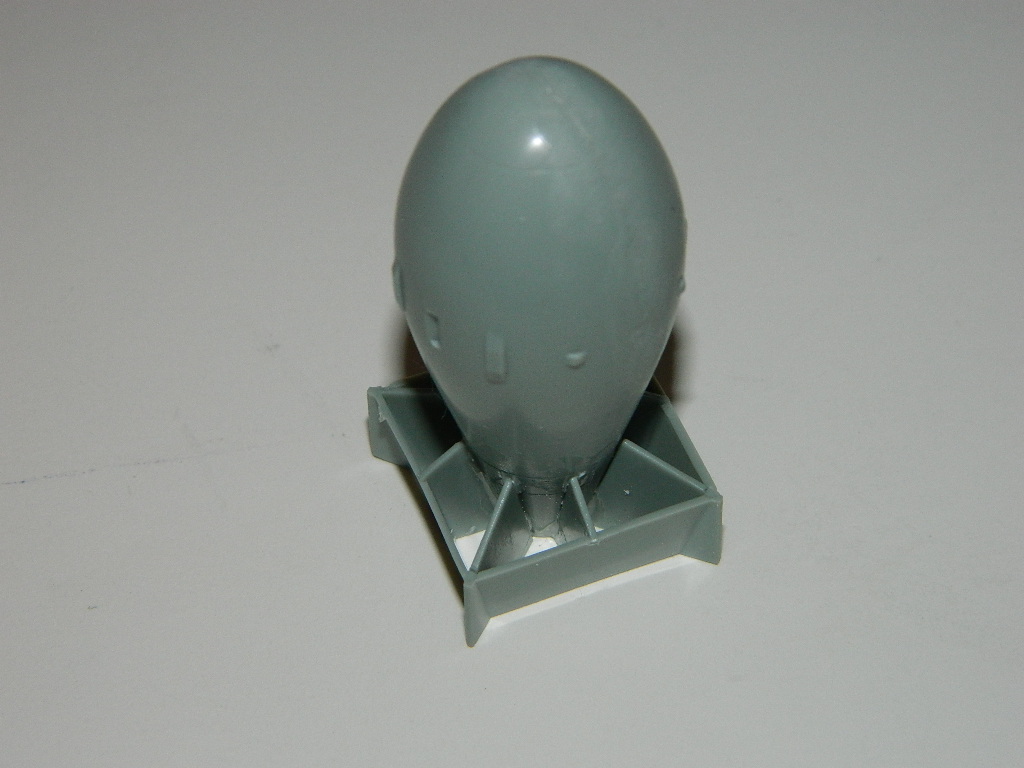
Nose weight: I used four lengths of plumbing solder in the front portion of the bomb bay travel tube; then I put several weights in the lower fuselage behind and next to the nose gear well under the cockpit floor. I also added weight inside the “Little boy” weapon. After this I did not need to add more weight to the kit, as it balanced well. If desired, Terry Dean has nose weights which will also work. The “Fat Man” held even more weight if you determined it needed it!
The entire interior was painted dark green; on the B-29 at Barksdale AFB that I and two other gents restored, I remember the paint was more olive drab than interior green. The insulation blankets were a dark European green. In this scale, I didn’t bother with a lot of work which will not be seen behind the nose canopy framing. I did run some wiring in the bomb bay because the real thing has a lot of control cabling, wiring, and tubing in it running the length of the bay. This added to the “busy factor” when viewing...
There are two bulkheads which attach to the bomb bay lower longerons and bomb racks; this is then offered up, and installed without cement to ensure the wings are set at the correct angle in reference to the fin and fuselage.
Since the aft bomb bay was not used (It contained a long range tank which is not included on this kit) I cemented the doors in place, and sanded them down. The oxygen tanks had been previously painted Tamiya camel yellow, and were installed now.
With everything inside, it was time to cement the tail gunner windscreen in place, after which I proceeded to cement the fuselage halves together. I cleaned up the fuselage seam, and then installed the clear cockpit canopy and nose cover. I masked these up then used a bit of putty to fair in… the actual canopy parts on the real aircraft are a rough fit. Only then did I install the wings, tail, and stabilizers. The wings fit perfectly over the spars and wing roots, and required a minimal amount of solvent cement run around them to make a strong joint.
The fin is a separate item, which facilitated Academy later releasing a B-50 with its taller tail. (This provided additional directional stability with the larger and longer 28-cylinder PW4430 engines of that beast)
The wings are provided as upper and lower assemblies with nacelle fairings on flap strips; these are upper and lower, facilitating the modeler displaying them down if you so desire; you’ll need the old out of production Paragon items, or the Eduard set. The fairings install on light scribe marks, and you can use the aft bullet nacelle aerodynamic fairings to ensure the whole thing lines up properly. Engines fit into the Nacelles from behind, and are positively placed on the front of the nacelle through use of tabs. I did not install prop shafts as I prefer to make longer shafts which then run from the engine gearbox to a hole I drill from the front into the firewall… they spin well but are removable for transport.
Stabilizers are two-part upper/lower items and fit perfectly on their tail mounts. I installed the silverplate discs in all the appropriate holes (over the side blisters and gun turrets) and used Tamiya filler. After sanding and polishing these areas, I used scribing tools and templates to restore the detail. Holes were drilled in the observer positions; I made them a bit too big, but oh well.
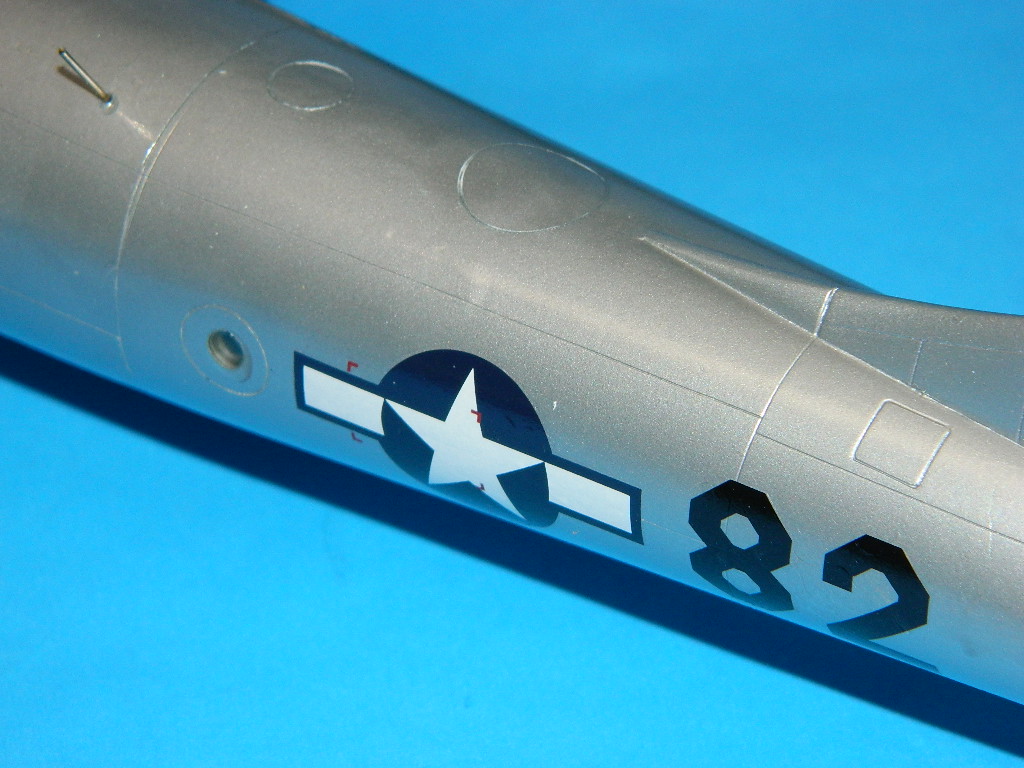
The two weapons are provided, “Little boy” for “Enola Gay” and “Fat Man” for “Bocks Car”. The mounting beam comes with appropriate parts for installing either one; and here’s where a decision comes in: the kit decals from Cartograf have correct markings for Enola Gay for the first mission, but for Bocks car the markings are for when the unit was based at Roswell AB in New Mexico in the late 1940-early 1950 time period. This clenched my decision to build Enola Gay.
Landing gear installs after painting and marking the model; overall silver aluminum, polished in some areas, dull in others. Check pictures for accuracy; the mid-wing spar box and center fuselage crown section between the wings are a different alloy and slightly darker. I used a Duplicolor flat black primer coat, polished the flat off when dry, then used Tamiya Bare Metal silver overall. I then masked the center wing panels, and used “real metal” powder on a rag to polish the finish. It worked for me… the only problem is decal adhesion is harder on this finish. Nothing to “grip” to on the mirror finish.
Decals were simple, with excellent color saturation and details/proportion. As previously stated, I did have a slight problem with adhesion, due to the hard polished paint, which I fixed with Johnson’s Klear acrylic. One coat overall sufficed.
Final work was to install the landing gear, wheels/tires, antennas, and bomb bay doors. The nose gear well is detailed; the main gear wells are not, but at least they are deep. The gear fits at the correct angles; the doors are detailed on the inside as well showing the cutout area for the tires when retracted, a nice touch.
As appropriate for the silverplate aircraft, a new set of Curtiss Electric reversible, cuffed propellers are provided for this release; once painted and decaled, I installed long plastic shafts in the propeller bosses so they could be mounted or removed as required; I used a 1/16 drill bit to ream out the engine gearbox housing, then continued to drill through the firewall area. This works well for me.
All in all, in my opinion, this was the best 1/72 B-29 kit out there out of the box. 10 of 10 for subject and execution, well done Academy! Thanks again to MRC for sending IPMS USA another great kit!


Comments
instruction sheet
saddly the new kit come with the plastic parts but no Enola decals and the instruction sheet has the parts redracted even tho there in the box, polictaly correct I guess
Change
Why assume it was about "polictal correctness" maybe somebody saw the word "gay" and it offended their values?
Why speculate like this at all?
Add new comment
This site is protected by reCAPTCHA and the Google Privacy Policy and Terms of Service apply.
Similar Reviews