
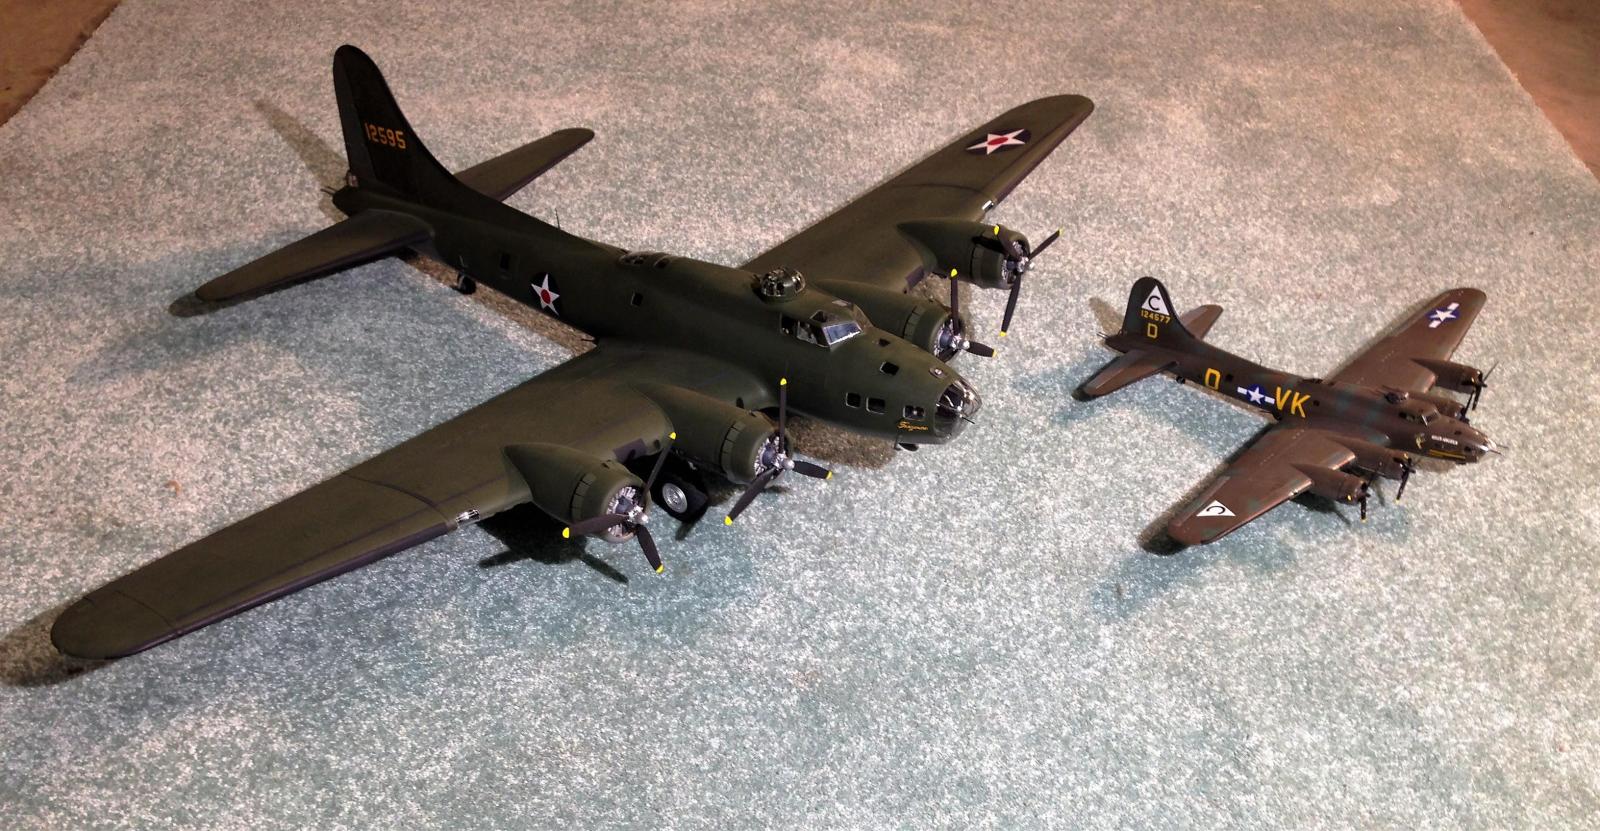
B-17E, F, and Early G: Part II - The Finished Model
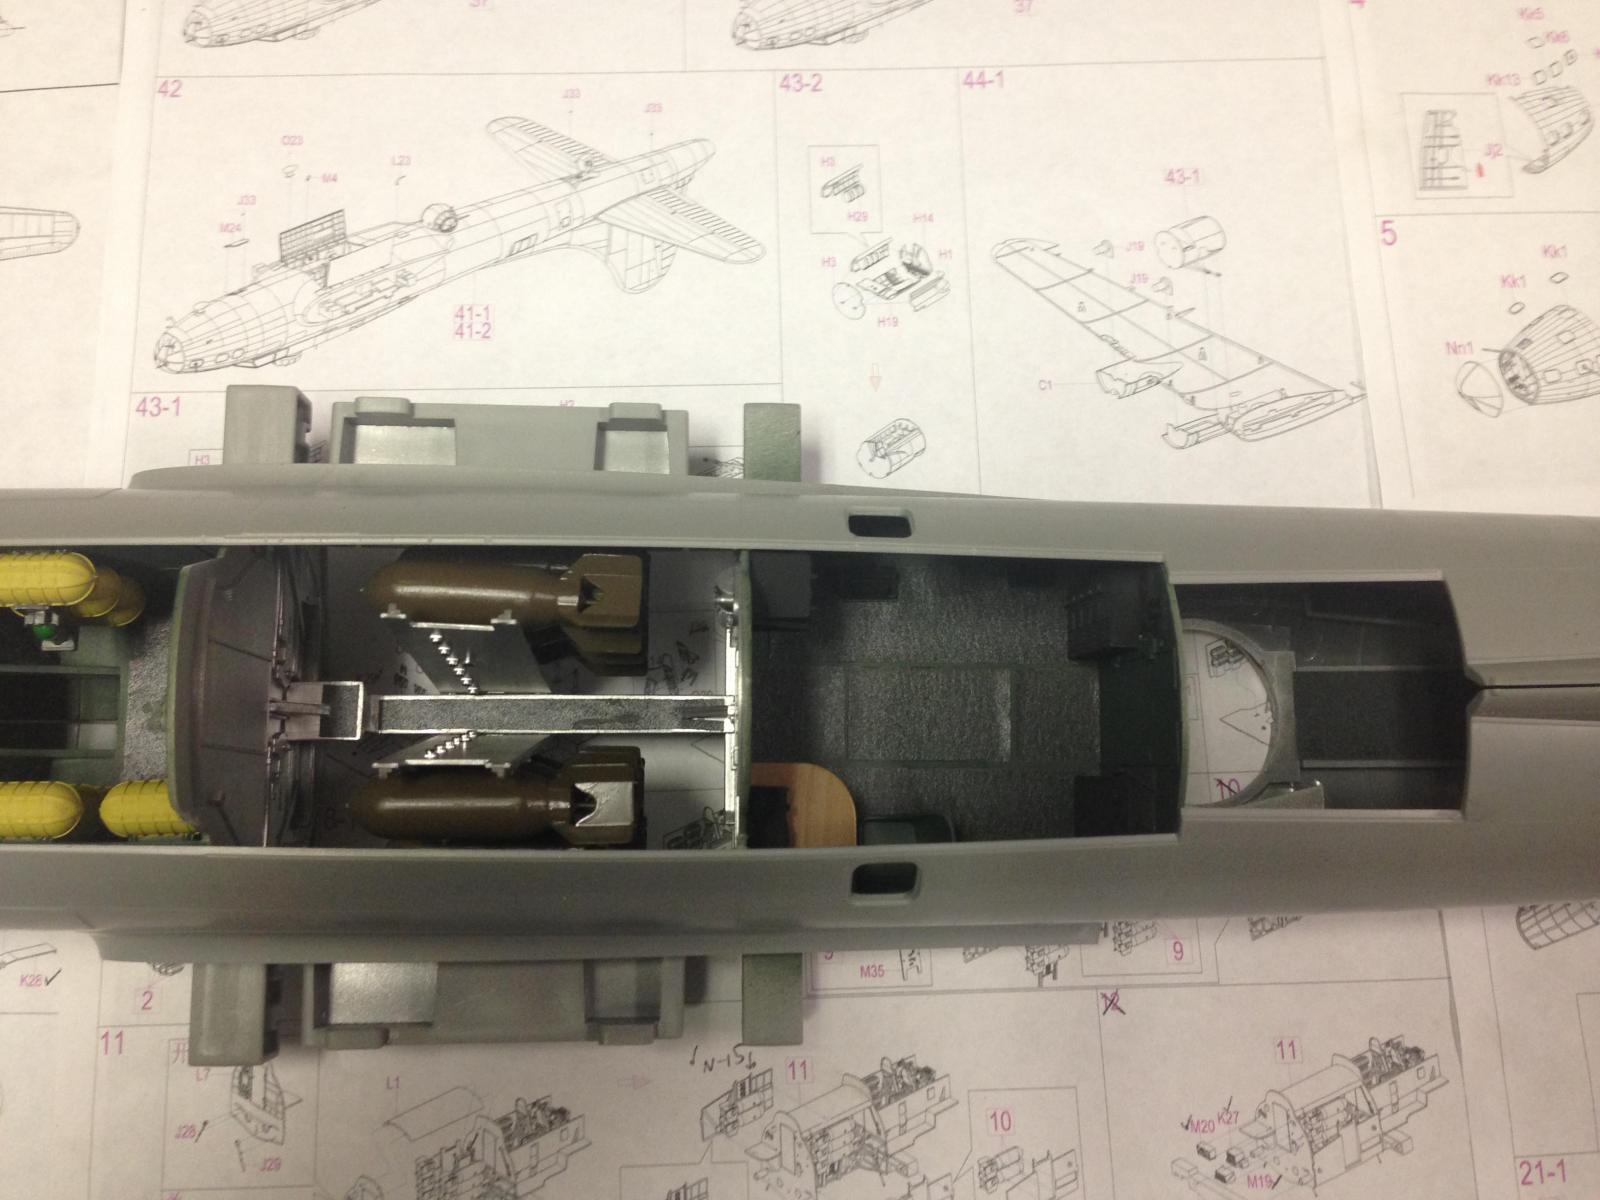
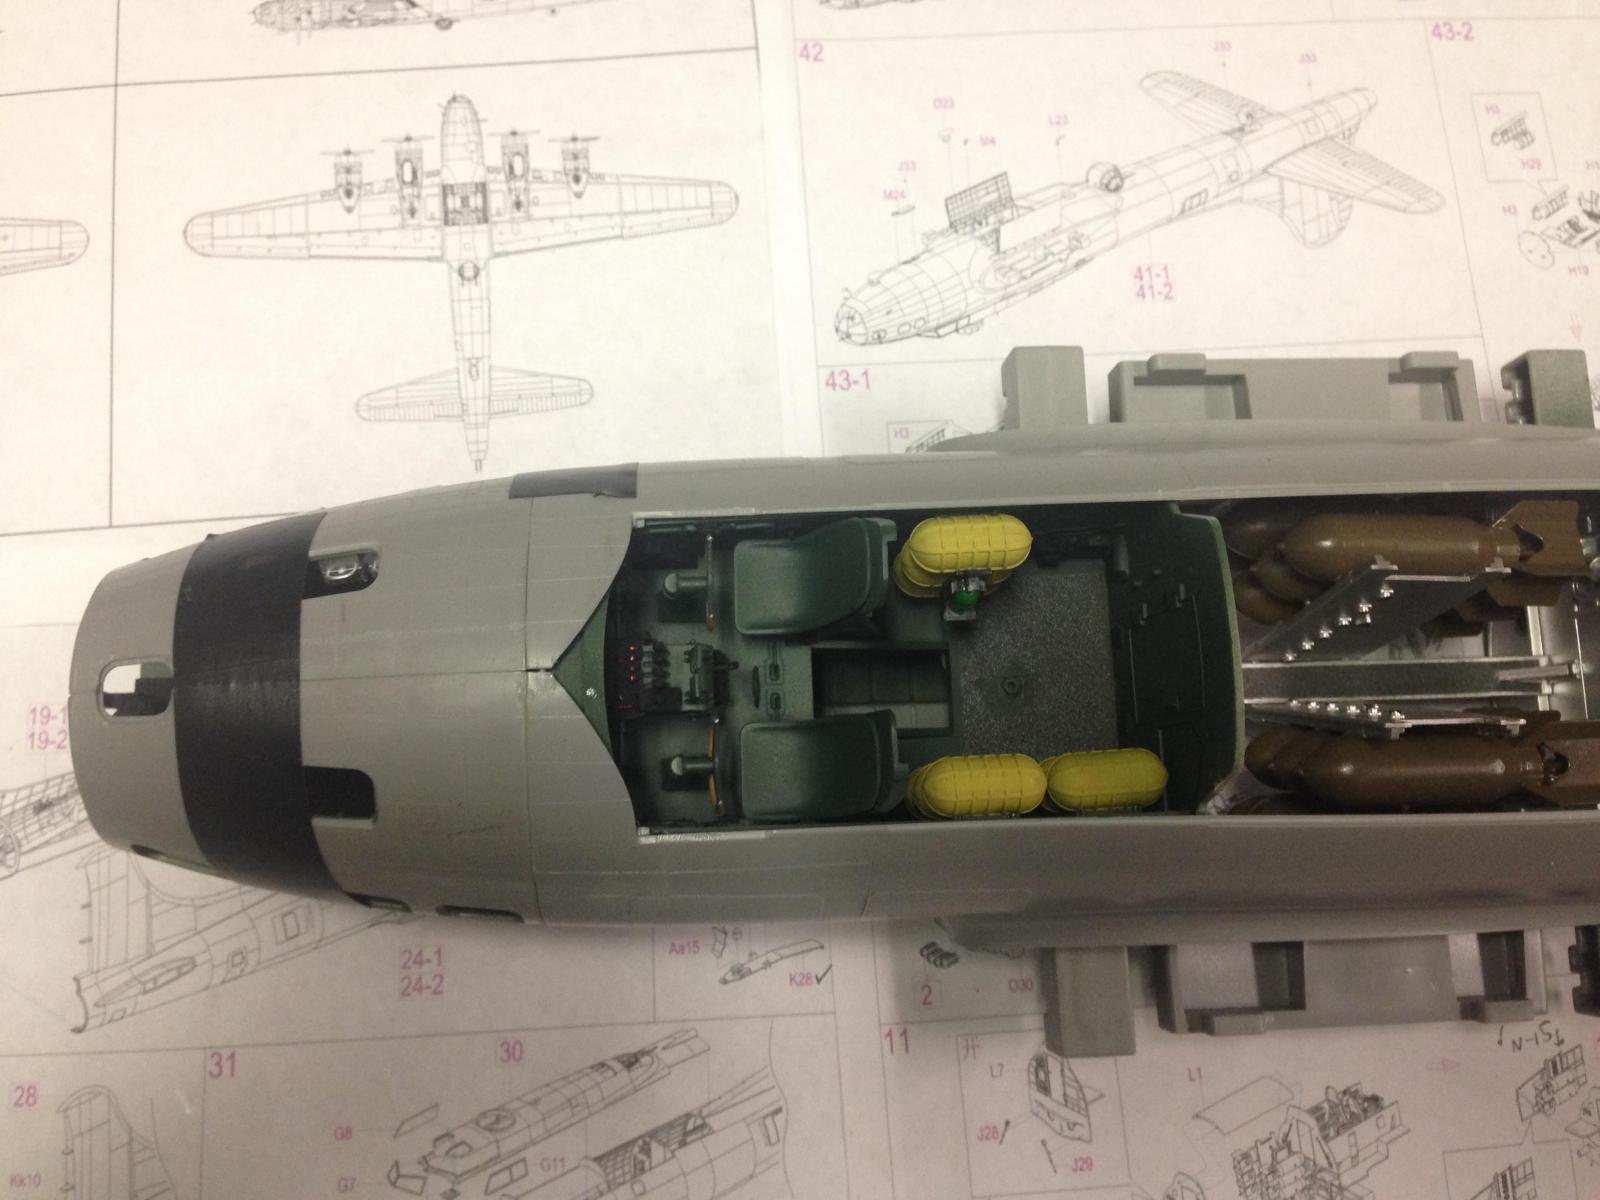
Beginning with the rest of the fuselage assembly (from Part I of my review), the fit of the two fuselage halves was good, but my alignment of the bomb bay catwalk and structure must have been a little off, since it’s slightly closer to one side. I installed most of the glass except for the radio hatch and nose; the waist and nose glass had to be sanded to fit. I used Micro Mask to mask the windows since I couldn’t find an aftermarket mask set for the E model. Some spots must have not been covered, because it was a lot of work to clean off overspray.
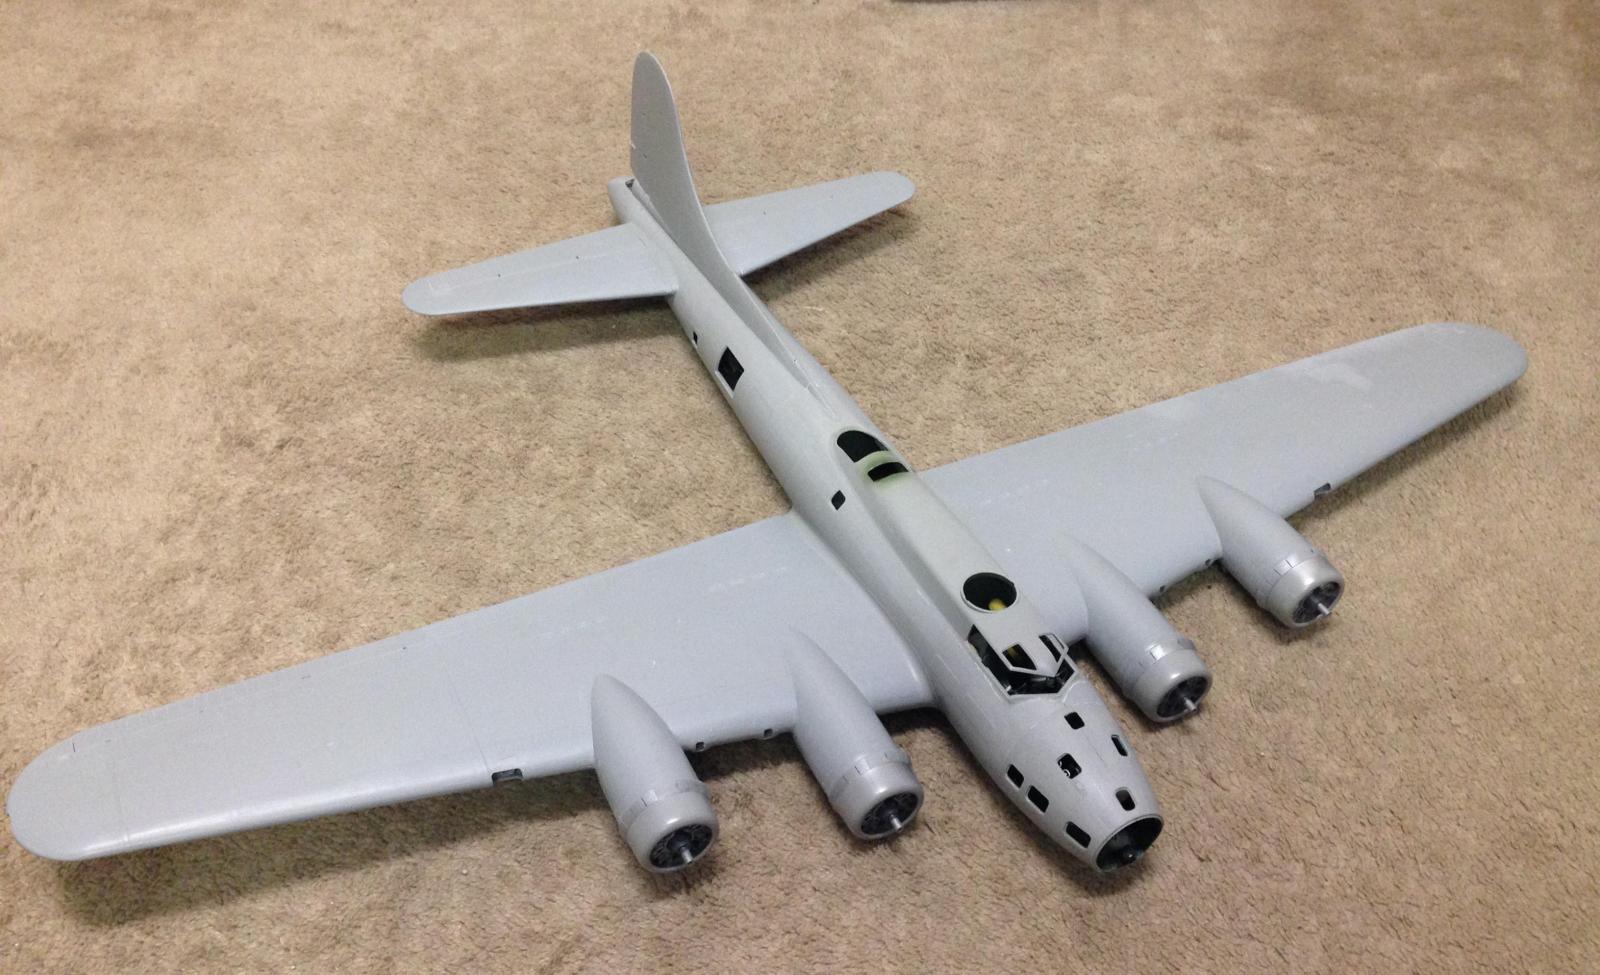
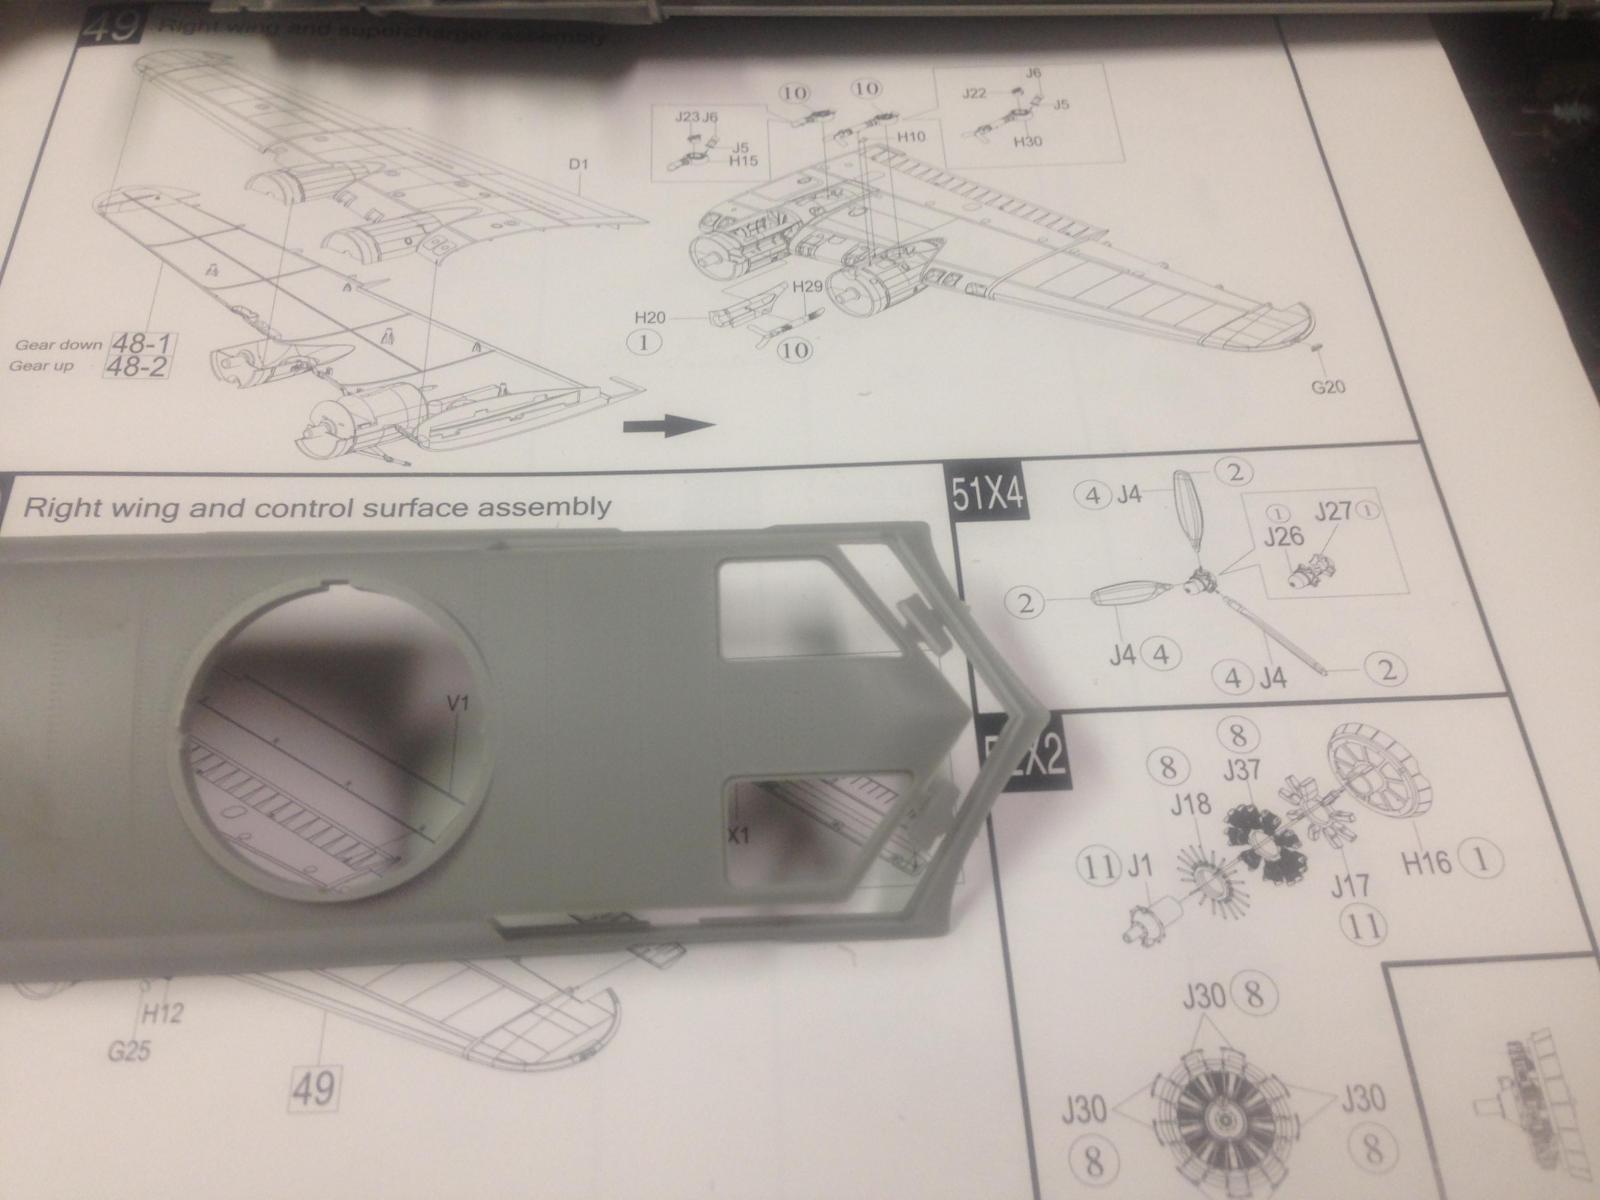
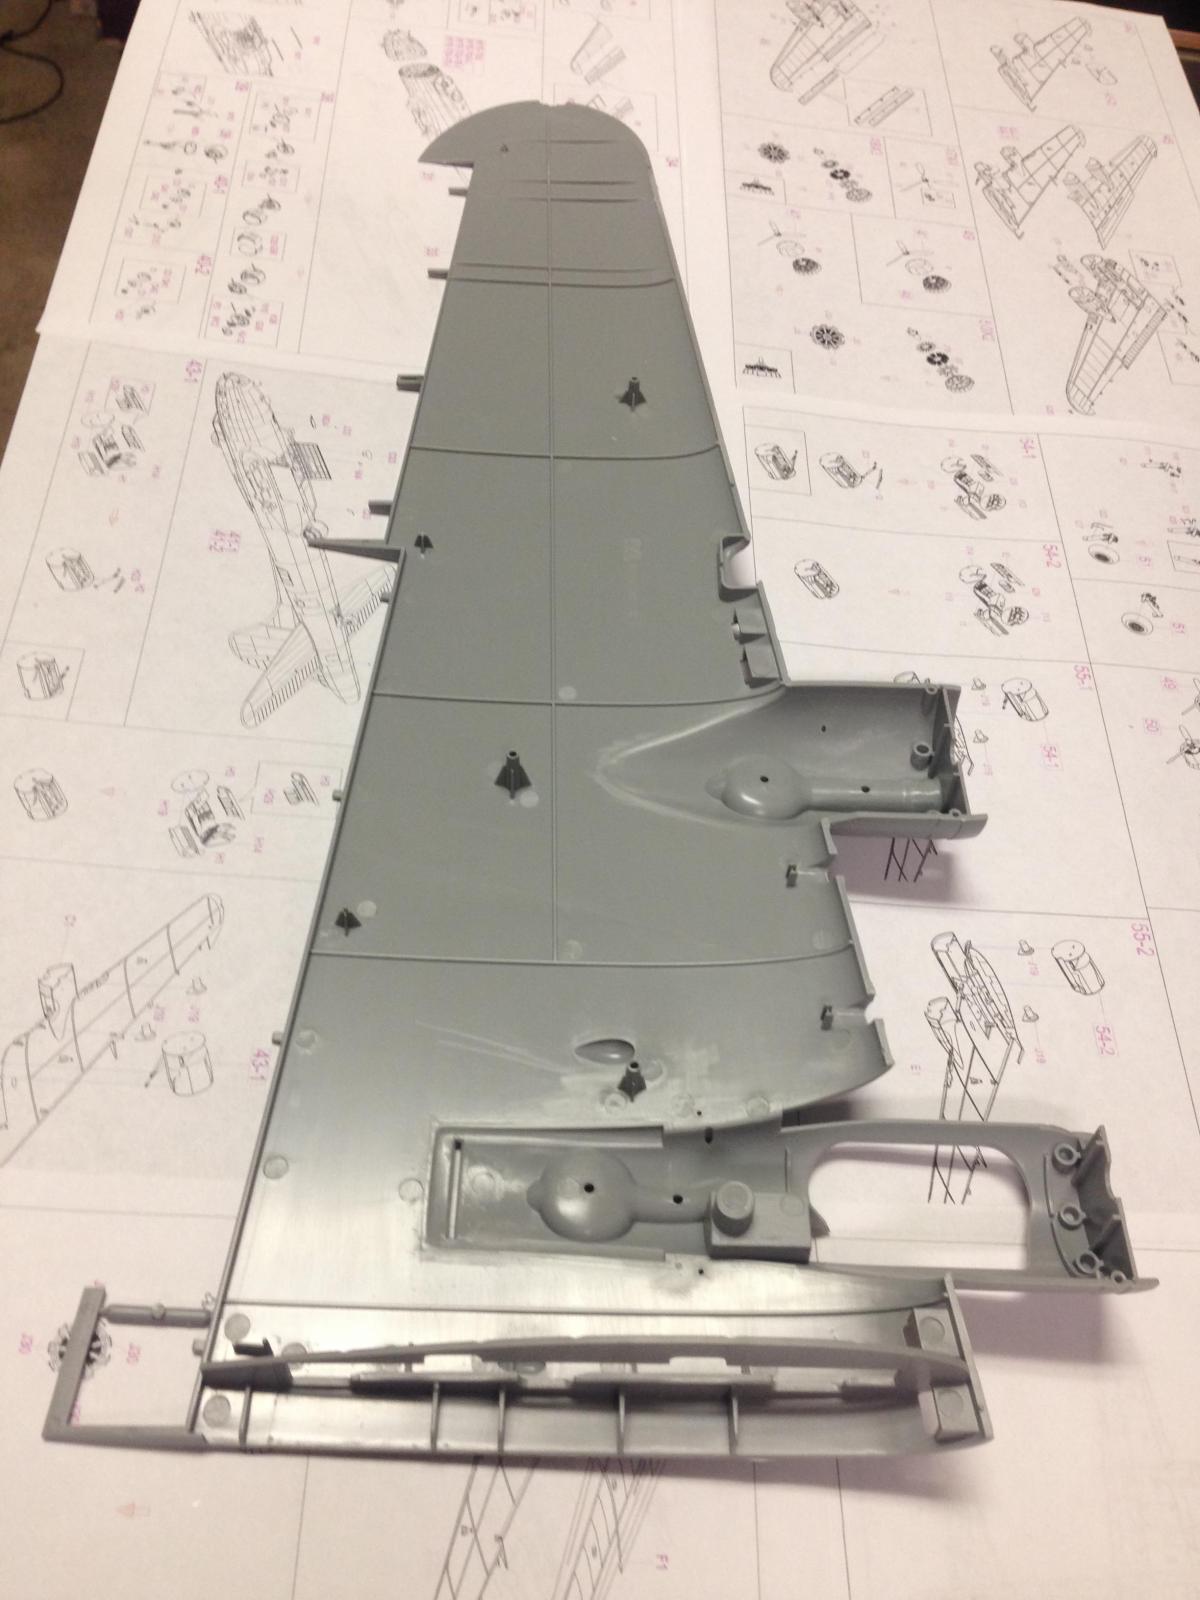
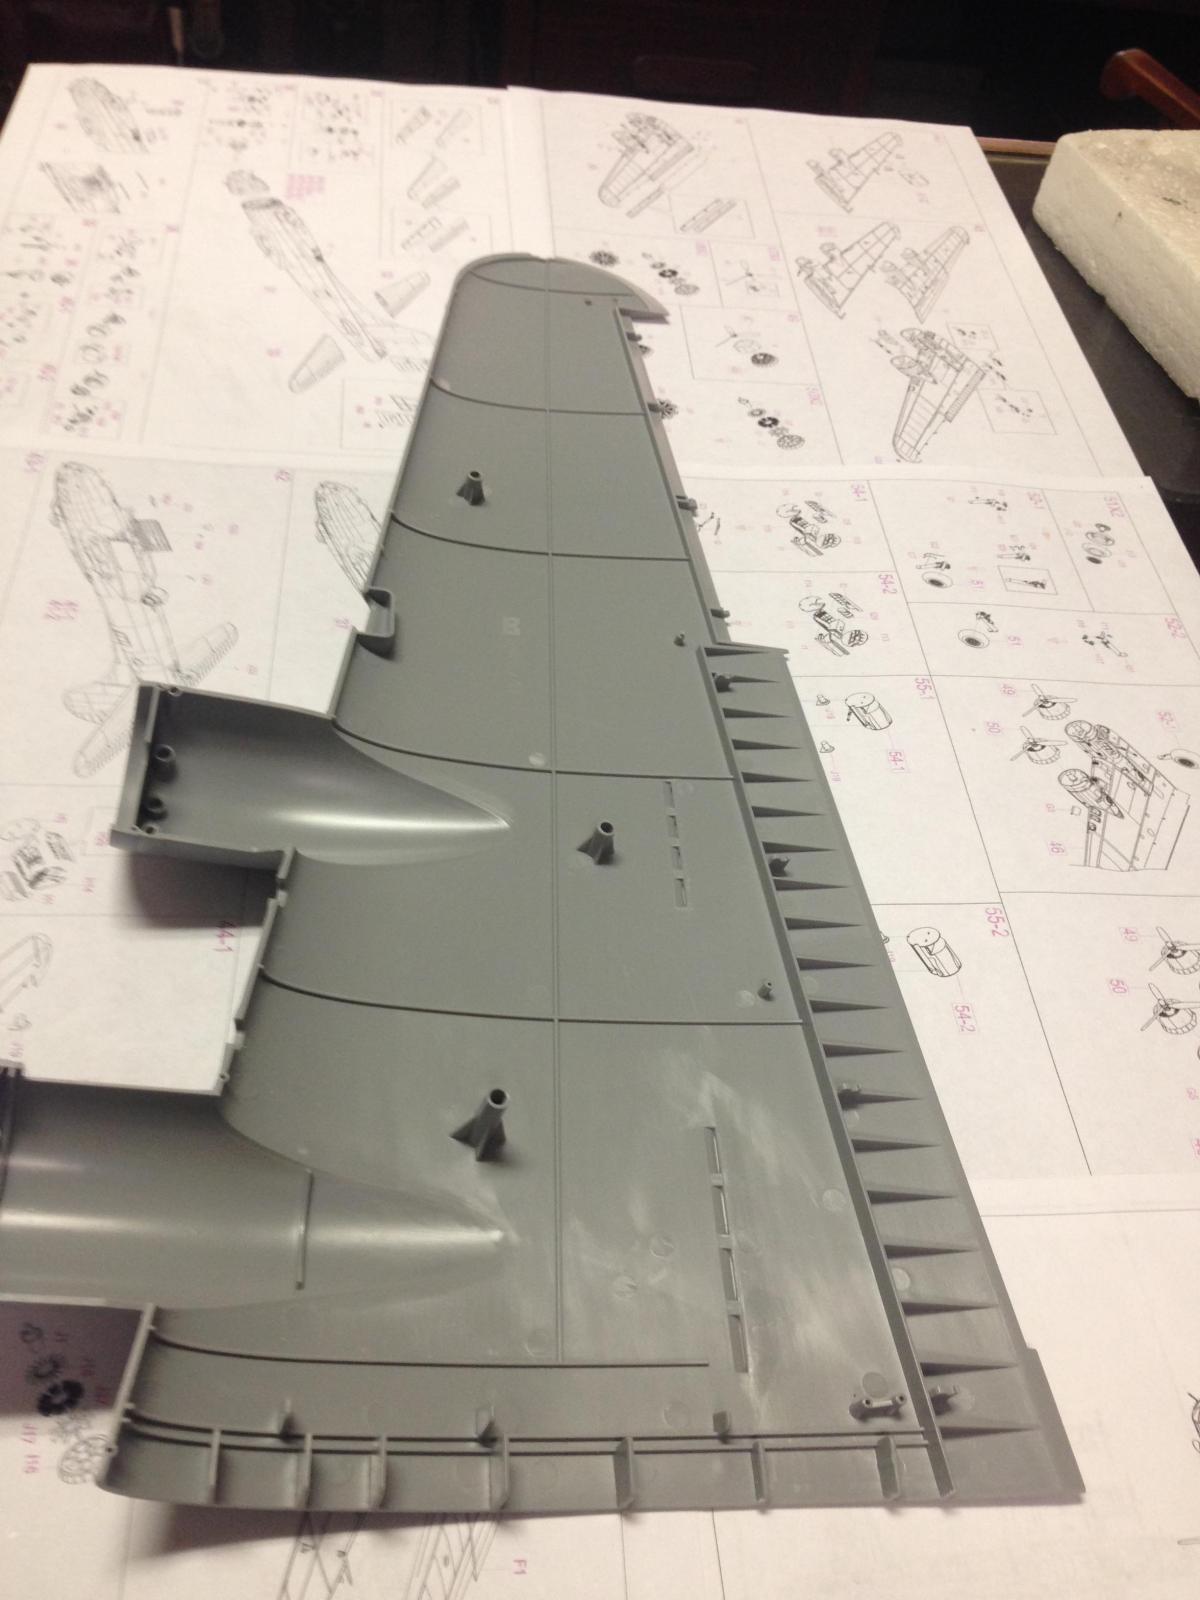
I worked on the wings next. I built the inner nacelles but left off the landing gear for the time being. This may have been a mistake, since the inner nacelle was too large resulting in a gap on the sides of number 2 and 3 cowlings. The kit includes two sets of gear, one down and one retracted. The wing is built very solid with little pyramids inside to hold its shape, but there seems to be a little washout in the wing which isn't correct. The landing gear plumbing {5 pieces each side} was difficult to figure out, because the drawing on the plans was so small and somewhat ambiguous. Hub caps were not included with the kit – they were included in production through the middle of the B-17F run – and will need to be fabricated.
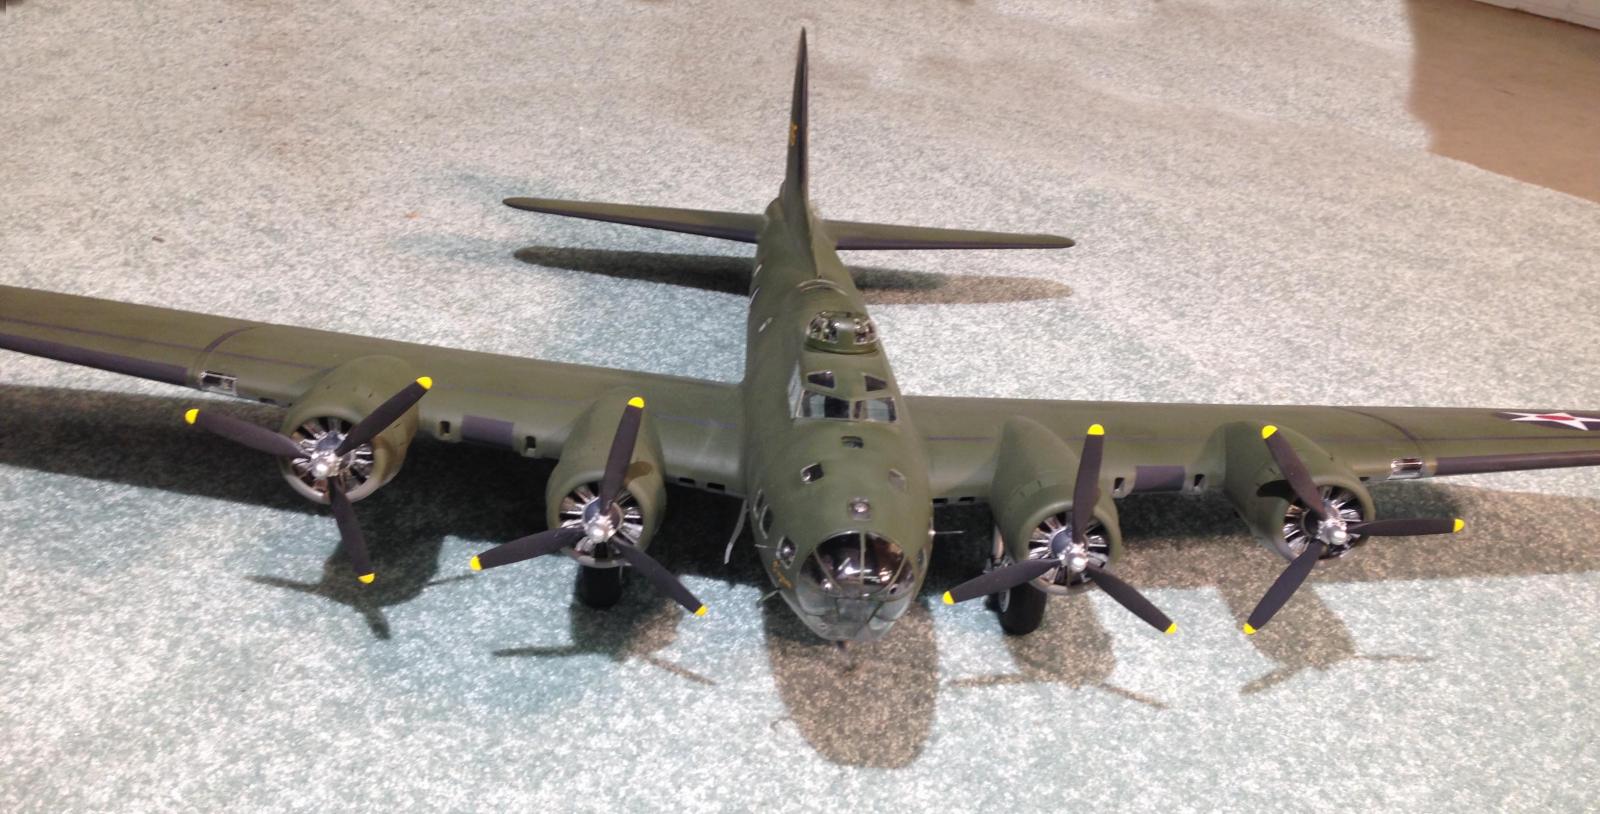
A new set of early cowlings are included which are slightly longer and have a different contour than the later cowls. These had to be shortened on later B-17s because of the use of paddle blade props, which would hit the cowling in the feathered position.
I had to trim the flaps to fit, and I installed them in the up position. In real life, only the left aileron has a trim tab; HK has both left and right ailerons engraved on the top, but neither on the bottom. One should have been engraved on both the top and bottom of the left wing only. Be careful not to cut off attach points on parts I-4 and -5, as I did.
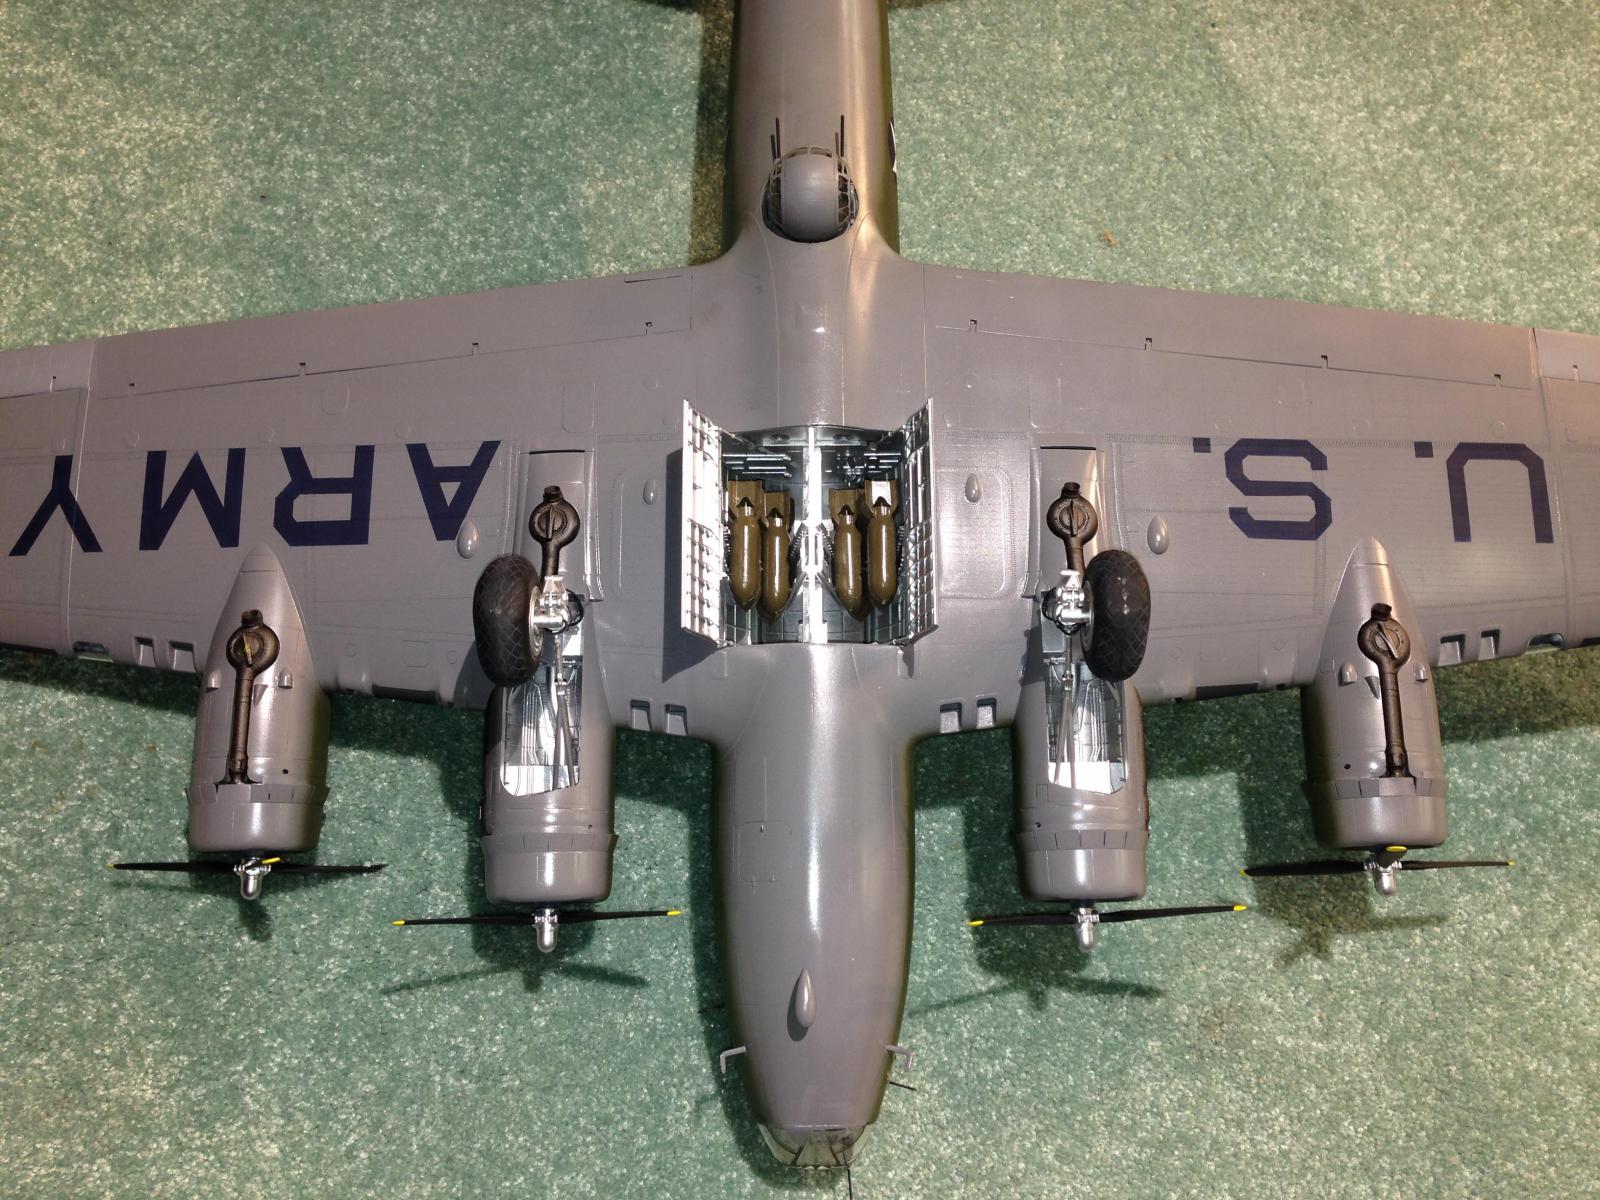
Long range fuel tanks, called Tokyo tanks, were not added until early in the B-17F production. Therefore, the wing tip vents, found on the top, should not be there, as should the outer two fuel filler stations, also on the wing top. The early models had two navigation lights per wingtip, one on top and the other on the bottom, about 18 inches in from the end of the wing, not a single one on the end like the G models had. Little nubs in the supercharger holes had to be cleaned out, and make sure to install the exhausts before the cowls, as they won’t fit after the cowlings are installed.
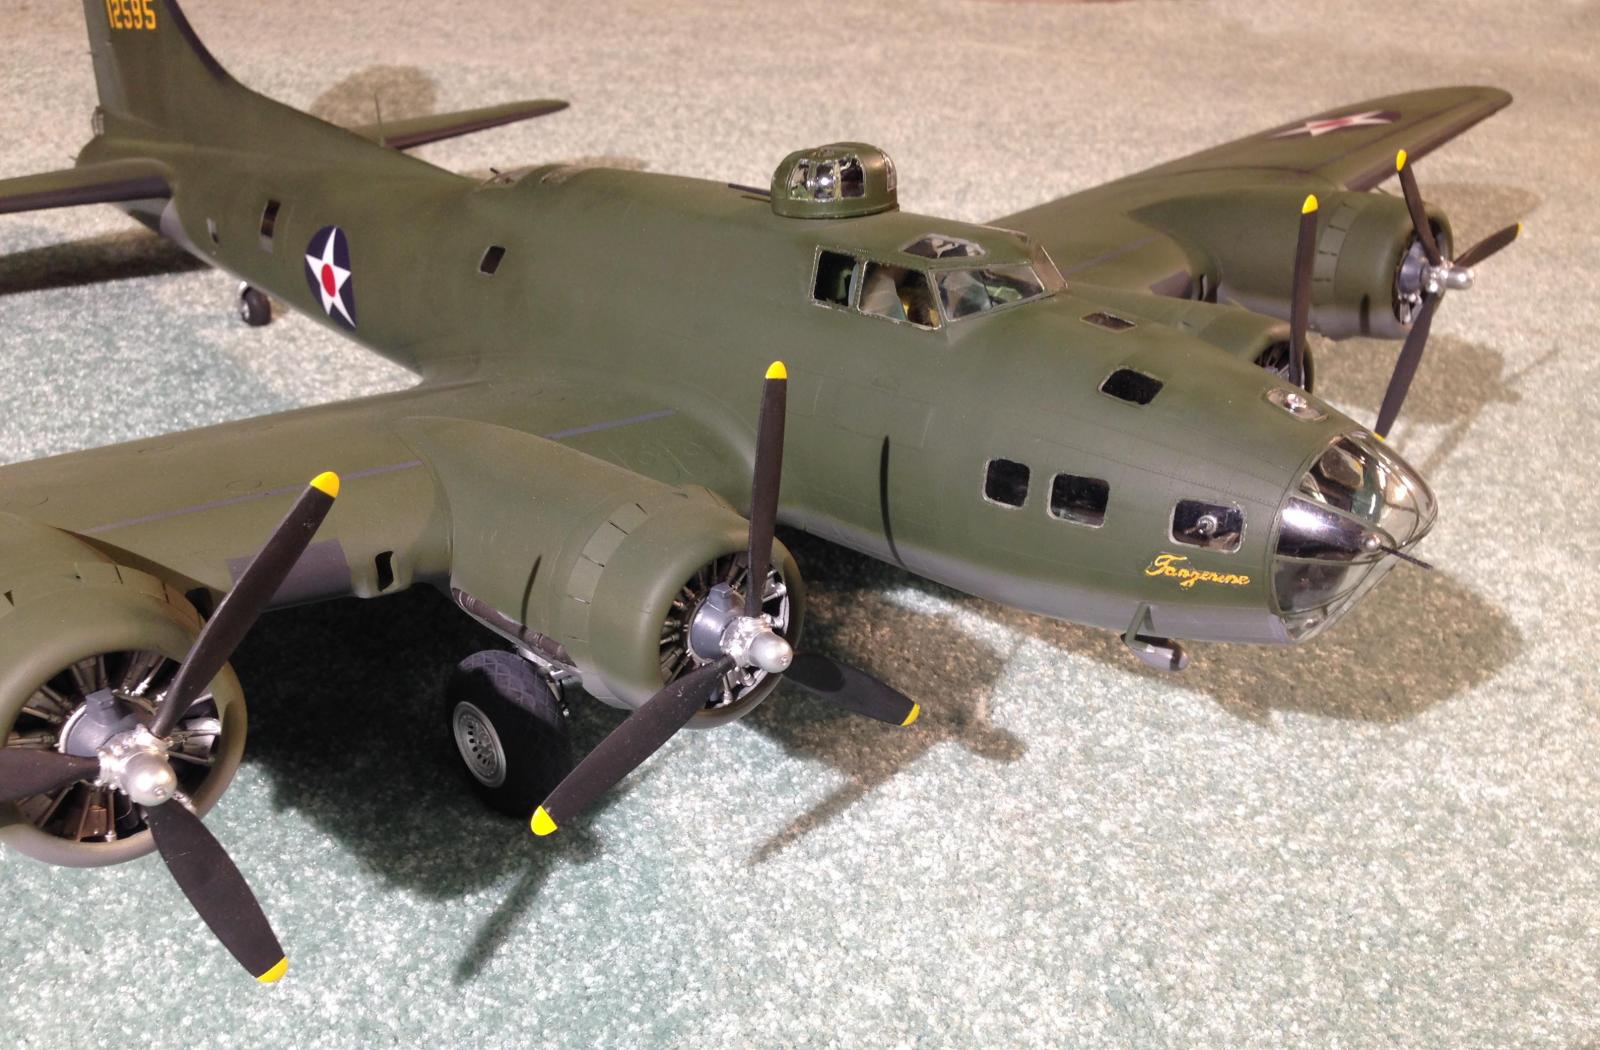
Two parts on the new Ff sprue were short-molded, so I left them off. One side of the ball turret wasn’t numbered, but it can be figured out. It’s not readily apparent how part O-14 fits. The ball turret was a tough build, and to get everything painted in the right order took some thought---the turret should be painted before the outer caps are added. HK uses the same turret setup as the G model, when the early models had the ammo cans inside the turret. The instructions weren’t clear where to put the gun mounts and gun sights, so I just made it all fit. M-17 and -18 are really N-17 and -18.
Be careful with the glass; any flexing will leave little almost-scale-like crazing. The top turret was much easier to build, but the instructions show all glass being installed from the outside, and I had to break mine apart because the center top glass has to be installed from the inside. The gun barrels feature round lightening holes but most early planes had elongated slots. I wanted to mount the wings so they could be removable, but fit of the wing to the fuselage wasn’t a precise fit on my sample, and the same was true for the turtledeck.
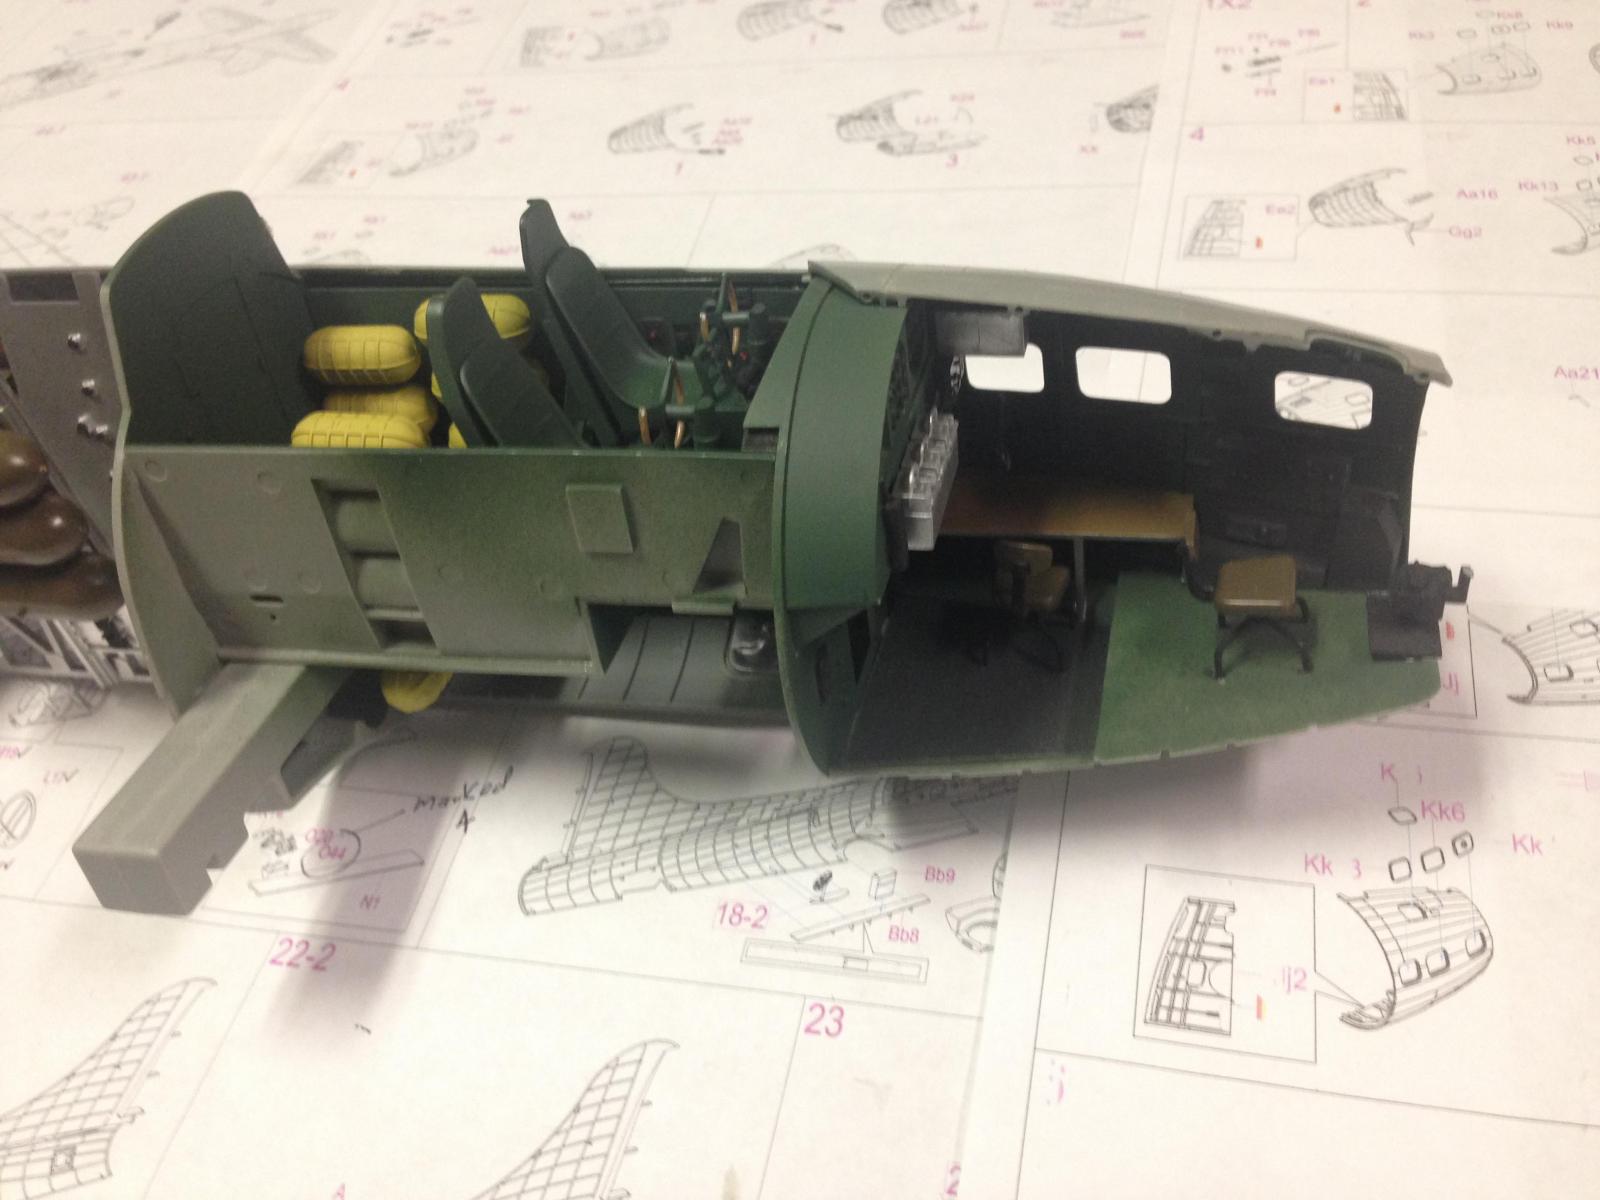
The radio room gun has a hole in the glass for the gun to sit in the stowed position, but in reality it slid forward on a track when not in use. In early models, there was no hole in the radio room upper hatch, since when the radio room gun was in use the hatch was taken out. It also should have two cross braces instead of one.
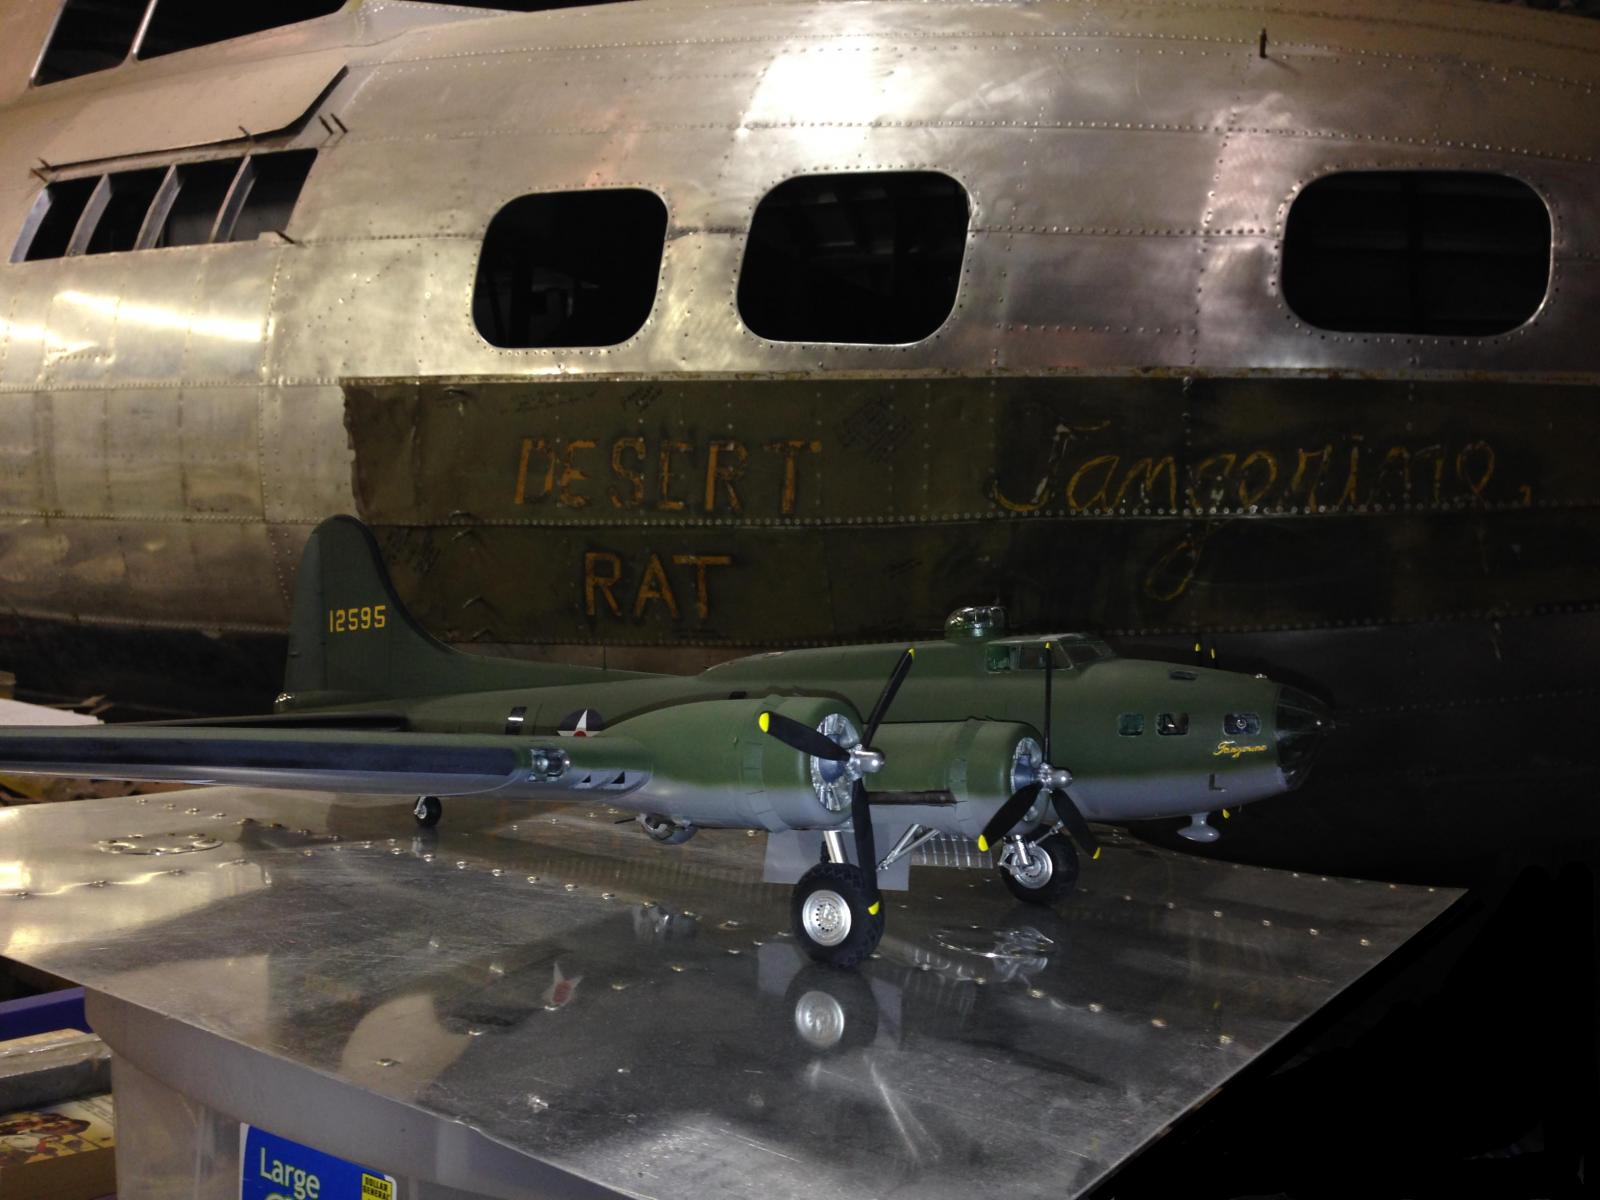
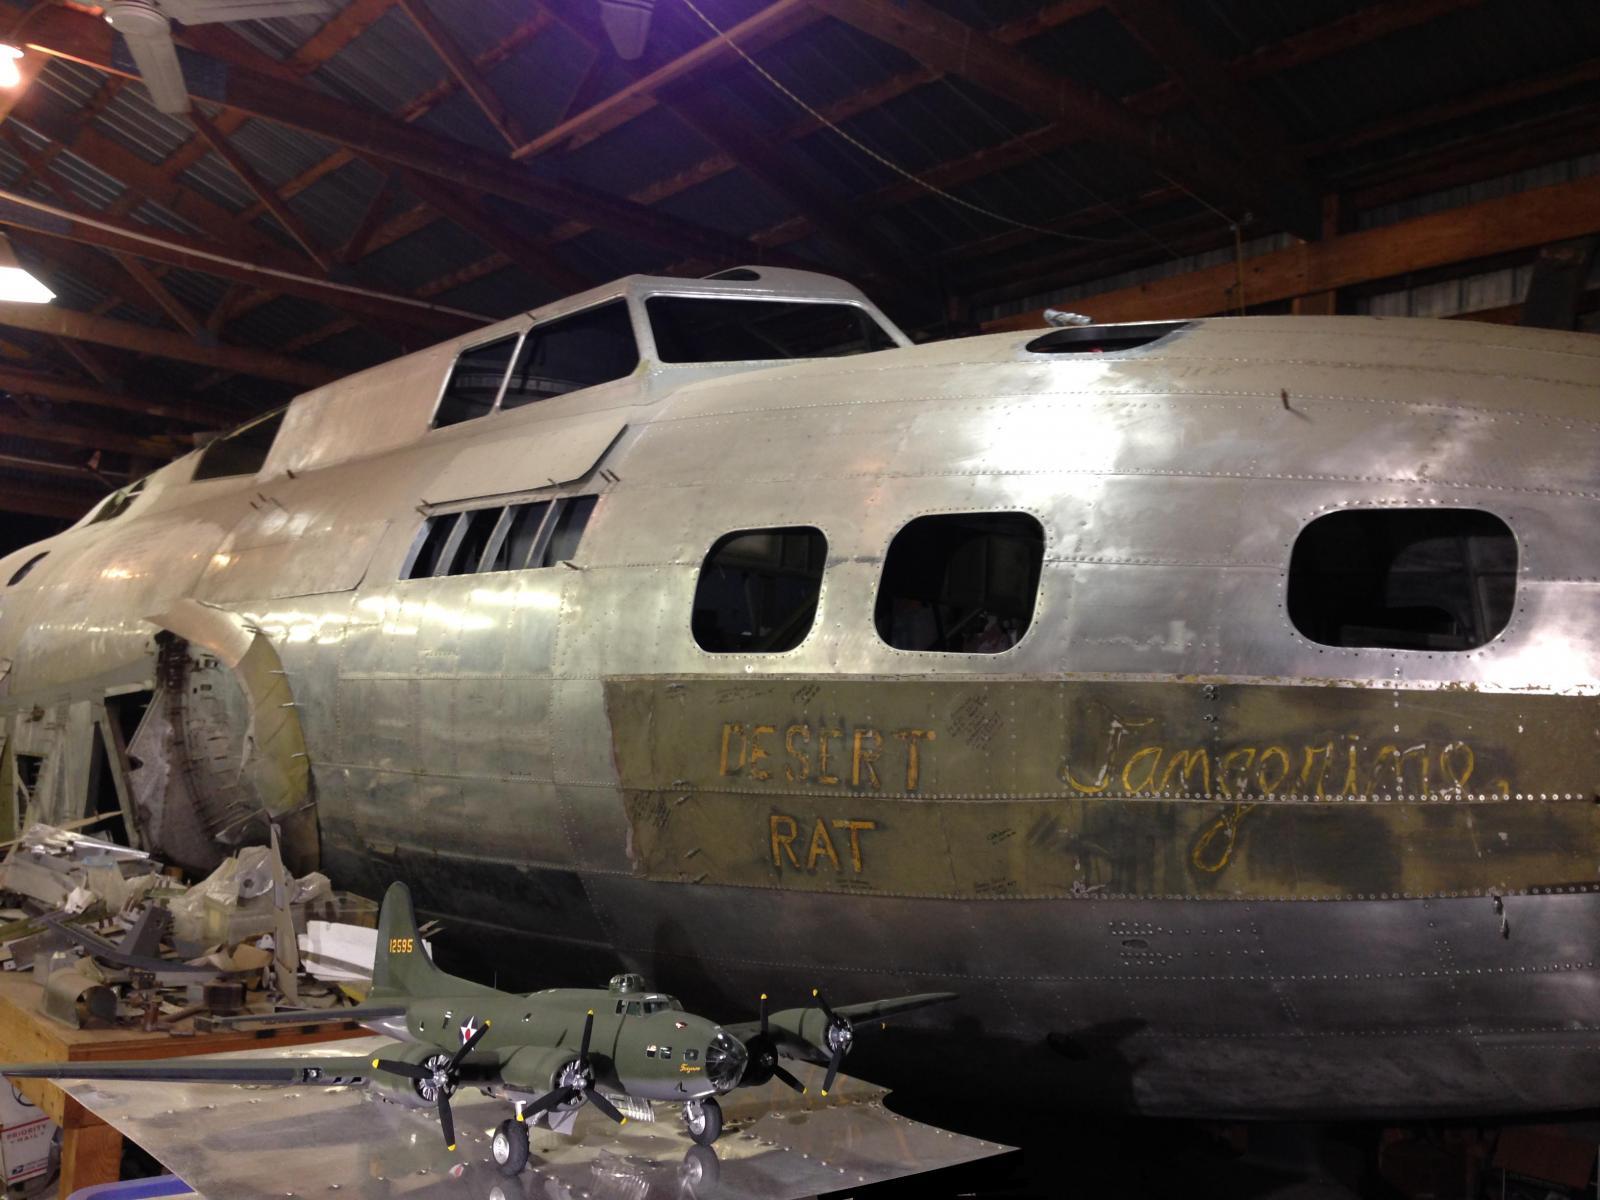
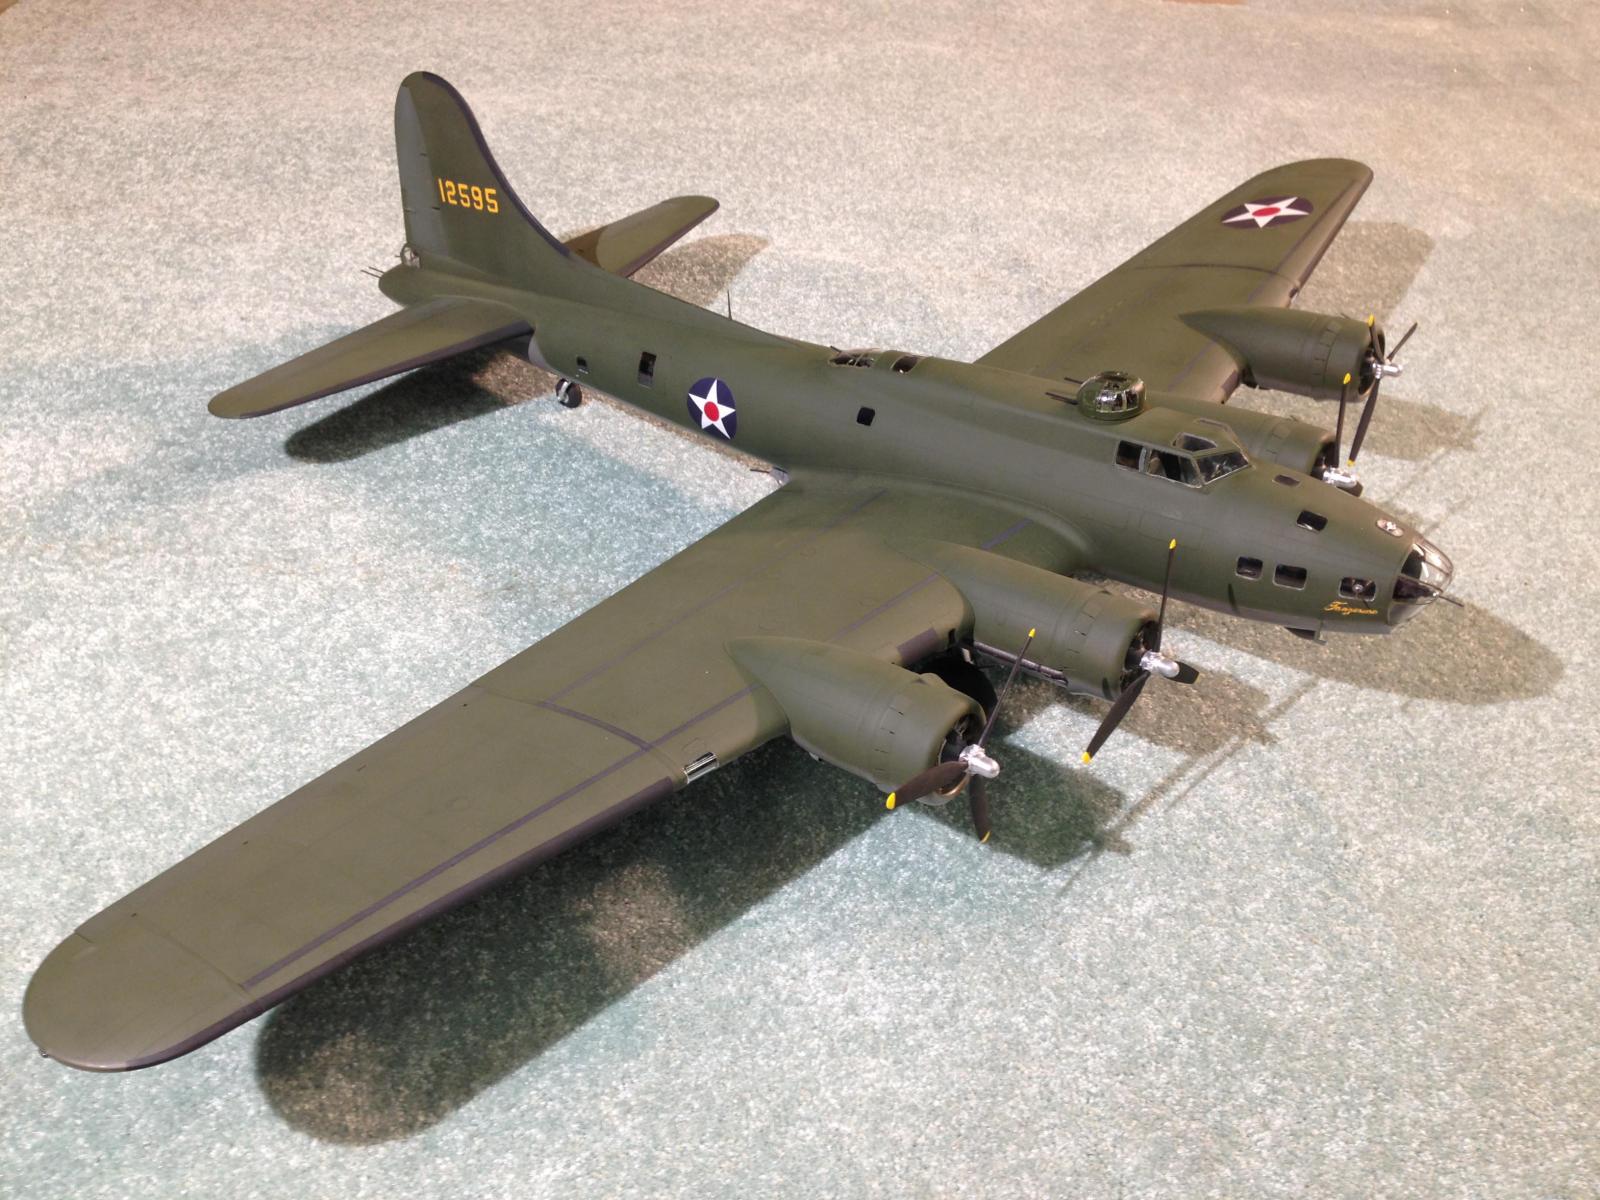
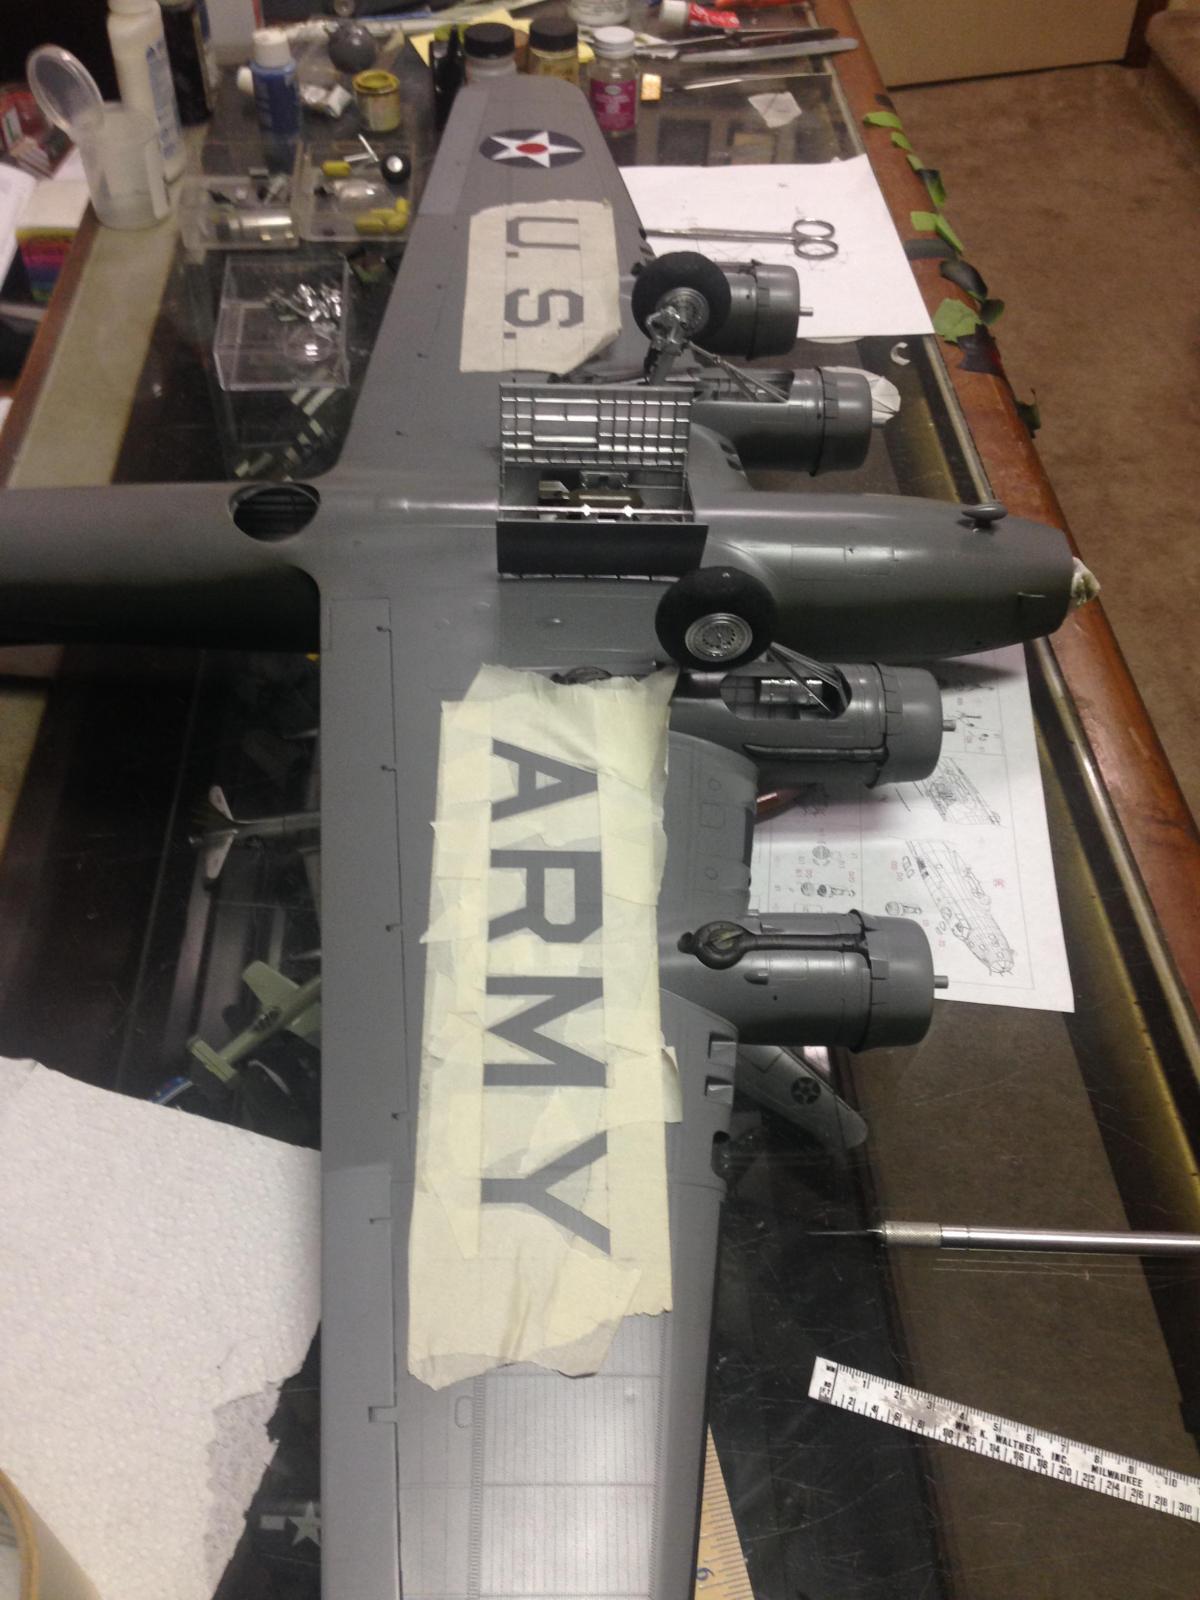
I used Gunze Sangyo and Tamiya acrylic paints---and this model took a lot of paint-----four jars for the top and two jars for the bottom. I hand mixed my paints to match FS 34079 for the top and FS 36173 for the bottom. It’s a heavy model and is challenging to hold for a long period of time to sand and paint. I got a heads-up from another builder to leave the tail wheel off until last, because it’s fragile and easily broken.
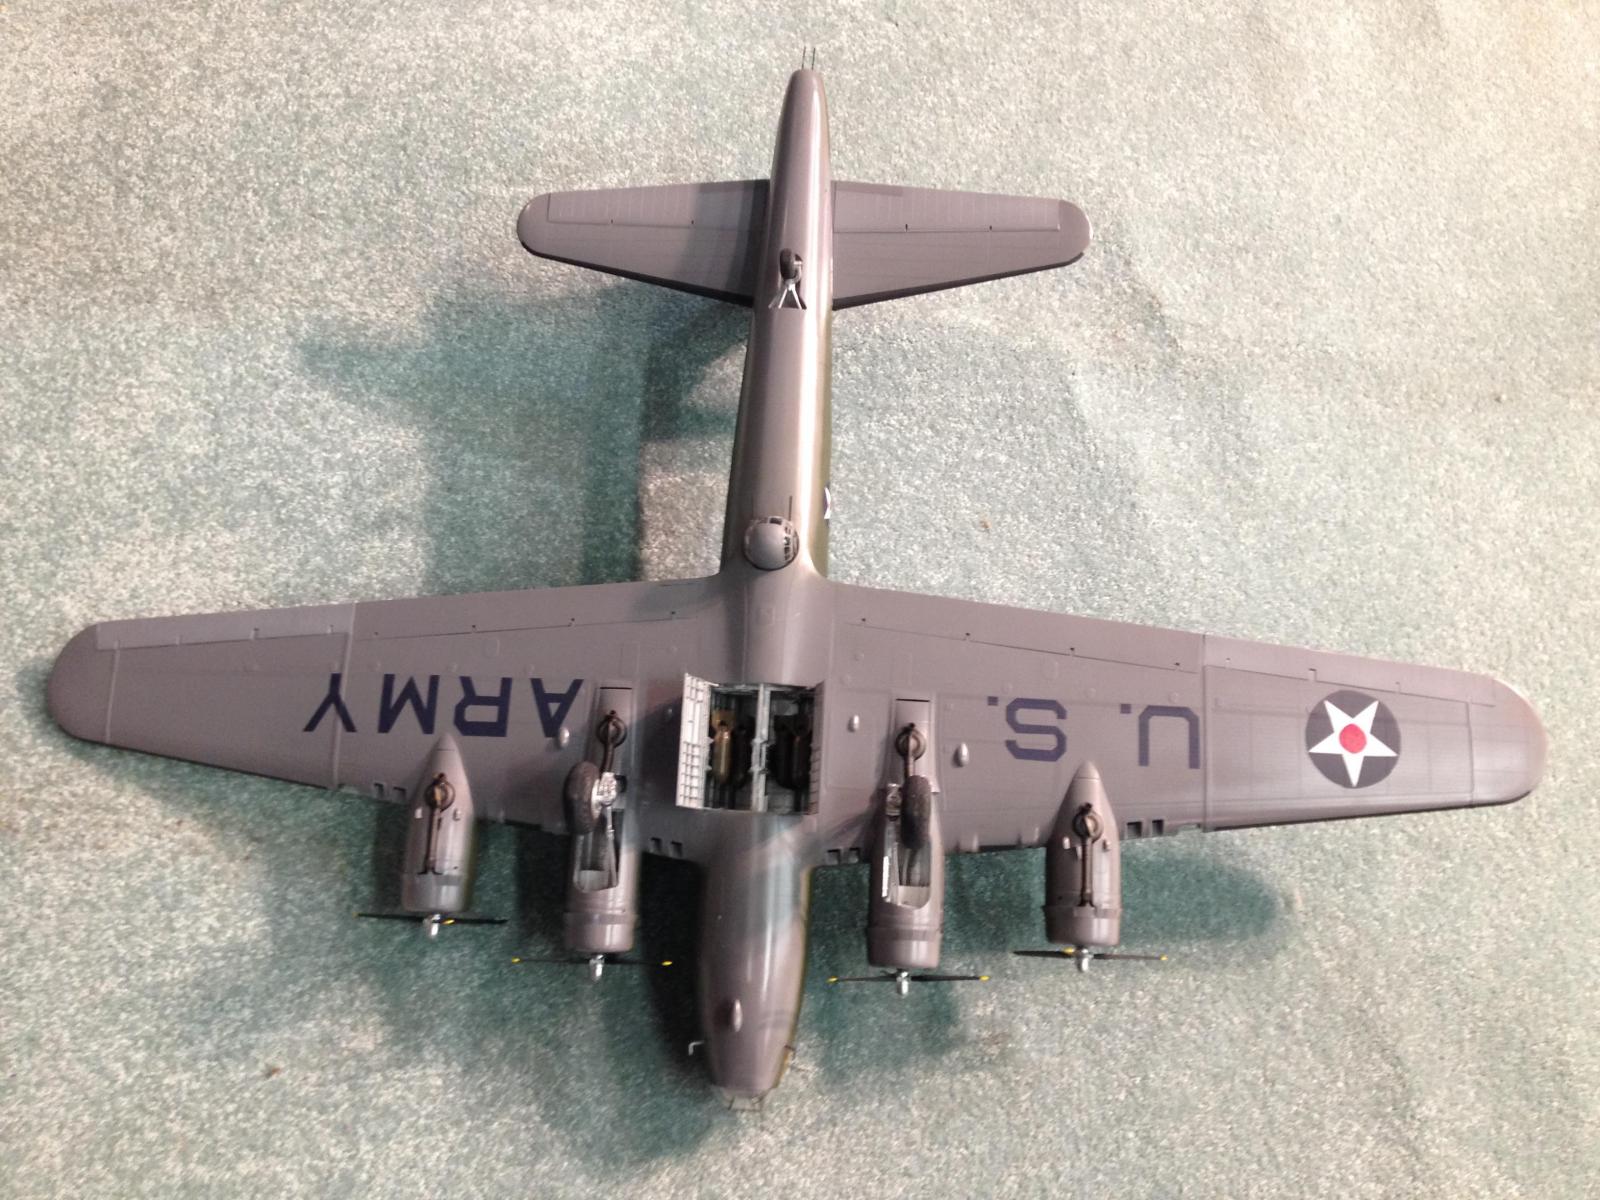
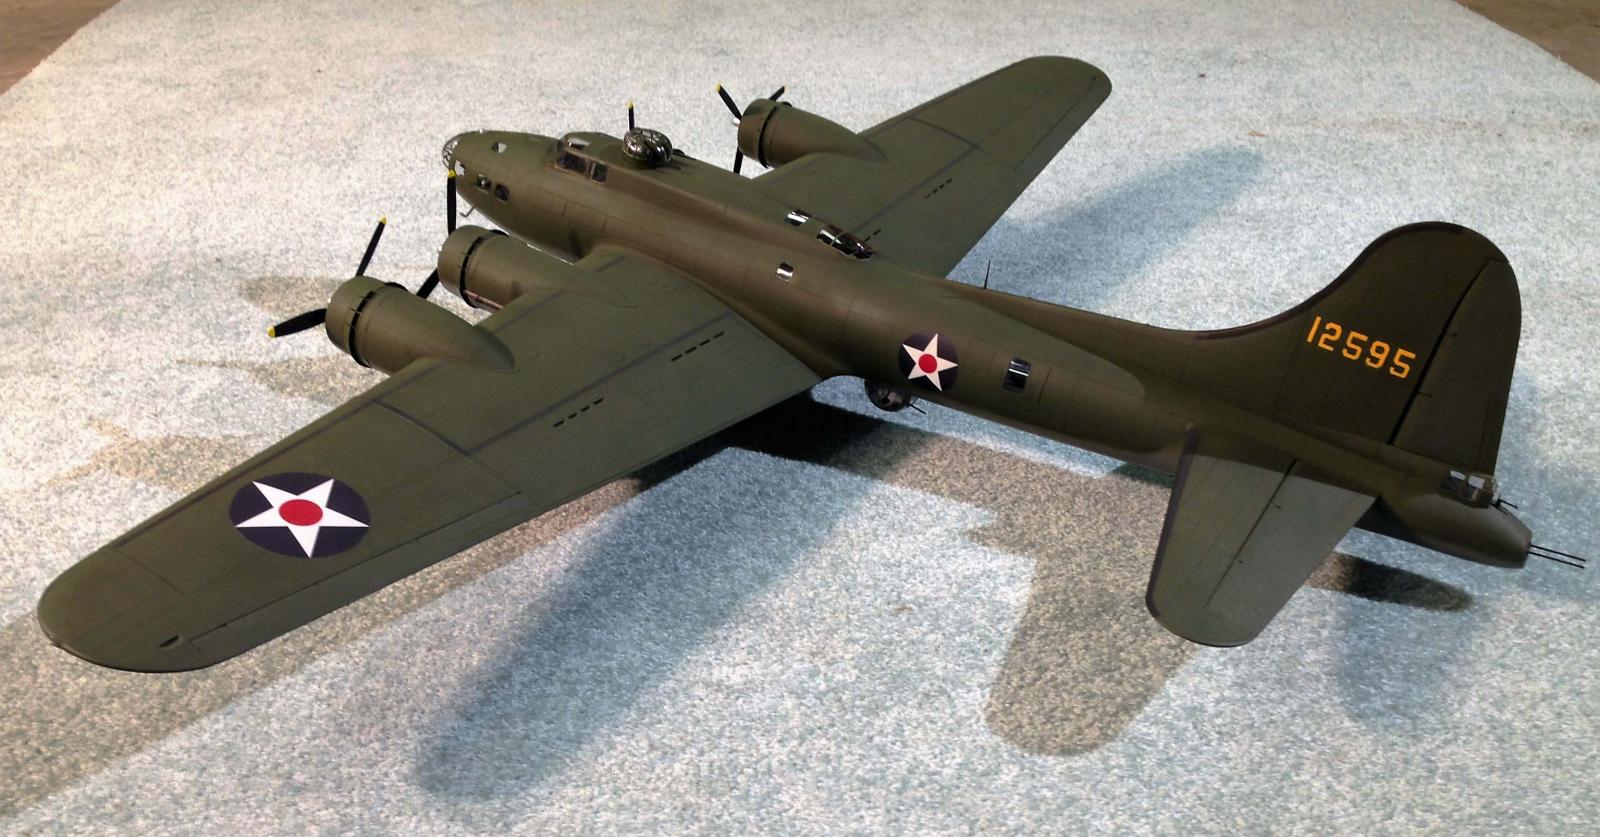
The paint scheme I used is for the B-17E 41-2595 that I am restoring. The wing walks, US ARMY, serial # and bottom star were painted on before I got homemade decals from a friend for the fuselage and upper wing insignia. The ball turret has two slots to line up and then it turns 45 degrees to pose it in the stowed position. The top turret fits in the fuselage hole and has a mounting point at the bottom that can be glued to the cockpit decking. I chose to just leave mine unglued so I can make improvements to this turret's glass. The two top nose glass pieces didn’t fit; the forward one needed a lot of sanding, and the rear one in front of the windscreen was fitted to a hole the builder has to cut in, as it’s an option. The nose glass fit well, but I wish HK had given us some round plugs for the empty gun ports. There are 6 ports and three guns, which is realistic, but the ball socket should be in every hole. The wingtip lights are solid clear so I painted the color on the back side but it doesn't show up very well. Next time I’d drill a hole toward the front of the “teardrop” to put the color in the lights. The prop blades had a loose fit into the prop hubs so I made a jig to set them. I had one missing blade, so I made one by laminating styrene sheet.
When finished, this is one impressive model. It was a longer journey than I anticipated, but hopefully, the new instructions will make it clearer. I want to thank HK and IPMS US for the privilege to review this model.


Comments
Add new comment
This site is protected by reCAPTCHA and the Google Privacy Policy and Terms of Service apply.
Similar Reviews