
Avro Shackleton MR.2
Airfix has been steadily updating its catalogue of 1/72 aircraft. One of their newest is the Avro Shackleton MR.2. This kit is a doozy! You will never have to look back at the old mold Shackleton kit again. Airfix gives you the choice of building either the early version with top turret or the late version with added antennas and turret removed. It also comes with a full interior with radarscopes, seats, panels etc., along with a detailed bomb bay with weapons, and movable rudders and elevators.
Construction
Fuselage
Construction starts as usual in the cockpit. Starting with step one you have the option of putting pilots in the pilot seats or not. I chose not to so I chose the seats that have the cushions molded into them. These are three-piece units that go together easily and need to be painted semi-gloss black on the sides and flat black for the cushions. Airfix uses Humbrol paint numbers but I converted them to Tamiya acrylics. Once painted and dry I added tape seat belts to the seats and attached them to their bases. Next were added the throttle quadrants and control yokes. Again all in black with some small touches of brown and white. These two small sub-assemblies then attach to the main floor of the fuselage along with the two wing spar parts. Next is to add the rear walls of the cockpit. These two-sided parts form the rear of the cockpit and the forward walls of the radar compartment. The rear wall of the front gun compartment is the last item to be added for this sub-assembly.
It is at this time you can make a choice. As the entire center section of the aircraft is detailed you can paint the floor, seats, consoles etc. or you can leave them unpainted. When the fuselage is closed up you pretty much cannot see a single thing in there. As this is a review I did paint all the seats and interior, but if I had to do it again to save time on the build I would have skipped a lot of it. After the cockpit area is completed it’s time to add the center and rear section seats. These should be painted with a leather color for the cushions and the backs and sides should be a red brown color along with the center section floor. I used Tamiya Hull Red. The directions show you the various ways the seats need to be facing depending on location.
Next up are the radar and navigation panels. This is made up of two large pieces, the panels themselves and the desk they sit on. The desk should be painted a flat black and the radar panel part should be painted flat black, lemon yellow for the screens, linen for the header and gray for the boxes holding the screens. It looks great when done but take photos since you won’t be able to see it once the fuselage is closed. Step 12 has you adding a sidewall to the radar section and then the sub-assembly is ready to be attached to the fuselage. Step 13 shows where to attach the radar panel and then it’s time to make some decisions on which version of this plane you want to do. I chose version A, the early MR.2 with the turret. Step 14 adds the rear fuselage wall, which should be painted leather with a linen trim. There is a chance you might see this part through the rear window so go ahead and paint it. Step 15 is omitted because it is for the B variant of this kit. Set this large sub assembly aside to dry.
As the fuselage floor dries Airfix has you starting on the Fuselage walls. This is where I ran into a fairly significant problem, which I didn’t notice right away, but would cause some issues later on. The right fuselage half was warped! More on this in a bit. Step 15 has you painting the various areas of the inside of the plane, flat black up front, light gray through the center, cockpit green aft of the bomb bay. I recommend painting both sides of the fuselage at the same time, both to save time and to see if you have the warping issue. You also have to drill out some holes depending on which version you are constructing.
The next two steps are adding in the rear observer’s area and some air conditioning ducting. The observer’s area is painted cockpit green with leather cushions and the ac ducting is painted brown with a linen wall and duct. This duct part is where I first noticed that I had a warped piece. I didn’t think much of it at the time but I should have taken this as a warning. You also add a decal to the porthole in the observer’s area. This won’t be seen unless you keep the entry door off. As I was keeping the door closed it wasn’t needed but I added it anyway. I attached the observer’s floor and the warped duct and set it aside. Step 19 has you attaching the fuselage floor to the model. First slide the wing spars though the holes in the fuselage then add liberal amounts of glue to the underside of the floor and then push till it stops. Airfix has done a good job of giving the floor a lot of area to attach to but definitely give it time to dry and make sure it’s squared up. The next step is to add in a mid-fuselage wall. Again paint it if the rear door will be open otherwise it can stay grey.
The next few steps have you working on the forward observer/gunner/bombardier area. It begins by building the observer seat and then painting it black. Then add the forward gun mount and various parts to the floor. Most of this area is flat black but some of the detail gets painted brown and gray. When the seat is dry attach this to the observer floor sub-assembly. I also added seatbelts to the observer’s seat since it will be visible through the turret glass. When ready attach it to the front of the fuselage that has the cockpit area already attached. There isn’t as much for the floor to attach to here so make sure it’s nice and square to the cockpit and keep checking it until its solid. Next is the main panel for the pilots. This is a two-part piece with a nice decal. It is painted light gray with brown rudder pedals. And on the reverse has a grey panel for the observers/gunner area. Airfix has made it easy to attach this part, as there is a guide under the fuselage halves where this part attaches. The hard part is making sure this part is squared up to the rest of the cockpit. Step 26 can be skipped if you are doing the early version like I was and step 27 has you drilling out variant holes and painting to match the other fuselage half. The final part of step 27 is to attach a large box on the front of the half in the observer’s area along with deciding if you want to have the rear entry door open or closed. I chose to close it. There is a decal that goes on there but again you won’t see it.
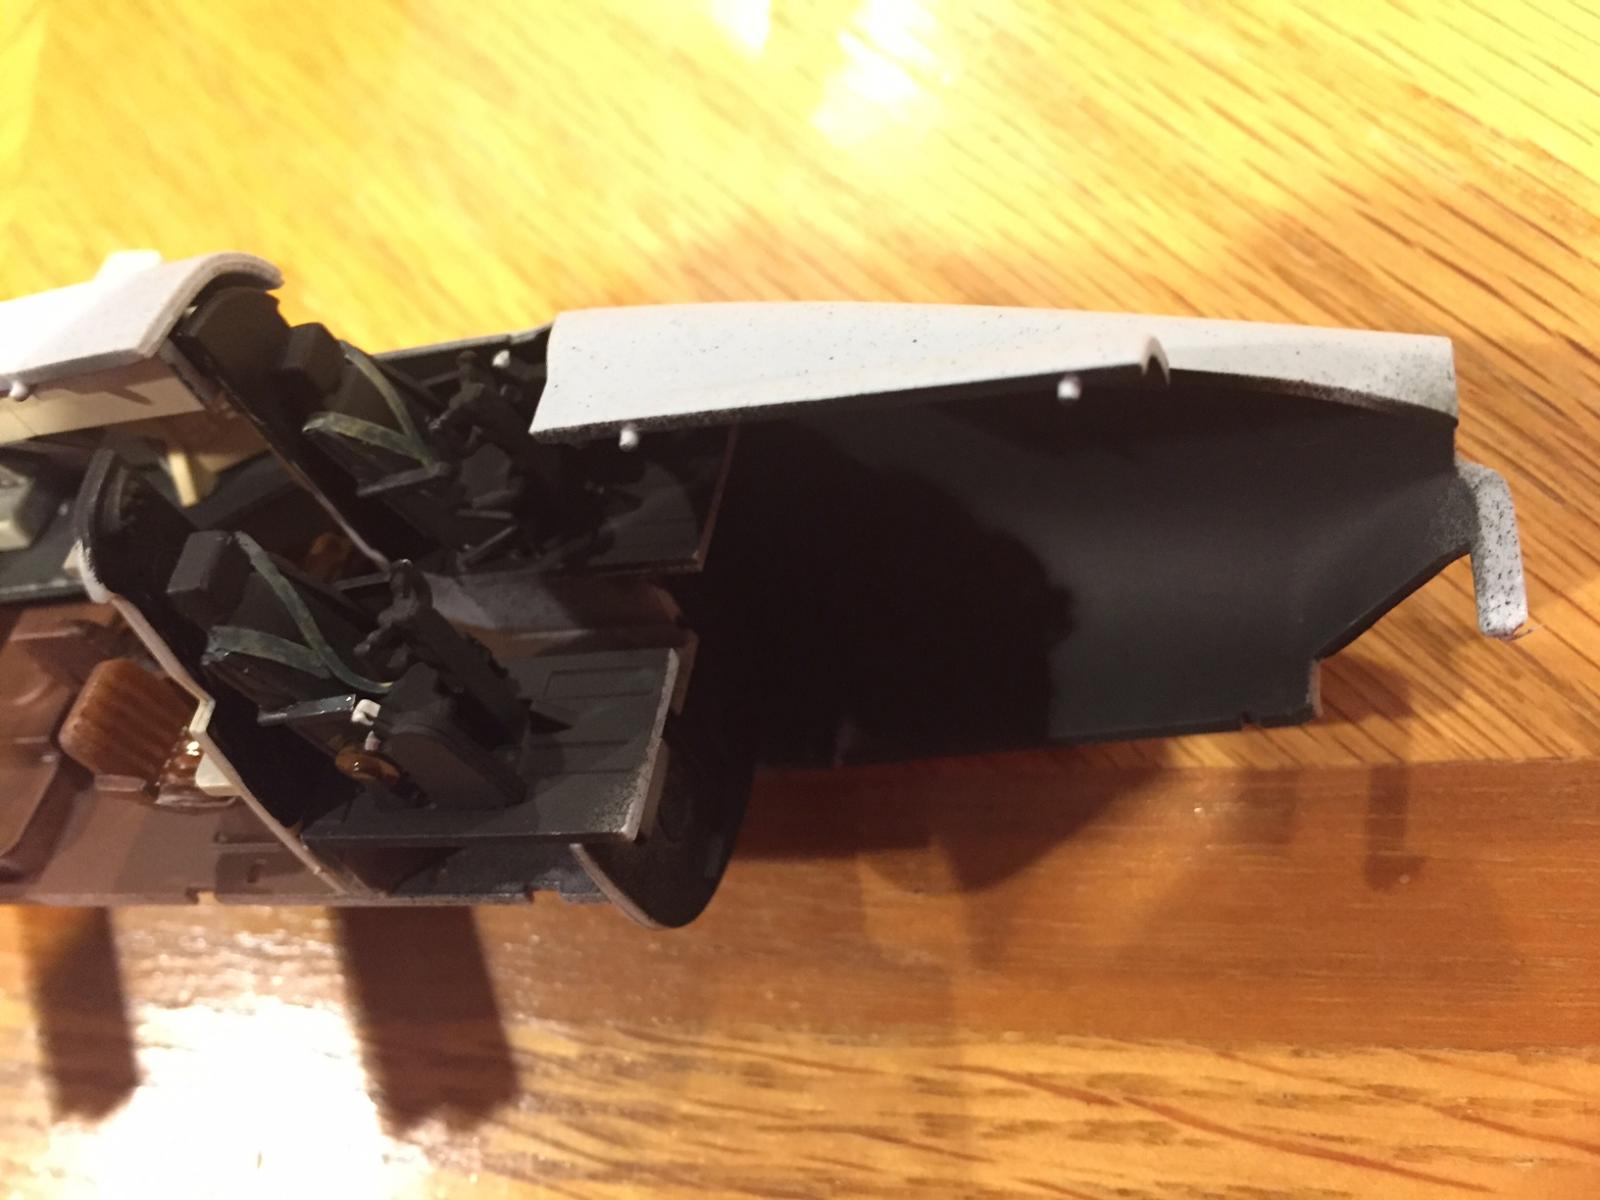
Step 28 was where the real fun began. It’s where you attach the fuselage halves together. It was then when I realized I had a warped fuselage half. The entire half had a curve to it! I have seen this on short run kits but not really on a mainstream kit, especially a new tool one. I did some searching and found that this might be a common problem with the new Shackleton kit. A gentleman that is building one in the club I belong to had the same issue and I did find another review for the kit that had it as well. My opinion is that it has something to do with the softer plastic that Airfix uses and that a part as long and as large as this might be too big for the plastic used. I was able to use the part in the end but it took a lot of clamping and gluing to make it work. This lead to major seam work once the parts were together which I had not expected as previous new tool kits from Airfix have made seam work almost an afterthought. I set the fuselage aside to dry and kept checking it to make sure it was staying straight and true.
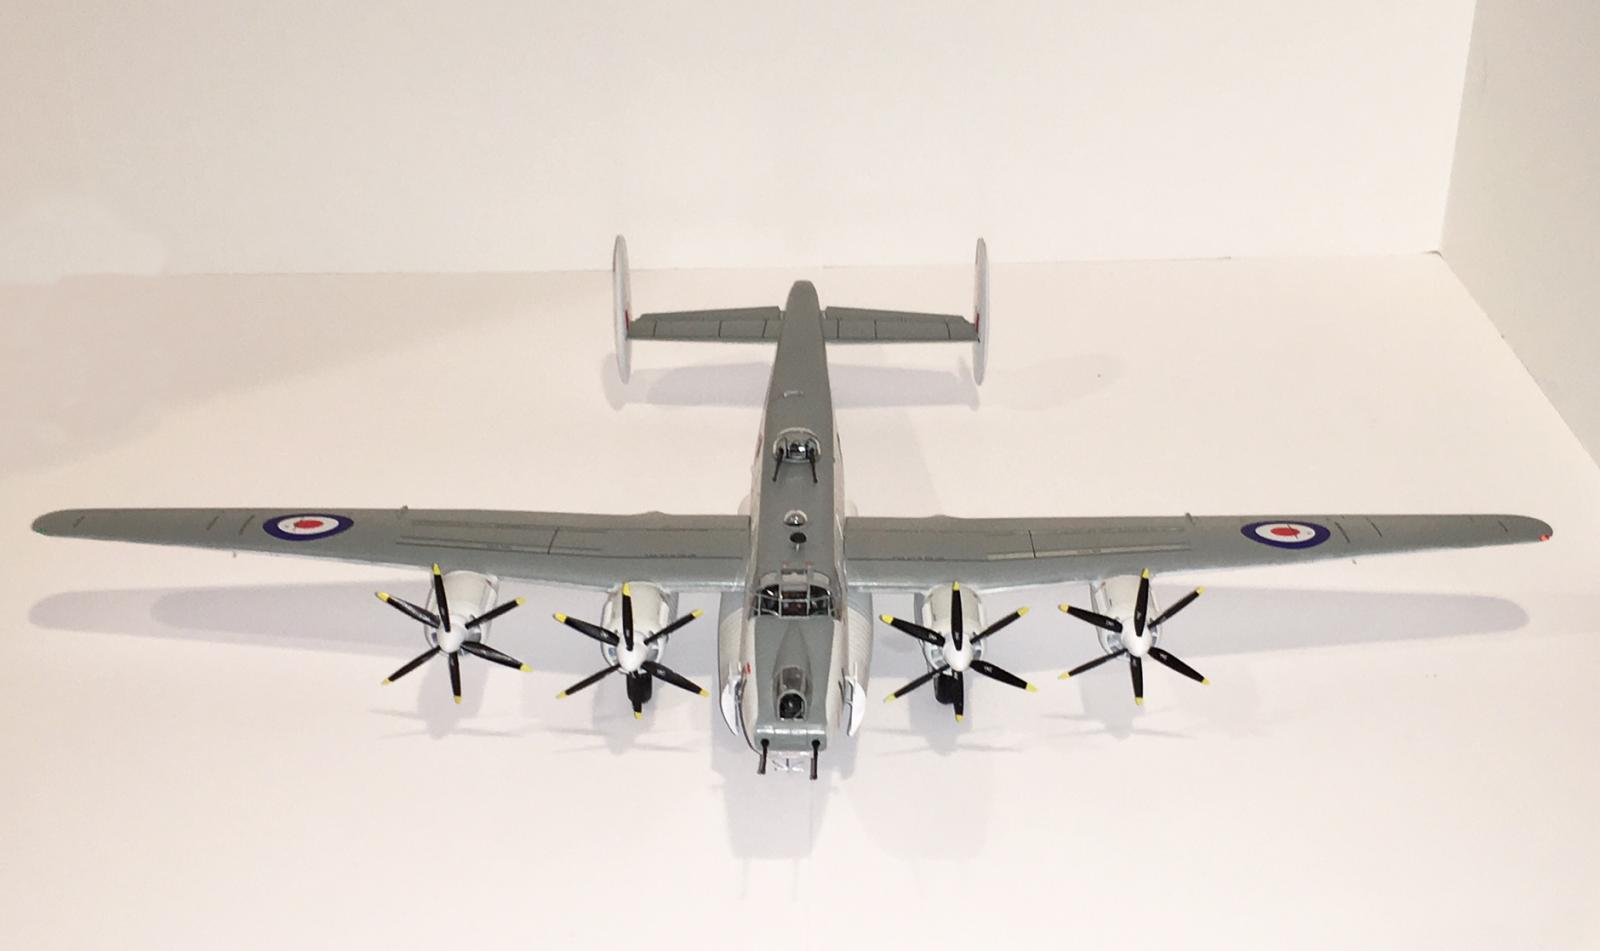
Nearing the last few steps for the fuselage is to build the rudders and horizontal stabilizers. The stabs are a two-part affair that has you sandwich the elevator between the two stabilizer halves. As I built each one I marked them with their step number to make sure I had the correct one on each side. I waited until they were dry and attached them to the fuselage. The rudders are built the same way and though the directions say to attach them to the plane I held off until after the painting and decaling to ease that process.
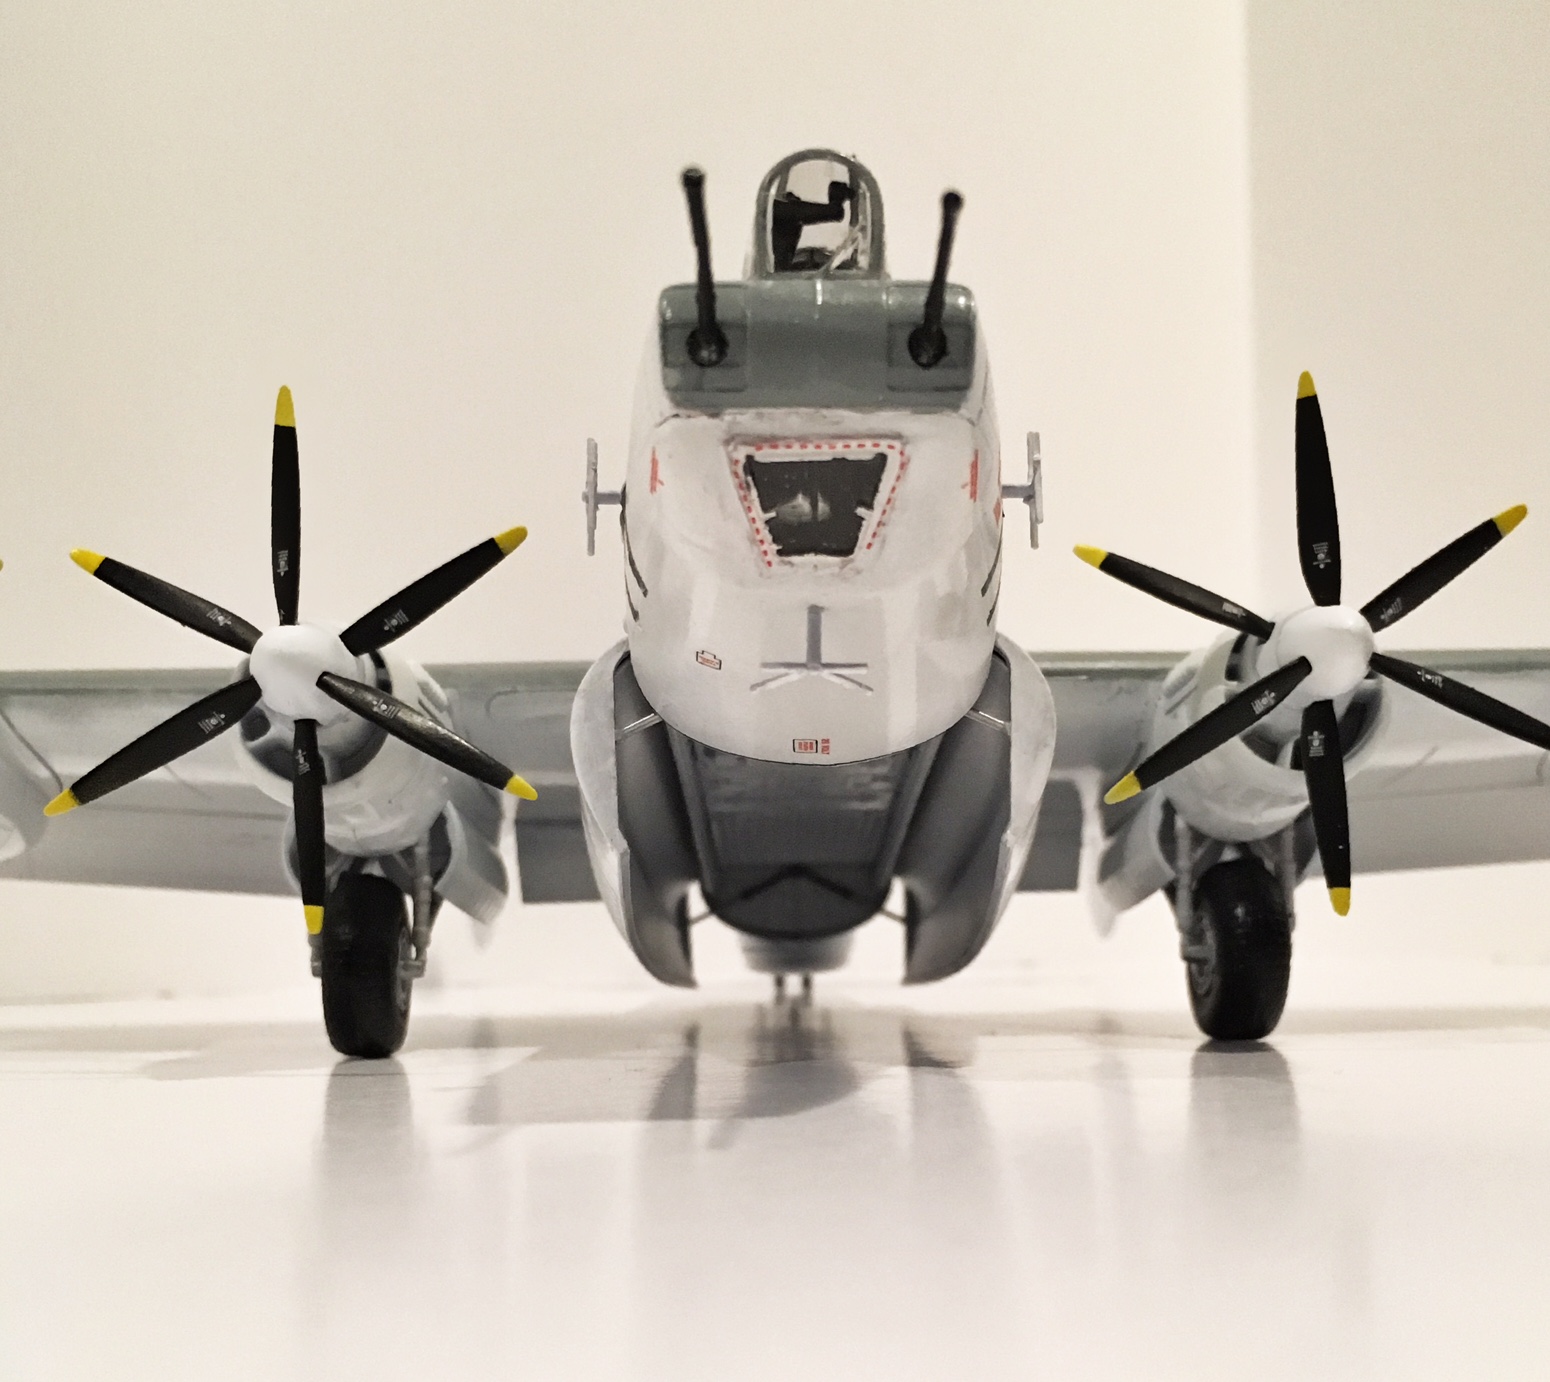
Once all this was all solid I flipped over the fuselage and started work on the bomb bay. I attached the bomb bay rear and sidewalls. The best part of this whole kit is how well Airfix does their attachment points. It was so easy to attach the sidewalls and even with the fuselage warp the rear wall went on with only some minor fuss. Steps 37-40 are finishing off the forward parts of the aircraft. You attach the forward gun turret control and the forward turret cover. Variant A gets the open ports Variant B closed. You then add the observer window and the bombardier window. Due to the warp I had a lot of trouble with the bombardier window but it wasn’t anything that putty and sanding couldn’t fix. The glareshield over the cockpit panel is next and this just slides right in. Next comes the overhead panel that attaches to the canopy. Because of all the glass on this kit and the fact that some of the plastic parts attach directly to them I highly recommend “futuring” your canopies very early in the build as some of these need to be attached before painting. The canopy and side windows are then attached to the fuselage and at least with mine due to the warpage needed some filling and sanding to get them to fit with little noticeable seam lines. I would definitely leave off most of the fuselage windows as they are very small and should be attached after paint. This ends the fuselage portion.
Wing
The next major assembly is the wings. Many of the steps need to be done twice (one for each wing). The build starts with the main gear bays. The first step is to attach the rear wall to the top of the gear bay. It is best to keep it as square as possible. Next come the top wheel supports. Mine were warped but thankfully they glue to each other and then fit into slots in the rear wall. This helps to straighten them out. Next is to add the front wall, this should totally straighten out any warping with the wheel supports that might be left. Next up is a large tank that adds some very nice detail to the inside of the bay. Step 52 is a big one, it has you attaching the wheel bay sub-assembly to the engine nacelle. It also has you adding the rear firewall to the nacelle as well. This is because the main gear legs actually attach to the outside of the gear bay you just built and the firewall can be seen. Remember to paint all the detail on the firewall as once the gear legs are attached you can’t really reach it. Make sure everything is square as it dries. If the bay or firewall is crooked, you’ll notice it and it will cause fit issues. Once this is done attach the other side of the nacelle to complete the process. Step 54 would have you add cowl flaps but I held them off until later so as to paint the insides of the area where they go and the insides of the flaps themselves. Step 55 has you adding the exhausts. There are two different types to make sure you chose the right ones. Version A are the short exhausts. They slide into slots on the nacelles and fit very well.
Now it’s time to decide gear up or down. If its gear up just attach the closed gear door parts and move along. I chose gear down. Steps 57 and 58 have you adding the main gear legs to the inner nacelles. It is a three-piece unit that has you attach the main gear legs to the inner outer side of the forward gear bay wall from step 52 then add the gear supports to the inside of the rear wall and the lower edges of the main gear legs. There are two great diagrams in the instructions that show what to do and when these parts are glued together they are very strong to hold up what is actually a pretty heavy model. The outer nacelles are next. These are made up of two halves. I had one set that was warped. It took some work but eventually they got into shape. Again add the correct exhausts and cowl flaps (also held off until later) and they are good to go.
The other major part is to build the wings themselves. They are in two pieces, a full upper and lower span, mine were straight and true and went together with no fuss at all. Once they are dry attach the inner and outer nacelles. I had marked mine with their final step numbers so they went in the right spots. When these are attached Airfix would have you attach the wings to the plane. I don’t recommend this. If you leave them off it will be much easier to paint and decal the fuselage. The way Airfix made the attachment you don’t need to worry about a seam at the wing join. Mine were so tight that I actually did not glue the wings on. This is the first kit I’ve ever been able to do that with. The last few steps dealing with the wings would have you attach the flaps. They are molded in such a way that it is easier to show them in the down position. If you want them up you have to cut off the top edge of the parts. I decided to show them down as they have great detail on them. I also kept them off until final assembly to make it easier to paint. The next step in the process was to start work on the bomb bay. There was nothing about the engine fronts. I looked ahead in the directions and saw that Airfix would have you attach them at the very end of the build! This would mean not painting the wings until very late in the process. I chose to add them first without adding the propellers. The easiest way to do this is to do part of step 111 and 112 adding the prop shafts to each engine face and then the engine backs. Then do step 113 where you attach the engine fronts, fill in the seams and you are set to paint the wings.
Bomb bay, Landing Gear, Ventral Fuselage items
Steps 73-90 has you returning to the fuselage to add the tail wheel strut, landing gear doors, weapons, bomb bay doors, and the choice of an extended or retracted ventral radar. I jumped around a lot in these steps because if I didn’t I knew I would end up knocking parts off of the aircraft. I started with the tailwheel strut, which is made up of two parts, a support brace and the strut itself. I added the brace but not the strut at this time for painting reasons. Then I added the ventral radar support and ventral radar. If you build the gear up option, then you can choose to do either the extended or retracted part for the radar. If you build gear down, then only the retracted will fit. Then came the bomb bay doors. These are made up of two pieces each, an outer face and inner face. These fit together snugly and while they were drying I attached the door retraction arms to the bomb bay on the fuselage. Once dry I attached the doors. This gave the fuselage a nice base to sit on when painting. I looked ahead in the directions to see if there were any more major parts to add. The only things left were gear doors, antennae, upper turret and forward guns. I felt this was a good time to stop building and start the painting process.
Painting and Decaling
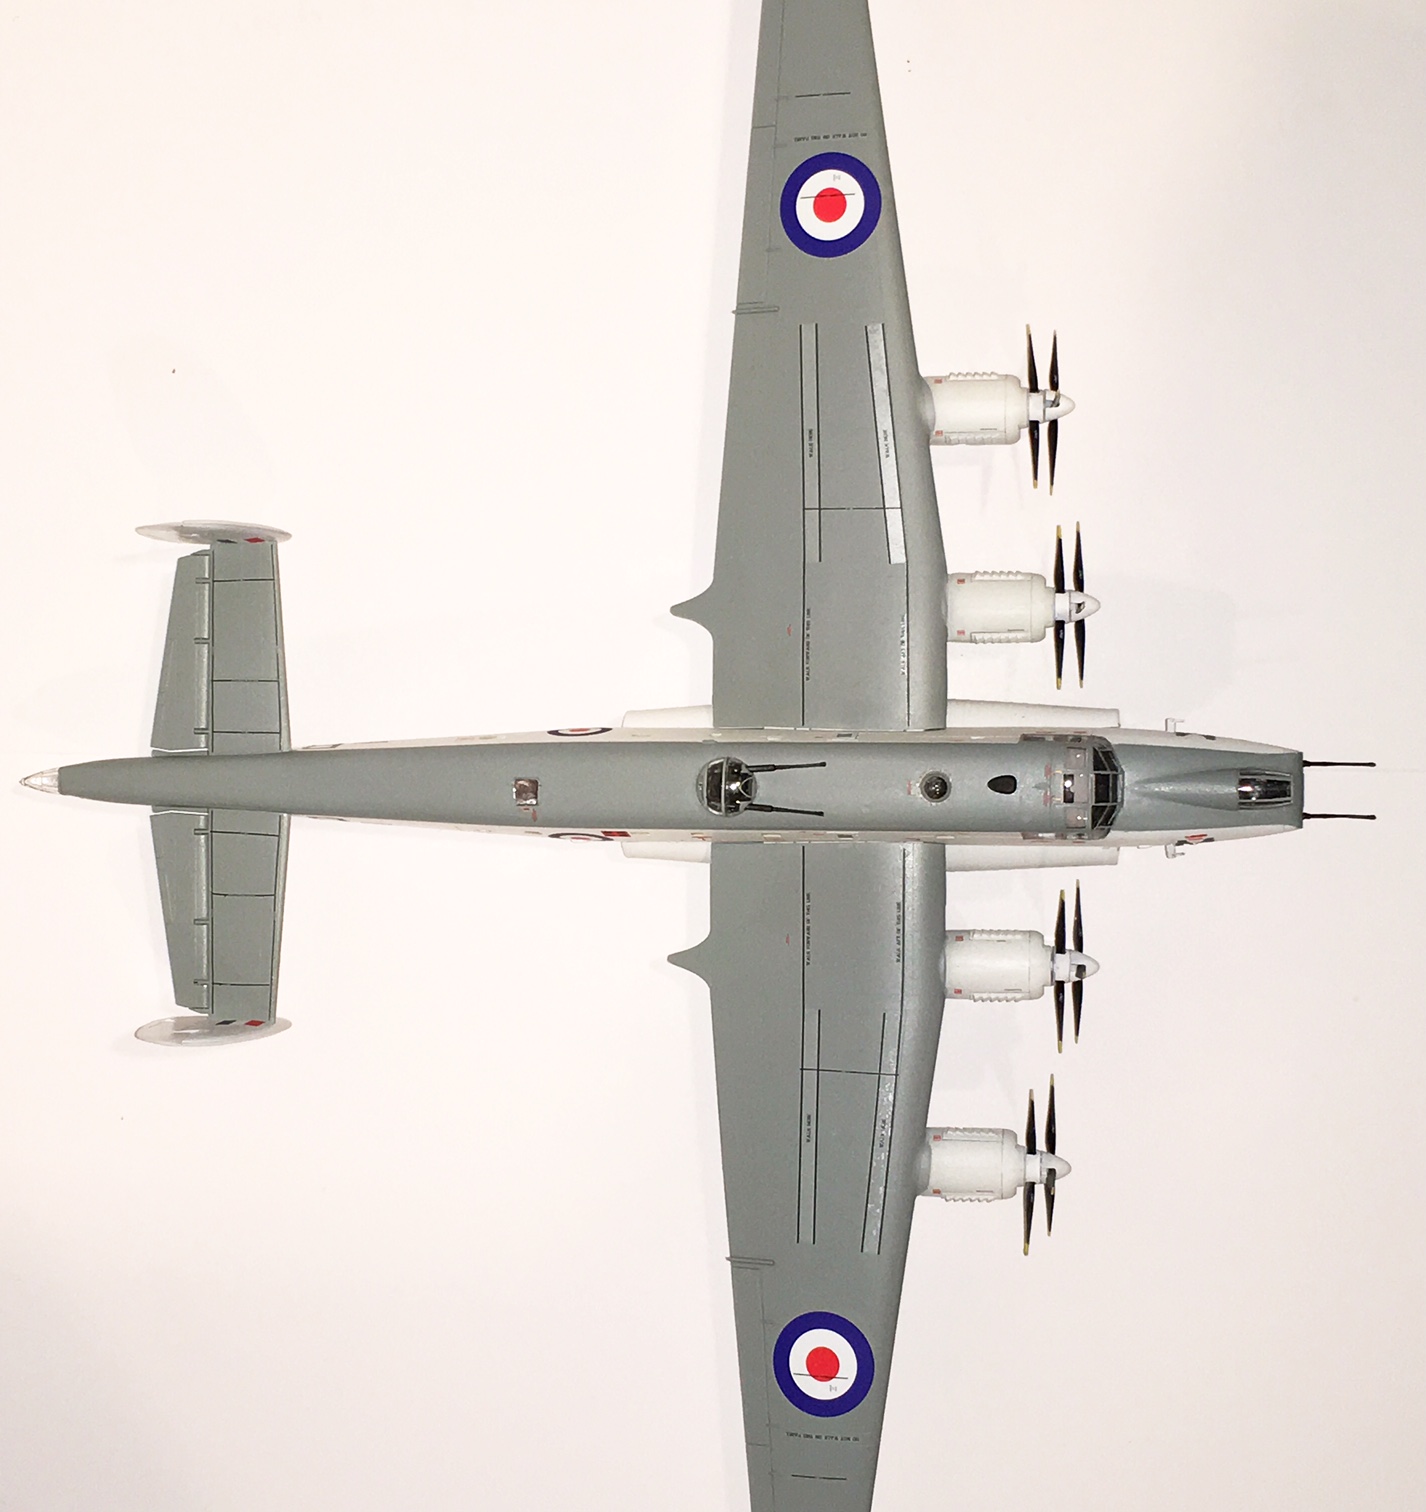
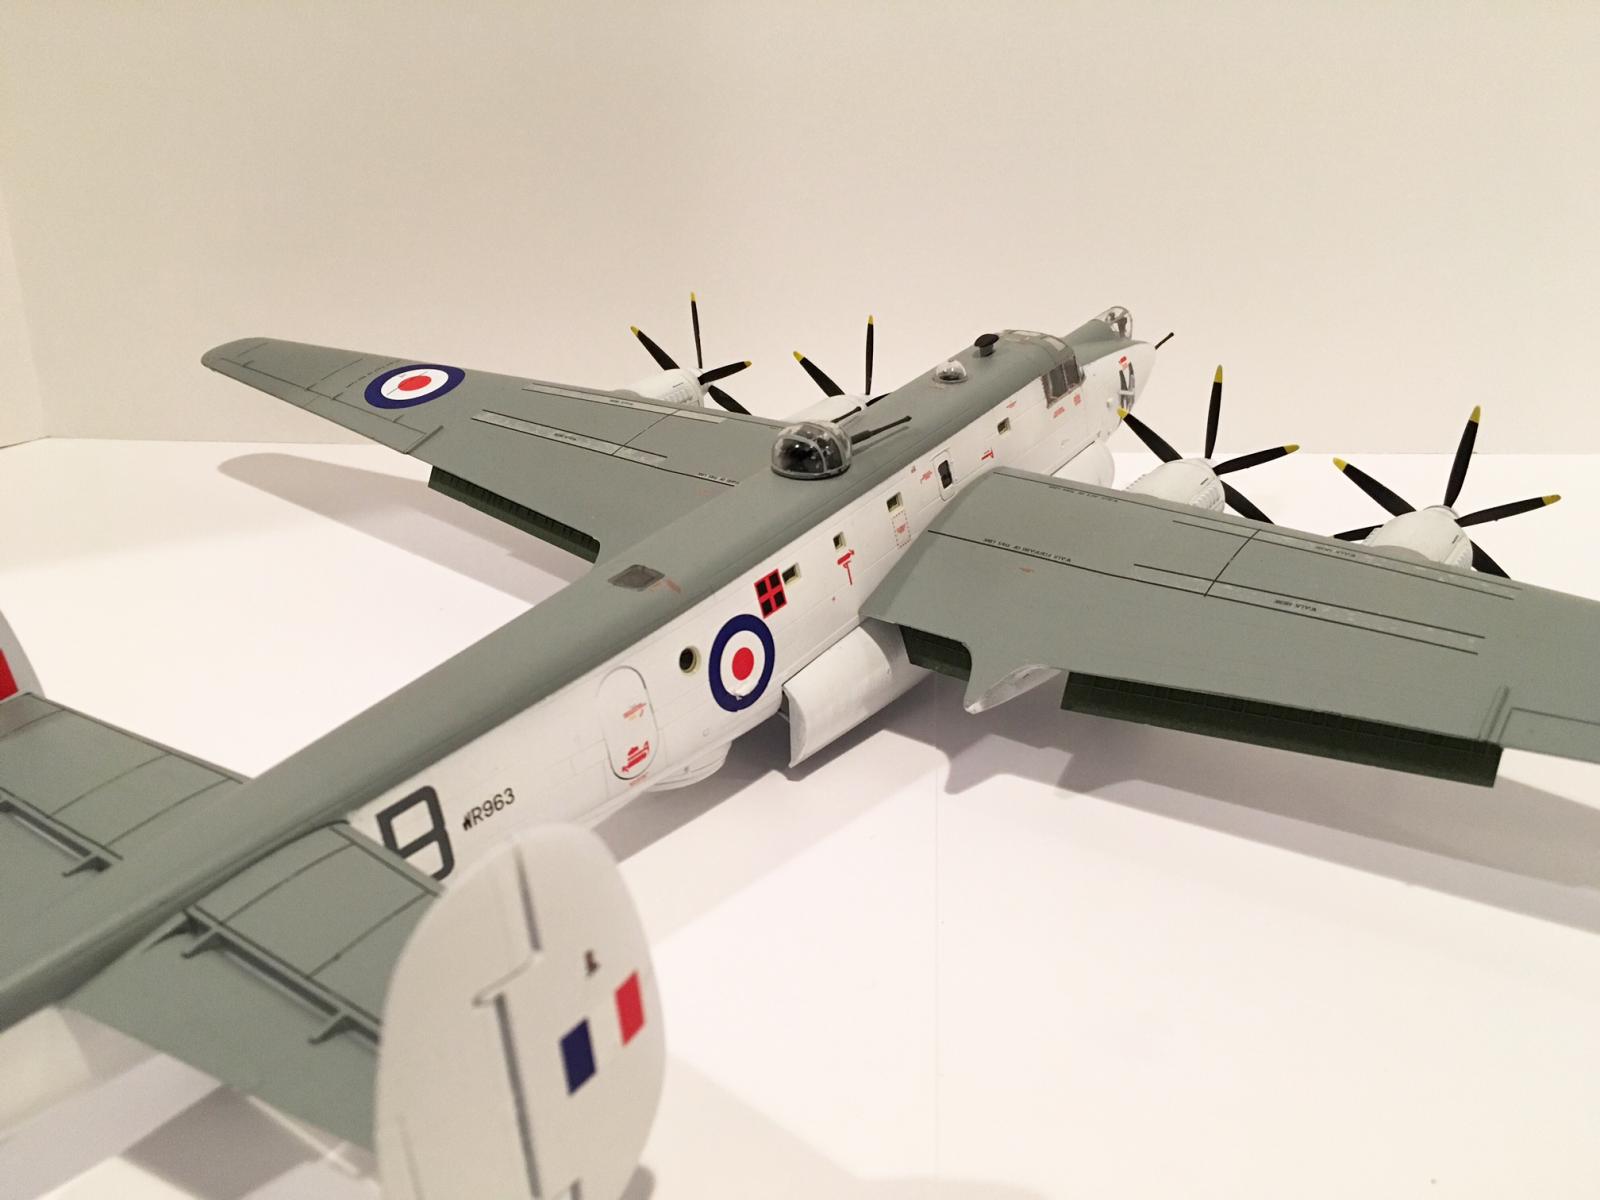
Painting for this kit is somewhat complex but is made up of only three main colors. Again the colors are in Humbrol enamels but I was able to convert them to Tamiya Acrylics. The colors used for the fuselage tail and wings are Xf-2 flat white, x-2 white, and xf-83 raf medium sea gray 2. My first step was to tape off all the “glass” parts. I had purchased the Eduard canopy masks and was glad I did. I highly recommend them for this kit as they make a fairly complex masking task easy. After masking the larger clear parts I filled the open windows on the fuselage with tape and taped off the landing gear legs and wheel wells as they had already been painted Xf-2 flat white and I did not want to get any paint on them. All sub-assemblies and loose parts were then given an overall coat of Tamiya gray primer. After this was dry, the first areas painted were the fuselage sides, prop hubs, twin tails and rudders, and tail observers window framing using Xf-2 Flat white. All of these parts were set aside and the props and wheels were painted a flat black. Once the flat white was dry the fuselage sides and engine nacelles forward of the wing were masked off and the bottom of both the wings the bottom of the fuselage, and main and tail wheel doors were painted X-2 gloss white. When this was dry the masking was moved up on the fuselage more added to the wings and the top of the wings and fuselage were painted xf-83. This does extend down the front of the forward gun turret as well so remember to mask there as well. Also the top turret glass was painted at this time. The final parts to be painted were the prop tips in yellow and the wheel hubs steel. All of this when dry was given a double coat of Testors clear gloss to ready the plane for decaling.
Decaling for this aircraft is very extensive. Once you pick the variant you want to use (Option A for this review) you see how extensive the decals go, besides the national and squadron markings you get stencil after stencil. Some of these even go on top of others so it is best to put down the national and squadron markings first, then the stencils. Starting with the wings I added the wing roundels first. These went on well but once I used some decal solvent they seemed to pucker up! I thought I had ruined them but after 24 hours they somehow had resettled down and looked great. Moving onto the fuselage I did one side of squadron and national markings and all was well. The other side though I ran into some trouble. The problem is that one side of the Shackleton is smooth. The other has air scoops molded into it. The decals though are not made to go over these molded on details very easily and I ended up having a tear in the fuselage roundel and bubbles in the squadron code on the nose. The easiest fix to this would have been for Airfix to make markings with cut outs or one that was larger than the other to go over the protrusions. In the end I was able to fix them in a way so the damage isn’t too noticeable. Once all the markings were done it was on to the stencils. I did these in phases as there are over 75 of them, 24 alone for the props! They all went on fairly easily and really do add a level of detail you don’t see very often, especially in this scale. When done the entire plane was set aside for a day to let the decals dry. Then most of the plane got a coat of Testers dull clear and the undersides got a coat of Testors gloss per the instructions. Now it was on to final assembly.
Final Assembly
To finish the plane, I went back over each step in the directions to see if any part had been missed other that what I had deliberately left off, seeing none, I added the main gear wheels and doors to the wings, added the clear parts to the under wing lights and the pitot tubes to each wing. Then came the fuselage additions of the tail wheels and doors and using Testors clear glue I filled in the window frames on the fuselage sides. These windows are very small and the clear glue will give the same effect without worry of smudging the clear piece. As this was drying I built the top turret. It is a 4-piece assembly for the turret itself that goes together nicely. Then I added the guns and turret glass. This was where I found my last issue with this kit. I had let the guns’ seal to the turret parts and then added the glass. The front turret glass caused the guns to dislodge and splay out instead of pointing straight ahead! Everything I tried could not get the guns to point directly forward. It looks like it has something to do with the front turret glass. My suggestion would be to shave open the gun ports more, this should give the guns some “wiggle room” to point straight. I then added the top turret rear glass and set the sub assembly aside. I added the rear observers glass to the fuselage and the forward guns to the front of the aircraft. Next came the various radar antennae and finally removal of all the masking from the clear parts. I then moved on to the wings adding the props and their hubs. Airfix does a nice job here and makes it so the props can only go on in the correct way so you won’t get the pitch wrong when putting both sets together to form the one hub. All four hubs were added and though the directions say not to I did glue them to the nacelles to give them added strength and to keep them in place. The wings were now done. The last step I did was to add the weapons to the bomb bay. These consist of 4 different torpedoes and are mini models in and of themselves, with sanding and filling of seams, multiple paint colors and even decals! They looked great and add some pop to the kit. Once completed they were attached to the aircraft. Once dry the fuselage was flipped back over, the top turret dropped into place, and the wings were then slid onto the wing spars. The fit was still very tight and no glue was needed. The Shackleton was finally done. And what a kit it was!
My most sincere thanks to Airfix for making the kit and to IPMS for allowing me to review such an interesting and unique kit!


Comments
Add new comment
This site is protected by reCAPTCHA and the Google Privacy Policy and Terms of Service apply.
Similar Reviews