
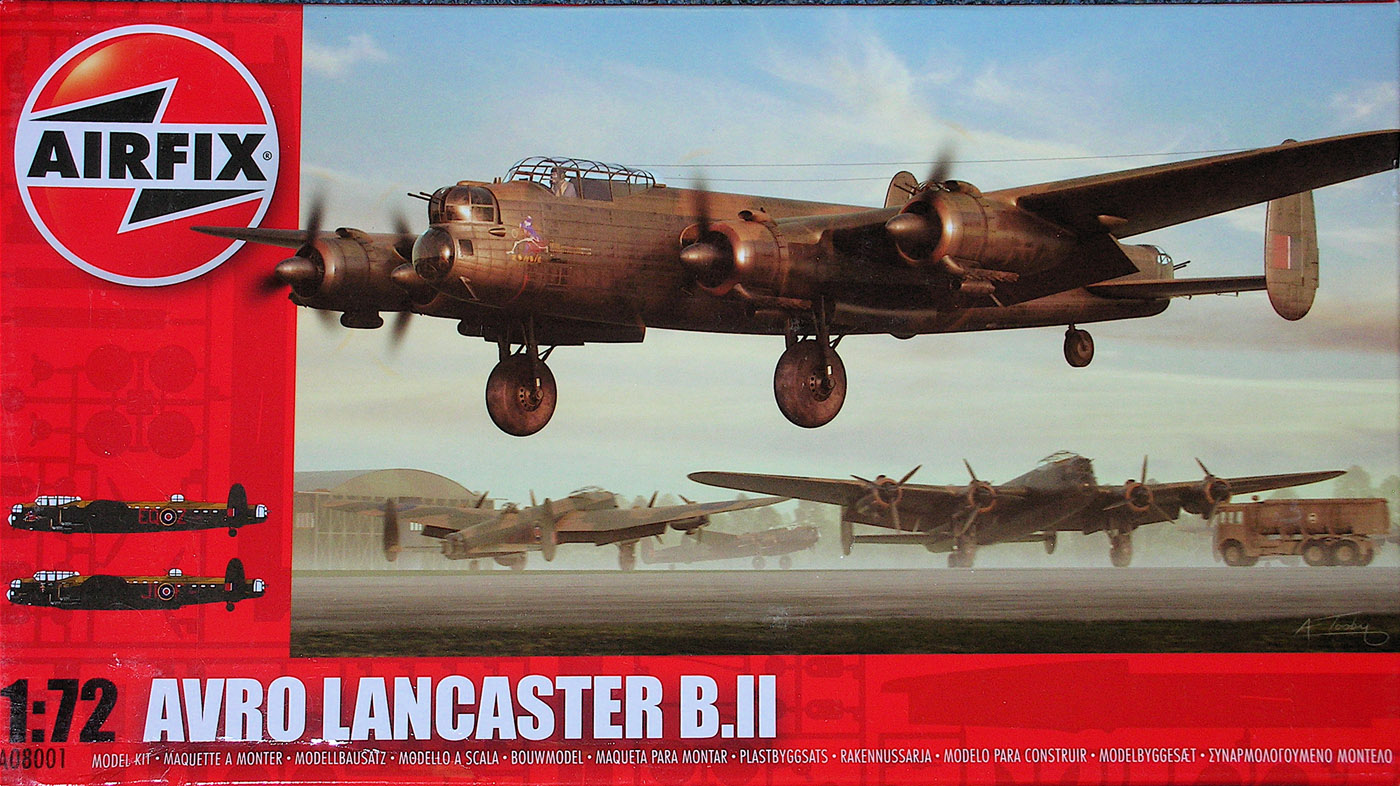
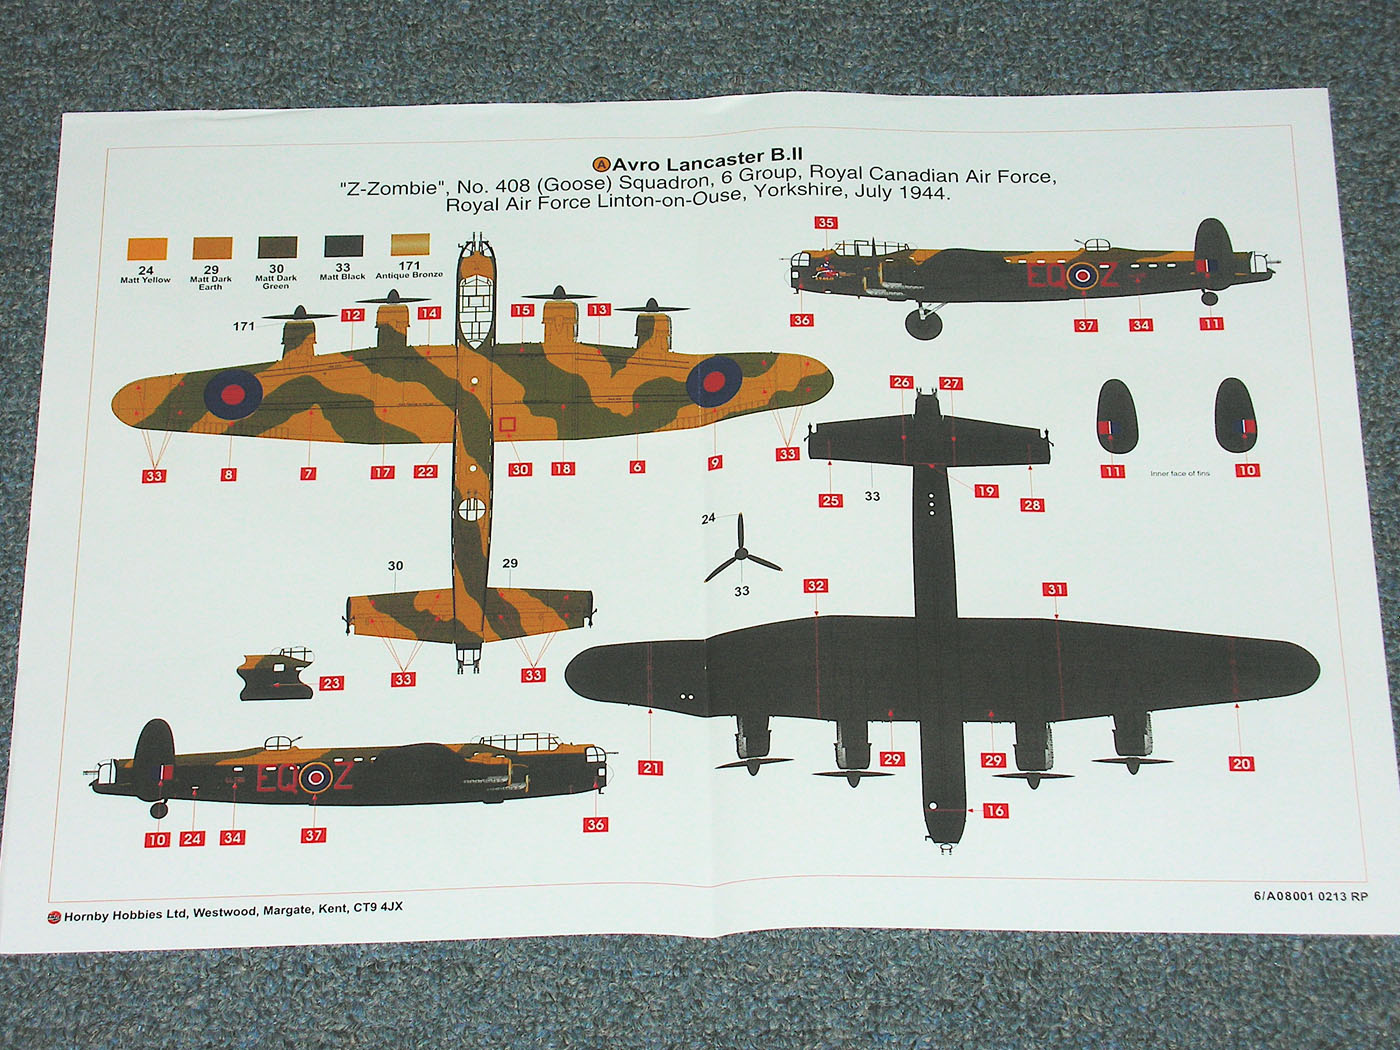
Avro Lancaster B.II
The Aircraft
Perhaps the best four-engined bomber of WWII, the Avro Lancaster has earned its place in history as well as in the hearts of the English people. It was instantly recognized that this was no normal aircraft and the time between design, prototype and production was minimized. However, the Lancaster was competing with the Spitfire and Mosquito for the Rolls Royce Merlin engines it needed and it was feared that a shortage might develop. Instead of shifting Merlin production to the Lancaster, it was decided to develop another version of the aircraft, the Mark II of this kit, using Bristol Hercules radial engines instead. The adaptation was easily made, but performance slipped. The Mk II climbed faster and the radial Hercules engines could absorb more punishment and still run, but the over all ceiling of the aircraft was reduced and the Hercules consumed more fuel, so range and/or bomb load fell as well. The Mk IIs were given to squadrons that were using Wellingtons and Hamptons since these also being radial engined, it was thought the maintenance transition would be easier and the Canadians. In the end, with the U.S.' entrance into the war, Packard started to license produce the Merlin, which ended the shortage and as soon as enough Mk IIIs, which were Lancasters with the Packard Merlin engines, were available, the Mk II was largely phased out of "Ops" and relegated to other duties.
The Kit
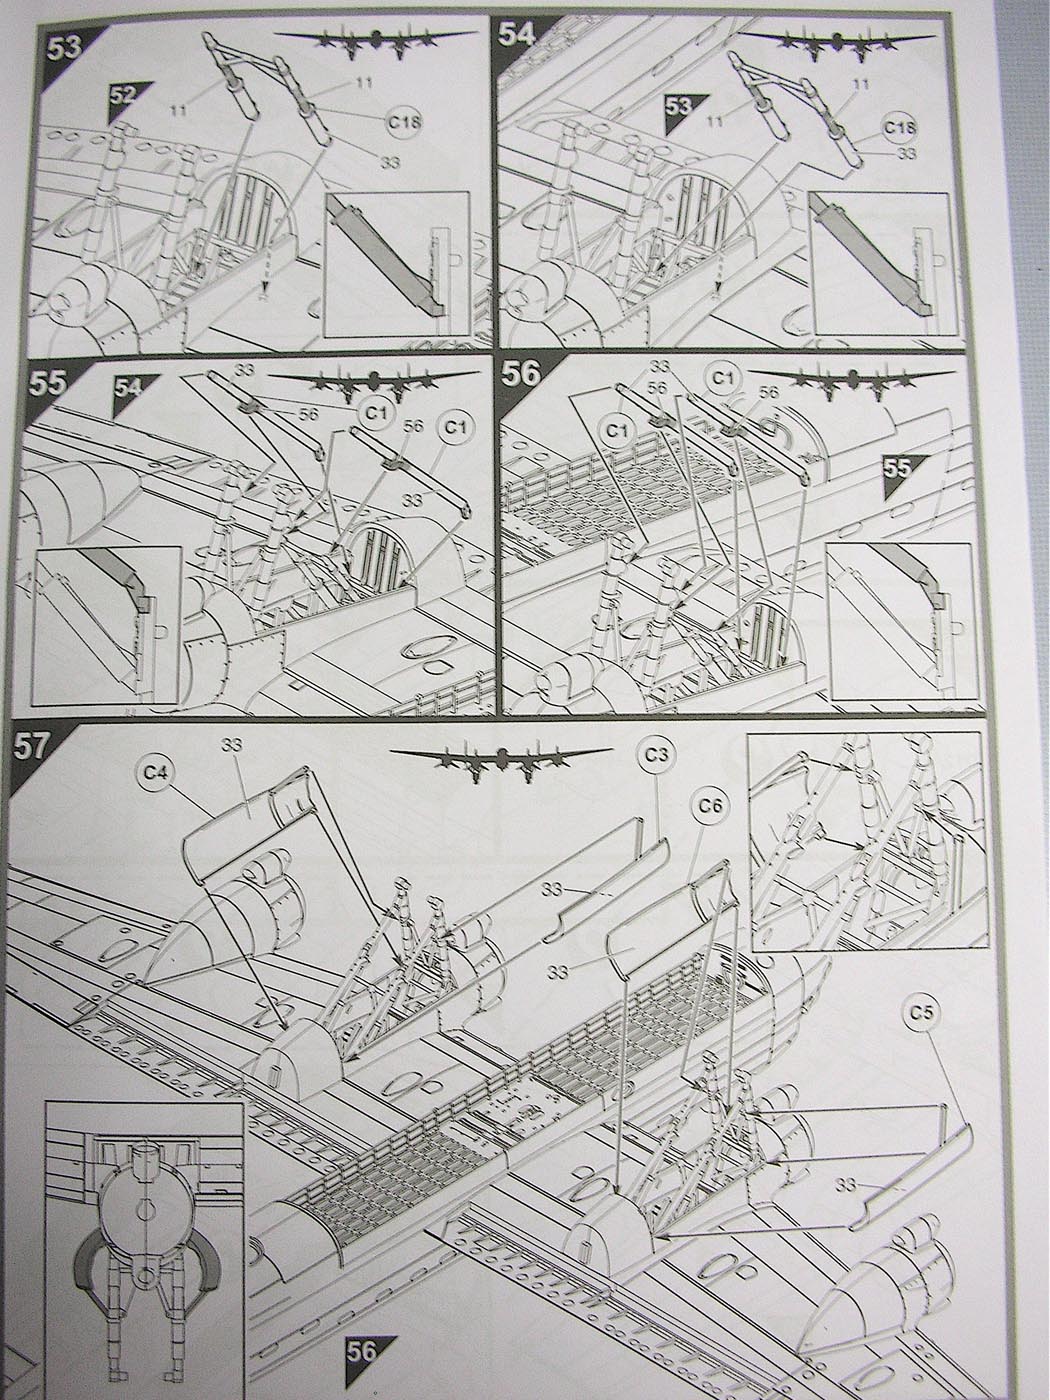
The kit has 239 pieces on five light grey and one clear sprue. This is a very detailed kit, so many of the parts are quite small and delicate. There is no flash, only very light mold seams and no punch out marks in highly visible places. The panel lines are engraved, perhaps a tiny bit too heavily, but with several coats of finish, they look fine. There is molded-in detail in the wheel and flap wells as well as the interior of the fuselage and the model can be built with normal or bulged bomb bay doors. An H2S bombing radar dome is provided, but there is no mention of this in the instructions. As there are several other clear parts that are not used, this is probably because the clear spru is common to all Airfix Lancaster models. A twenty-two page instruction booklet guides you through assembly with clear illustrations and international symbols and there is a glossy two sided full color painting guide for the two sets of markings provided on the decal sheet, which includes stenciling, instrument faces for the cockpit, radio operator's and engineer's areas as well as a set of maps for the navigator's table. The plastic is what has become typical for the new Airfix kits being light bluish grey, somewhat soft and easy to cut and sand.
The Build
First off let me say that this is very well engineered kit and the overall fit is excellent. This holds true for small parts and large, which means you must be careful in what you cut/sand off a part when cleaning things up. Check the fit of all parts before you trim or sand them to make sure the fit stays tight. As a corollary to this, make sure all the interior parts are in correct alignment and fit snuggly against the fuselage wall. If not, you will have problems getting the two halves to join properly as tolerances are very close. If you can't get the fuselage halves together without a gap, you either did something wrong or didn't do something you should have.
Interior
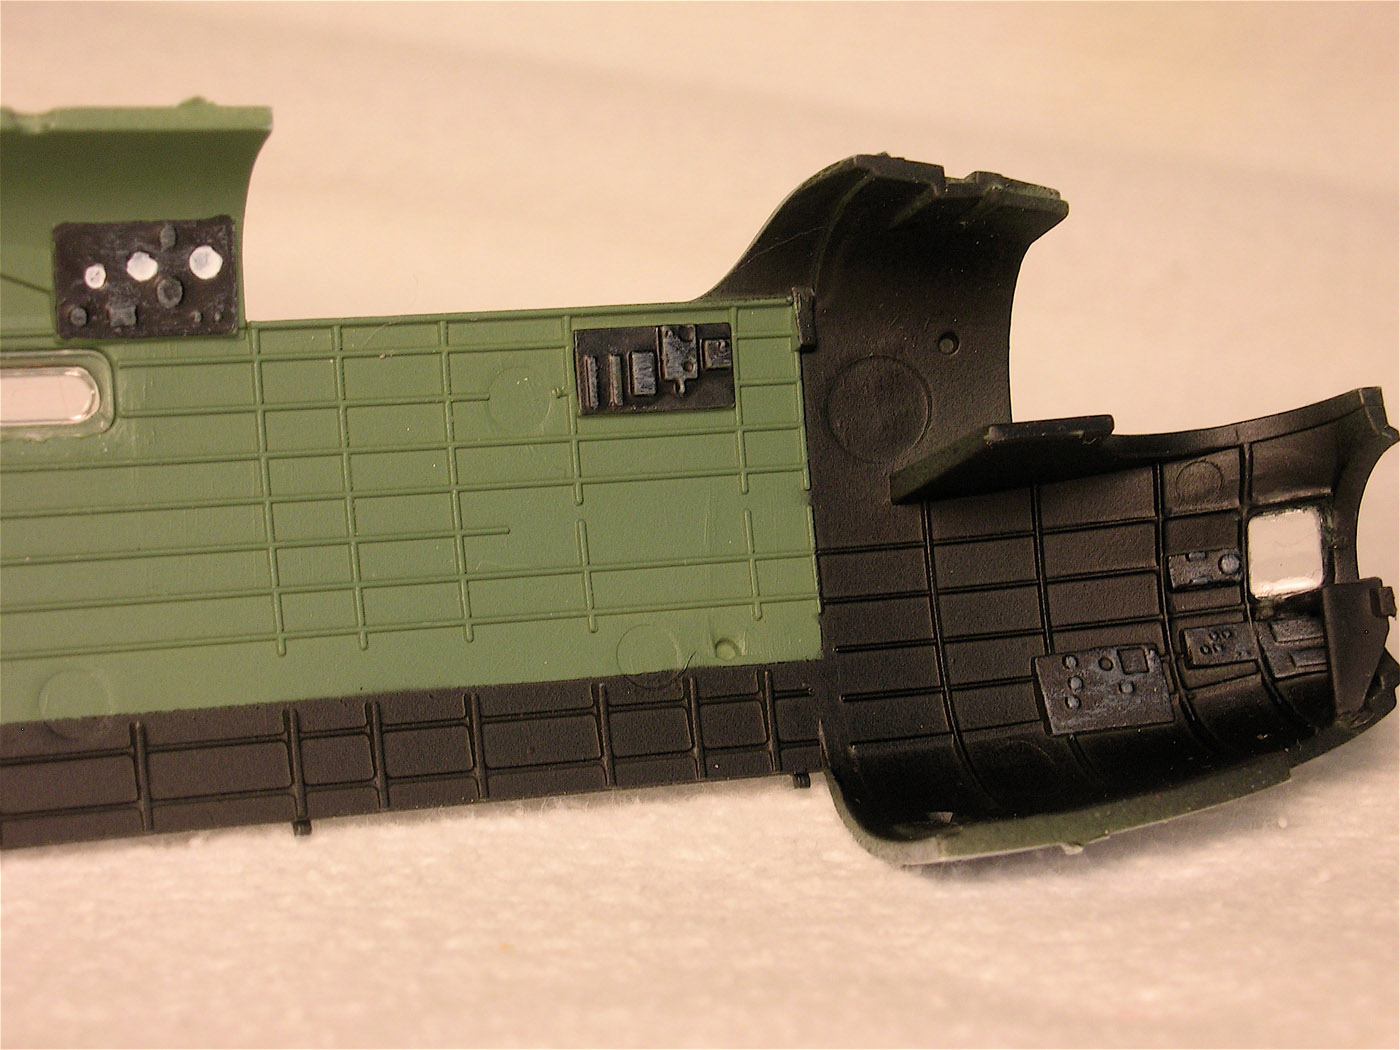
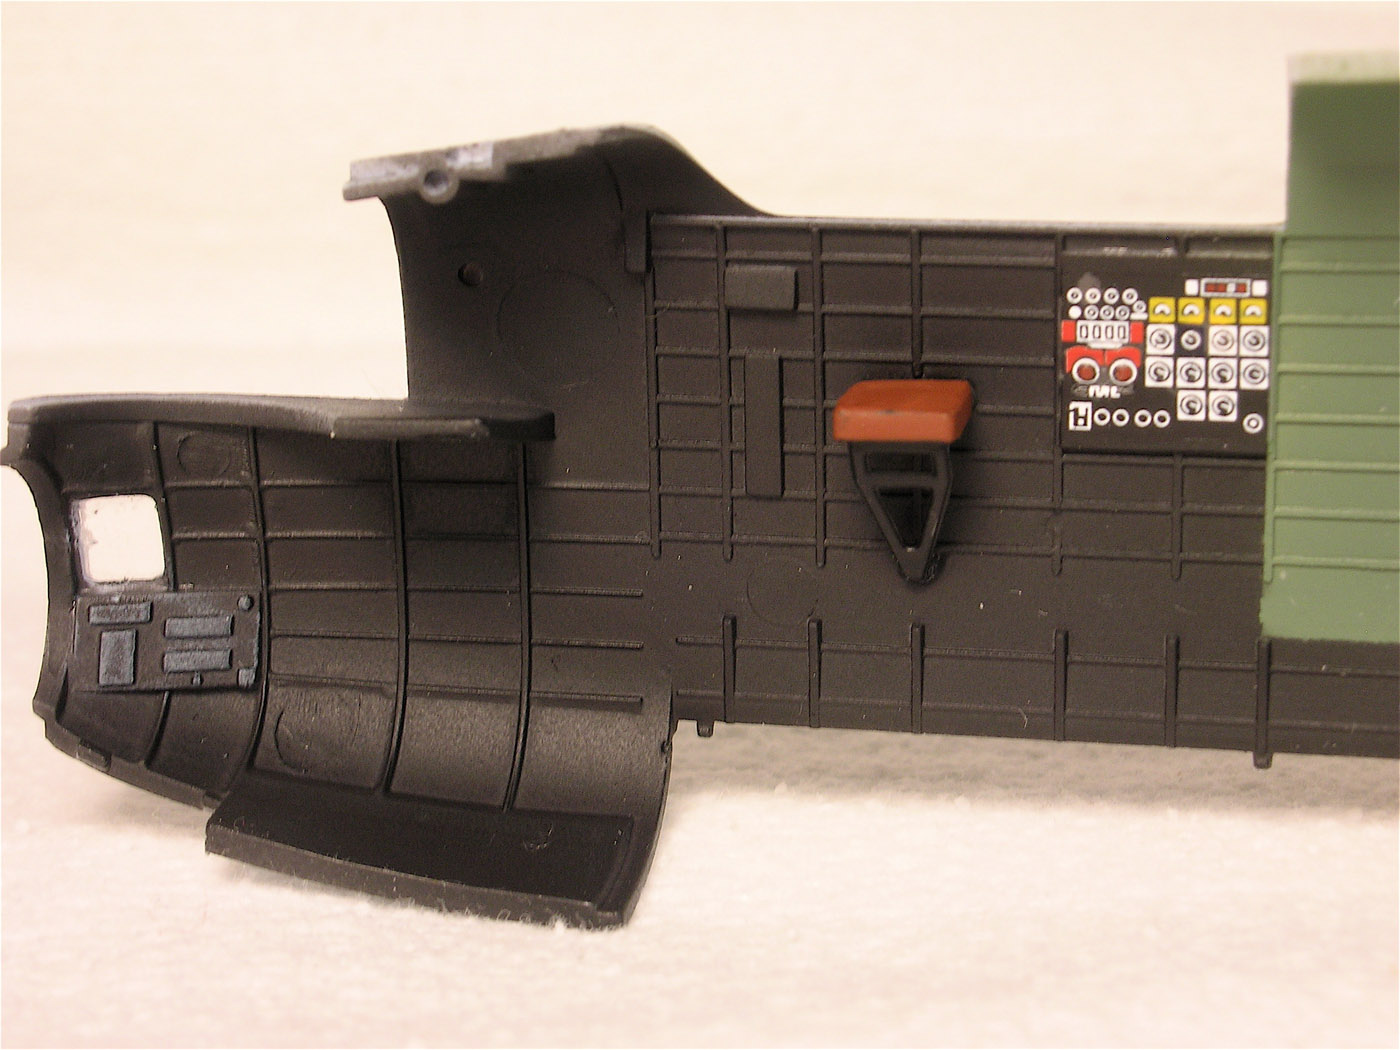
There is quite a bit in here and quite a bit is visible under the greenhouse type canopy. Everything fits well, but assemble it in the order directed so it all goes together correctly. Make note of painting instructions so you do not have to paint around parts. You make your first choice of aircraft at this stage by either including or not including the ventral turret mount, so make sure you know what aircraft you're doing. Also you'll need to open up holes/slots for a stand, if your going to do that (See Landing Gear below). I needed a little putty on the bottom to align the halves with no 'step', but that might have been as much operator error as anything else.
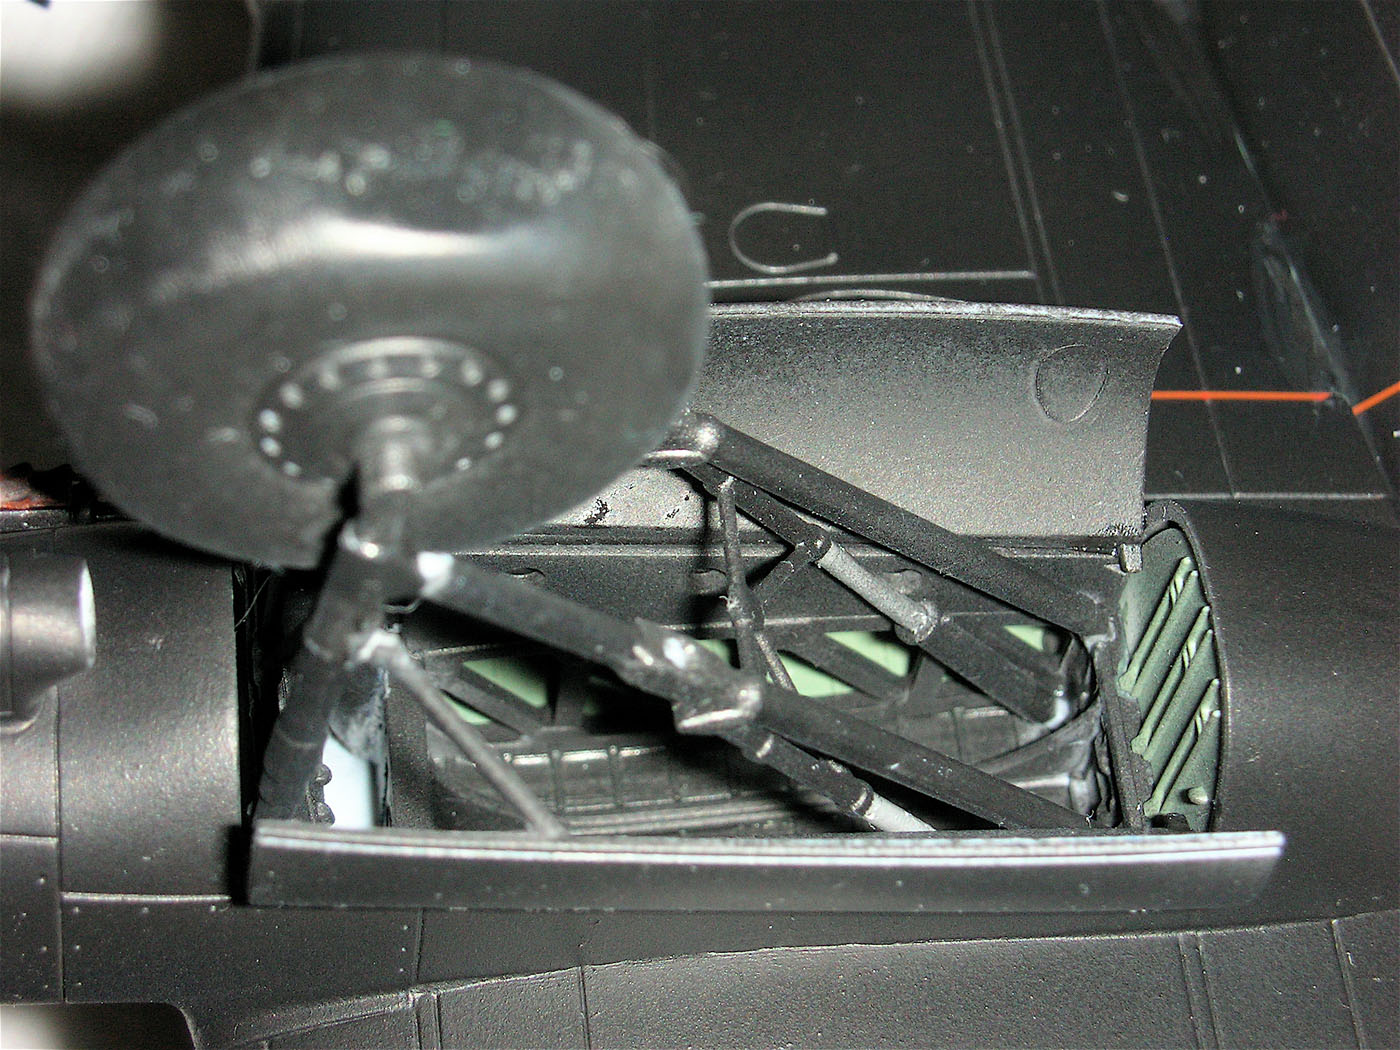
Landing Gear Bays
This is a pretty elaborate set up. It all attaches to the wing spars, as it did in real life, and is quite detailed. Again, make sure of your alignment so when you add the top and bottom wing halves it all goes together.
Wings
A somewhat unique assembly sequence has you attach the top wing half to the spars/landing gear bays and then you add the bottom half. Fit on mine was so fine that no putty was needed at the wing root at all.
Tail planes
These have a half lap joint that makes alignment almost guaranteed. However, on mine the fit was so tight that I needed to file down the tabs so that the elevators would completely fit into the slots in the fuselage. Also, care is needed so you get the right part on the right side. There is a small "dent" in the left part into which fits the tail wheel. That should face down. If you get it reversed, you'll need to modify the tail wheel part for it to fit and it will not be as sturdy.
Engine nacelles
As these are in right/left halves, some clean up in necessary, as it is with the upper and lower air intakes. The fit to the wing is very good, but needed a tiny bit of putty here and there.
Landing Gear
These are done just as they are in the real aircraft, mounted to the spar via an access panel on the top of the wing behind the engine. These panels were the worse fitting parts in the kit. They took some putty to close gaps around them and fair them into the nacelles. But even at this, they still fit pretty well. You can do the model gear down, gear up or either way with a stand. If you choose to go with the stand, you'll need to buy one, as it's not supplied. Airfix now sells stands separately.
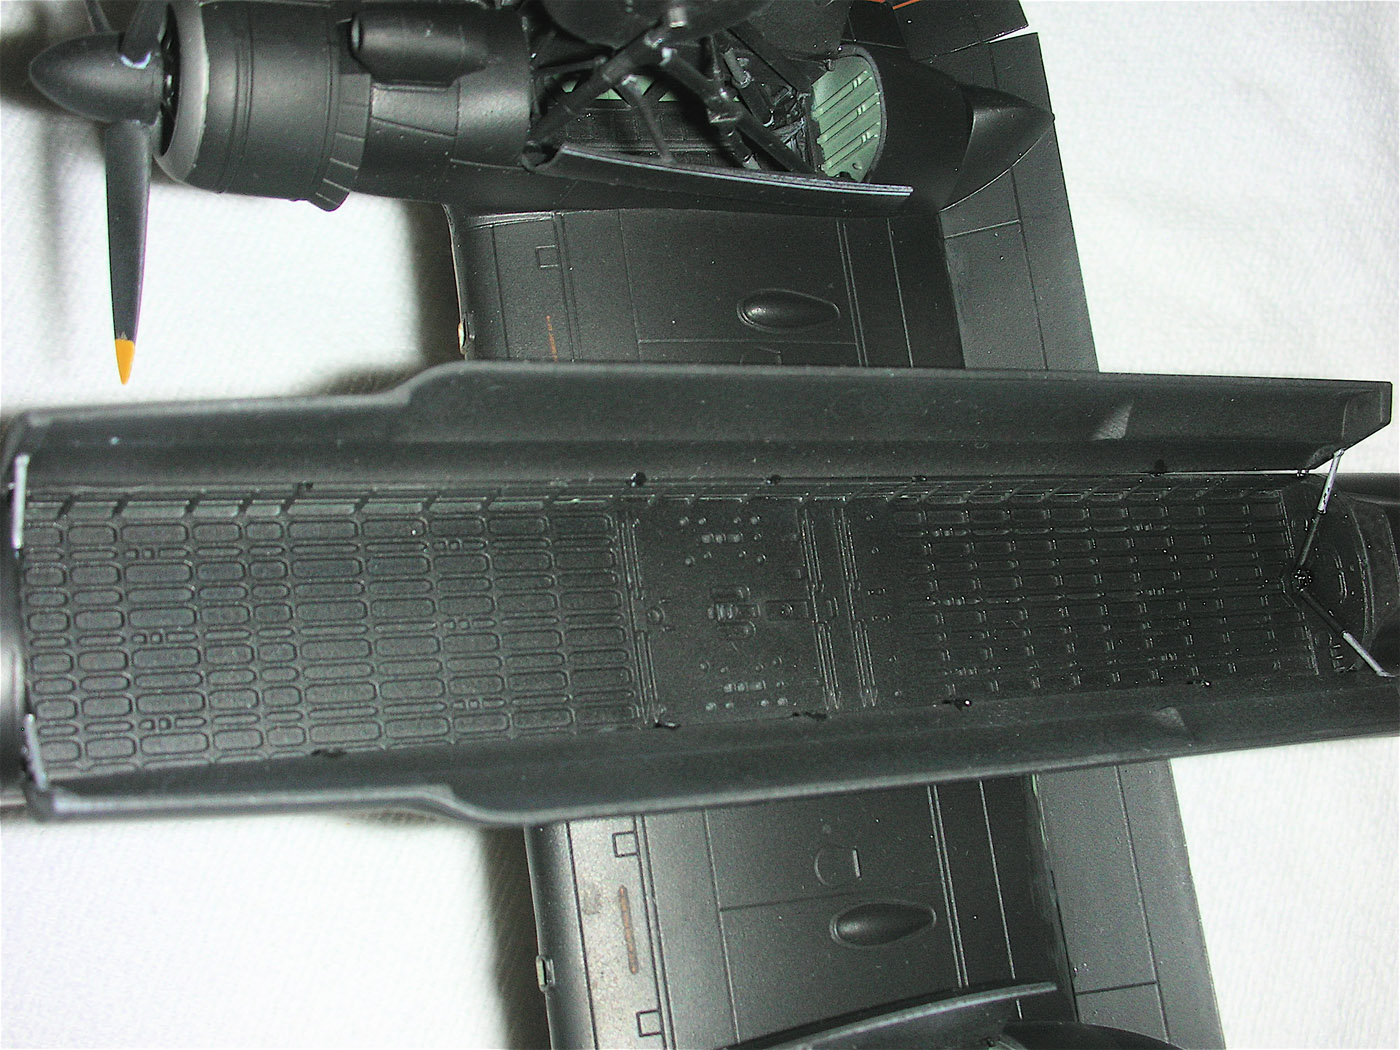
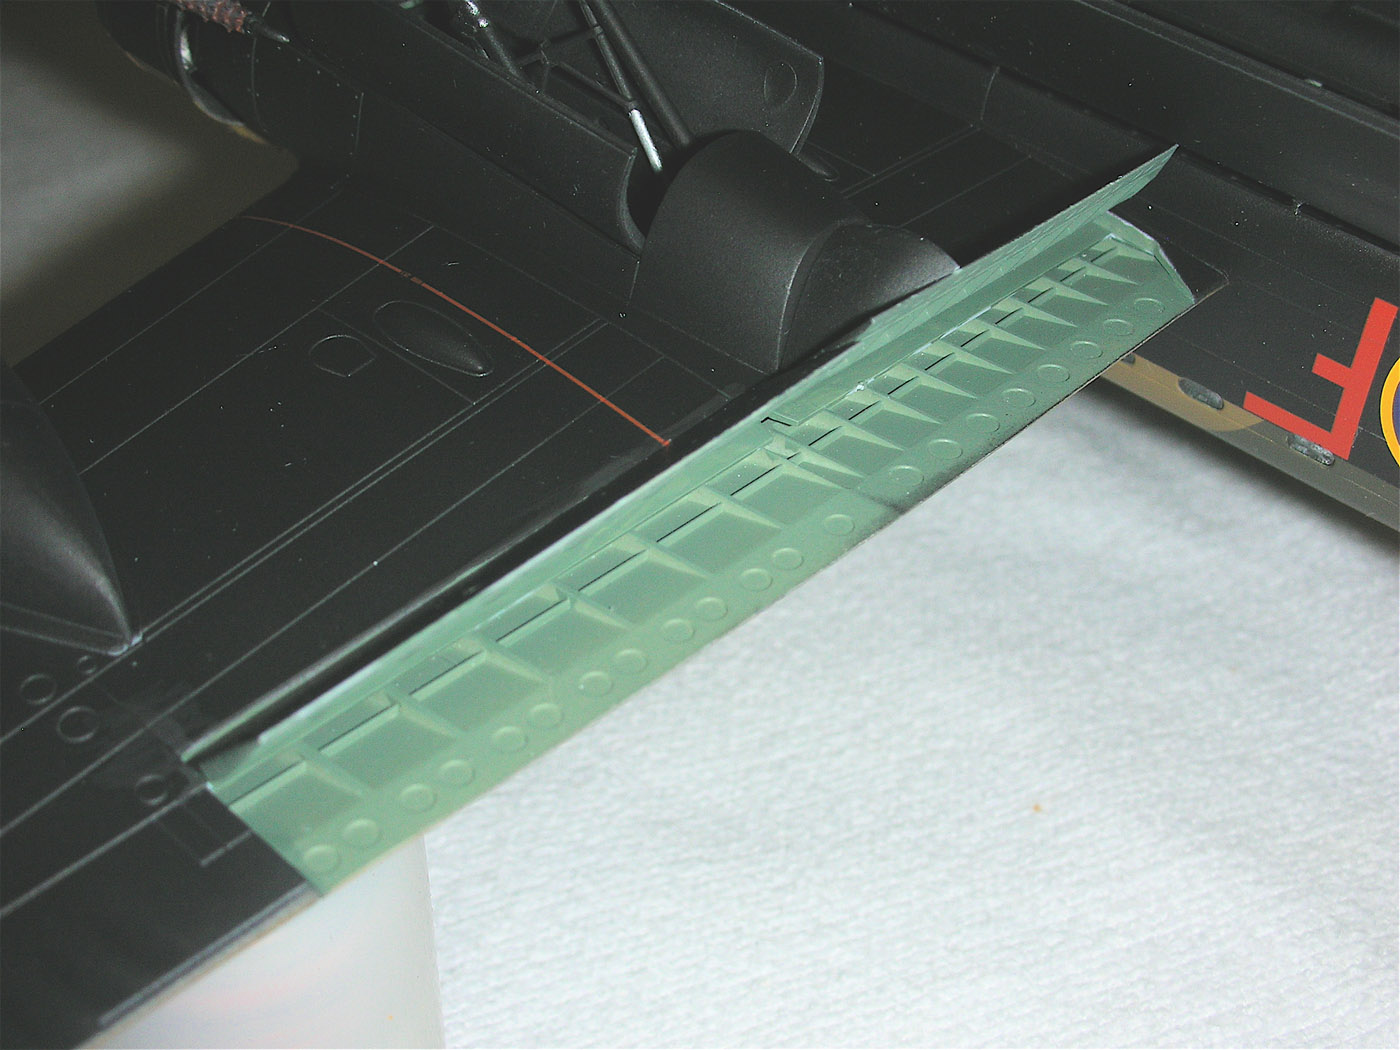
Flaps
You have a choice of up or down. The interior of the flaps and upper wing are nicely detailed, so having them open looks good. There is a separate part for the rear of the engine nacelle as it folded into the forward part when the flaps were down.
Bomb Bay
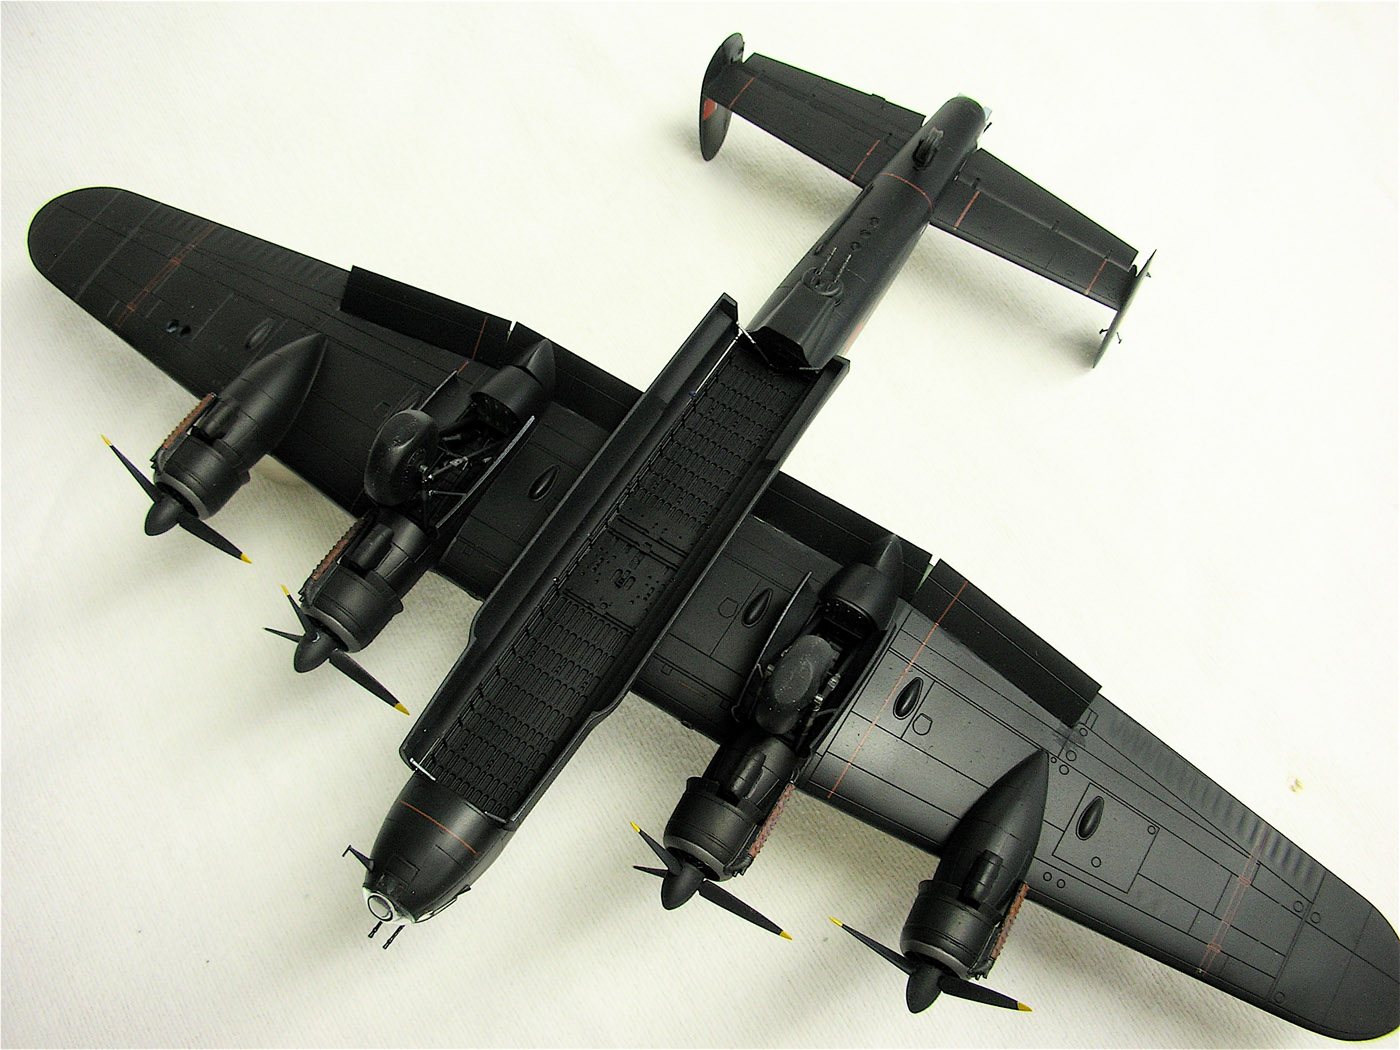
You have your choice of regular or 'bulged' bomb bay doors, depending on the aircraft you are modeling and doors posed open or closed. Unlike other kits, there are not separate parts for closed or open doors. As I did mine open, I can't speak to the fit if they are done closed. The only advanced planning needed is that if you use the bulged doors, you need to add the fairing and retainer for the ventral turret way back when you're assembling the fuselage. The bomb bay is very detailed, but can't be finished because you do not get a bomb load so you don't know what bomb shackles to put where. You can add them later, so that's not a complete tragedy, but you need to buy Airfix's Bomber Resupply set (Cat. # A05330) to arm this kite. (Hmmm, separate buy for a stand, separate buy for the armament. I sense a trend.)
Gun Turrets
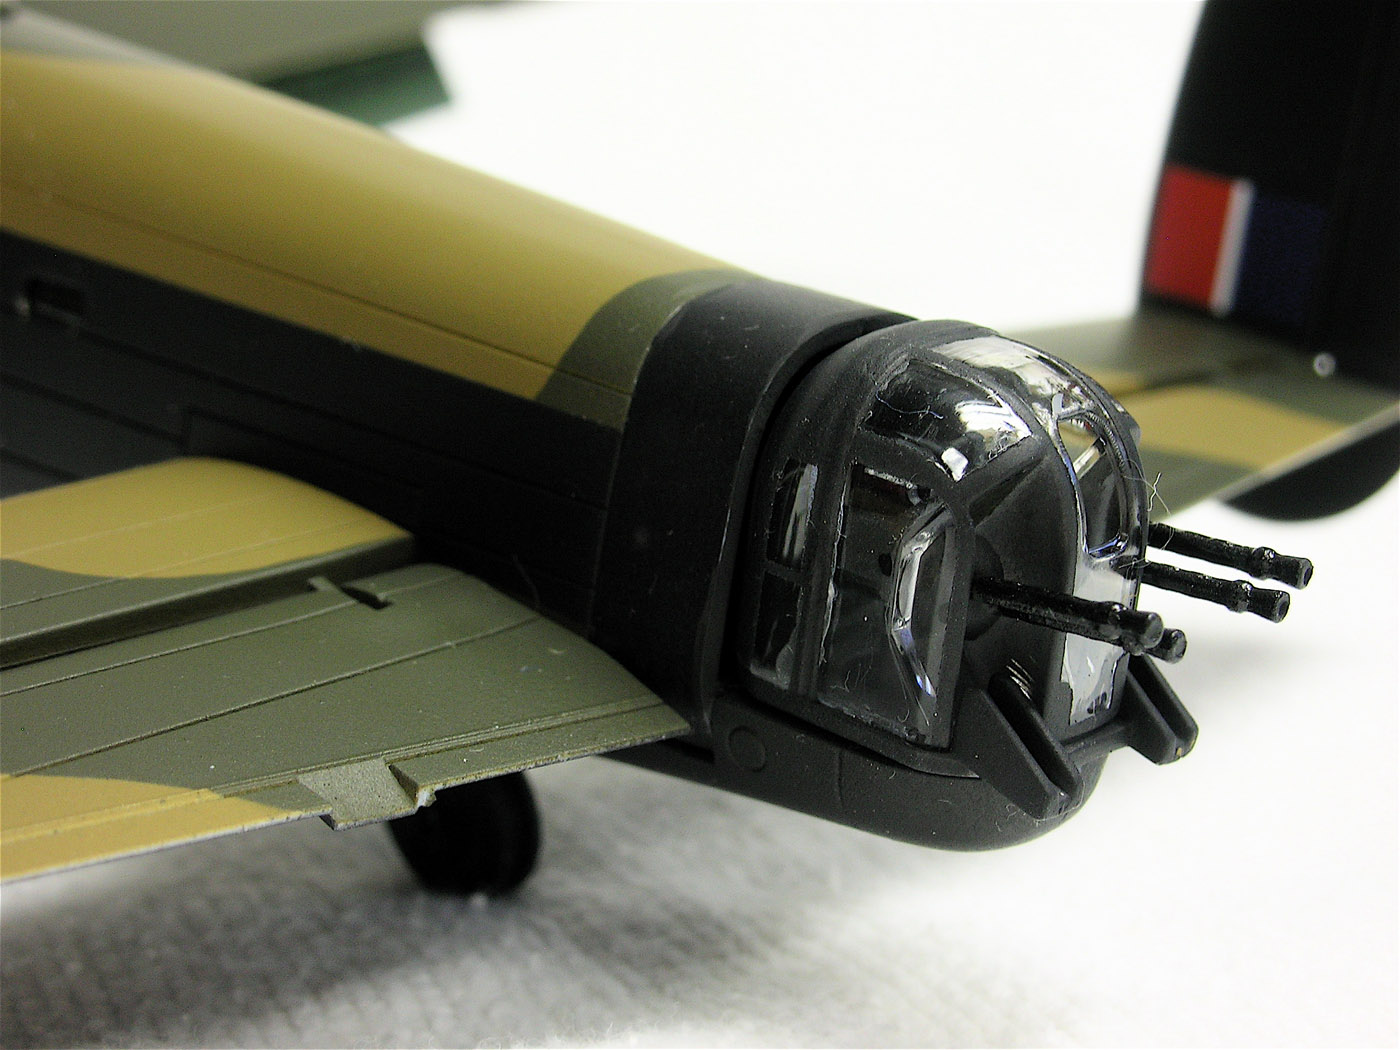
Unfortunately, the dorsal and rear turrets are split vertically, which means a seam on clear plastic, so much care is called for in assembly. In addition, the nose and rear turrets have cowlings around them that have to either be assembled literally at the same time in the case of the rear turret or after as in the nose. You can't do them in advance to ease painting; the turrets won't go in with them in place.
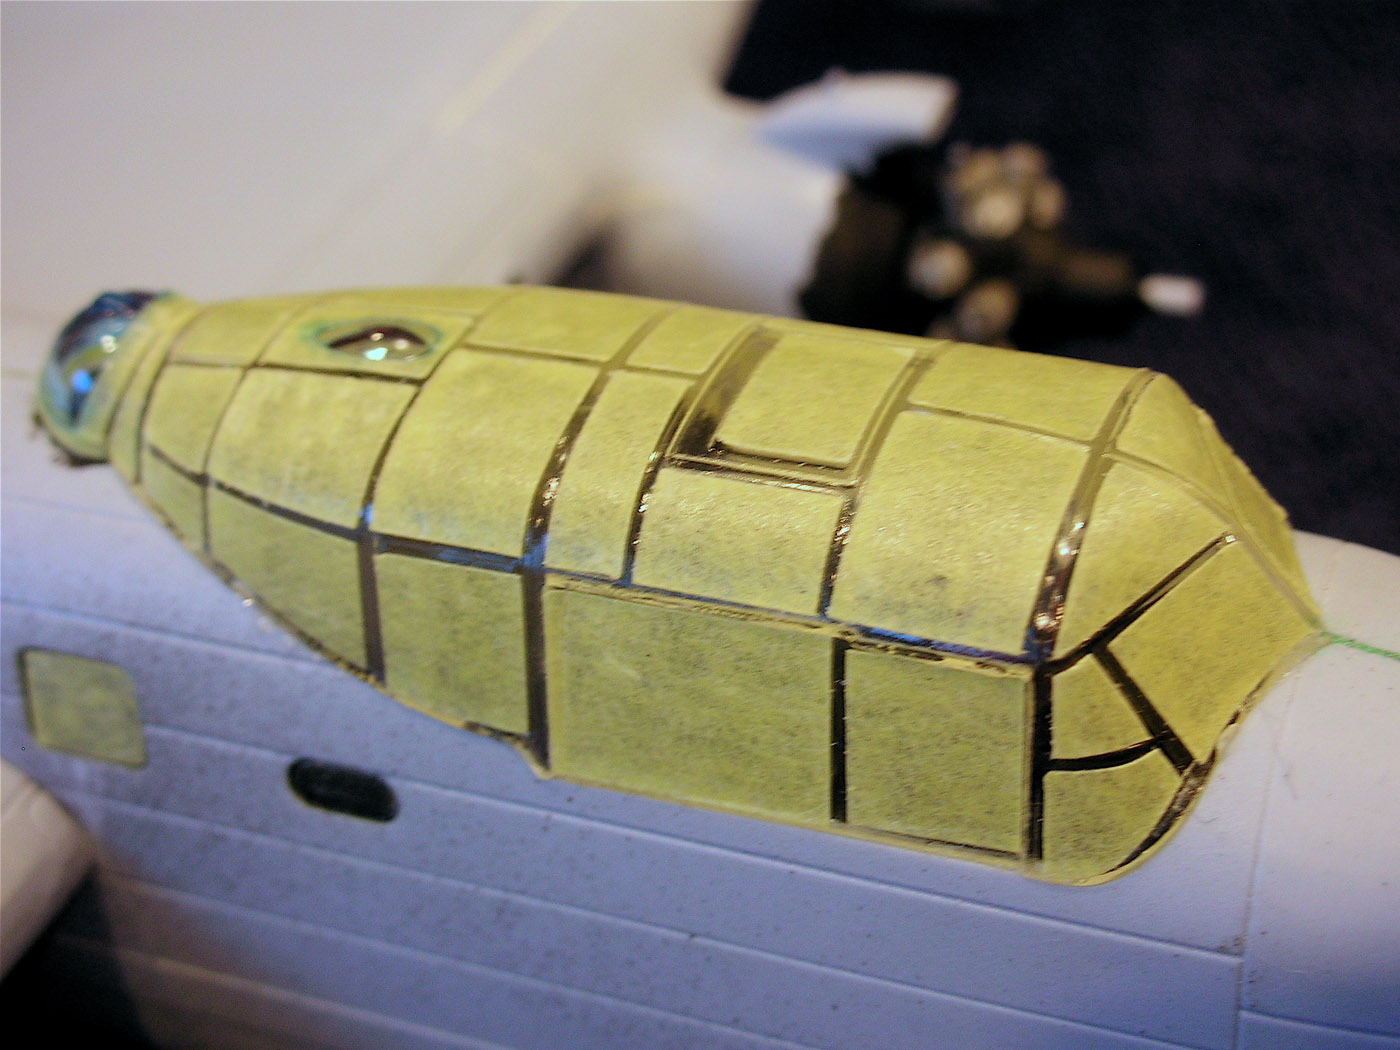
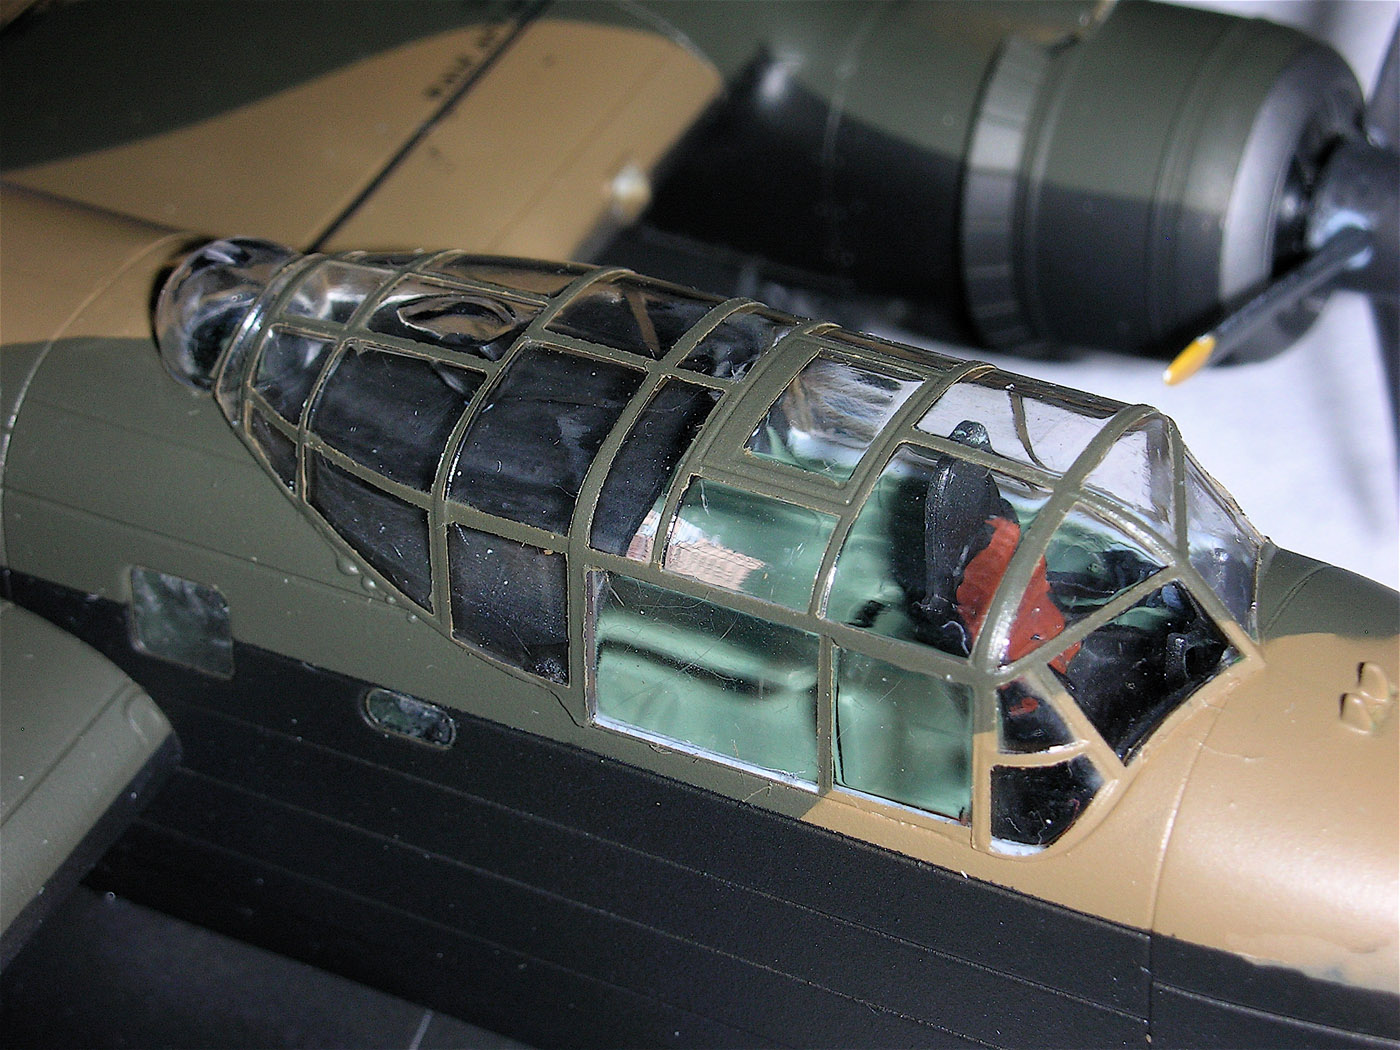
Canopy
This is a large, greenhouse type thing. The side panels are separate as you can do it with or without the teardrop bulges on the sides. However, none of the aircraft in this kit have them, so they must be used on the B.I or Dambusters release. But, again, it's clear on clear, so be careful while assembling it
Engines
The weakest parts of the kit, detail-wise, are the engines. They are not much better than ones out of old Airfix kits. This is somewhat ameliorated by the fact that they are buried under the cowlings, which are quite well done. They are left and right halves, so will need some cleaning up, but have nice cowl flap detail on them.
Decals
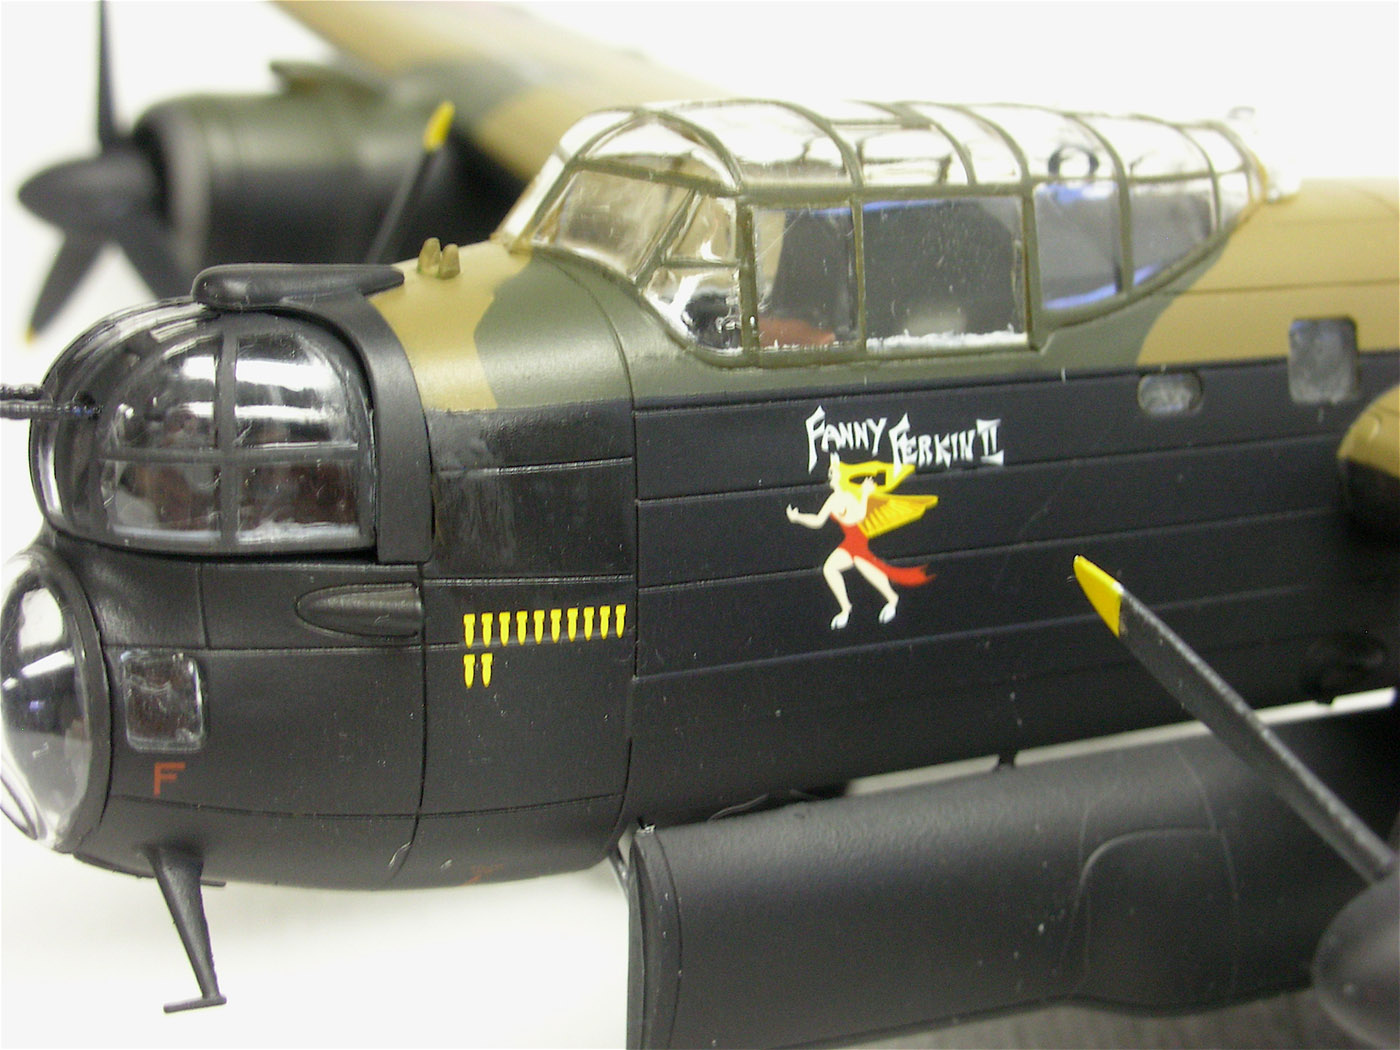
These are thin, pretty tough and responded well to setting solutions. Care is needed, however, with all the lines on the wings as the raised panel lines can cause silvering if you don't get them to snuggle down completely. Location of some can be a bit dicey as the full color guide makes it difficult to see panel lines to use as guides.
Painting
This is a big plane in 1/72 scale and you use a lot of black paint. In around all the nooks and crannies, it took me a full hour to lay it all down. The full color guldes are excellent. One tiny nit is that they show a circular clear part just behind the bombers nose position on the bottom. This would be the seachlight that was installed in front of the bomb bay to focus with one at the rear at 60 feet altitude. This was for the Dambusters type 464 Lancasters and would not have appeared on the Mk IIs. On the kit part, it’s a raised circular panel line, so can just be painted over. One major suggestion here is to get Eduard's flexible masks for this kit (product code CX372). They make masking all the turrets, cockpit greenhouse and all those little windows on the sides so much easier. Heck, in my case, possible. I would not have been able to do it without them. They are well worth the money.
Summary
This is an excellently engineered kit that fits very well. However, it is a big kit and has many parts that need to go in "just so". It's not a kit for beginners, but the normal IPMS member shouldn't have any problem with it. It builds up into an impressive representation of the real thing and in the hands of a really good aircraft modeler (Which I'm not. As evidence, you'll see schmutzes, decal wrinkles, etc. in the photos. Those are operator error, not the fault of the kit.), it could be spectacular.
Many thanks to IPMS/USA and Airfix American for providing me the opportunity to build and review this kit.
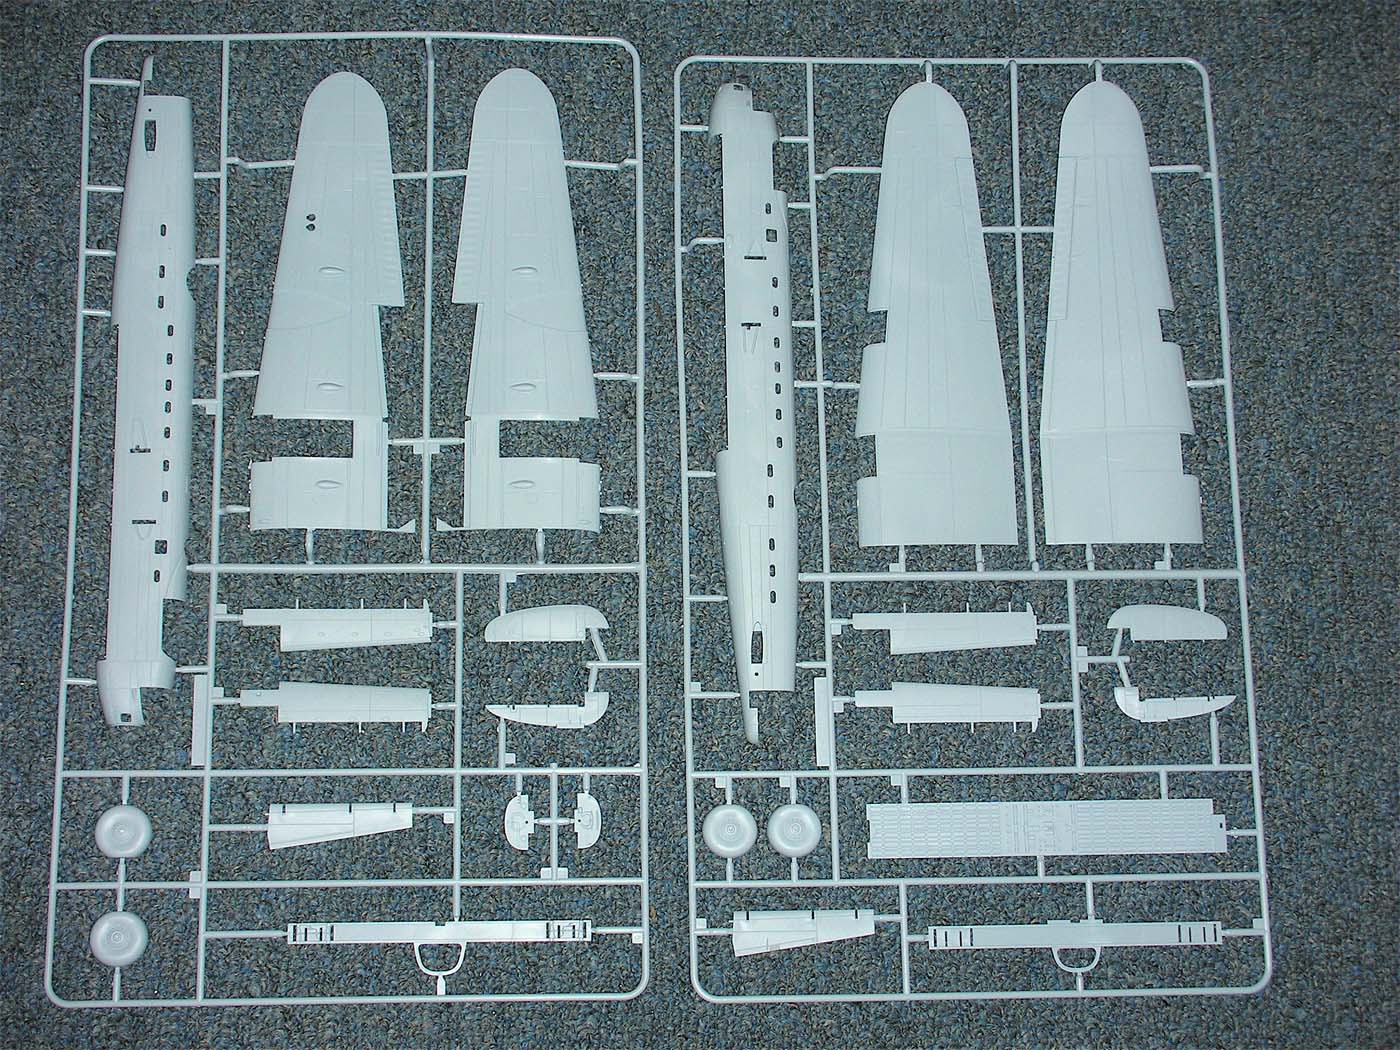
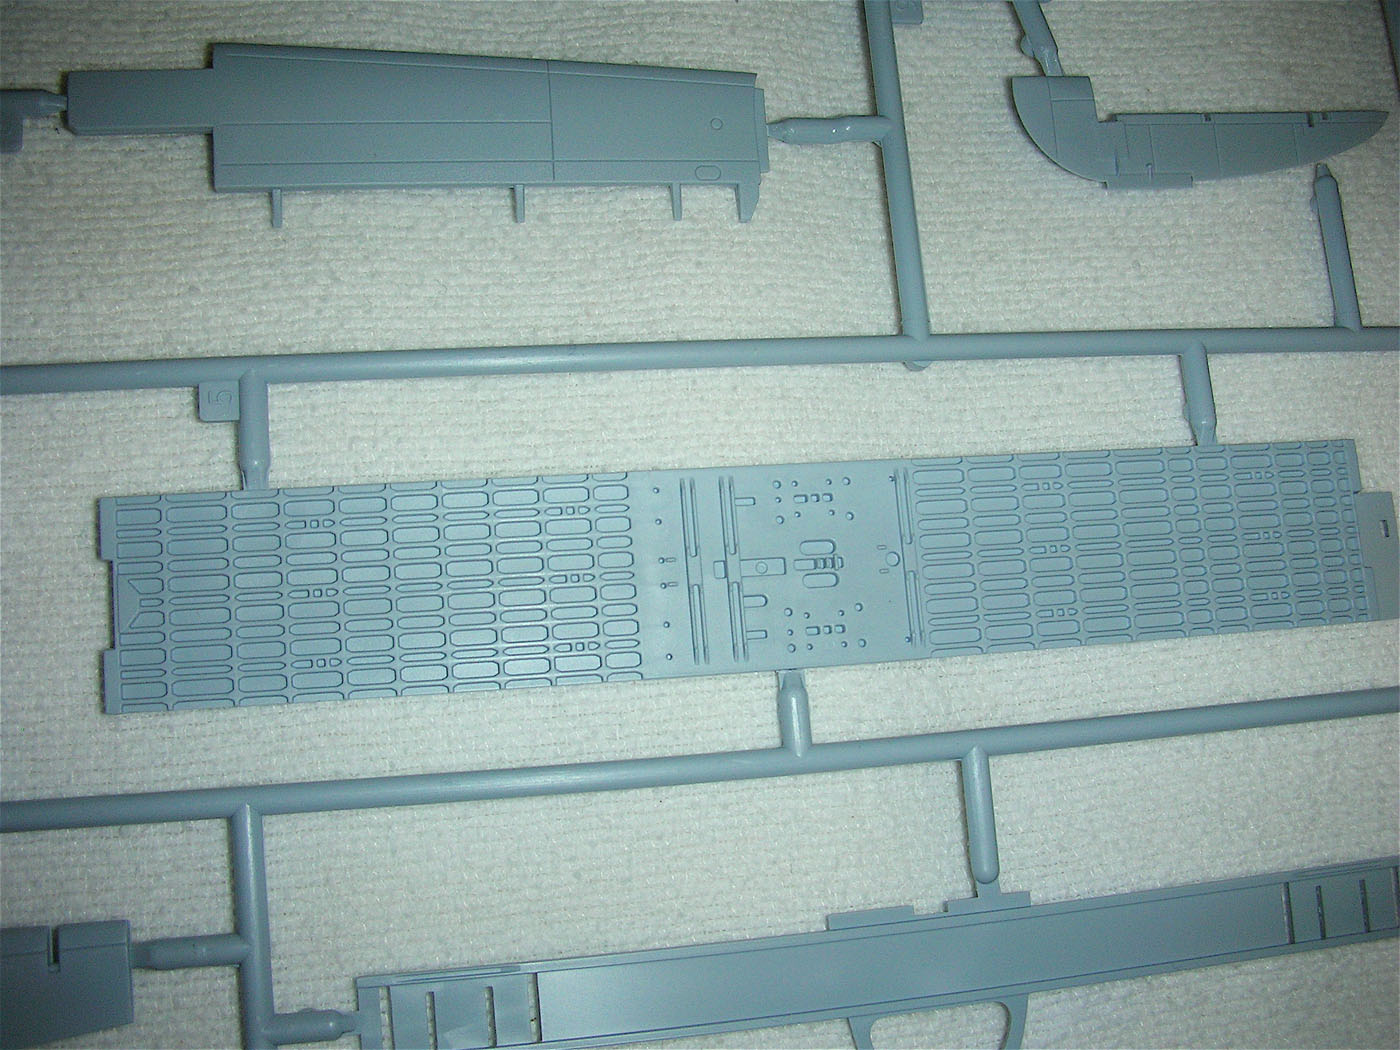
Sprues
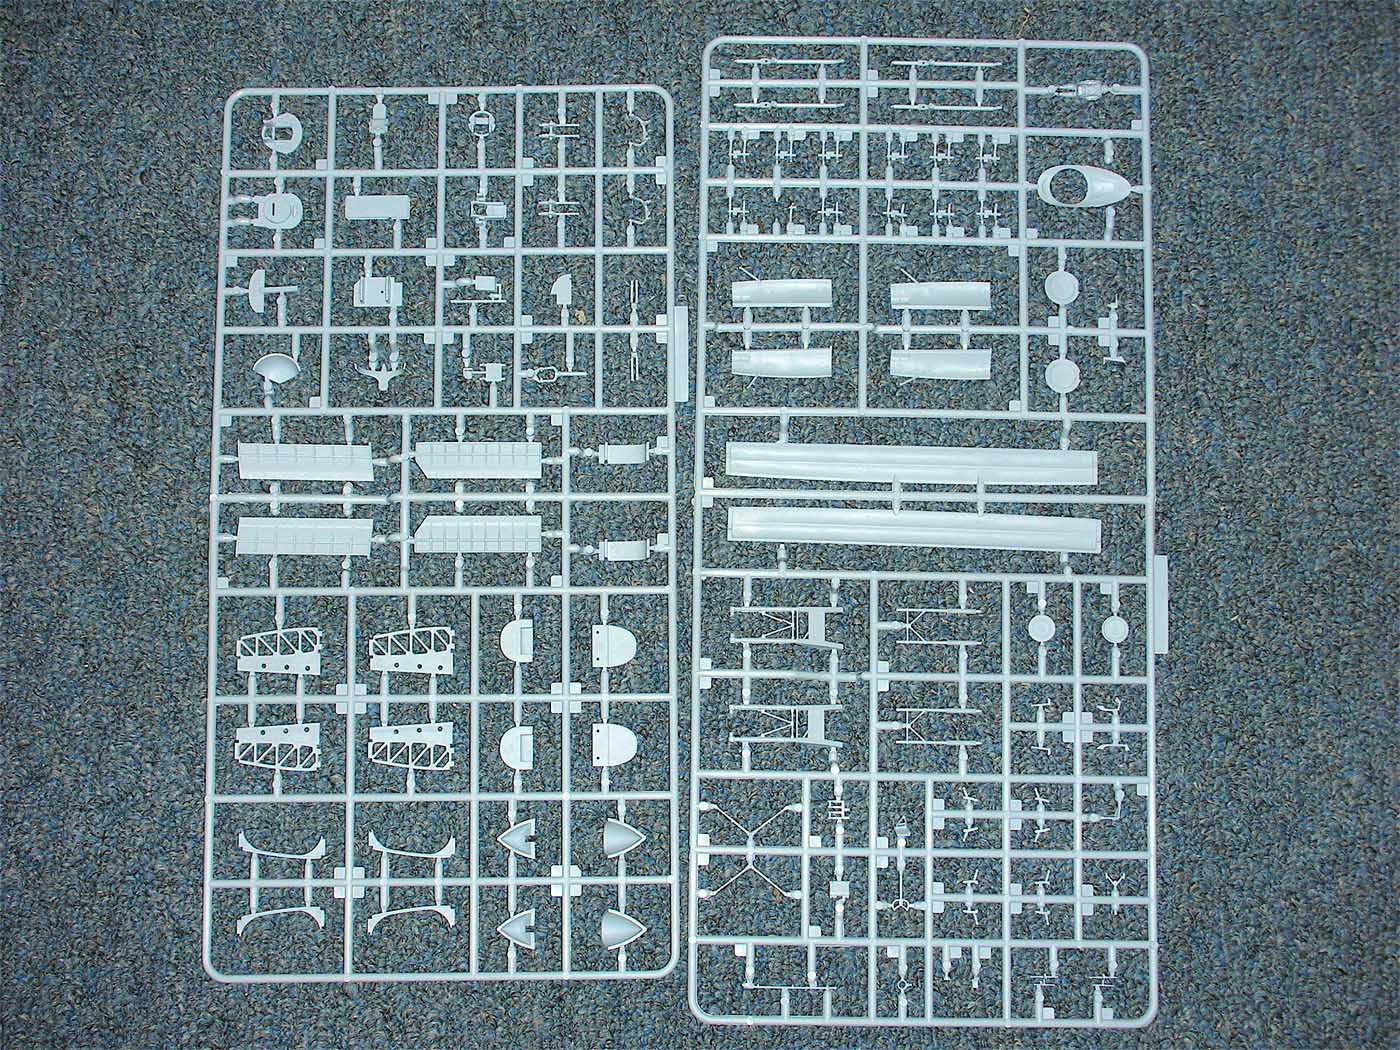
Sprues
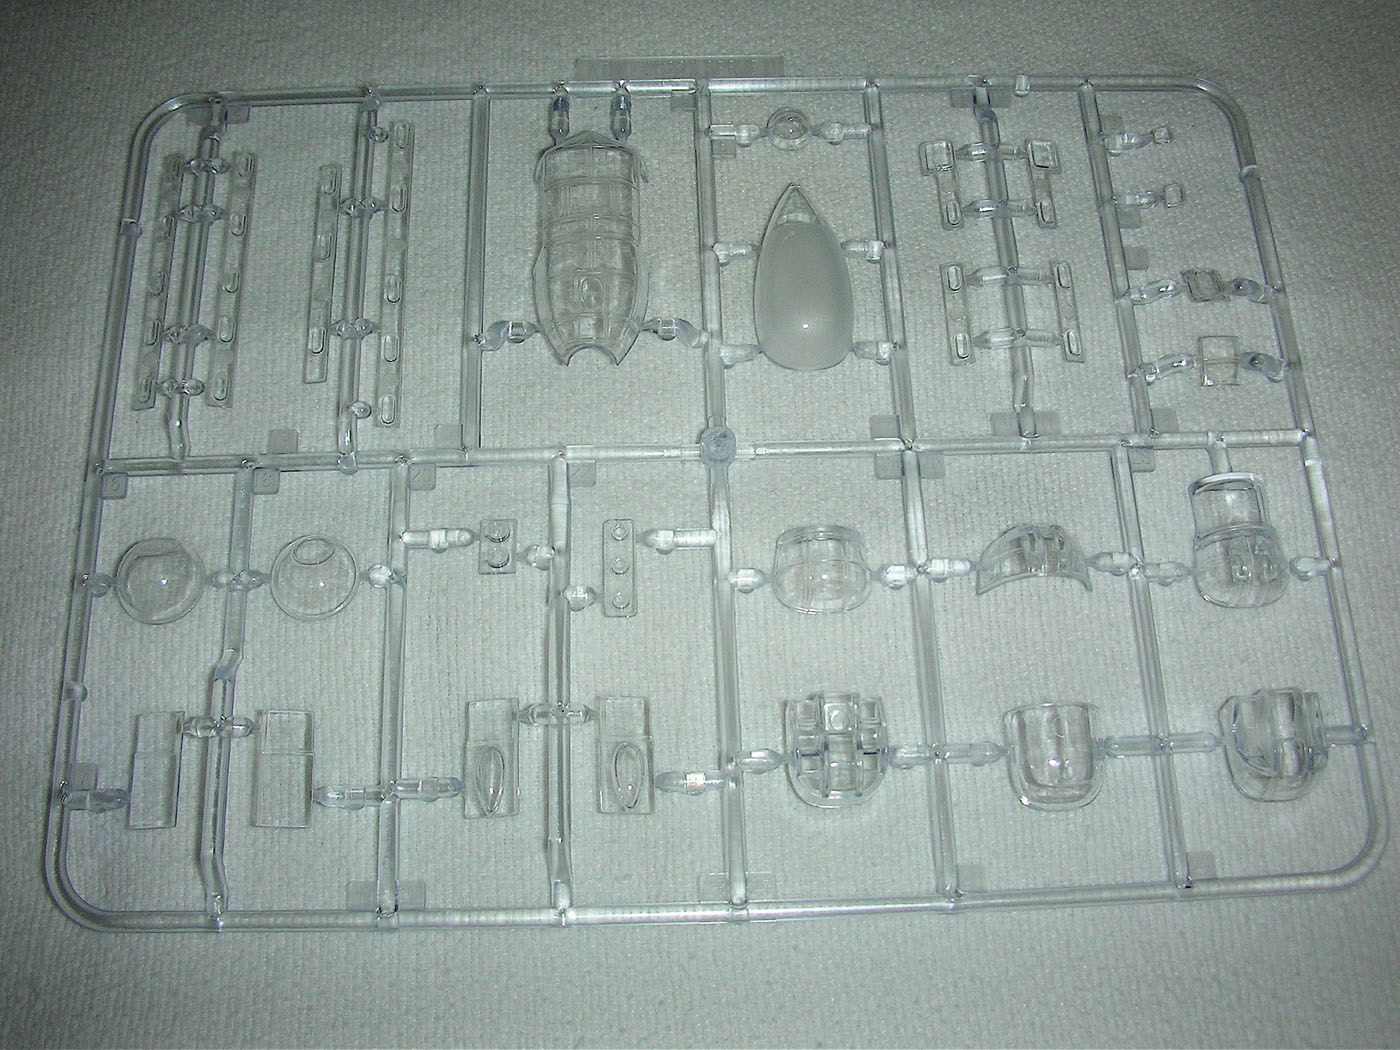
Clear sprue
Interior detail
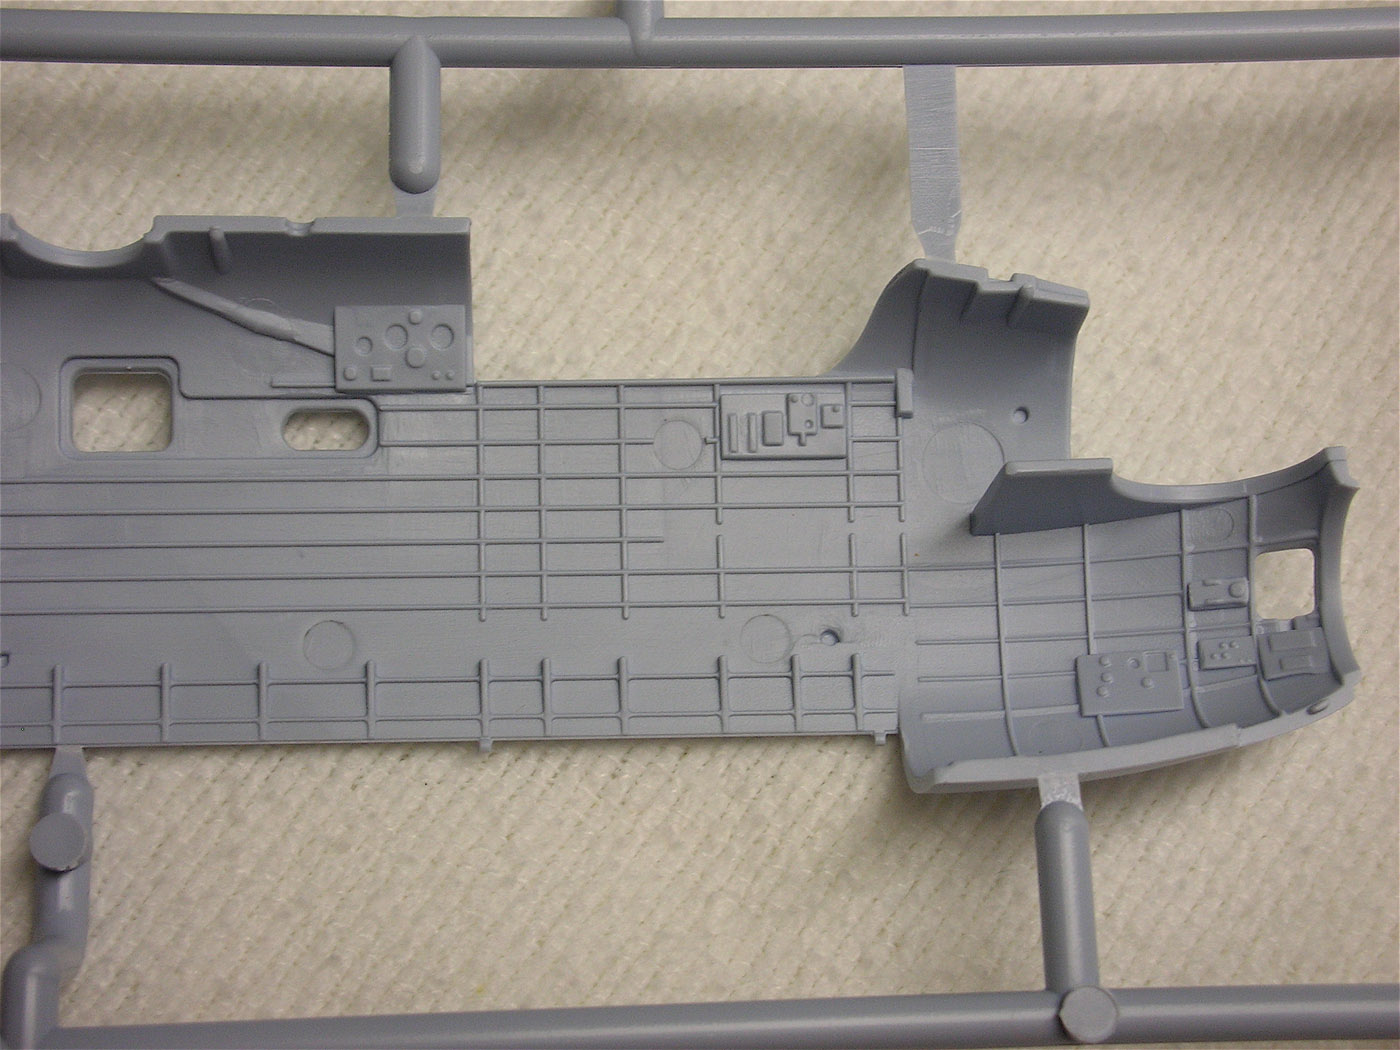
Interior detail

Wing detail
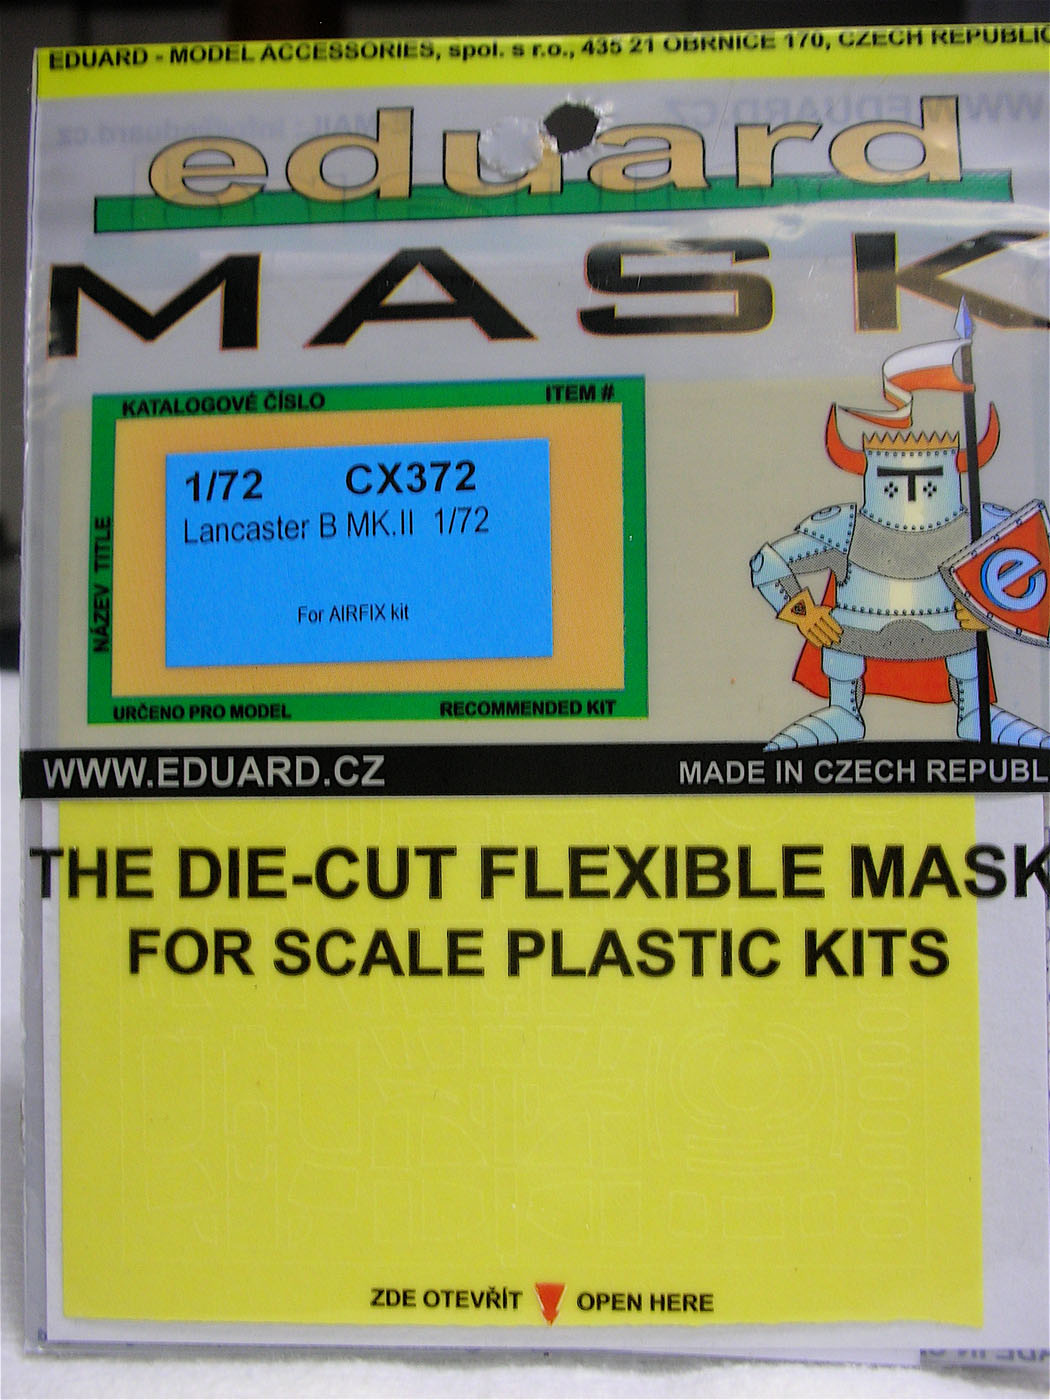
Eduard mask used
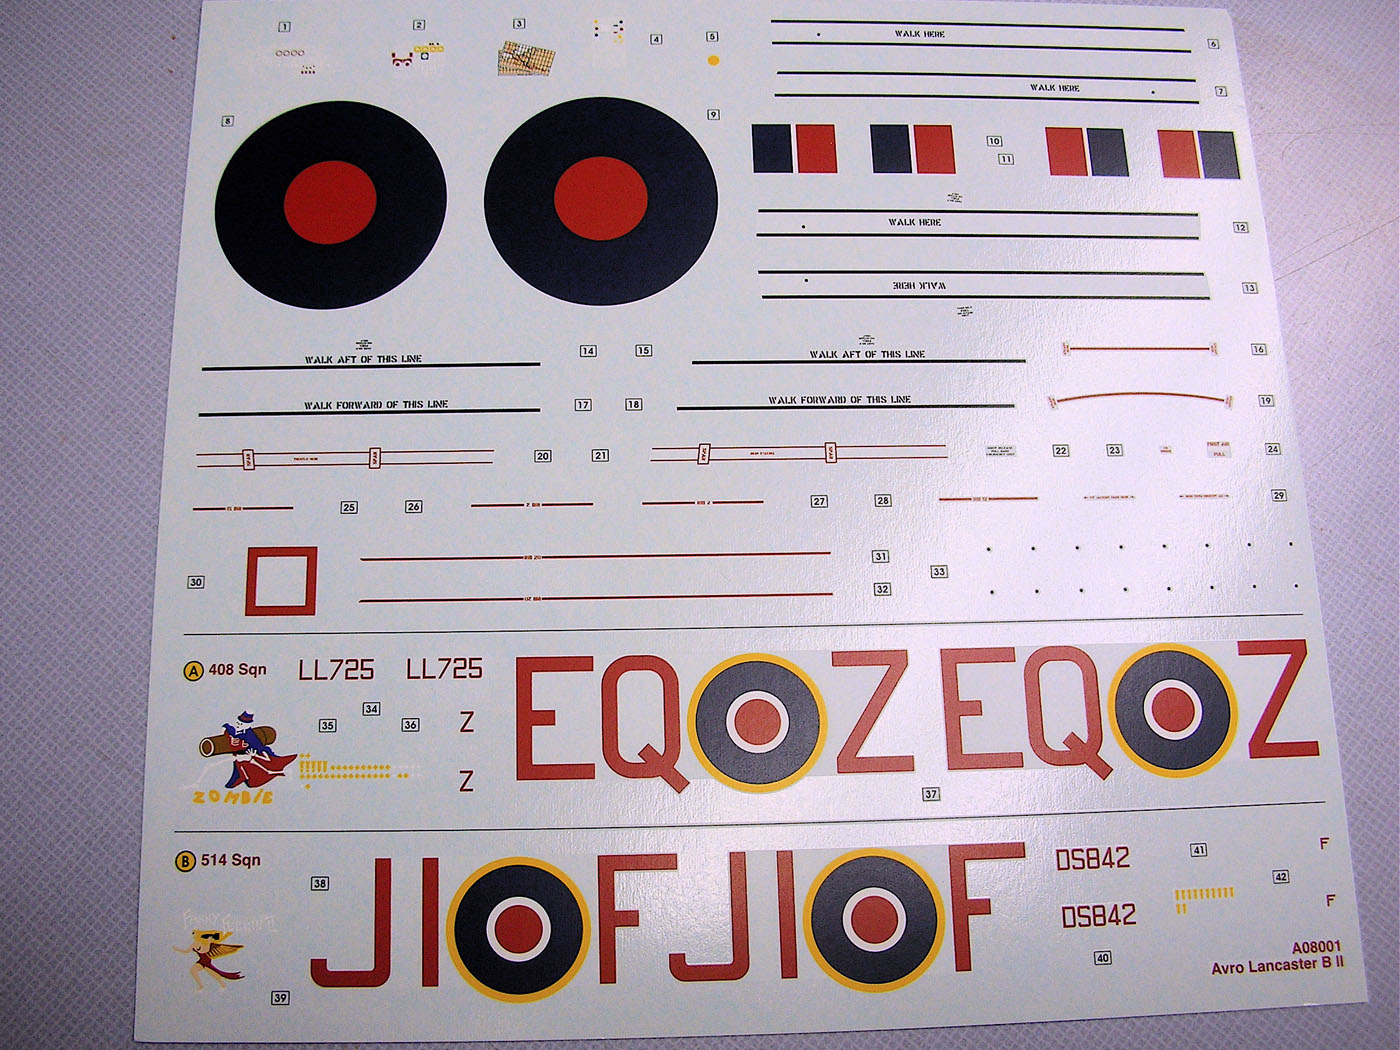
Decals
Painting guide
Instructions
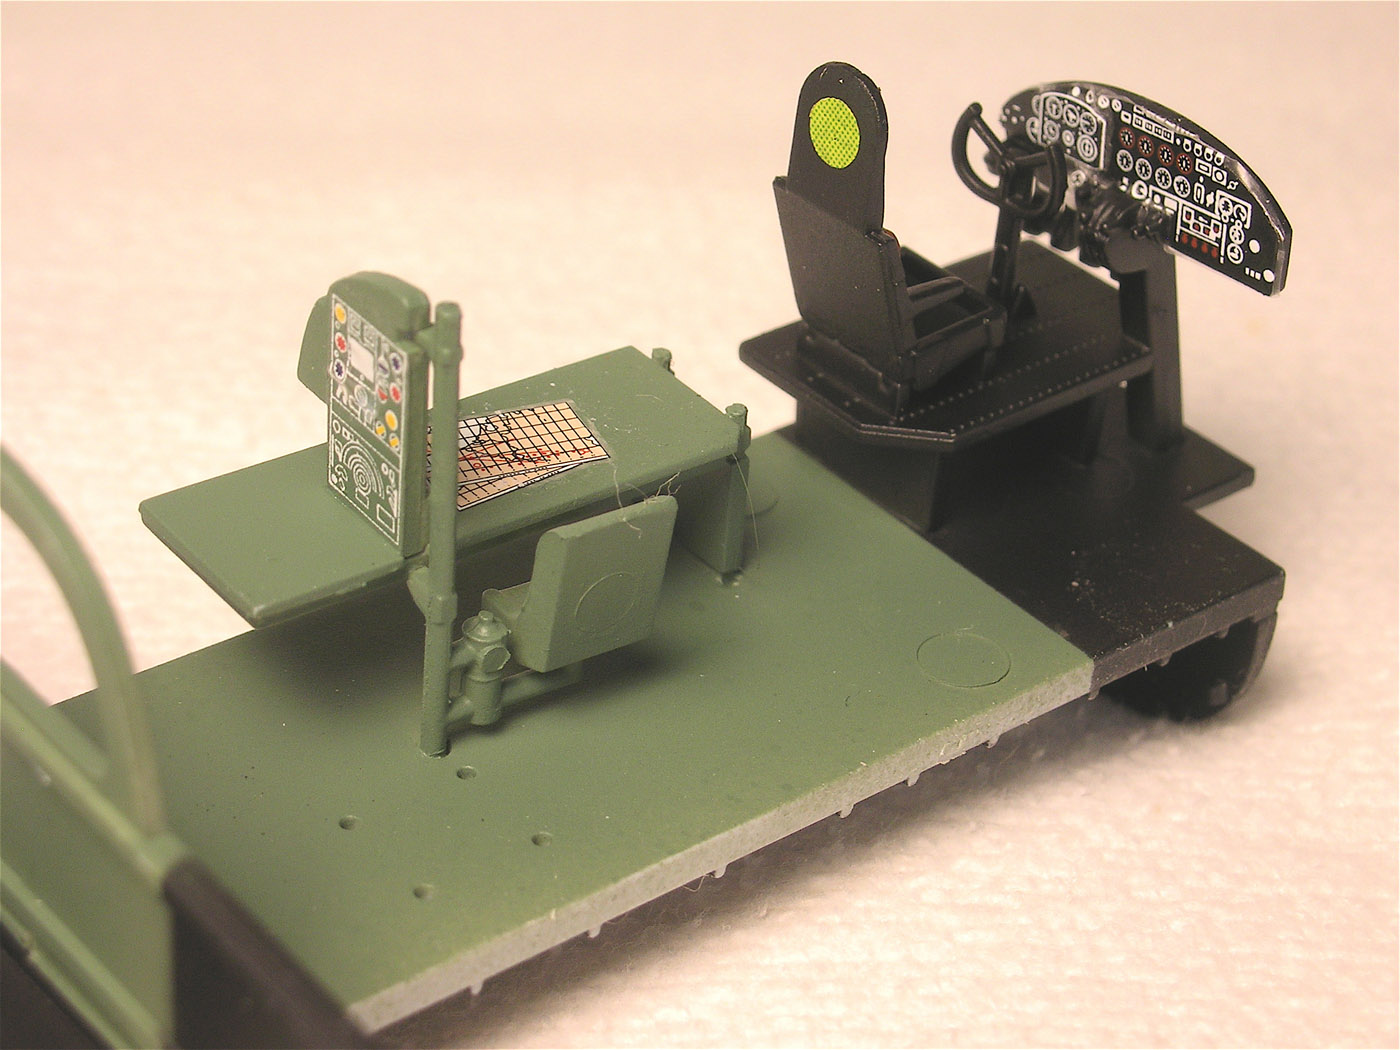
Pilots office
Crew compartment
Crew compartment
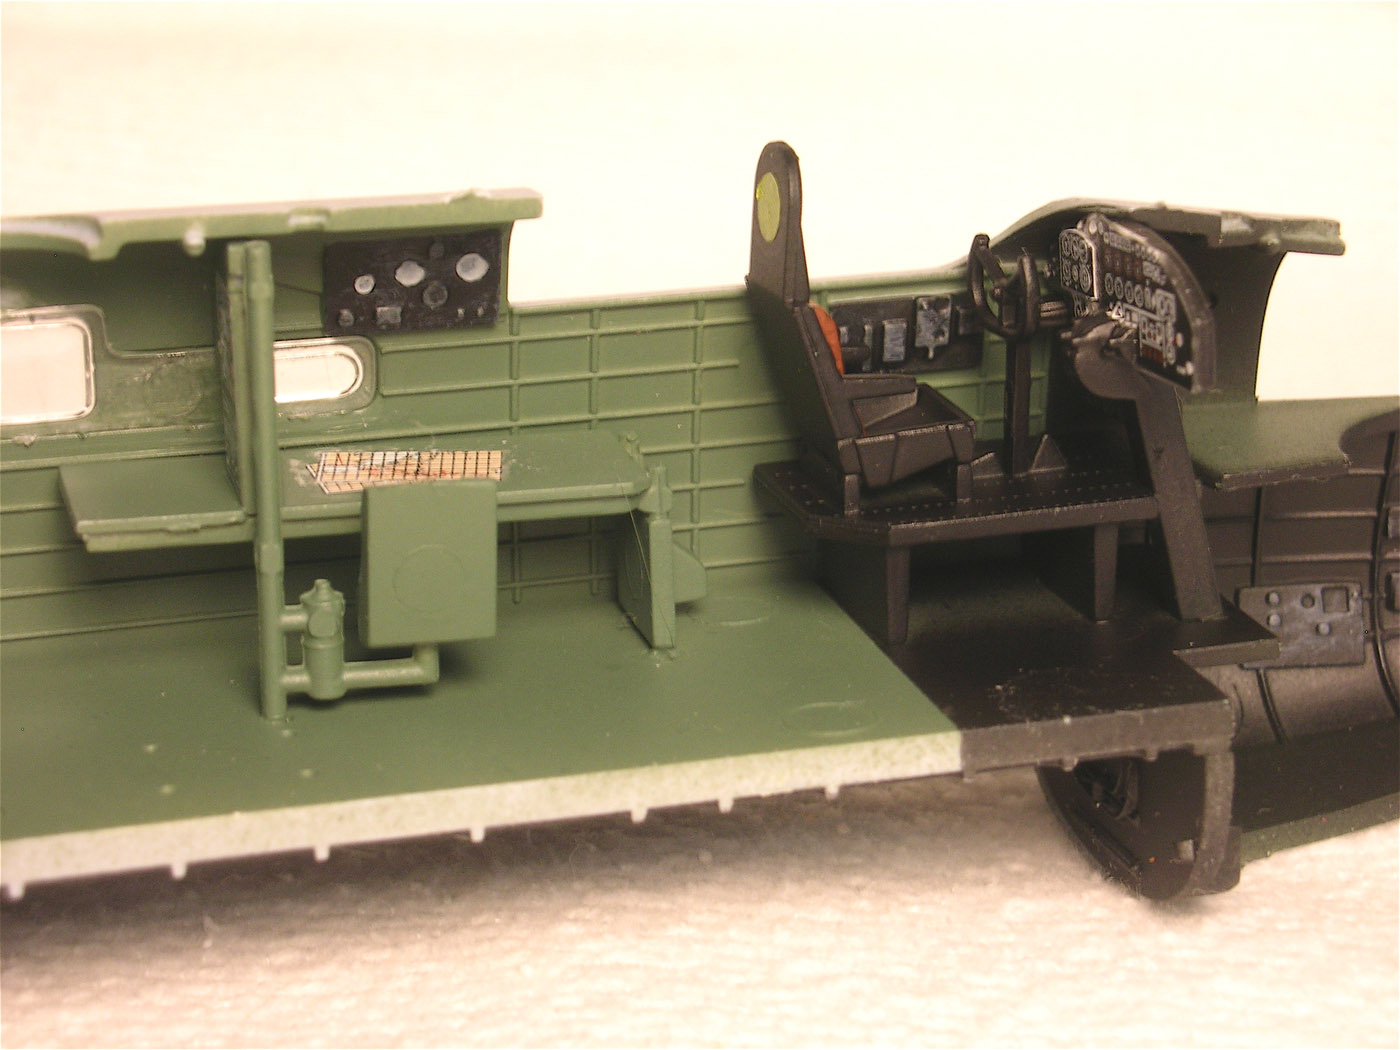
Crew compartment

Gun turrets
Masked canopy
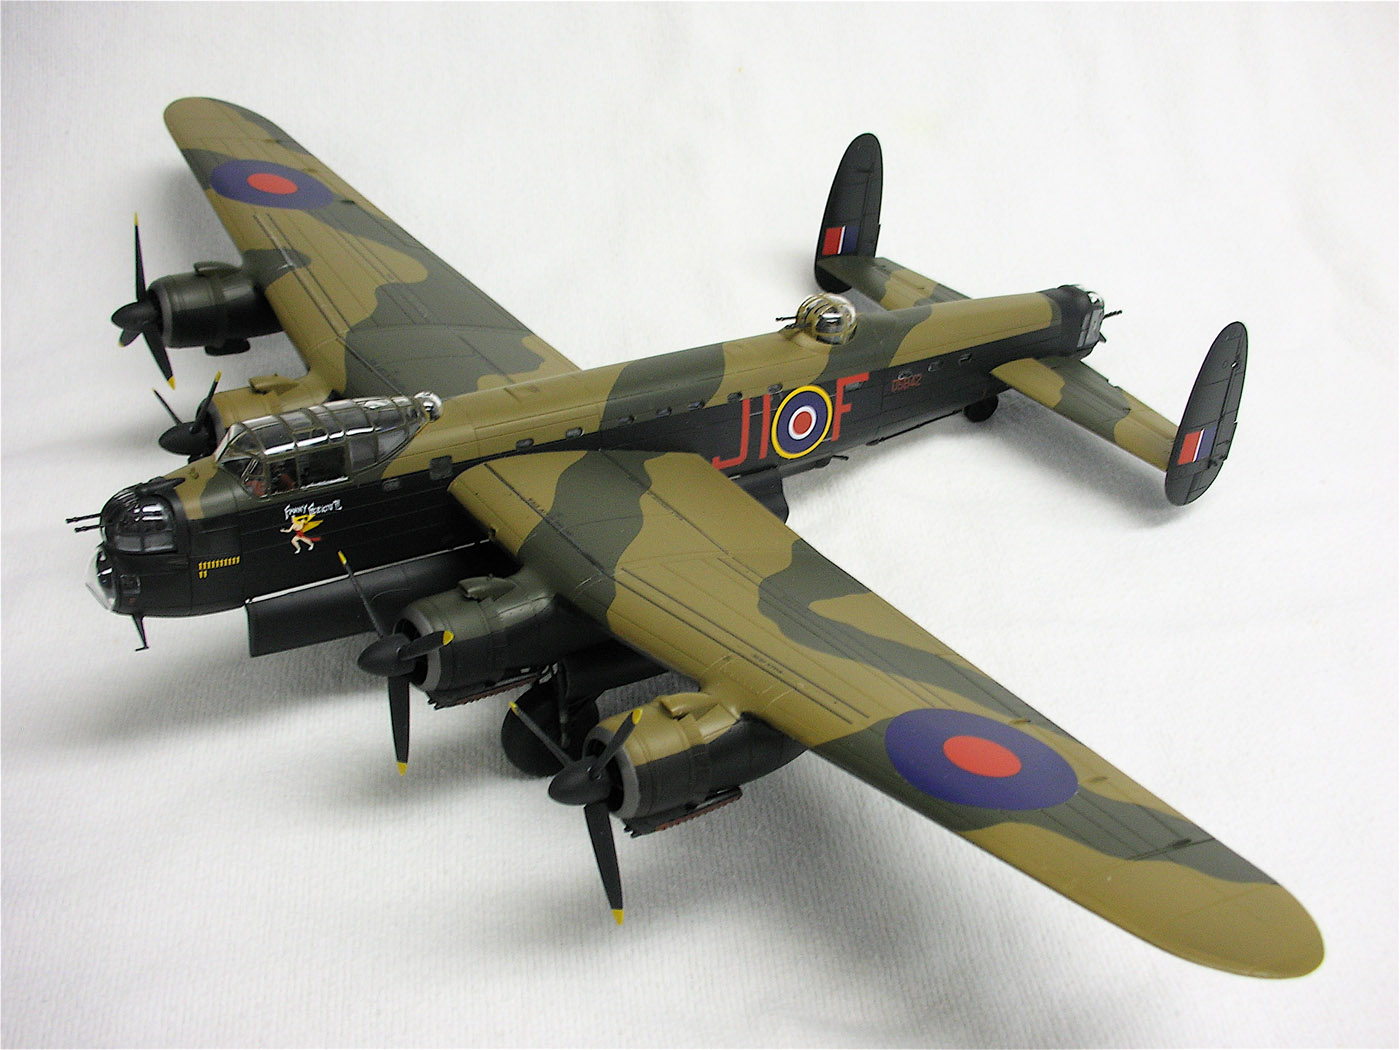
Finished model
Closeup
Tail

A/C codes
Bottom
Wheel wells
Bomb bay
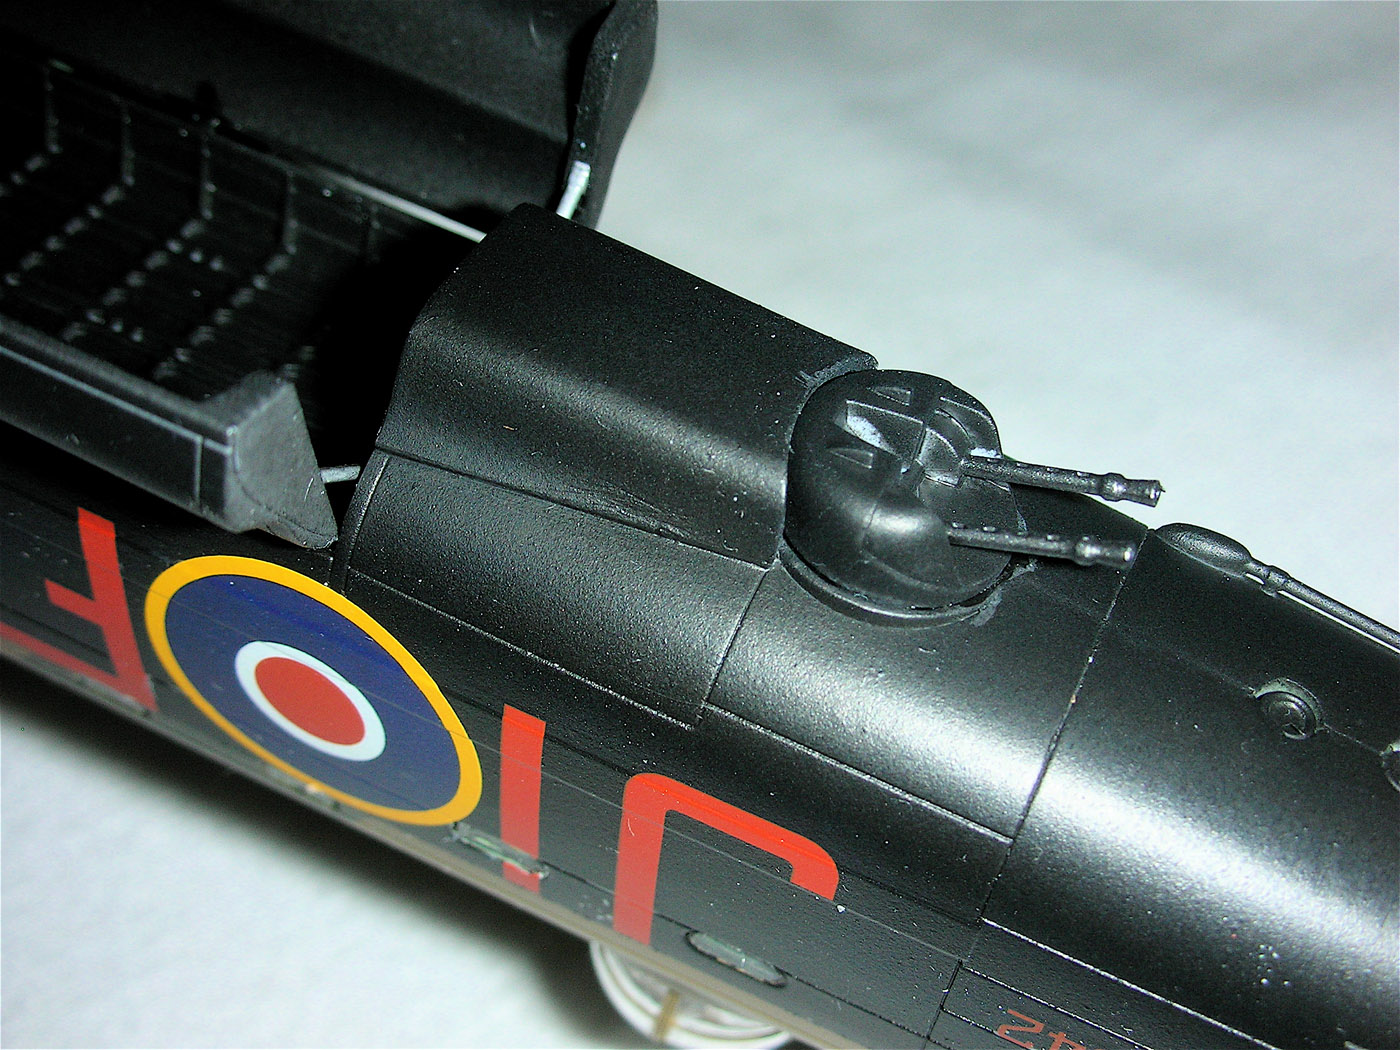
Turret
Flaps
Comments
Add new comment
This site is protected by reCAPTCHA and the Google Privacy Policy and Terms of Service apply.
Similar Reviews