
AMX Ghibli
Though it has flown operationally in Bosnia, Afghanistan, and Libya, the AMX Ghilbi has been overshadowed by its larger counterparts: the SEPECAT Jaguar, the F-15E Eagle, and the Panavia Tornado GR.4. In the early 1980’s, Aeritalia, Aermacchi, and EMBRAER of Brazil collaborated to design and produce a light attack aircraft to meet requirements for the Italian Air Force (AMI) and the Brazilian Air Force (FAB). Planners called for 187 planes for Italy and 65 for Brazil. These numbers were later augmented by 51 Italian and 14 Brazilian two-seaters. These are the only two countries using the Ghibli for attack and reconnaissance missions, so its numbers are modest.
Modeling companies haven’t helped its obscurity and I believe this is the first 1/72 injection molded kit of this aircraft. I’ve not built a “new-release” Italeri kit since 2014 when I finished their 1/72 SAAB Gripen. In the intervening years, Italeri has evidently made great strides in detailing and engineering. The Ghilbi features exquisite surface detail with crisp panel lines and indented rivets. It’s among the very best I’ve seen on any model lately.
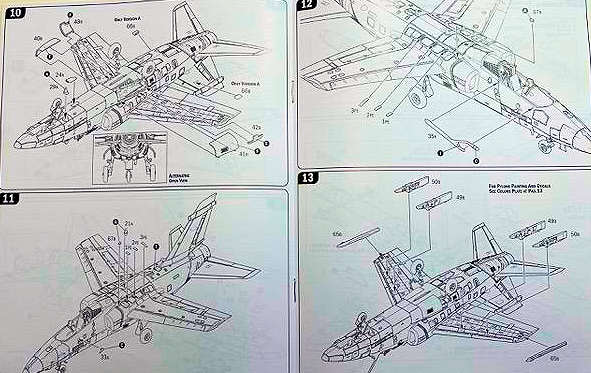
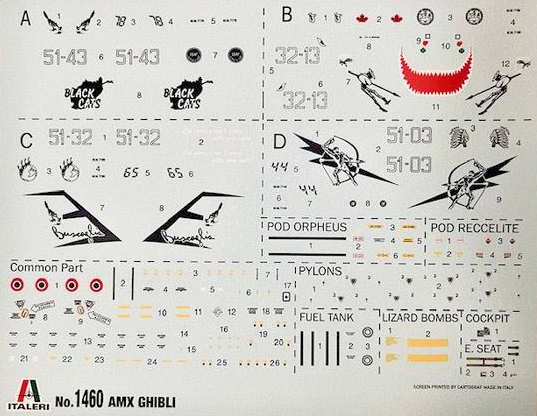
The kit has two runners of parts molded in dark gray plastic, one runner of clear parts, one photo-etched fret, and decals depicting four Italian Air Force aircraft. A sixteen page instruction booklet with eighteen steps of “exploded view” diagrams also includes four pages for painting and decal placement.
Assembly is straightforward and the instructions are relatively easy to follow. Except for leaving off the landing gear until way later in the build, I followed the sequence as shown. The cockpit looks especially convincing with raised detail and decals. I did, however, run into a couple of issues which I will explain later. Italeri provides several external stores to choose from: drop tanks, Sidewinder missiles, GBU-16 laser guided bombs, and two separate recce and targeting pods. All are executed with the same fine detail as the rest of the kit. The clear parts are blemish free and you can display the canopy in the open or closed position. Six P/E pieces simulate the strengthening plates along the spine of the aircraft. You’ll have to bend the rear most pair to match the curve of the fuselage.
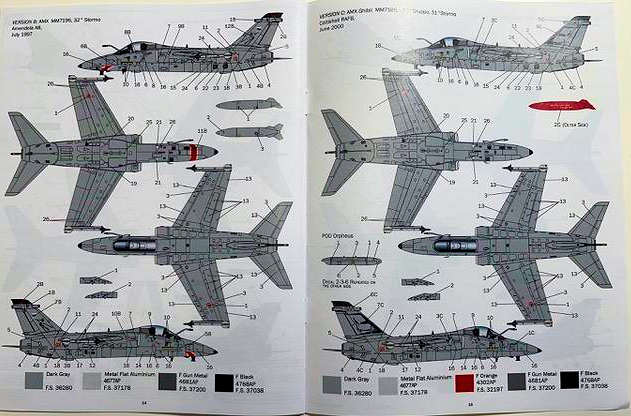
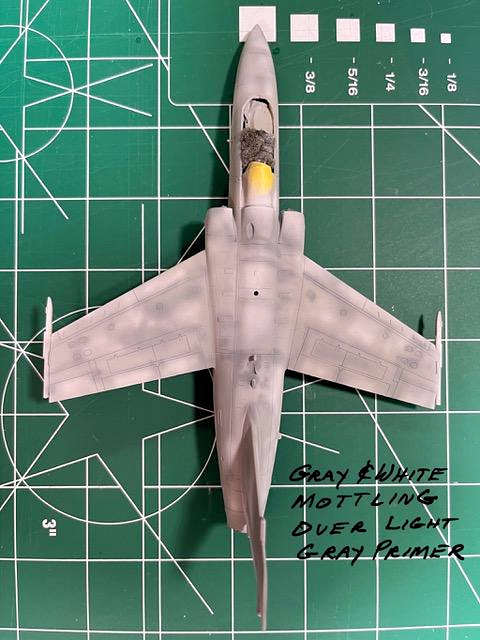
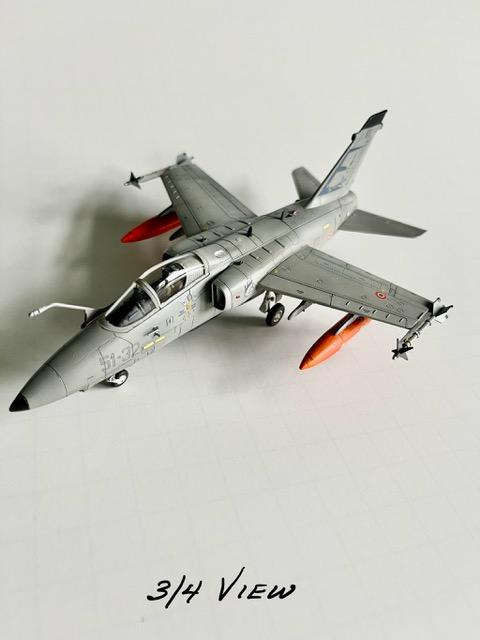
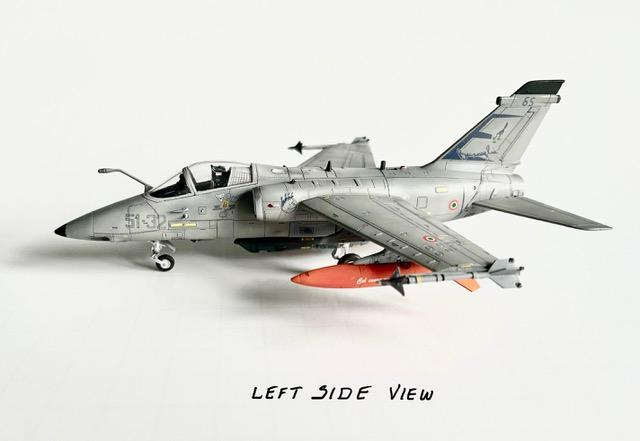
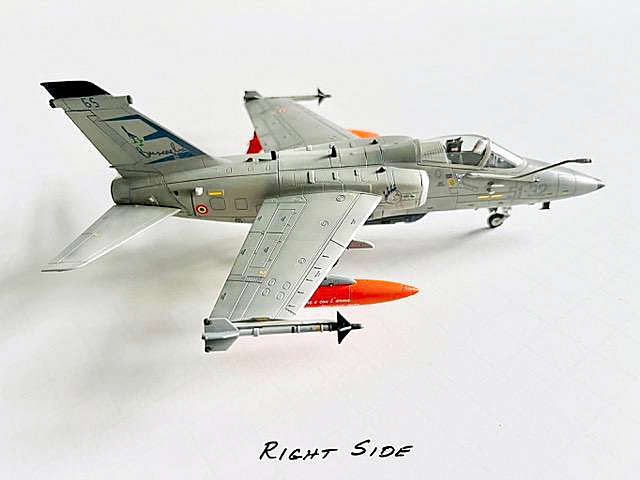
All marking options are for the basic gray camouflage scheme. Paint suggestions are listed for Italeri’s acrylics and US FS numbers. I don’t have any paints in my collection to match the overall color, FS 36280, but I felt Tamiya XF-19 Sky Gray was close. I applied several light coats of XF-19 over the Alclad Grey Primer and white/dark gray mottling. After spraying a layer of Tamiya’s X-22 Clear, I added the decals for the version that sported orange drop tanks to add color and visual interest. The decals themselves worked well, settled nicely into the surface detail and had no silvering except around some smaller stencils. There are lots of stencils and other detailing decals. Finally, I sprayed everything with Ammo’s Satin Lucky Varnish and added the windscreen and canopy.
So what about those “issues?” As I usually do, I did an early “dry fit” of the major components and all was good. Before you close the fuselage halves, you must add the following sub-assemblies: cockpit, nose wheel well, interior intakes to the compressor bulkhead, the main gear wheel well, and the exhaust. Having done this, I glued the halves and set the model aside to cure overnight. To my chagrin, the primer coat exposed a slight lip along the top and bottom of the fuselage. This was probably my fault - I think one of the sub-assemblies forced the two edges out to alignment. I had to scrape and sand these seams to get them flush. Surface detail was lost along the way. Therefore, I would suggest building the sub-assemblies and adding them one at a time to a fuselage half and dry fitting with the other fuselage half before adding another interior sub-assembly. You should be able to sand any offending bulkheads if there is an alignment problem.
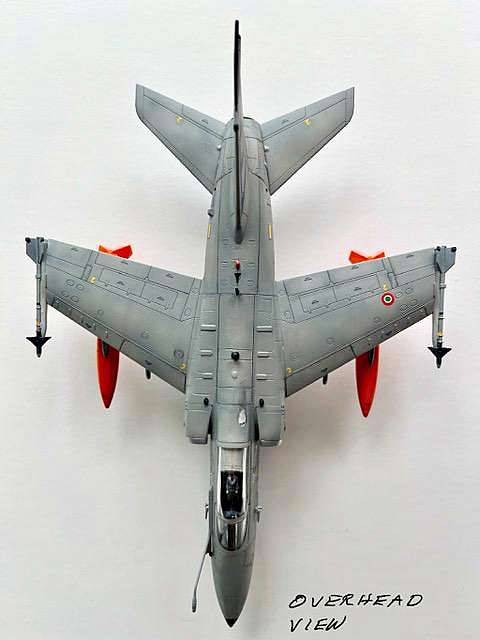
As on the actual plane, the wings have a slight anhedral. The kit has this feature, but the wings fit loosely into the fuselage slots. Care is needed to make sure the wings droop symmetrically while the glue dries.
One more observation: I did not install the landing gear until late in the build which ultimately caused some headaches. The main gear strut and retraction arm are tricky to align properly when the wheel well is encased in the fuselage. It appears easier to add these struts while building the sub-assembly as directed. The nose gear was not a problem and can be added later.
That’s it. Overall, this is a terrific kit of an interesting airplane. Despite my “issues,” I enjoyed the build and am very pleased with the way it turned out. Italeri has produced a really nice gem of a kit. While the number of small parts might not make it suitable for a beginner, I can highly recommend the Ghilbi to any other modelers. I hope Italeri will release the Brazilian AF version and/or the two-seater as I would purchase those also.
My thanks go to MRC for providing this newly released kit and to IPMS for the opportunity to review it.


Comments
Oops!
Evidently, in my haste to get this review complete, I didn’t do a thorough job editing and made an error - in the first sentence no less! I apologize to all of you. The first sentence should read: “Though it has flown operationally in Bosnia, …”
Fixed.
Fixed.
Add new comment
This site is protected by reCAPTCHA and the Google Privacy Policy and Terms of Service apply.
Similar Reviews