
Admiral Saloon German Staff Car
History
The passenger car was built for comfort, with a powerful engine. Admiral was the top of Opel pre-war model range. Between February 1938 and October 1939, 6404 cars were produced. During World War II, most cars were requisitioned by the Wehrmacht and Luftwaffe and used by their senior officers.
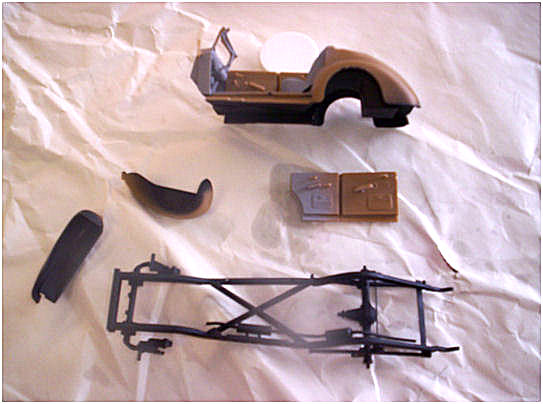
Items in the Box
The model is made from injection molded plastic, light brown in color. The plans are well presented in book format, printed both sides. Provided are clear molded plastic sheets for windows, both for a hard top or convertible configuration; also, parking and head light lens are supplied. A small decal sheet is also included.
Construction
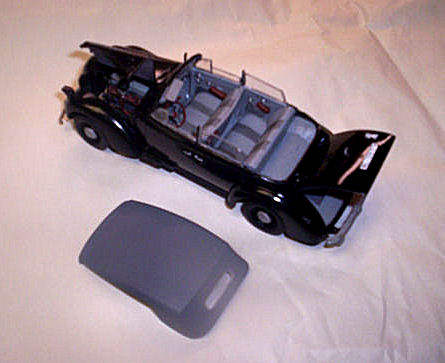
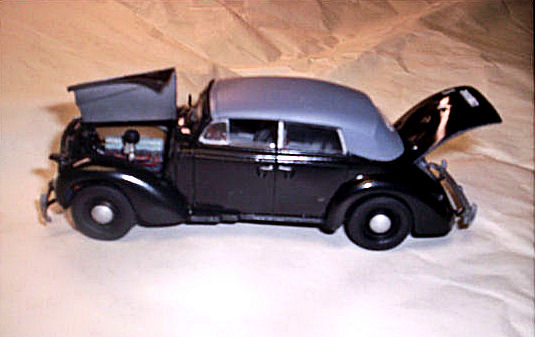
Initially, I started with the chassis buildup, assembling and pre-painting the assembled frame and muffler system. Next came the assembly of the engine and transmission. Included were the engine accessories, such as manifolds, carburetor, generator, and water pump. The wheel assembly was next — in this kit, the wheel assembly was made up of five (5) rings, composing up the tire assembly. Also, the wheel hub consisted of two (2) pieces. After painting, the hub and tires were put together. Next came the assembly of the drive train, differential, steering, and suspension system. I had to replace the thin plastic steering wheel and rear stabilizer rods with thin brass wire because the plastic rods that were supplied broke during assembly. (NOTE: some parts of this kit were very thin and easily broken.) Next came the front and rear seat assembly (also pre-painted). With this completed, I then added the front and rear seat assembly to the chassis. The dash, heater, and steering column were then added. (NOTE: I made and added the clutch, brake, and gas pedal, not included in the kit.) The doors, arm rests, and door handles were added at this time. This concluded the body assembly. Pre-painting was then completed.
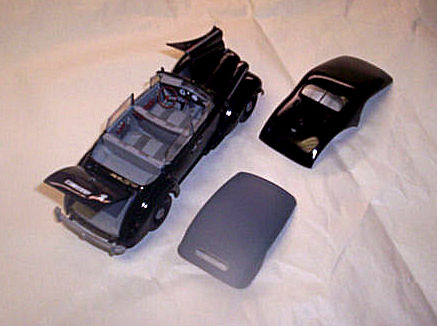
The kit provided two (2) choices: hard top and convertible. I chose the convertible top. Next came the addition of the front grill assembly and front fenders. One side of the hood was placed in the open position, showing most of the motor detail. The trunk lid was also placed in the open position. The running boards and bumper assembly were then added.
Paint
The model was sprayed with gloss black (store bought). This application was not successful, as I had to overcoat with clear acrylic gloss (Testors Clear Poly Scale), which improved the finish. Several coats were needed. Decal application went well.
Conclusion
With some small modification, the kit went together well. There are many tiny parts. The kit is for the more experienced modeler.
I wish to thank ICM Holding, Squadron, and IPMS/USA for allowing me to review this kit.

Comments
Add new comment
This site is protected by reCAPTCHA and the Google Privacy Policy and Terms of Service apply.
Similar Reviews