
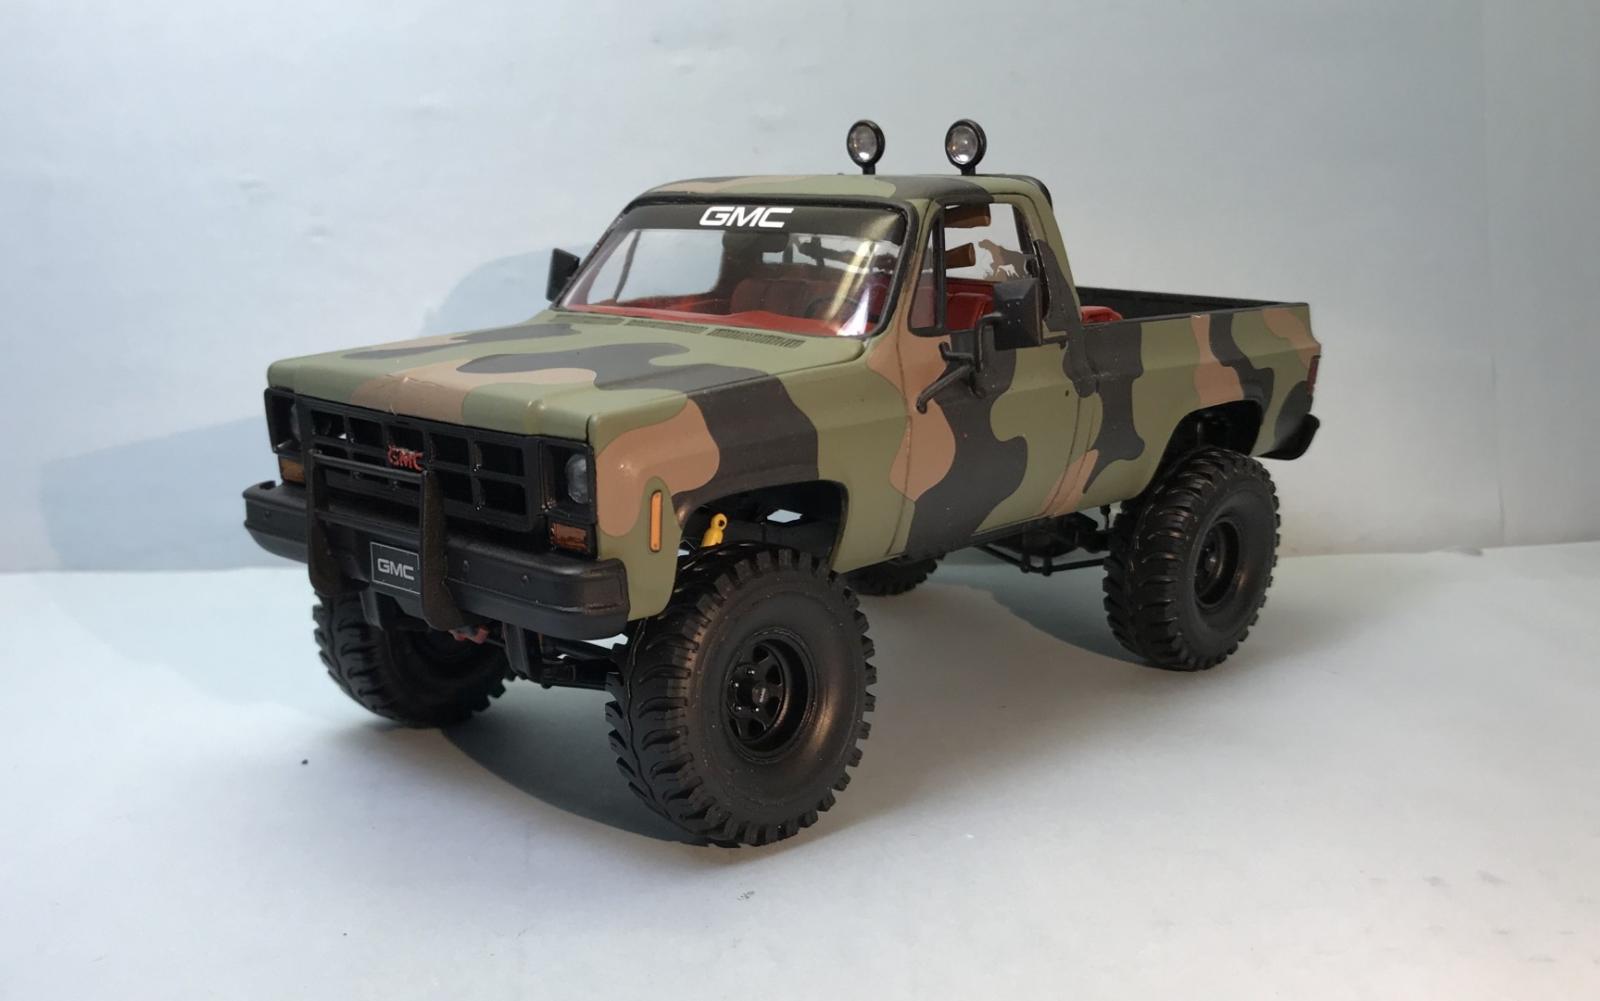
'78 GMC Big Game Country Pickup
This kit is a modified re-release of the Monogram GMC High Roller kit from 1981 (the parts have a 1978 copyright on them) with differences being different decals and the “Ground Hawg” sidewall markings are missing from the tires.
Kit
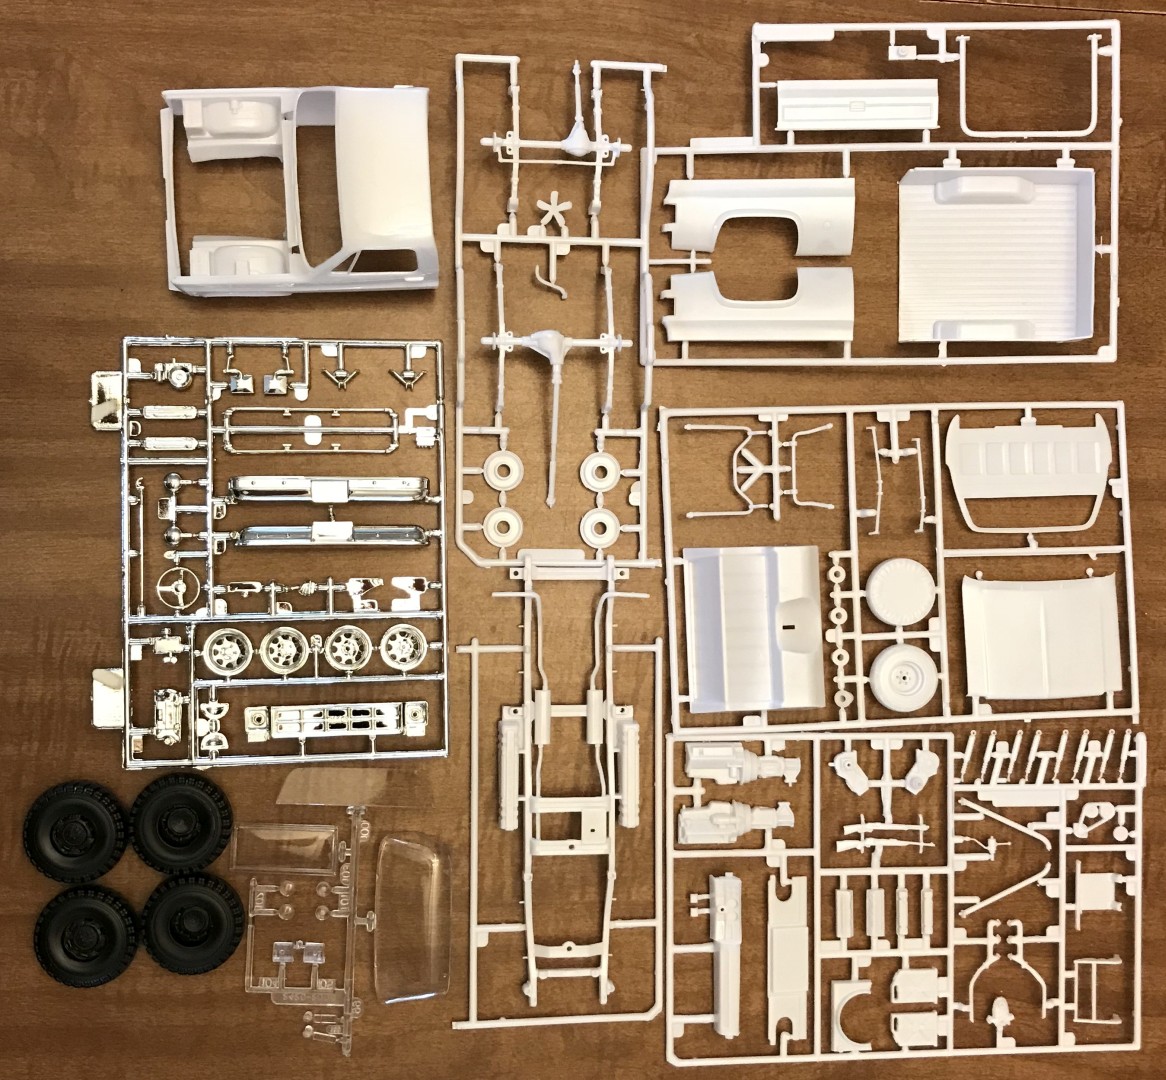
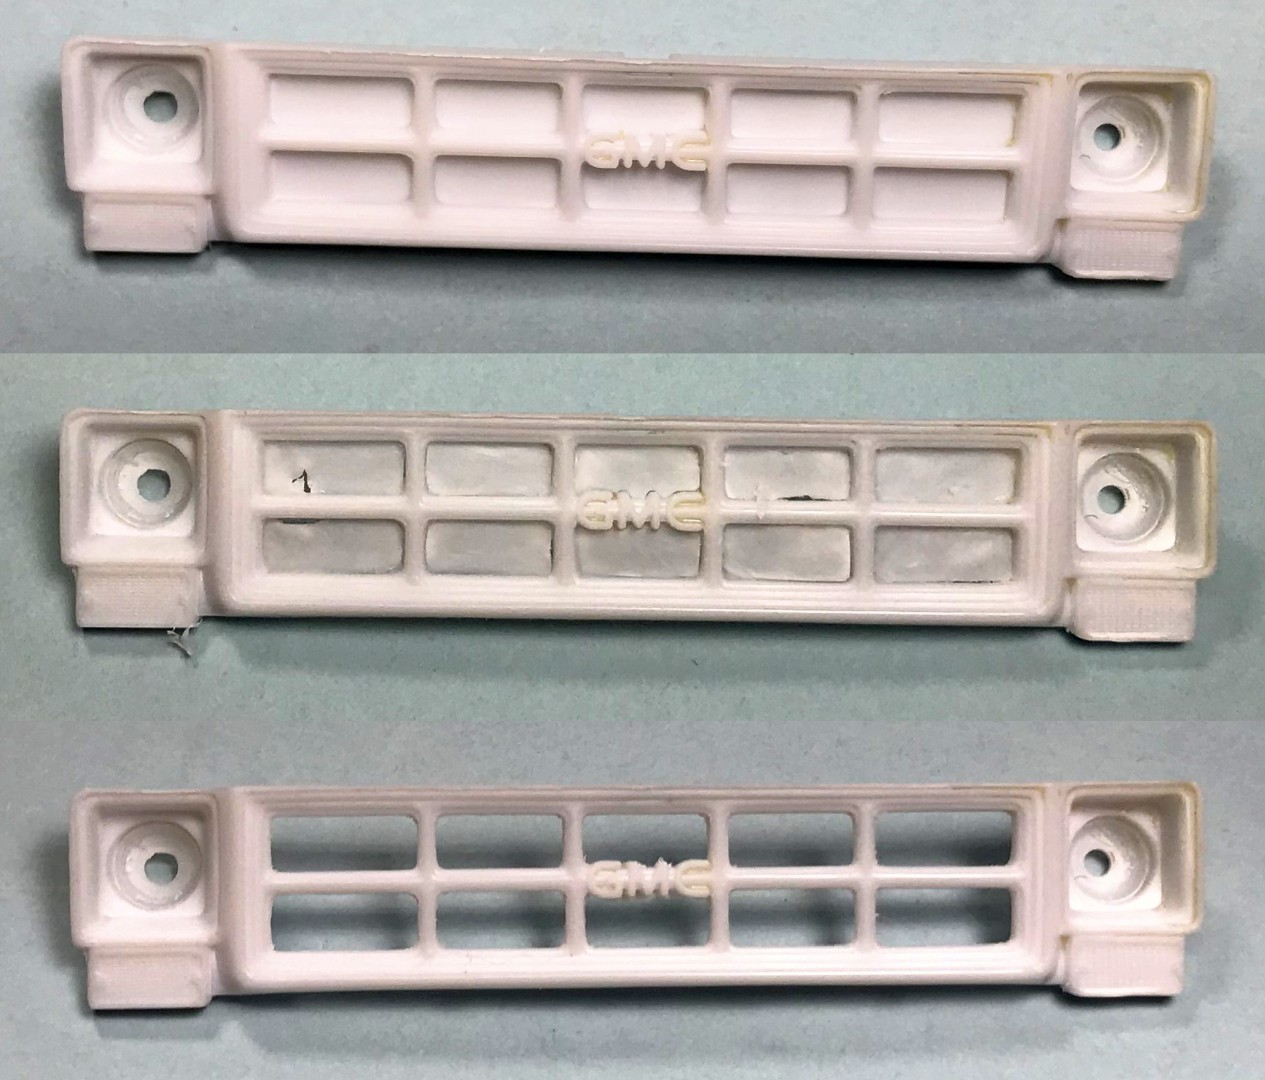
The kit comes packaged in the usual Revell 1/24/25 size cardboard box with 5 bags of white, clear, and chrome molded parts as well as the rubber tires. The tires were floating around in my box, as the bag they were in doesn’t look like it was sealed all the way. The clear parts are bagged separately. There is a total of 5 sprues of white plastic plus the separate cab, 1 sprue of chrome, 1 sprue of clear, and the 4 rubber tires. All this adds up to a total of 92 plastic parts. The parts are molded with good detail and some flash. There are some ejector pin marks that will need to be addressed. I am hoping my kit was a one-off as some of the ejector pin marks were extremely deep, almost all the way through the part.
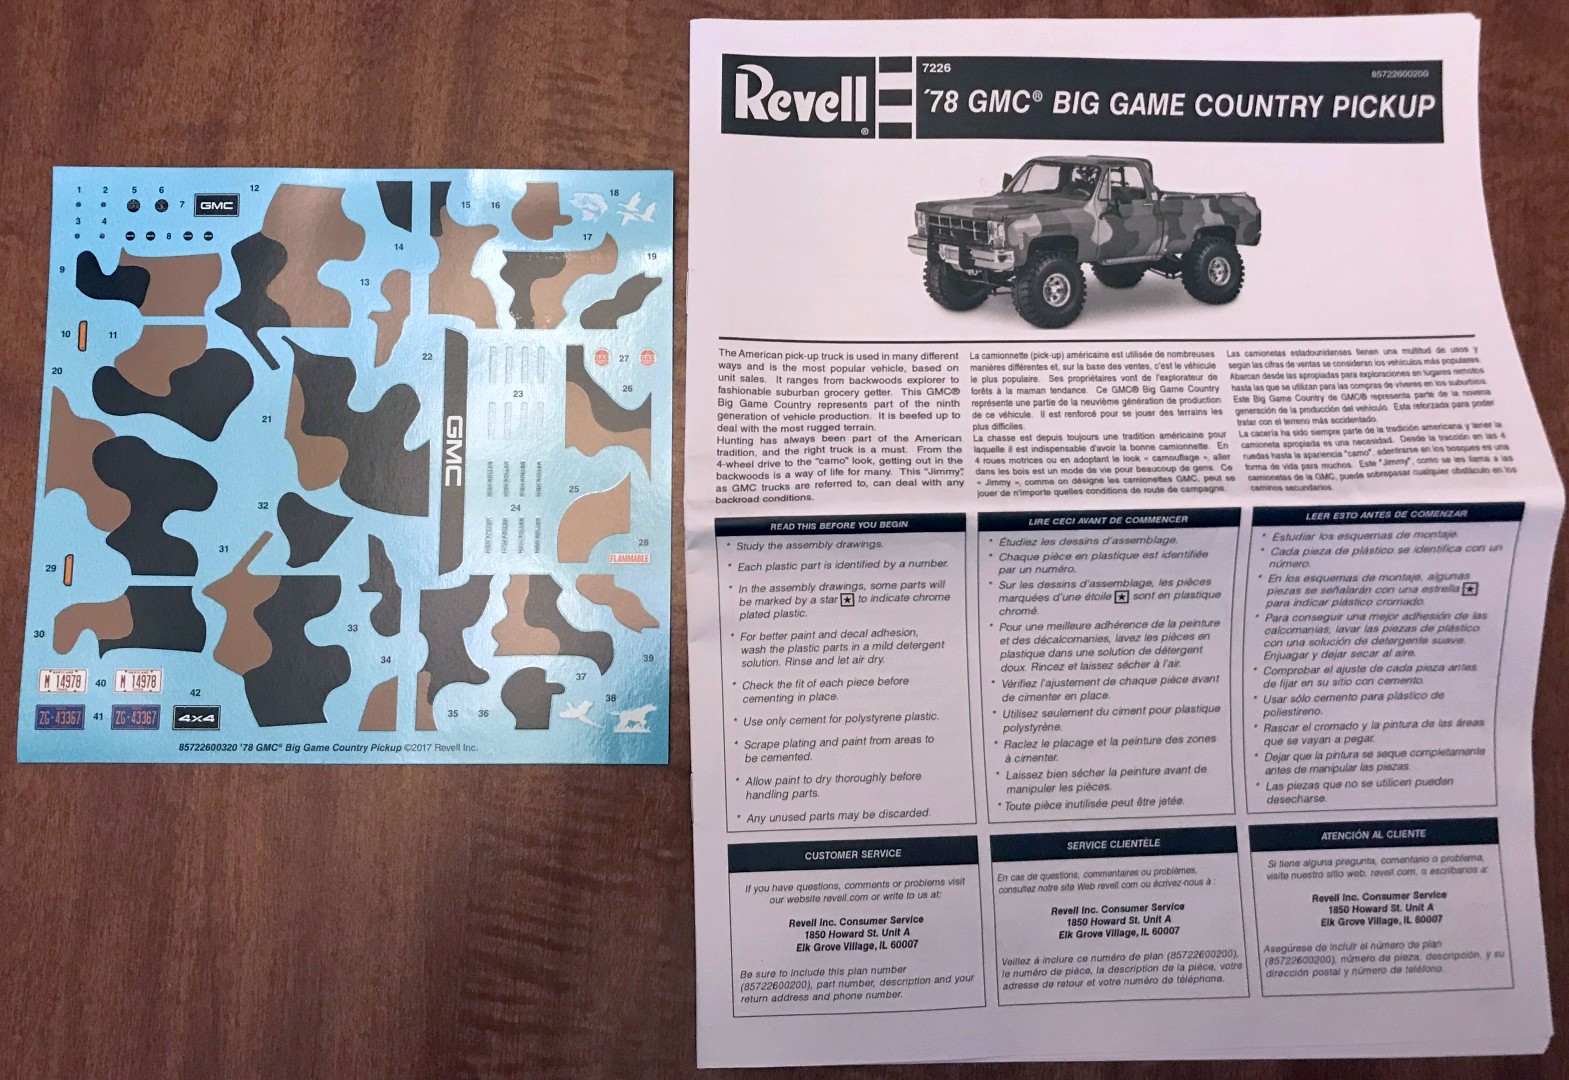
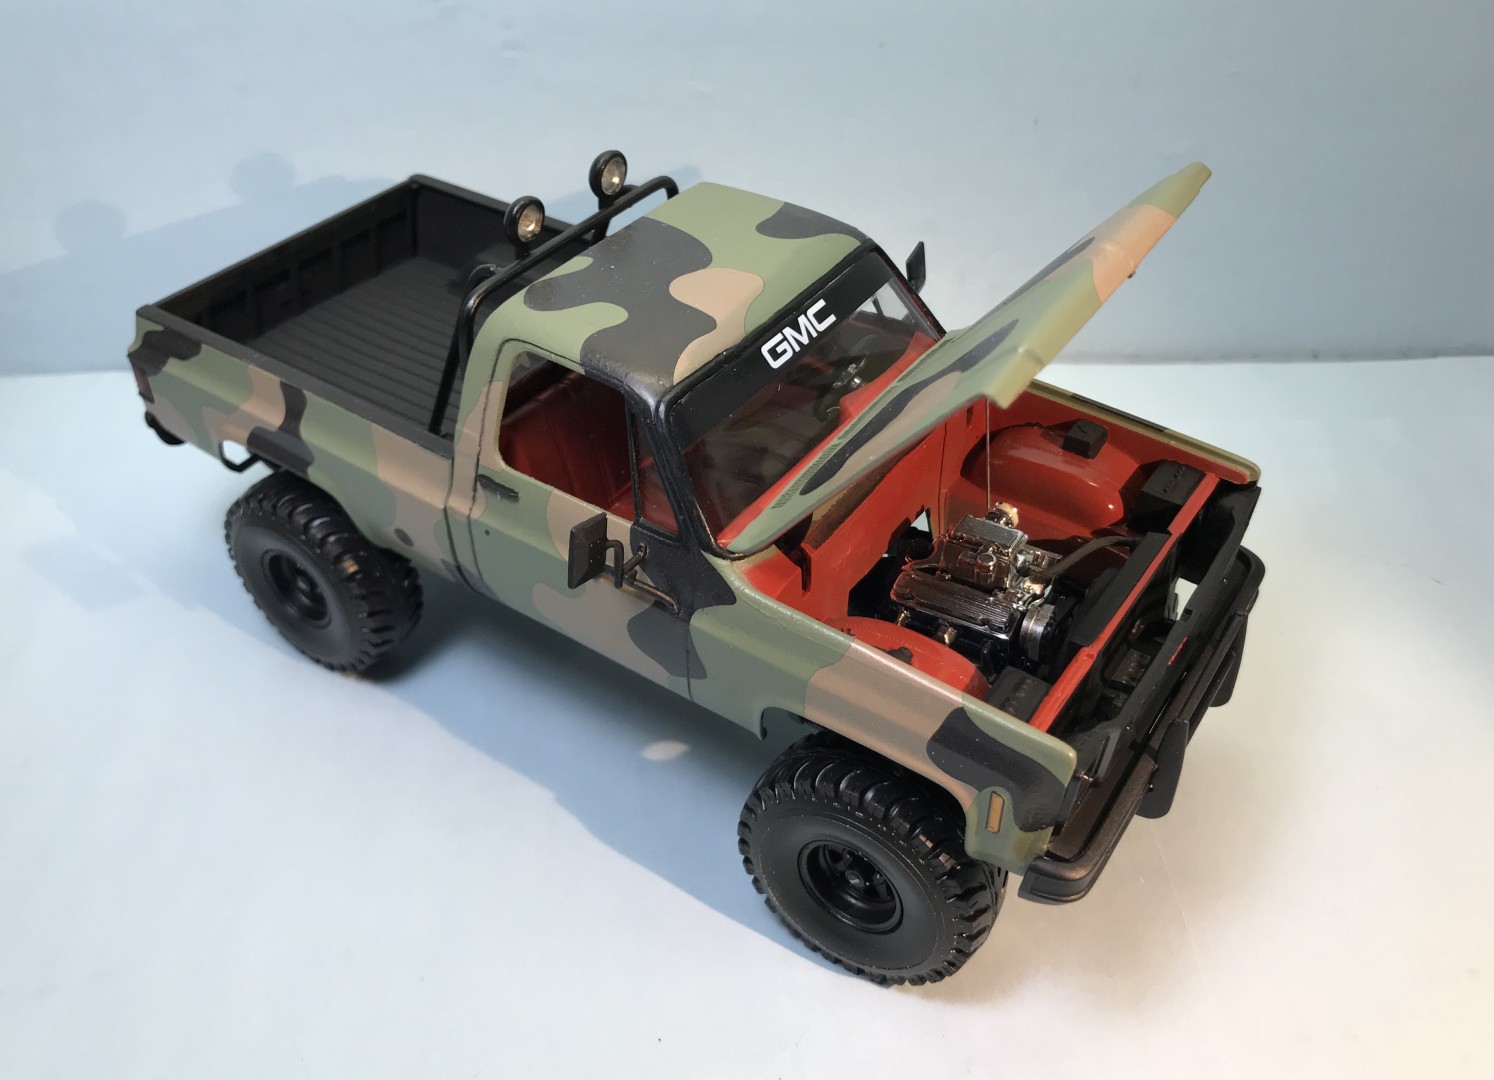
The kit also comes with a large decal sheet. The decal sheet includes markings for the instrument dials, shocks, wheel centers, front side markers, license plates, gas can, rear window, and windshield top. The black and tan portions of the camouflage for the whole truck are represented as decals so you only have to paint the truck body and bed olive drab. The instruction manual is 16 pages long and consists of 23 steps, including the decal guide. Paint callouts are generic in that they just give a generic color name and do not reference any particular paint manufacturer. There is also a listing of the parts and what they are, which is nice if you are not sure what each part represents.
Construction
Construction starts off with the engine. The engine is a small-block engine with fuel injection similar to an older Corvette, which would not be the stock engine for the truck. There is a choice of plain or chrome valve covers. The engine block and transmission are molded together in halves. There is also a 2-part transfer case for the 4-wheel drive.
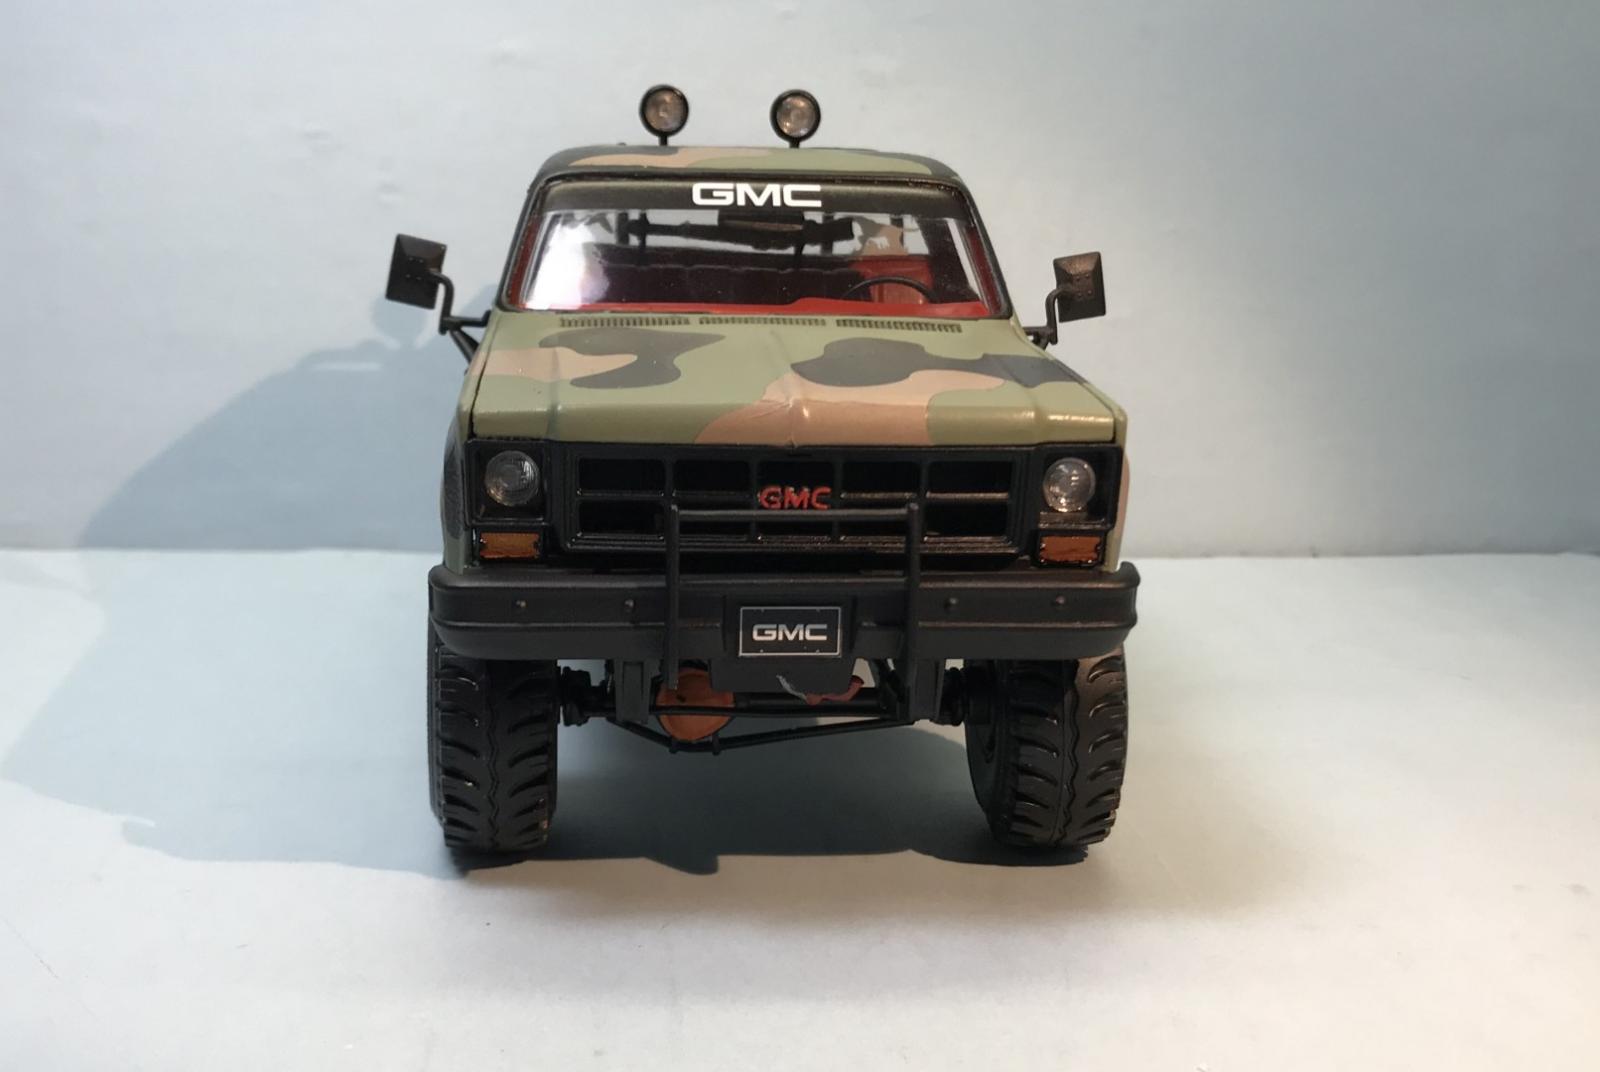
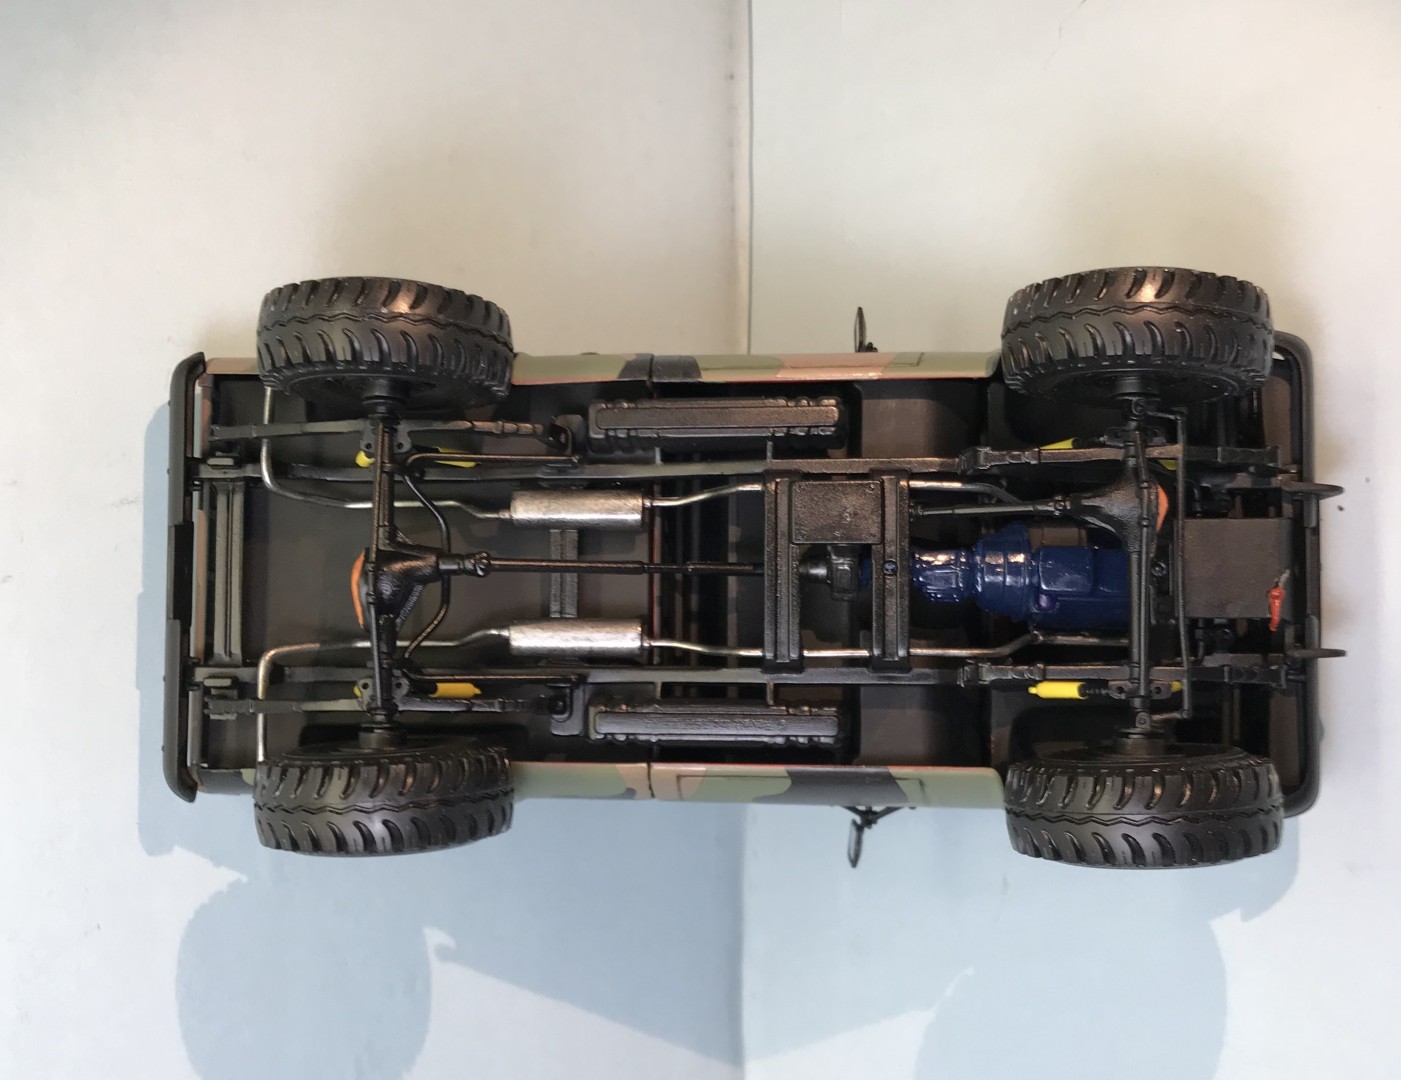
The chassis has the dual exhaust molded into it. The front and rear axles, springs, and drive shafts are molded as one piece each. There are separate torsion bars to be added to each axle. There are also dual shocks for each wheel, although on mine, they seemed a little short and don’t fully go into the hole in the axle after attaching to the pin on the chassis. Once glued in place, they look fine. There is a winch and skid plate that gets glued to the front of the chassis.
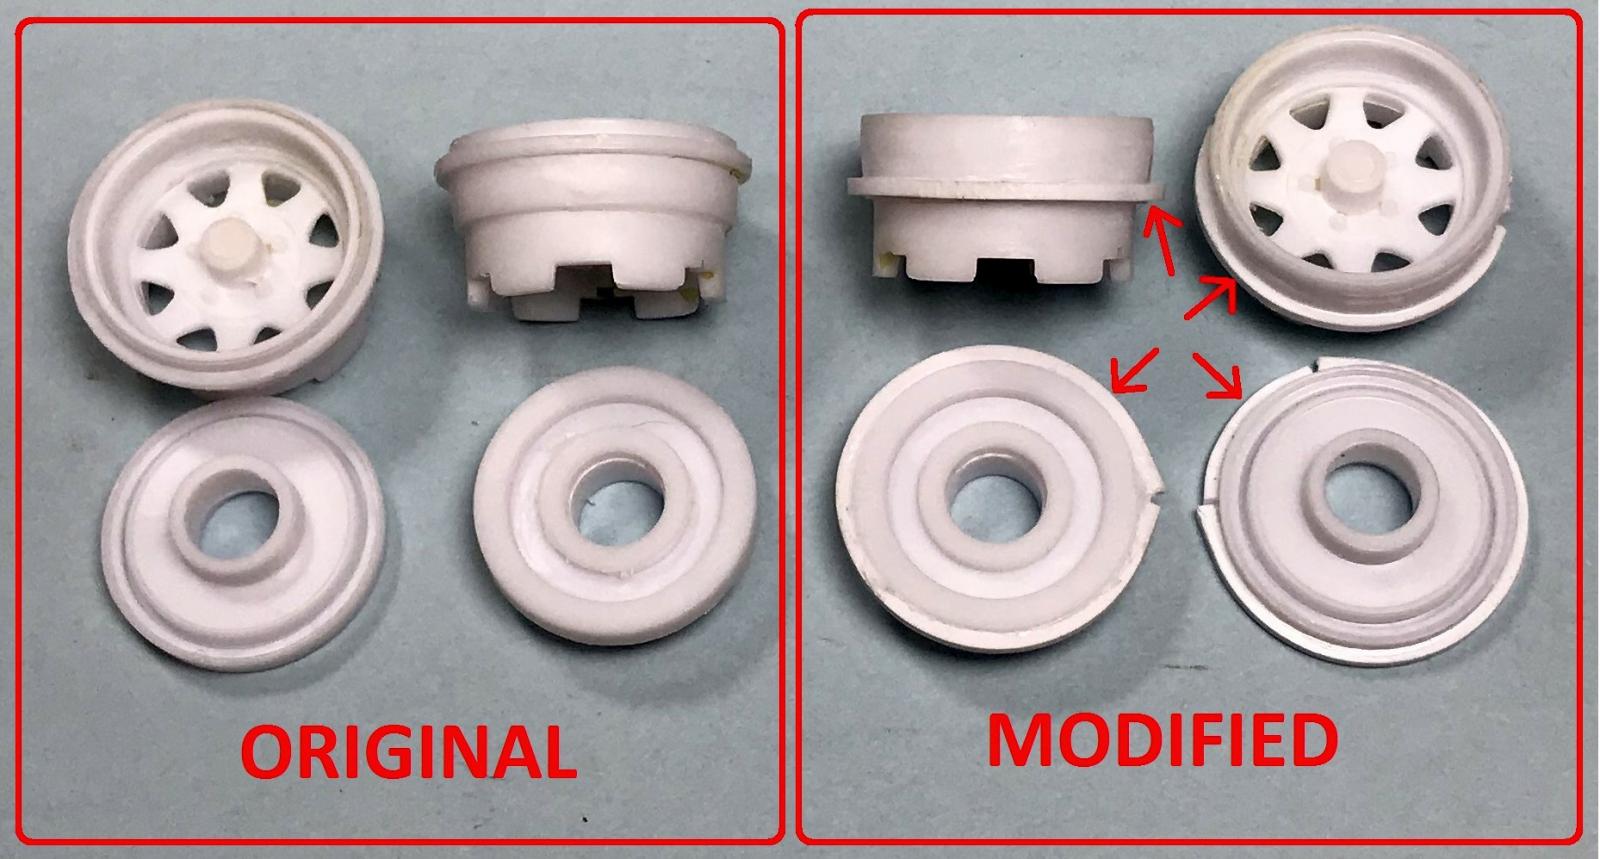
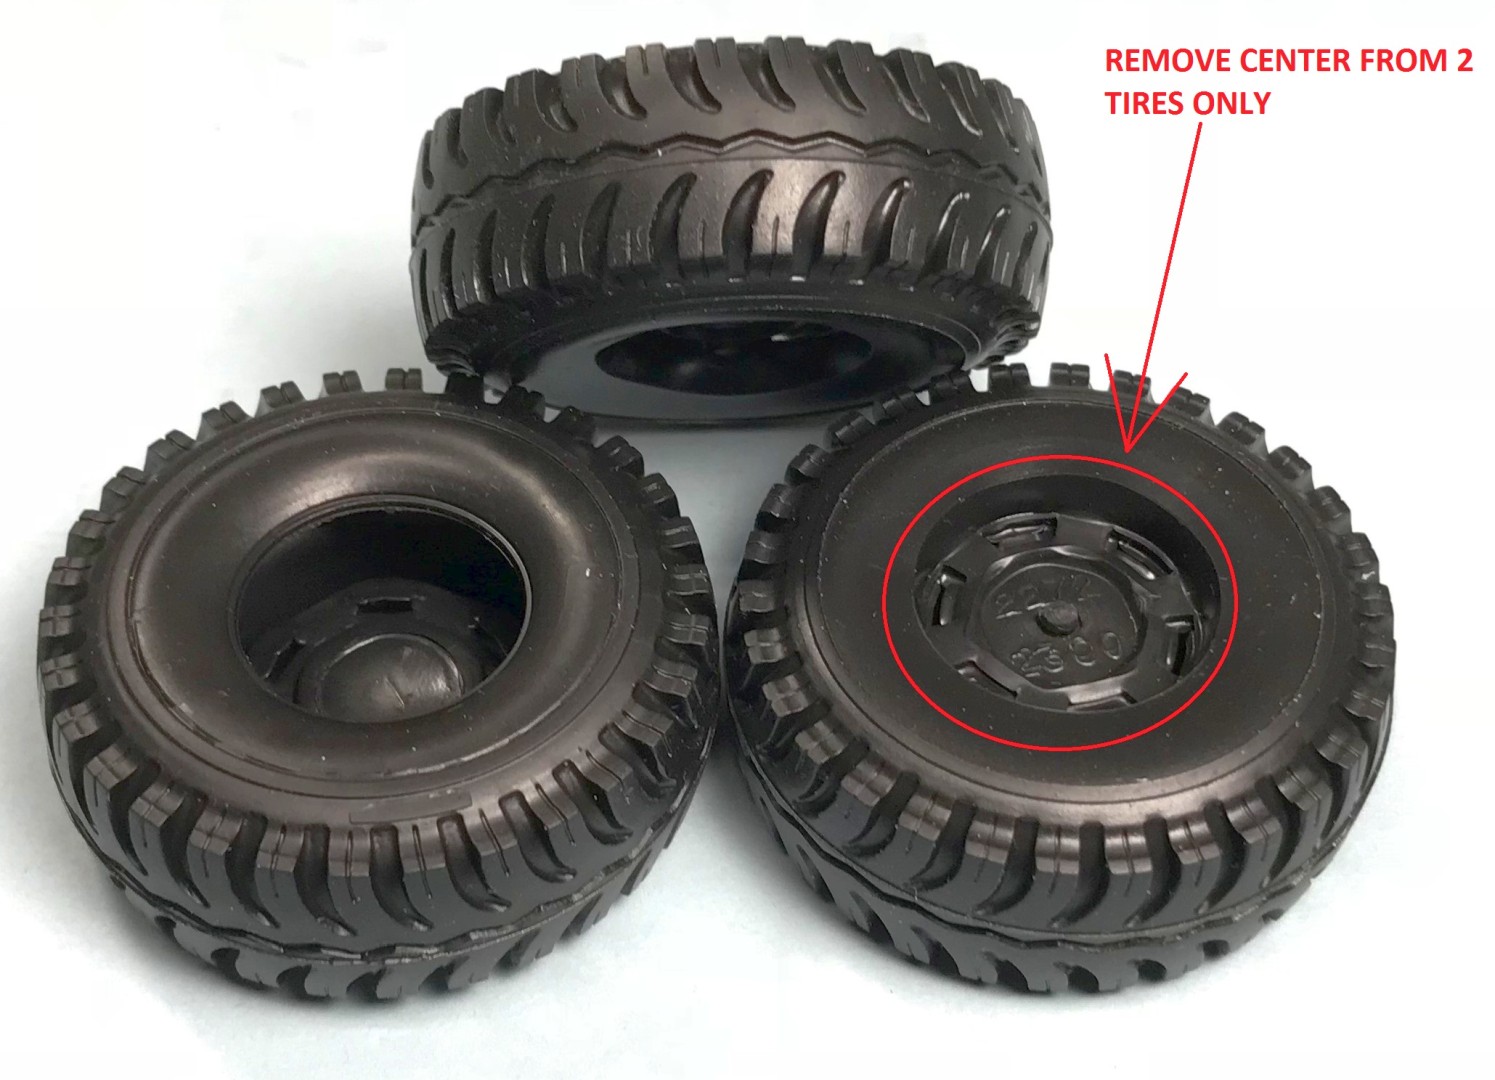
Next up are the wheels and tires, this is where I started modifying parts. If you assemble the wheels and tires per the instructions, the tires on the right side of the truck will have the tread facing the wrong direction. This has been an issue with this kit since it was first released. I modified the wheels by removing the lip around the outside of 2 of the outside rims (part 92). I then added a ring of 0.040” square styrene lower down on the rim, right at the bottom of the raised ring. I also added a ring of 0.040” square styrene on 2 of the inner rims (part 12) at approximately the same distance from the edge as the outer wheels original ring. Please see the picture to see what I added (red arrows). I also added a spacer approximately 0.060” thick to the back of the modified outer rim to make the wheel retainer (part 13) sit at the correct location. For the tires, I only trimmed the inner “spider” out of 2 of them, allowing the modified rims to fit in the tire backwards, making the tread correct for the right side. The other 2 tires I built up according to the instructions leaving the “spider” in place. Now all 4 tires have the tread facing the right direction.
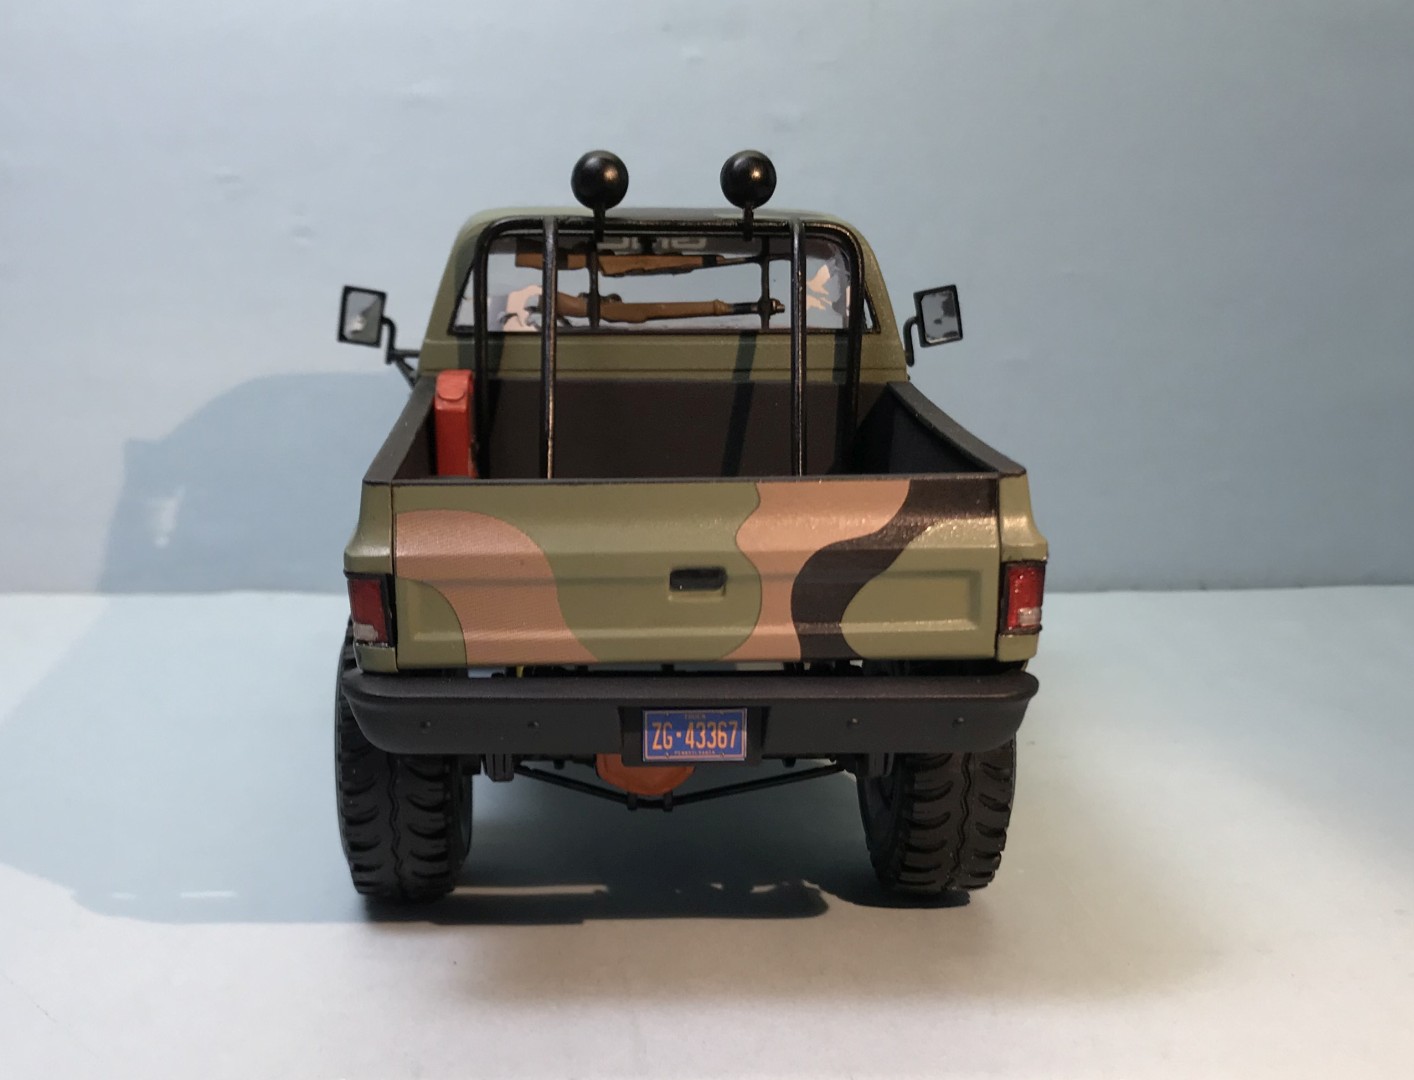
The interior builds up next. It consists of a single tub with the sidewalls molded in place. There are armrests molded in, but no other details on the sidewalls. The steering column has the turn signal stalk and 3-speed shift lever molded on. Be careful of the shift lever, it breaks easily (don’t ask how I know!). The gauges have decal faces. There is a CB radio included as well as a gun rack with a rifle and shotgun for the rear window. There is also an optional sun roof.
The cab builds up with no issues. I was able to add the rear wall to the cab before adding the interior. I decided to modify the front grille by opening up its back. It is a simple design to open up and I thought it improved the look. In order to mount the front bumper, I had to remove the 2 pins from the bottom of the front of the cab, as they interfere with the fit of the bumper. The windshield and vent windows are molded together. There is a separate rear window. Both need to be installed from the inside. I had to sand down the top edge of the back window to get it to fit correctly in the opening.
The bed of the truck builds up from separate side pieces and a working tailgate. My bed was warped, but I was able to straighten it out with a little heat from a heat gun and some careful bending. There are step inserts you can install in the sides of the bed if you wish. There is a CB antenna that can be mounted to the roll bar. The tail lights are clear and need to be painted with clear red on the back side before mounting. There is also a spare tire and gas can that can be added to the bed.
Paint and Markings
I used a combination of Vallejo, Tamiya, Testors and big-box store spray paints depending on the color I needed. I first painted the body and bed in red spray paint to get the “original” color down. I then painted over that with a camouflage green spray paint to get the main green color. I didn’t take the time to make sure the paint was smooth and without imperfections as I wanted this to look like it was camouflaged in someone’s back yard. I used the kit decals for the camouflage and they went on beautifully. I used Micro-Sol over the decals to get them to snuggle down. I was extremely pleased with the way the decals performed. They all fit exactly where they were meant to go. I de-chromed all but the engine parts and painted all the chrome trim black. I thought the chrome would stand out too much for the camouflage.
Conclusion
Overall, this was a fun build. The kit is somewhat simplified, but still plenty detailed. The fact that the tires/wheels needing to be modified to be correct make it a little bit of a tougher build. I would recommend this kit to anyone that is a fan of 4x4 trucks.
I would like to thank Revell and IPMS for giving me the opportunity to build and review this kit.

Comments
Add new comment
This site is protected by reCAPTCHA and the Google Privacy Policy and Terms of Service apply.
Similar Reviews