
60/54cm Morser Karl w/Munitionspanzer IV Limited Edition
The Karl “Gerät” (device) was a huge self-propelled siege mortar. The 60cm shells weighed around 5000 pounds and contained several hundred pounds of explosives. Hasegawa says that the Karl made a “significant impact” wherever it was used. The problems with Karl were that it wasn’t very mobile, and it required special ammunition. When a Karl was in use, it had to be in a special firing position, which should be level and support the chassis.
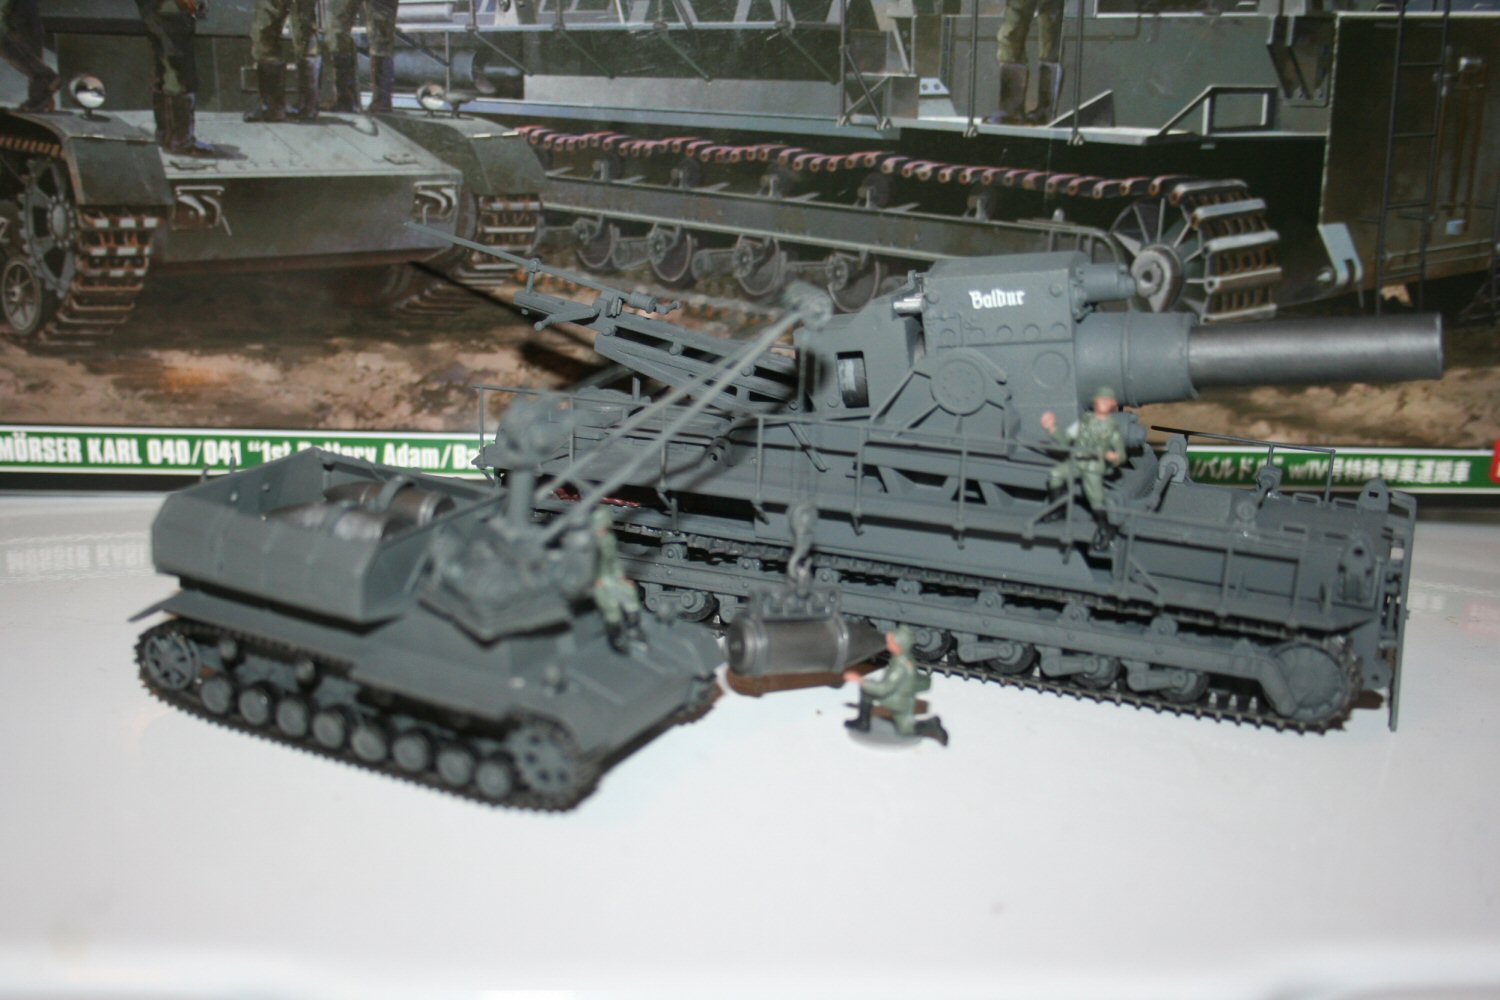
This is Hasegawa’s release of their Karl Mortar in 1/72. It includes the “Munitionschlepper” Panzer IV. This kit has been released before, with the Munitionschlepper or with the railway transport add-on. What makes this kit desirable is that you get more options for the basic Karl mortar.
The two big options are:
- Two barrels and two sets of projectiles, in 60cm or 54cm.Earlier versions only had the 60 cm option.
- Suspension can be built for either road movement (at a blazing 6 mph) or firing position.For the firing position the wheels were pulled up so that the bottom of the chassis rested on the ground, making the gun stable for better accuracy during long-range firing.
The first Karl mortars were the 60 cm versions. After some field experience they were modified to the 54 cm version. The reason for this was that the 54 cm version had a longer barrel. With the slightly lighter 54 cm shell and a longer barrel, the Karl could shoot further. Engineering excellence in practice. This kit comes with barrels for both 60 and 54 cm, and there are shells for both sizes.
The suspension comes with two complete assemblies of left and right road wheels, molded into the correct position for either road or firing.
Assembly
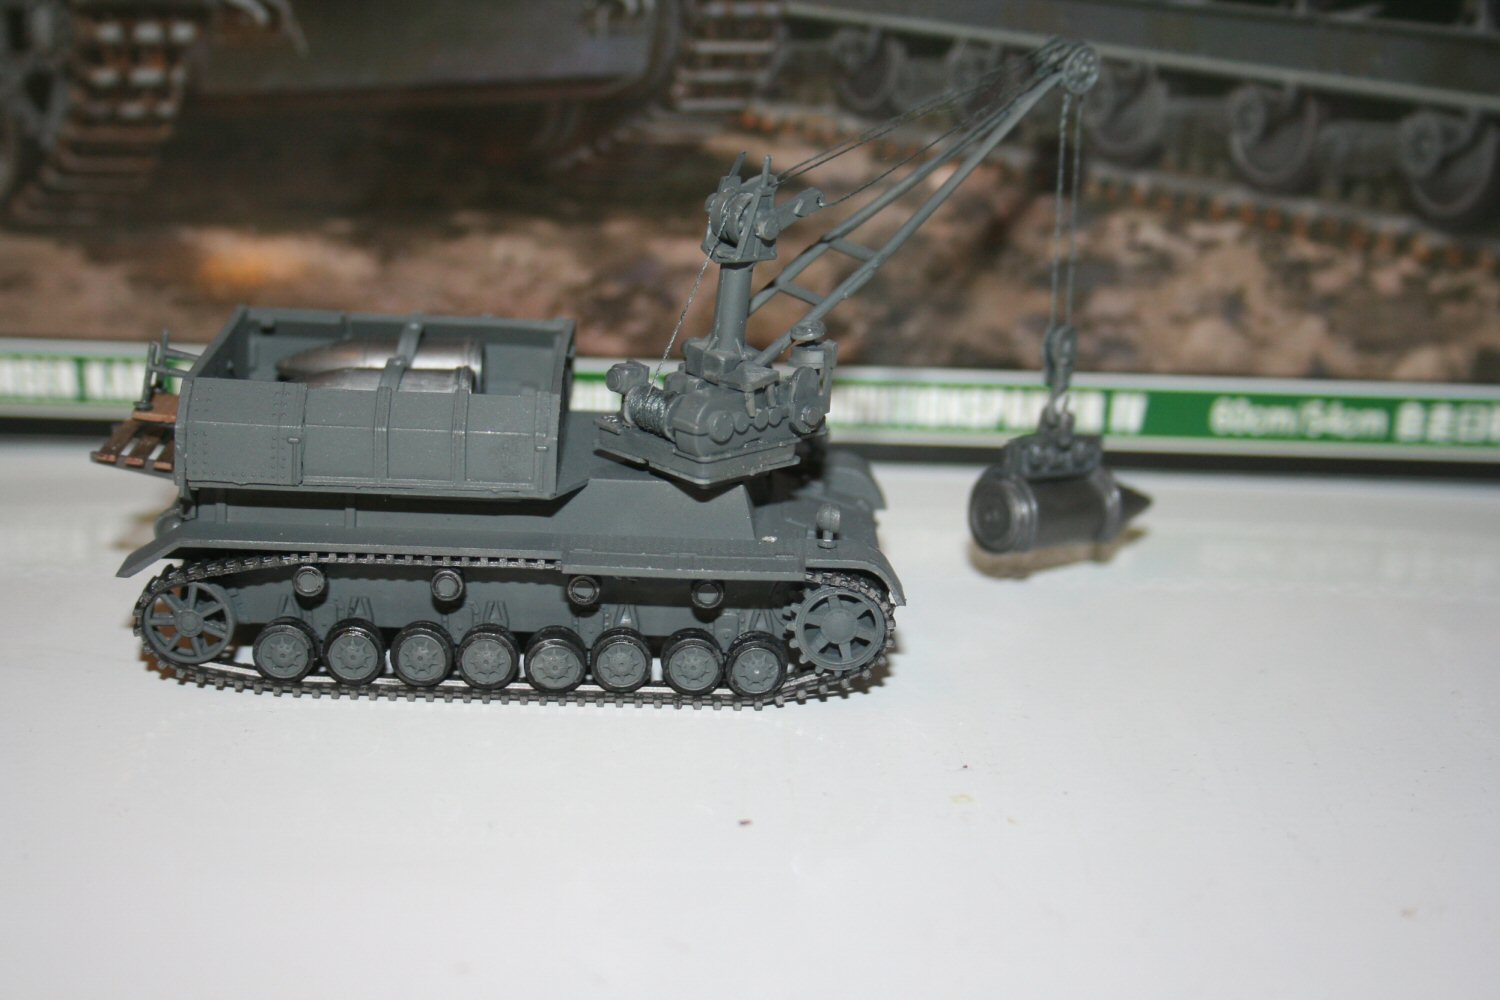
Munitionspanzer
I built the Munitionspanzer first, partly because I wanted to do the simpler vehicle first, and because that’s how the instructions are set up. Steps 1 through 10 are the Panzer, 11 through 26 are the Karl.
There are a lot of small parts in the assembly. The base of the crane has 11 separate parts. The good news is that everything fit nicely, and all of the parts played well together. The suspension parts required a tedious painting of the road wheels, and there are 24 of them. I spent an entire Saturday morning painting these and the road wheels for the Karl.
Painting was far less demanding. I decided to do the whole thing in Panzergrau. So except for the road wheels and the platform on the back, the Munitionspanzer got the overall gray. I didn’t put the “other color parts” (road wheels, tracks, rear platform, munitions) on the model until assembly was pretty much complete
One area where I had to put on my “high detail” hat was the crane. The assembly of the crane was moderately simple, but Hasegawa suggests using “string” for the crane cables, and there isn’t much guidance in the instructions. I lucked out because my wife had a spool of grayish-silver thread. Once I figured out where I wanted to put the “cables”, I anchored one end of each cable with Elmer’s glue and let it set up. Then I gently stretched the cable to the other end and glued it in place. Hanging the shell from the hook helped keep the cables from sagging.
I installed the tracks. Not really a big deal, but I had some trouble getting the ends of the tracks to respond to any type of glue. I wound up gluing the ends of the tracks to the hull.
Decals for the Munitionspanzer were a breeze. There weren’t any.
And now it was time to start the Karl.
Karl
The Gun
Assembly begins with choosing which gun you want to build. You have to choose the 60cm barrel or the longer 54cm barrel in the first step of assembly. Once the barrel halves are assembled and the seams taken care of, you build the recoil mechanism. This consists mainly of 4 shafts which glue to a bulkhead, which the barrel glues to also. This is then inserted but not glued into the gun carriage assembly. Two more shafts with springs on them are mounted to the bulkhead, and then another bulkhead is inserted over the shafts, but not glued in. Finally a third bulkhead is glued in behind the second. This one glues only to the gun carriage assembly, leaving the gun free to move front to rear, with the springs returning it to the rest position at the front. The shock absorber assembly is now added. You can set the gun aside for after the chassis is ready for it.
When I set the gun assembly aside, the recoil worked. Later, when I mounted it in the chassis, it wouldn’t move. I even tried water pump pliers to move it. No go. I think this is a result of Hasegawa’s great engineering, in that the parts fit quite tightly. But after the paint dried on the shafts, it stopped them from moving. I definitely didn’t want to disassemble this assembly to see if I could make it work.
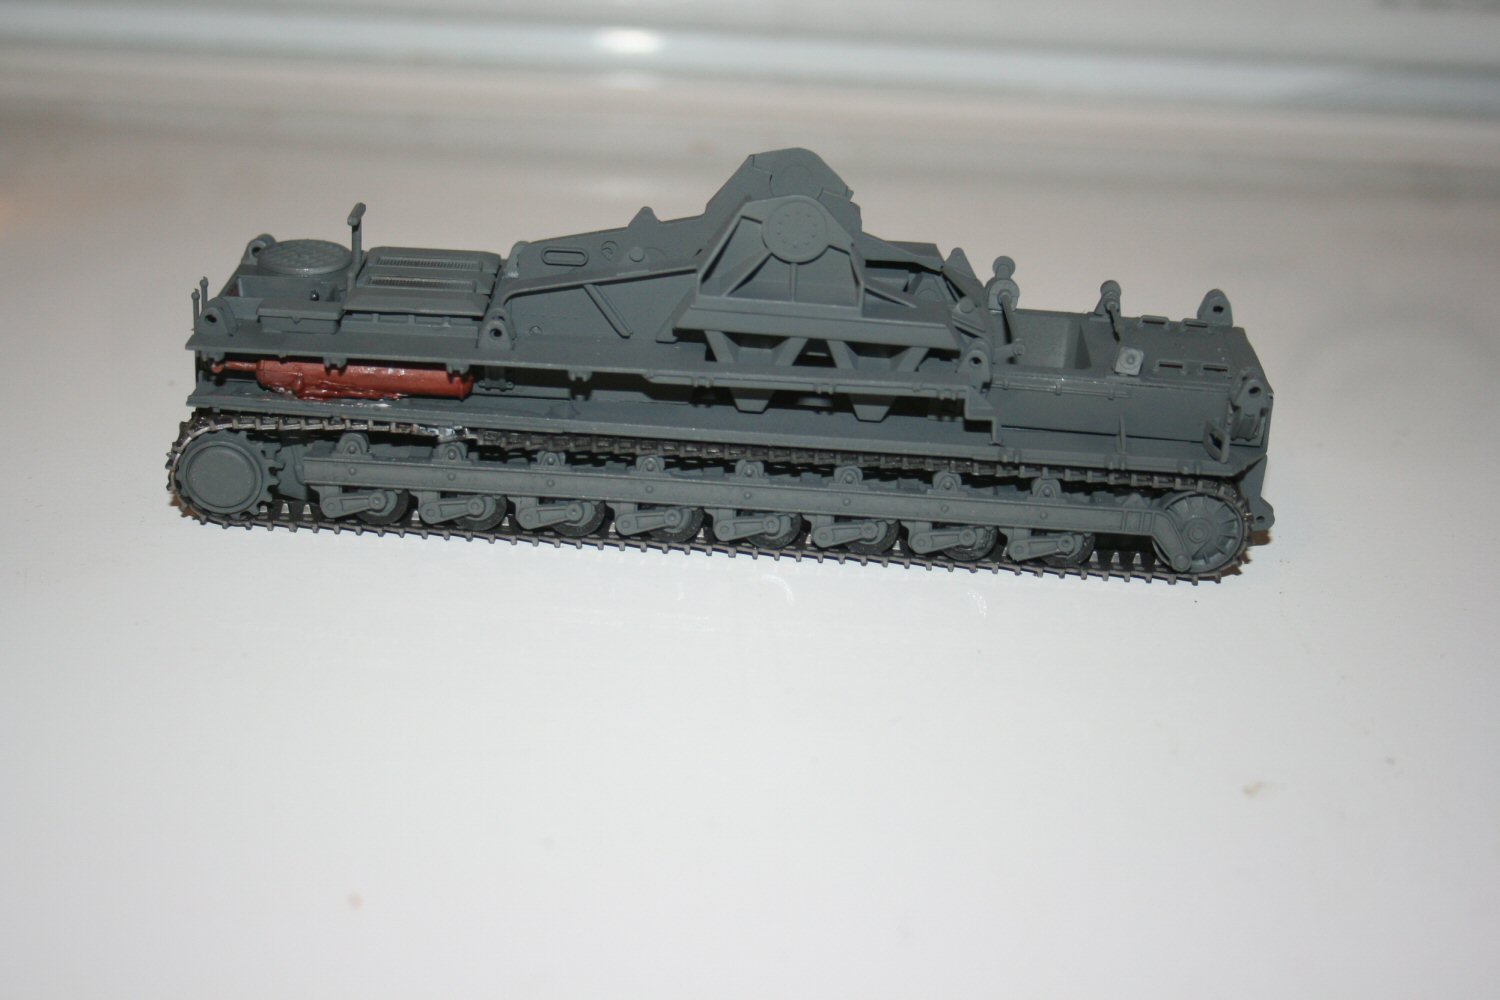
The Suspension
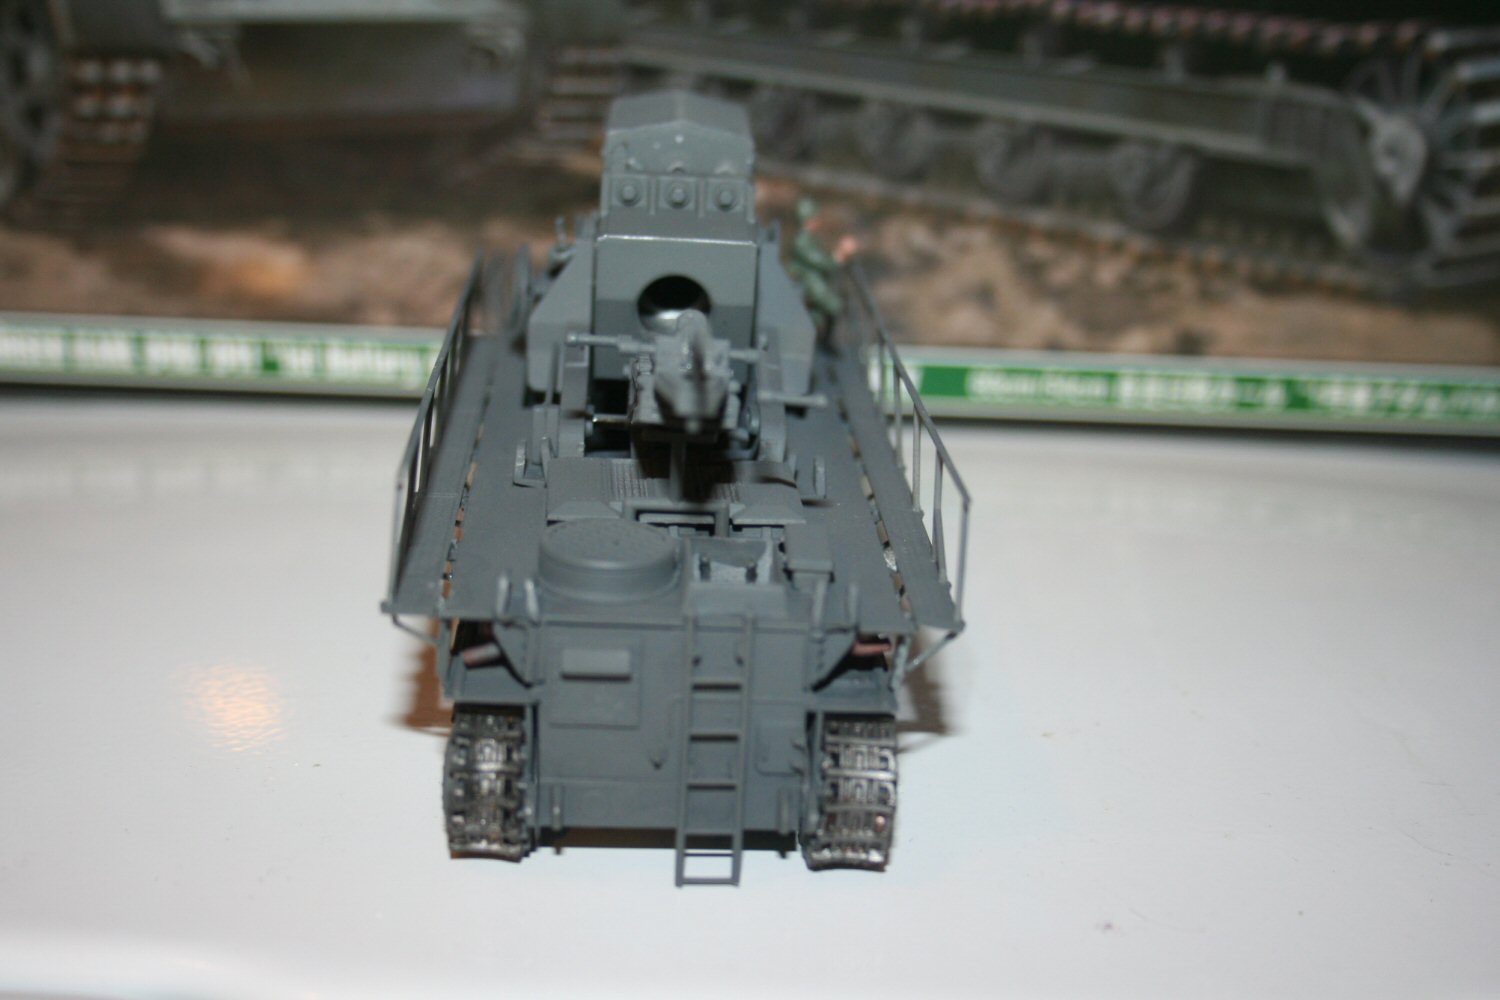
There are two wheel assemblies for each left or right side. One has the wheels down for travel, the other has the wheels up for firing. I’ve included a scan of this part of the instruction. The inner and outer assemblies are different, but use the same wheels. Once these are assembled, they are attached to the hull, along with the top base and the end pieces.
A bit of advice on Step 16. Assemble the mufflers and install them before installing the top deck. Once the deck is installed, the mufflers are VERY difficult to install. Let my experience save you a lot of trouble here.
The next three steps are just installing detail parts. The only place I had any trouble here was the ladder at the rear of the vehicle. With the suspension raised, the ladder was too long, and held the back end off the ground. I shortened the ladder. This is something Hasegawa missed when adding the additional suspension choice.
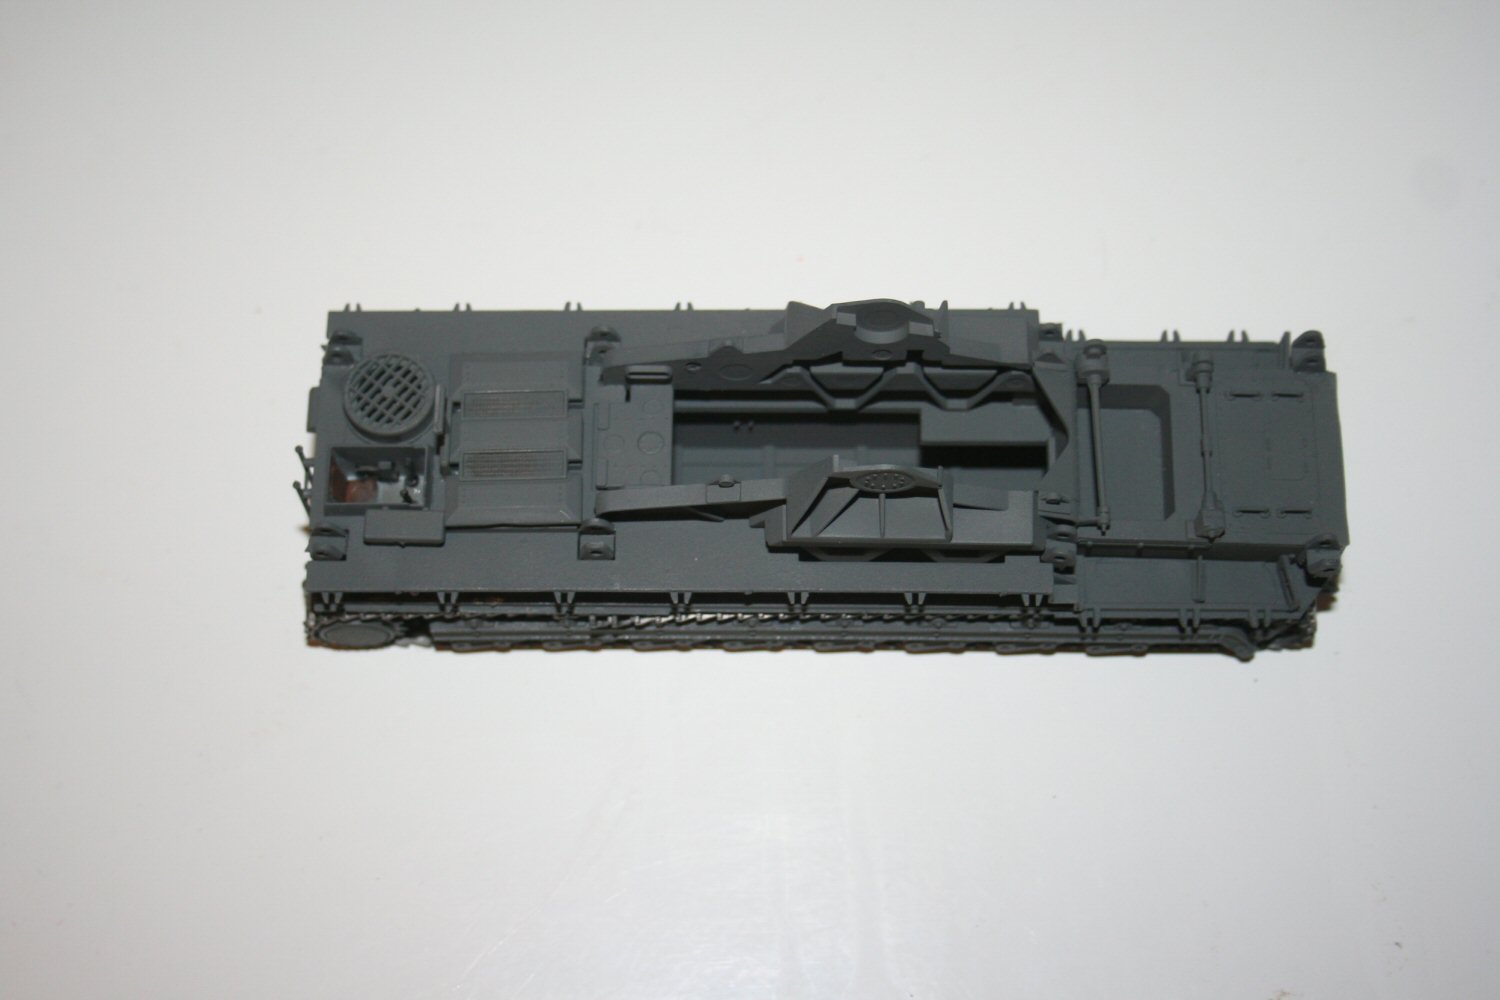
The gun mounts are large pieces, but the go in place nicely. After they’re set, the gun assembly mounts in two slots. There are two mounts which are not glued to the gun but are glued into the slots. These allow the gun to elevate. Works fine.
After the gun is mounted, the loader assembly is put in. I had a little trouble with this because the gun did not go completely forward. But it works.
The tracks were added at this point. Same glue problem as the Munitionspanzer had.
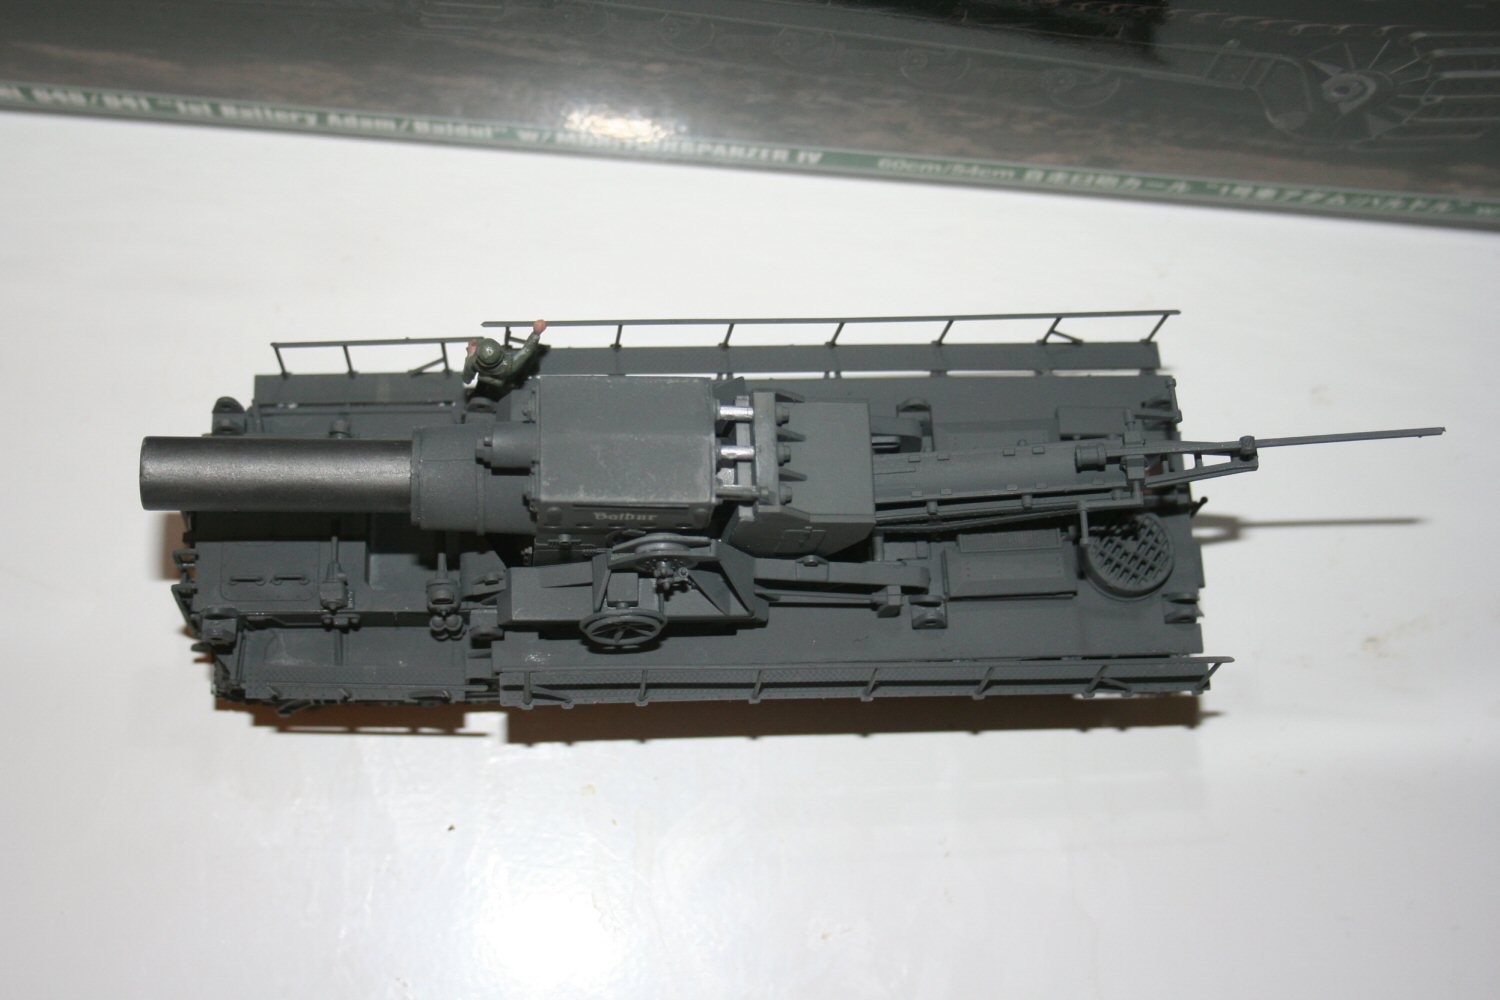
I put the decals on. Note that Hasegawa misspells Baldur as Baldul on the box and in the instructions. But the decal is spelled right. There are only the two name decals and a couple of aligning marks. I wish some airlines would adopt this marking scheme.
The last details added are walkways and railings which go on both sides of the vehicle. I had to work the holes in the walkways with a #11 blade because the holes were a bit smaller than the pins. Eminently fixable. I had some problem with mounting the walkways. They mount to small extensions on the side of the vehicle, and there’s not much area for the glue to hold with. I wound up using gel-type CA with accelerator to get them to stay. It then required a bit of paint touch up because the CA turns white when you use accelerator.
Figures
I assembled and painted three of the 16 figures provided. I put one on the ground examining the shell hanging from the Munitionspanzer crane. The second is sitting on the Munitionspanzer, he’s the crane operator, waiting for the first guy to finish. The third I added because he had a raised leg, and he fit the step on the side of the Karl.
Overall Evaluation
Recommended. This version has the extra barrel for the 54 cm version, plus the “crouching” suspension which was used when firing the gun. This would be a superior version for a diorama when the gun is being loaded for firing, or for setting up for a siege.
The kit builds well, with few problems. With as many small parts as this kit has, I expected many, many more fit conundrums or wrong parts. As it was, I had only a concern with one ladder too long and the gun doesn’t move for recoil.
Many thanks to Hasegawa and Hasegawa USA for the review kit, and to IPMS USA for the chance to build something outside my usual area of interest.

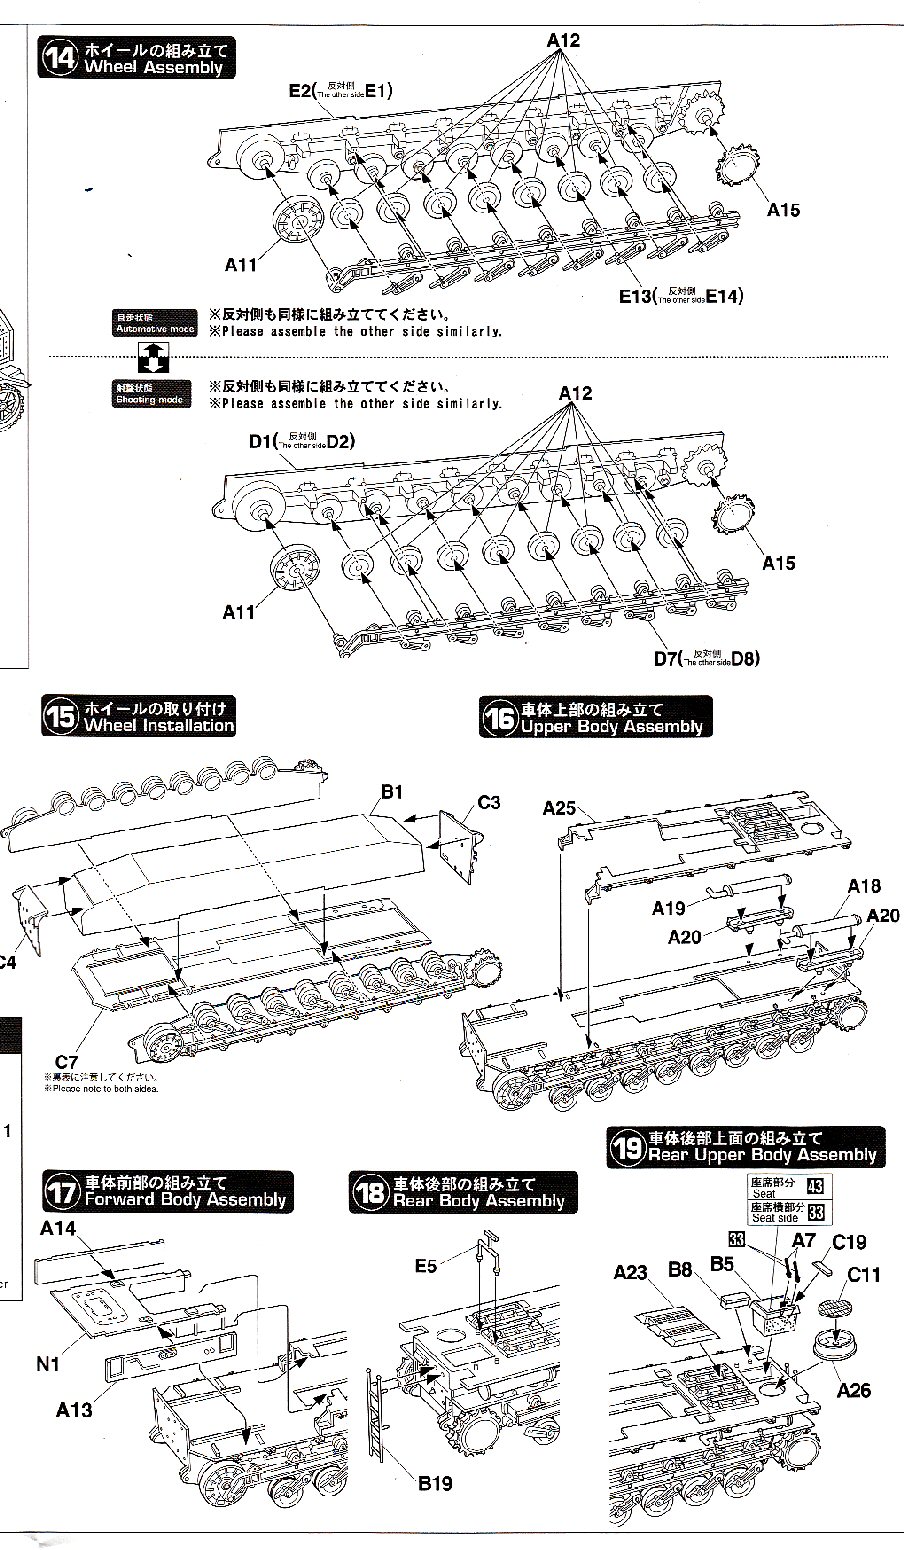
Sample of the instructions
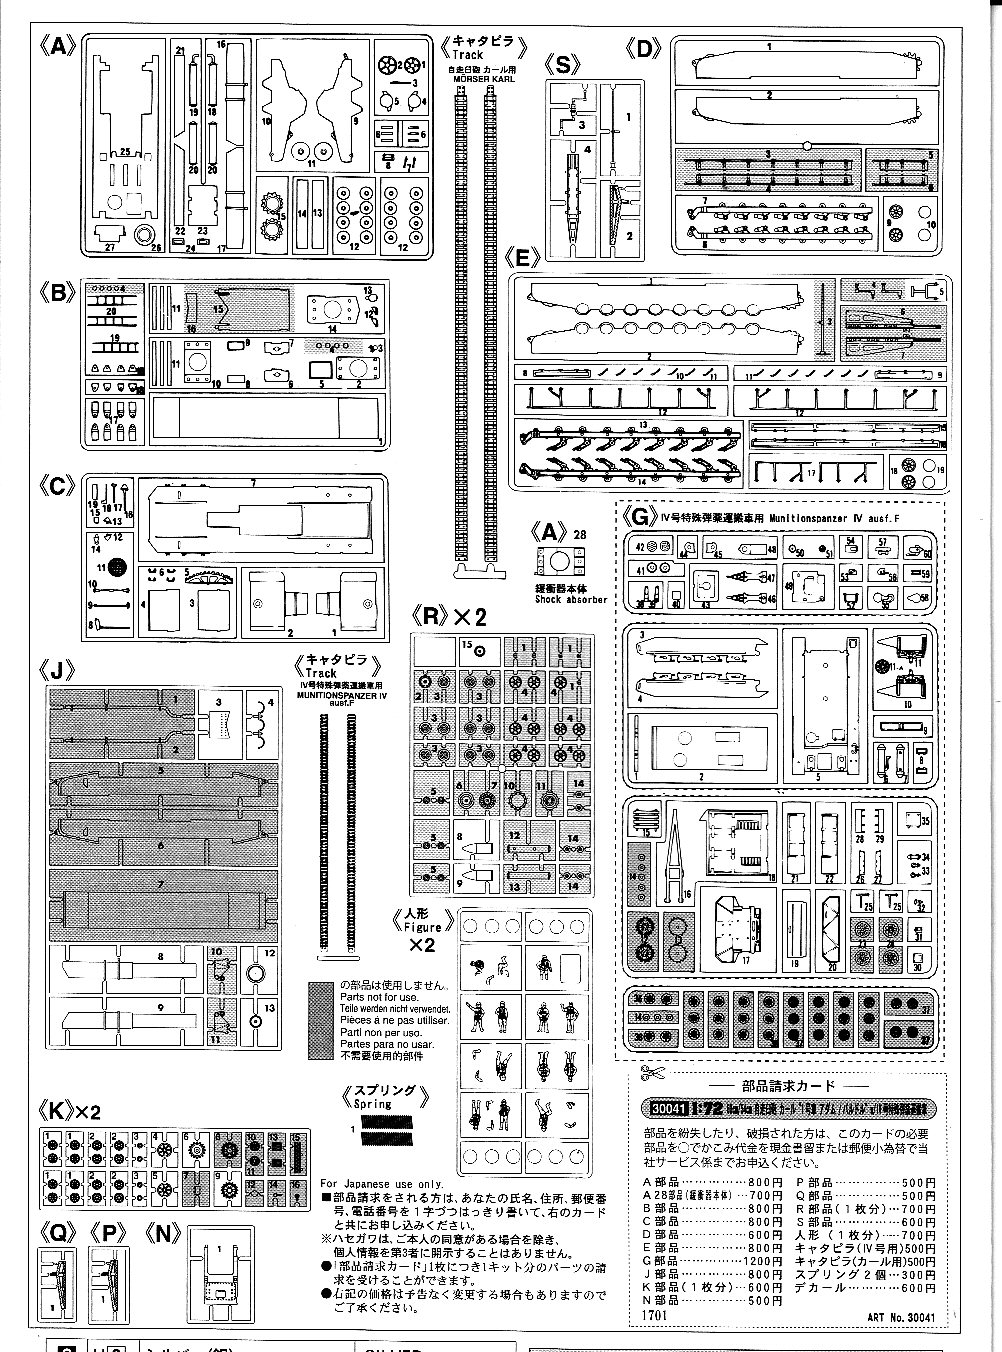
Sheet showing all of the Karl sprues
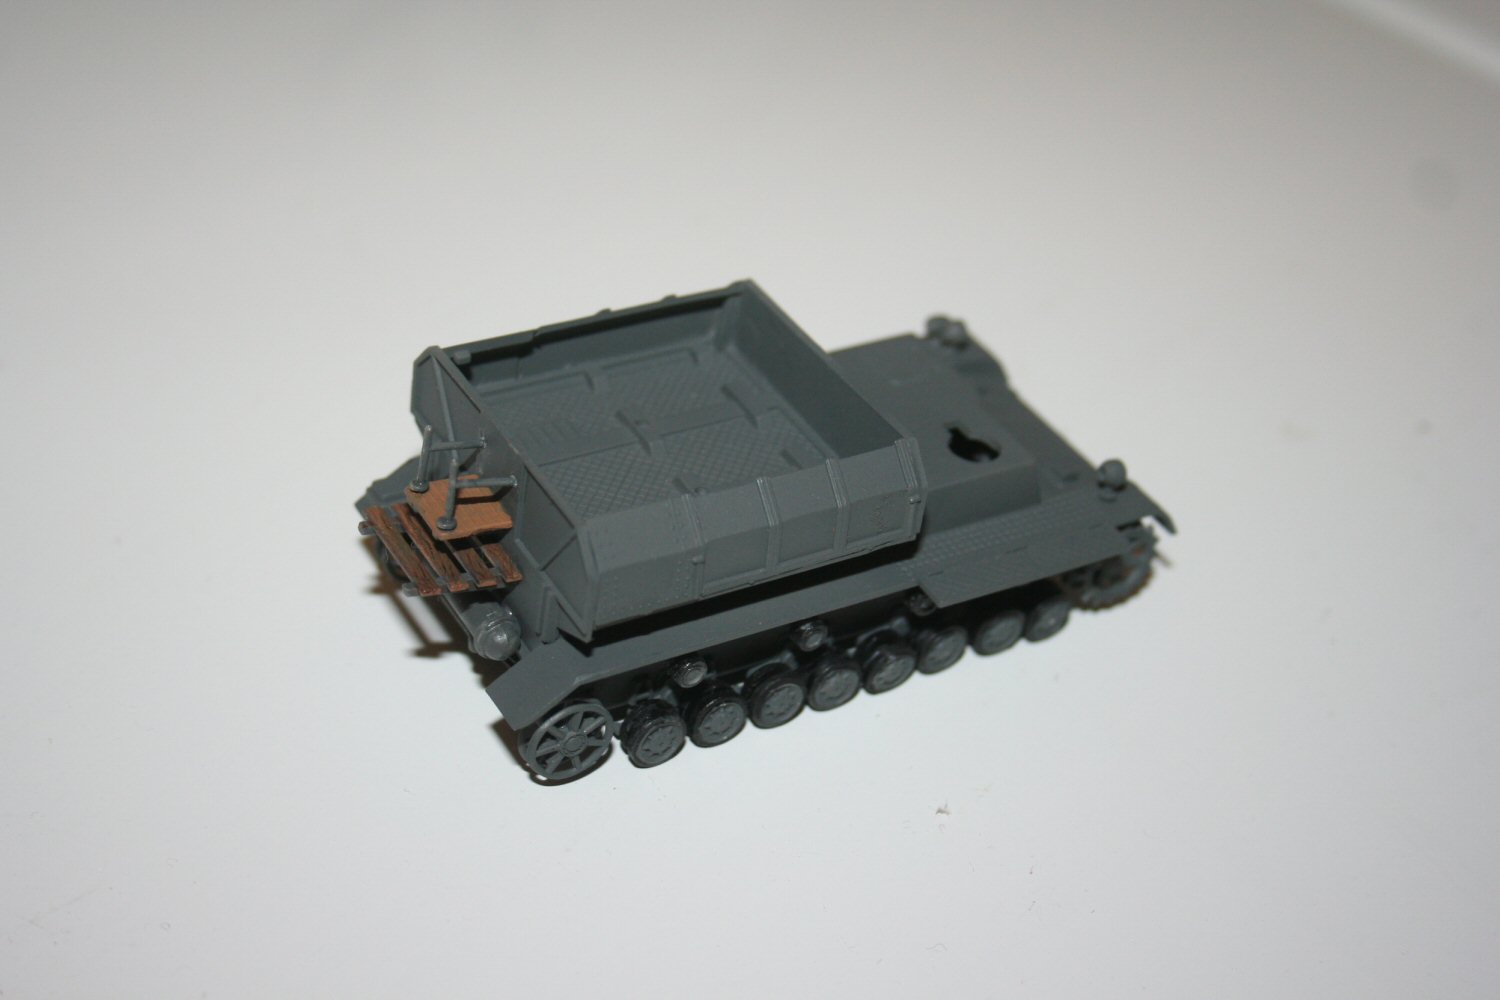
Munitionspanzer in Progress
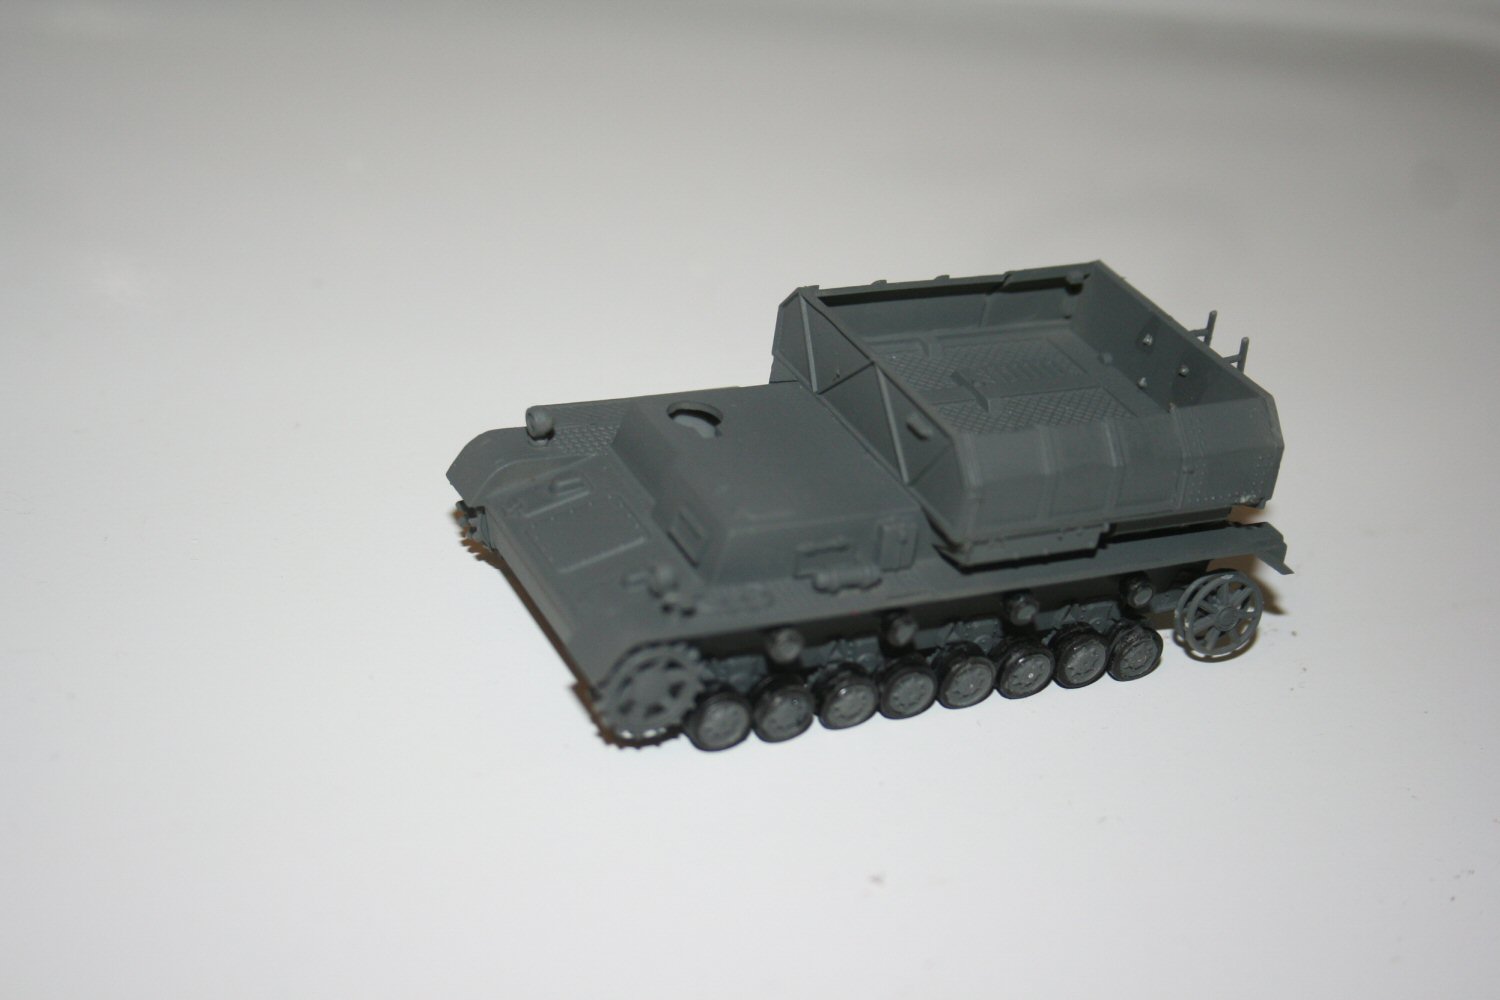
Munitionspanzer in Progress

Munitionspanzer Rigging

Munitionspanzer Top
Munitionspanzer Finished Right
Karl Chassis Side
Karl Chassis Top

Karl Chassis Rear
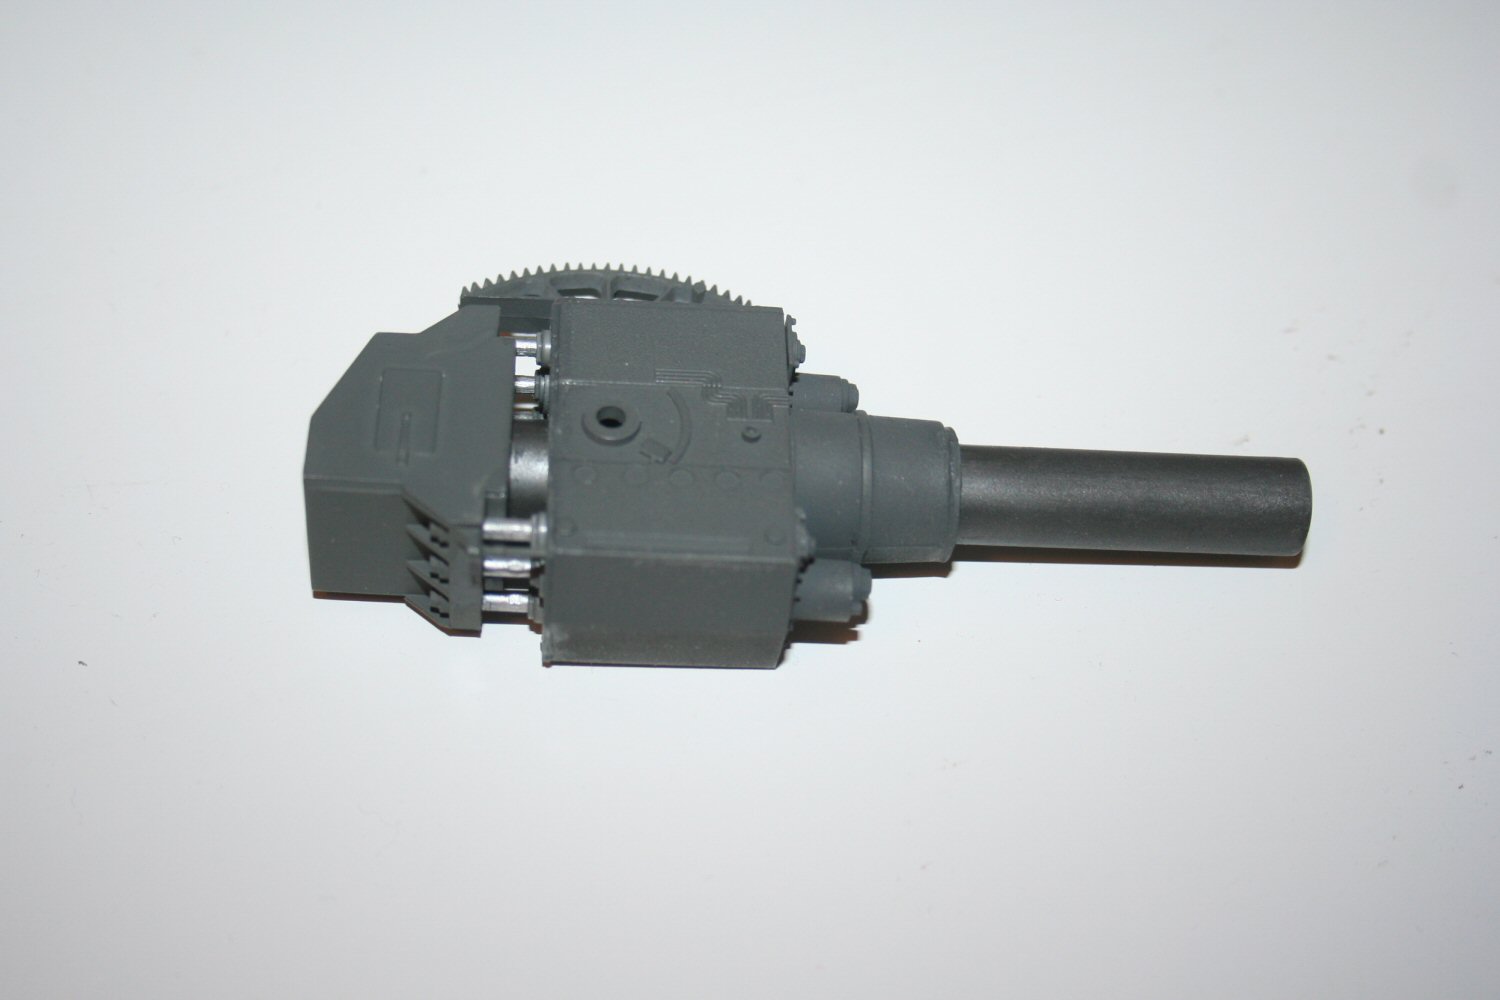
Karl Gun

Karl Finished Left
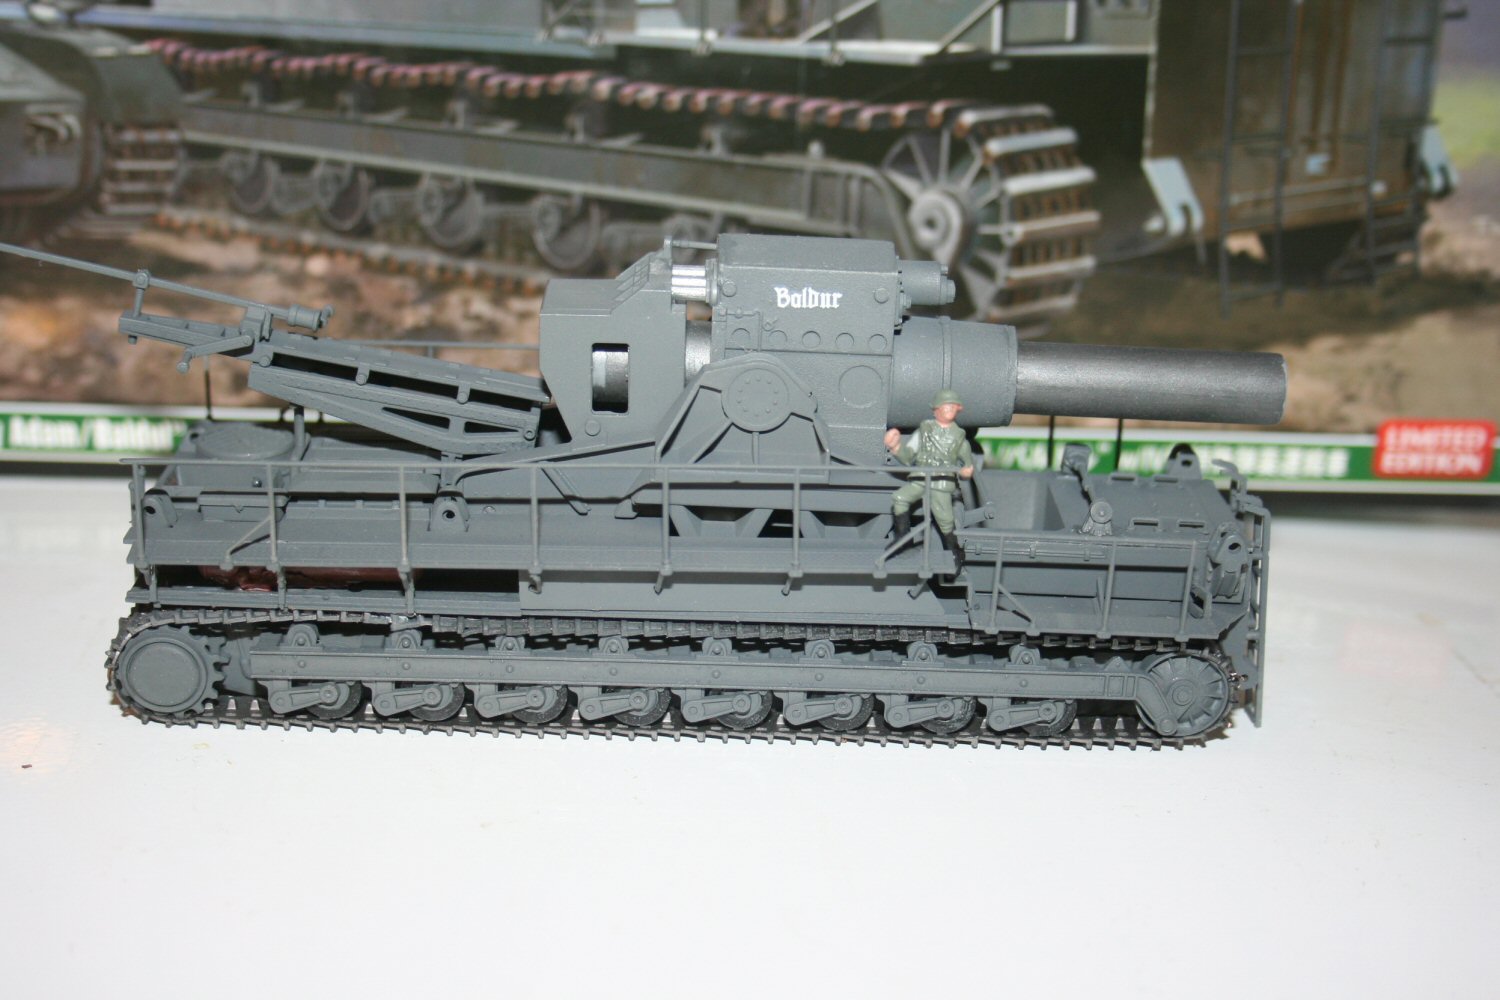
Karl Finished Right

Karl Finished Front
Karl Finished Rear
Karl Finished Top
Comments
Add new comment
This site is protected by reCAPTCHA and the Google Privacy Policy and Terms of Service apply.
Similar Reviews