
A-4E Skyhawk "VMA-211 Wake Island Avengers"
I would like to express my sincere thanks to Platz for providing this kit to IPMS/USA and to them for allowing me to review it.
The A-4 Skyhawk originated as a private venture design under a team headed by Ed Heinman. When the US Navy began looking for a replacement for the AD Skyraider Douglas Aircraft presented their new design. The Skyhawk went on to be one of the most successful post-WWII aircraft to serve the US Navy. A total of 2,960 A-4s were built in many variations and they flew in the service of as many as ten countries.
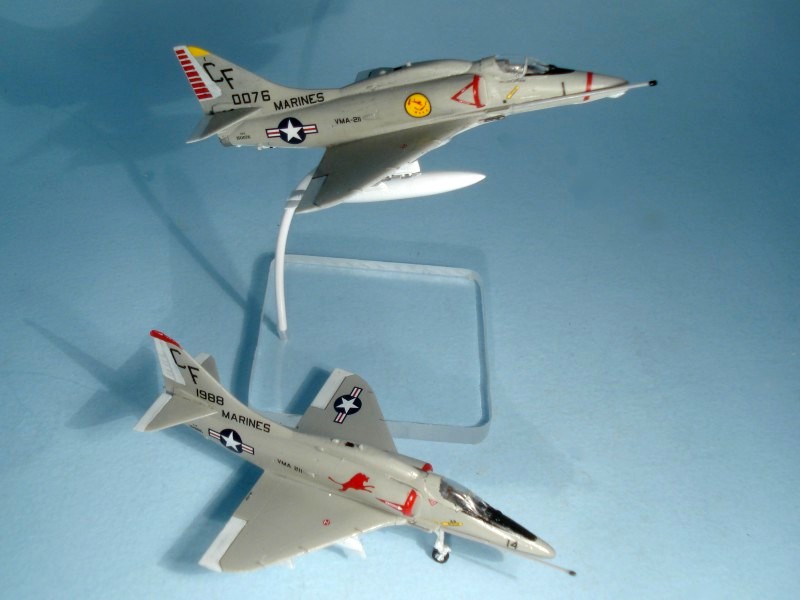
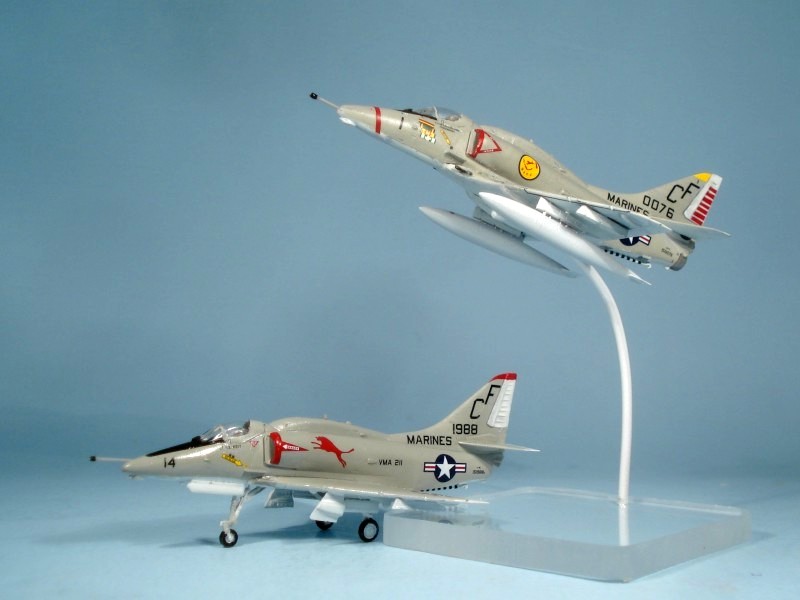
The models built for this review represent the US Marine Corps Squadron VMA-211, “Wake Island Avengers”. VMA-211 was established on July 1, 1941, however, the squadron can trace it linage back through VMF-2, VF-8M, and VF-4M when it was established in 1937. In November 1941 VMA-211 was deployed to Wake Island, the scene of the squadron's heroic battle with Japanese forces a month later. The Japanese soon overran the island and VMA-211 relocated to Palmyra Atoll. There it adopted the name “Avengers” in memory of those squadron members who were killed or captured on Wake Island.
Platz has released a kit of the A-4E as it would have looked during the Viet Nam War. In fact, the kit contains parts for two complete and identical A-4Es. The kit box is entitled “VMA-211, Wake Island Avengers”, but there is a complete set of decals for four aircraft:
- A-4E, Bu 151988, VMA-211, "Wake Island Avengers"
- A-4E, Bu 150076, VMA-211, "Wake Island Avengers"
- A-4E, Bu 159651, VMA-153/VMA-311 "Tomcats"
- A-4E, Bu 15050, VMAT-102 "Skyhawks"
I built both of the models using the VMA-211 decals, but built one with the gear down and one with the gear up.
The Kit
The kit comes in a small box measuring 7-1/2” X 4-3/8” X 1-1/8”. The box top shows a photograph of the two A-4Es, one in VMA-211 markings and the other in VMAT-102 markings. The back of the box depicts colored line drawings of four aircraft in the markings provided on the decal sheet. The pictures on the front and back of the box may be useful when painting and decaling the model.
The instructions are broken down into six easy to follow steps. The painting and decaling diagrams are clear and easy to read. Painting callouts use generic colors, FS numbers, Gunze Sangyo and Model Master Paint codes.
The parts are molded on 6 gray and 2 clear styrene sprues. The canopies are crystal clear and fairly thin. There are not many parts in this kit, but they are nicely molded with engraved panel lines. There is even some nice detail on the interior of the landing gear doors. Flash and ejector pin marks are a bare minimum. The best of all is that the parts fit together with little or no filler.
The Build
The instructions start with the external tanks and placing the wheels on the main landing gear. Joining the fuselage halves and joining the top and bottom of the wings follow next. If external stores are to be added, then holes must be drilled in the bottom half of the wing before it is assembly. Speaking of external stores, the kits only provides external fuel tanks, no rockets or bombs.
Next come the addition of the horizontal stabilizers, guns, engine inlets, seat, and canopy and exhaust nozzle. They also show the refueling probe being added at this time. I suggest it be placed as the last item. Because there is so much handling to be done adding the landing gear, gear doors and the external fuel tanks, this delicate little piece is subject to breakage.
The build is very straightforward and I did not encounter any difficulty. The part fit was excellent and the slightest bit of filler was used at the wing/fuselage interface on the underside.
I have one word of caution. Don’t forget the weight in the nose to keep this model from being a tail setter. The reminder is in the instructions, but it could be overlooked as it is incorporated in a note written in Japanese characters.
The only thing I can suggest to make this kit better is to include a stand for the wheels up in-flight build. I made a simple stand using a piece of Lucite and a section of heavy copper wire painted white. To finish the stand off I think I’ll add the VMA-211 logo to the base.
Finishing
Finishing these two models is fairly simple. The upper surfaces of each model are light gull gray and the under surfaces are white. For such a small model the decaling is pretty thorough. The decals are easy to work with and slide off the backing after a few seconds of being wet. Some of the decals are quite small, but all behaved nicely. That’s exactly what you expect from Cartograf decals.
Assessment
For such a small scale the parts fit is better than many 1/48 scale models on the market. The same can be said for the level of detail. The decal placement is trouble free. As an introduction to building 1/144 scale models, a better kit than this one cannot be selected. It is easy to recommend this kit to the novice as well the more experience builder.
Thanks again to Platz and IPMS for making this kit available for review.


Comments
Add new comment
This site is protected by reCAPTCHA and the Google Privacy Policy and Terms of Service apply.
Similar Reviews