
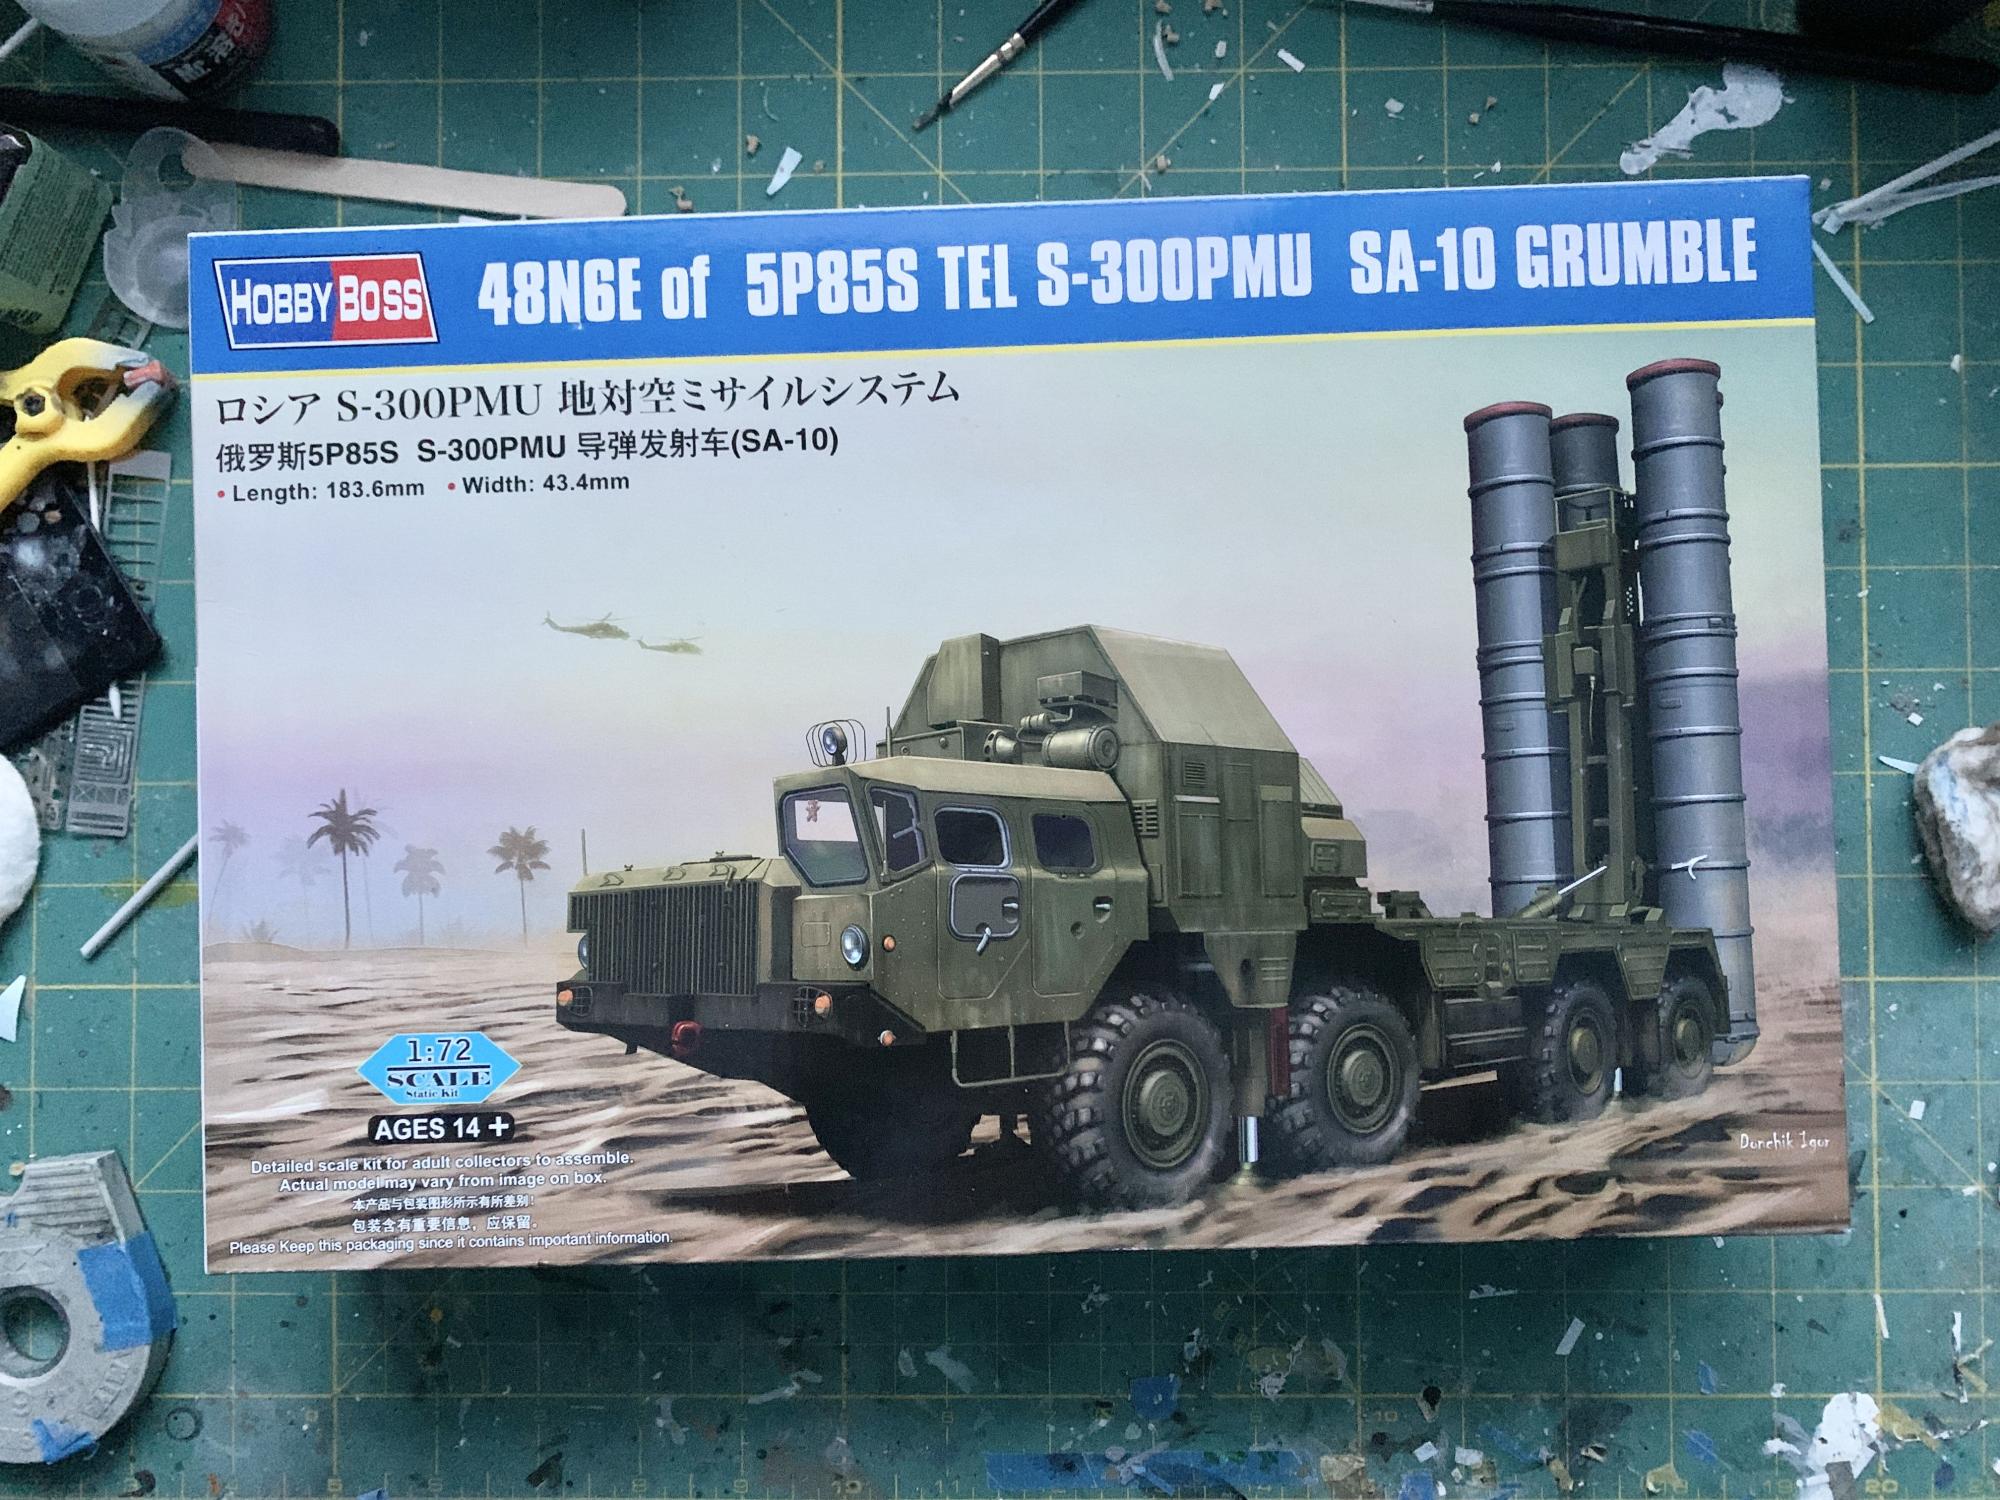
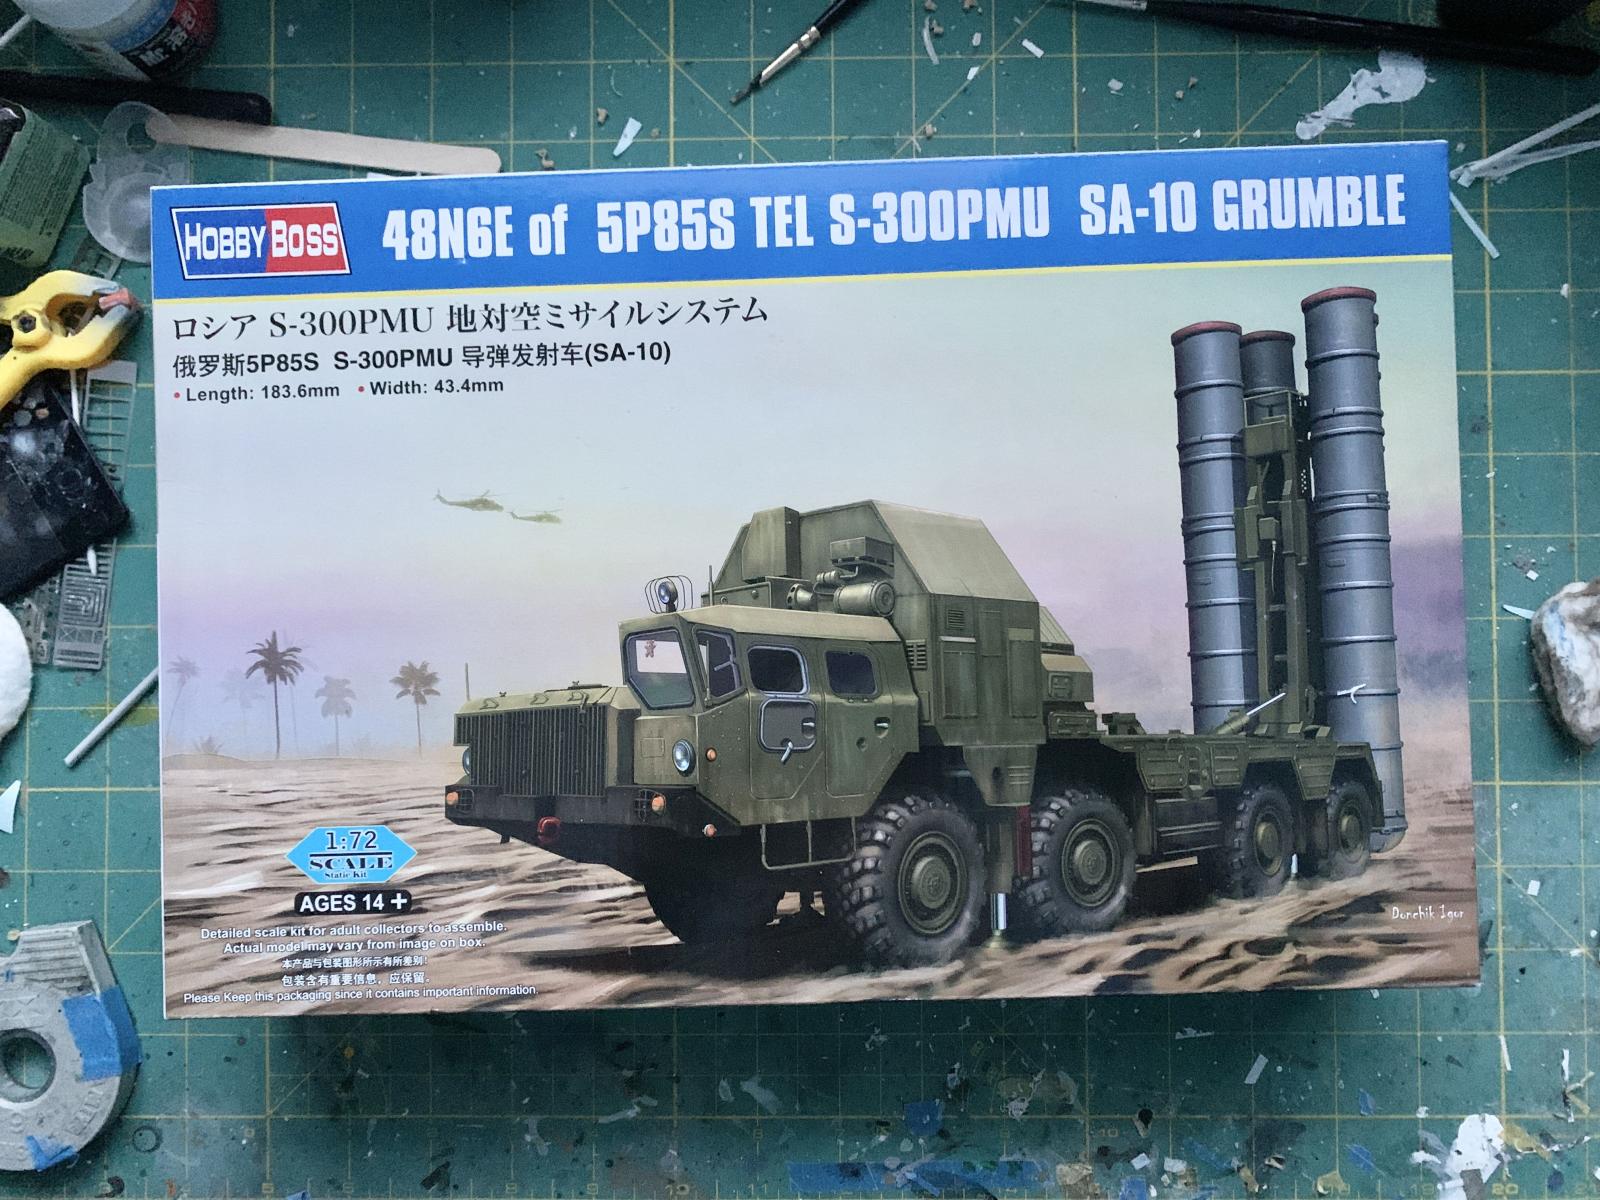
48N6E of 5P85S TEL S-300PMU SA-10 Grumble
Notes: Missiles not included, only canisters. Instructions are vague on stencil placement. This kit would make a great introduction to armor kits.
First deployed by the Soviet Union in 1979, the S-300 (NATO reporting name: SA-10 Grumble) is a Russian long-range surface to air missile system designed to counter aircraft and cruise missiles. Over the years, the system had evolved to intercept ballistic missiles as well. Regarded as one of the most potent anti-aircraft missile systems currently fielded, it is mostly used in Russia, Asia, and Eastern Europe, though it is also in use by three NATO members: Bulgaria, Greece and Slovakia. In 2007, the S-400 (NATO reporting name: SA-21 Growler), an evolved version was introduced. The S-300 system is basically the Russian answer to the US Patriot missile system.
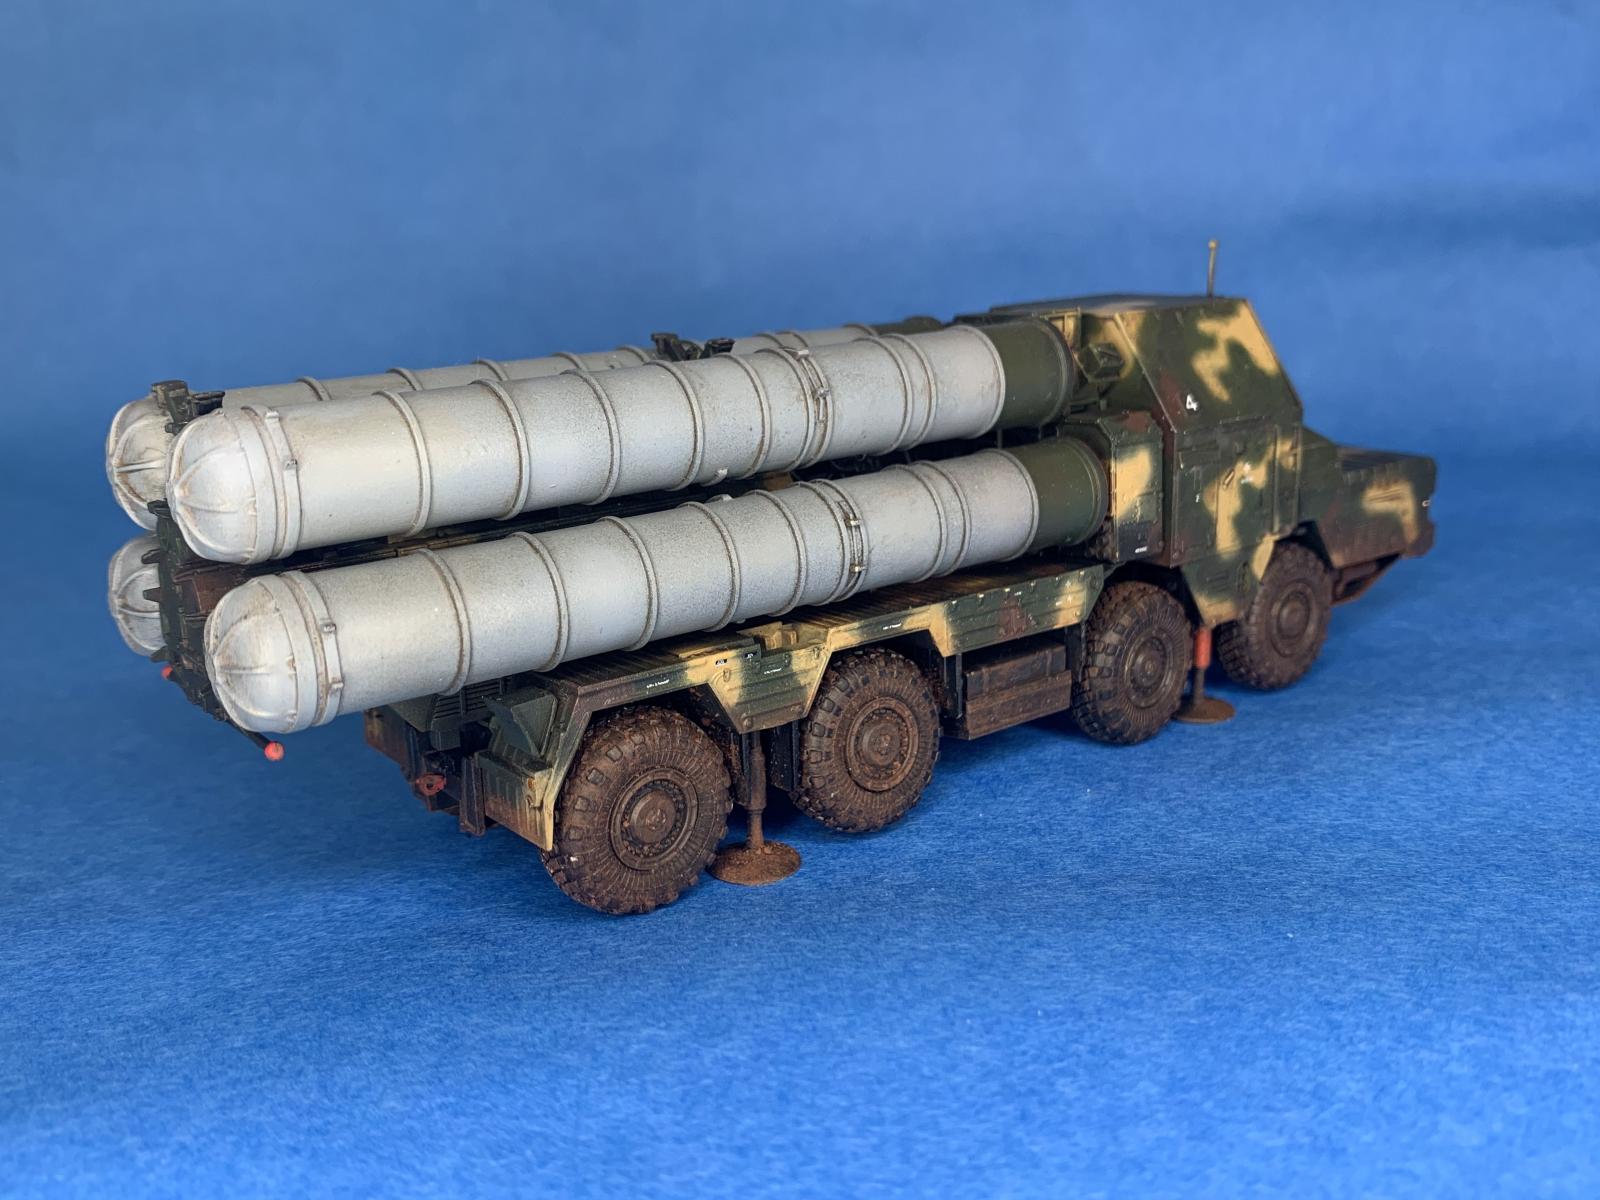
Receiving the kit, I expected the box to simply read “S-300 (SA-10 Grumble),” but instead got a box labelled “48N6E of 5P85S TEL S-300PMU SA-10 Grumble,” which is quite a mouthful. Essentially, “48N6E” is the designation of the missile itself, while “5P85S” is the designation of the vehicle it is mounted on, itself a MAZ-7910 8x8 truck. “TEL” stands for Transporter Erector Launcher. So, this long name basically describes the type of missile mounted on a specific vehicle chassis, built into a mobile SAM system. The S-300 family encompasses a wide variety of systems, so for those in the know, this very long name makes a lot of sense.
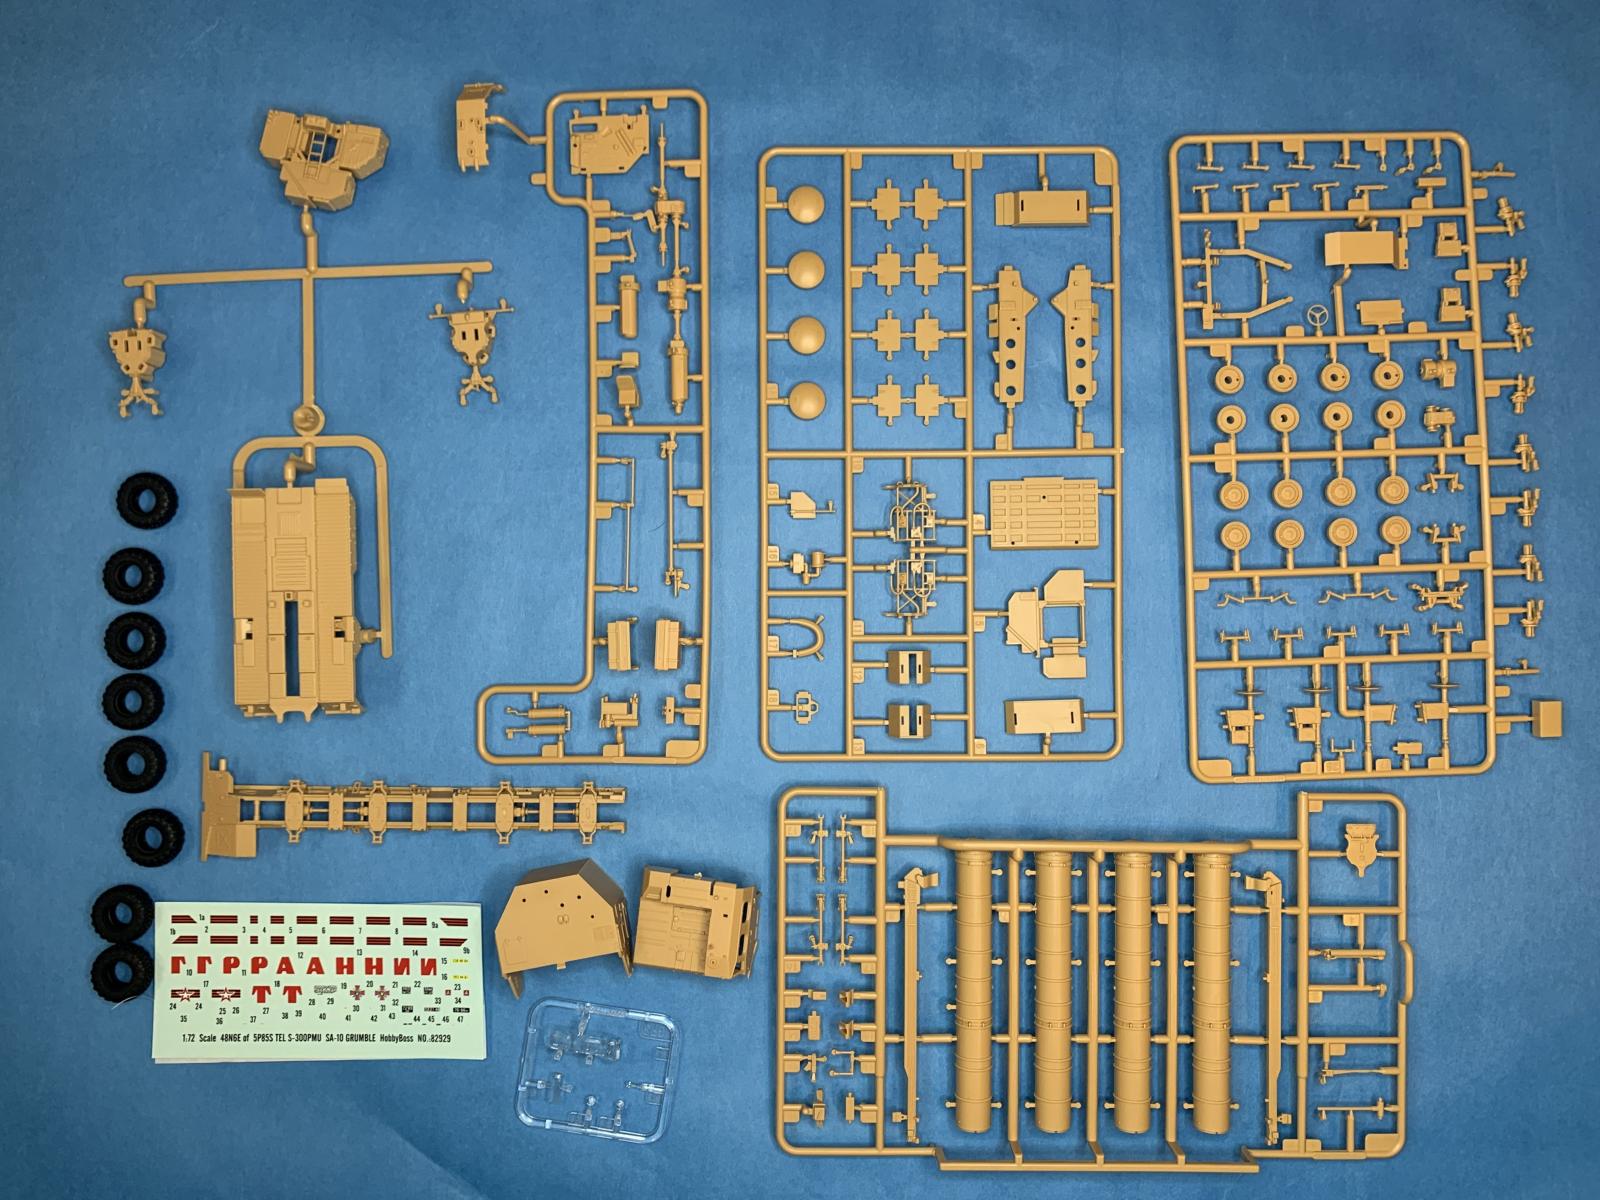
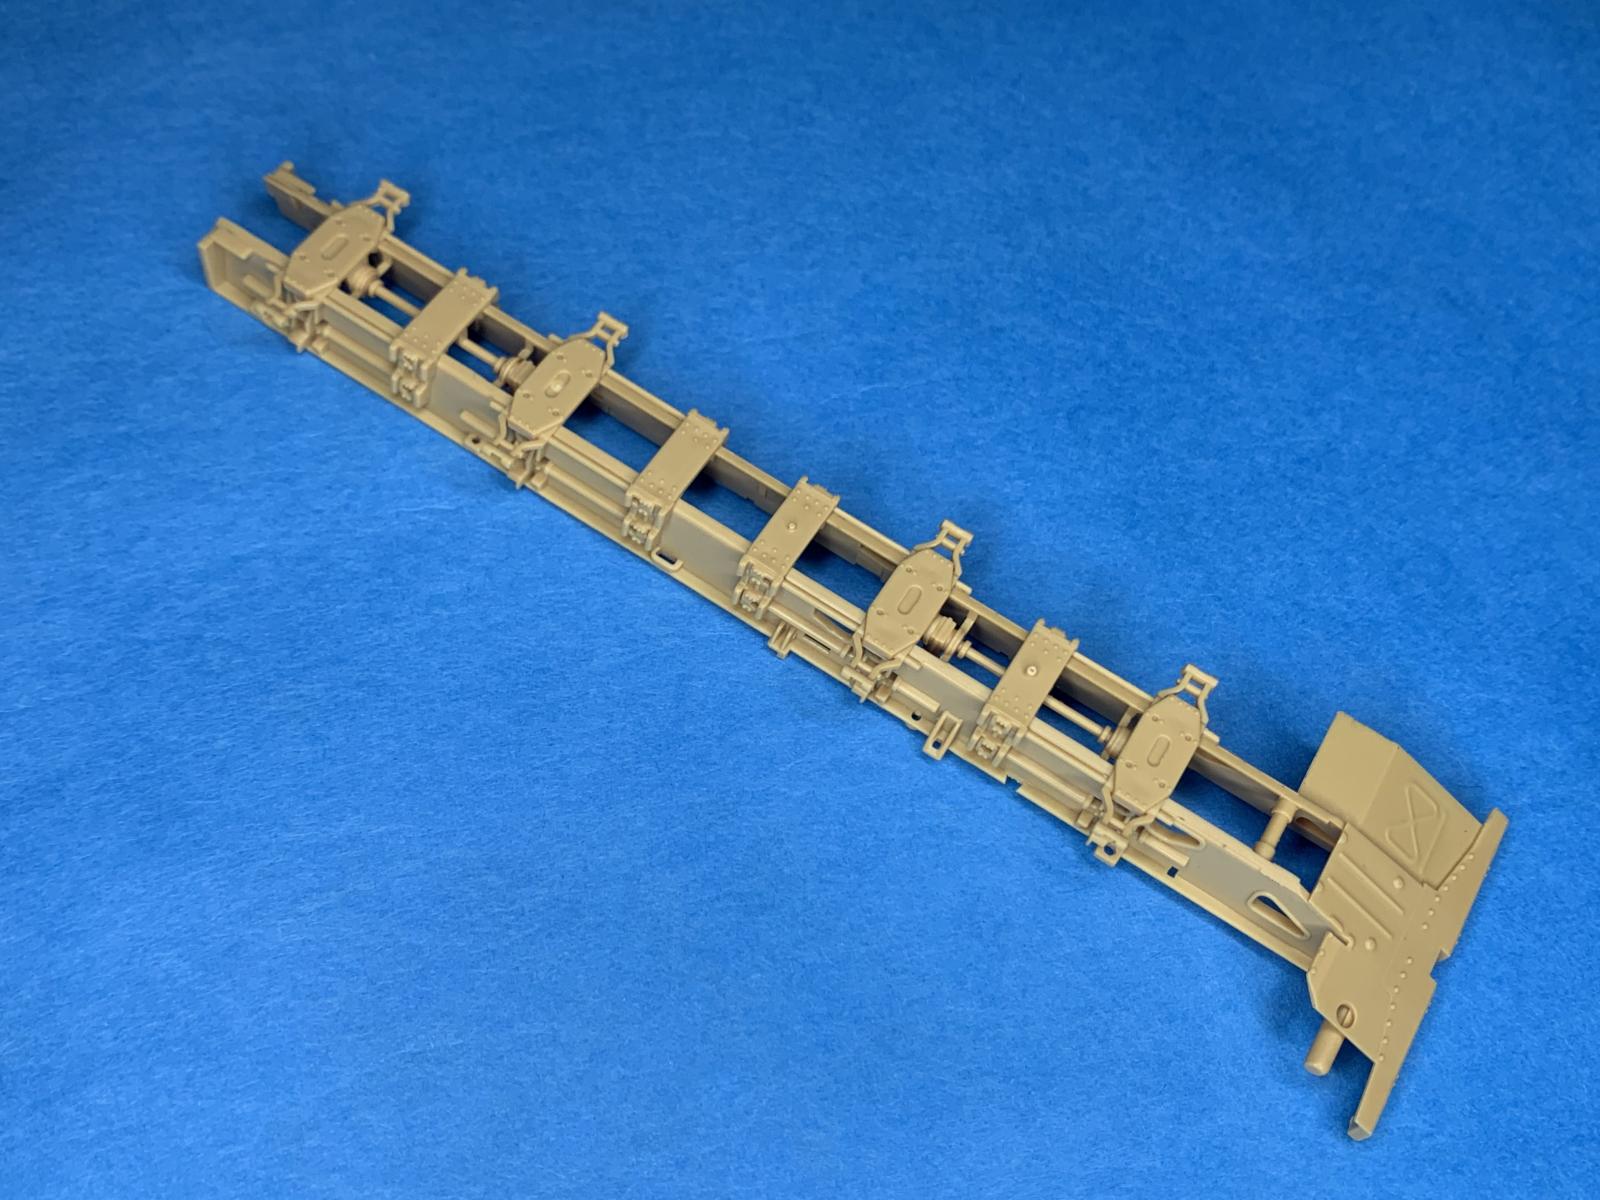
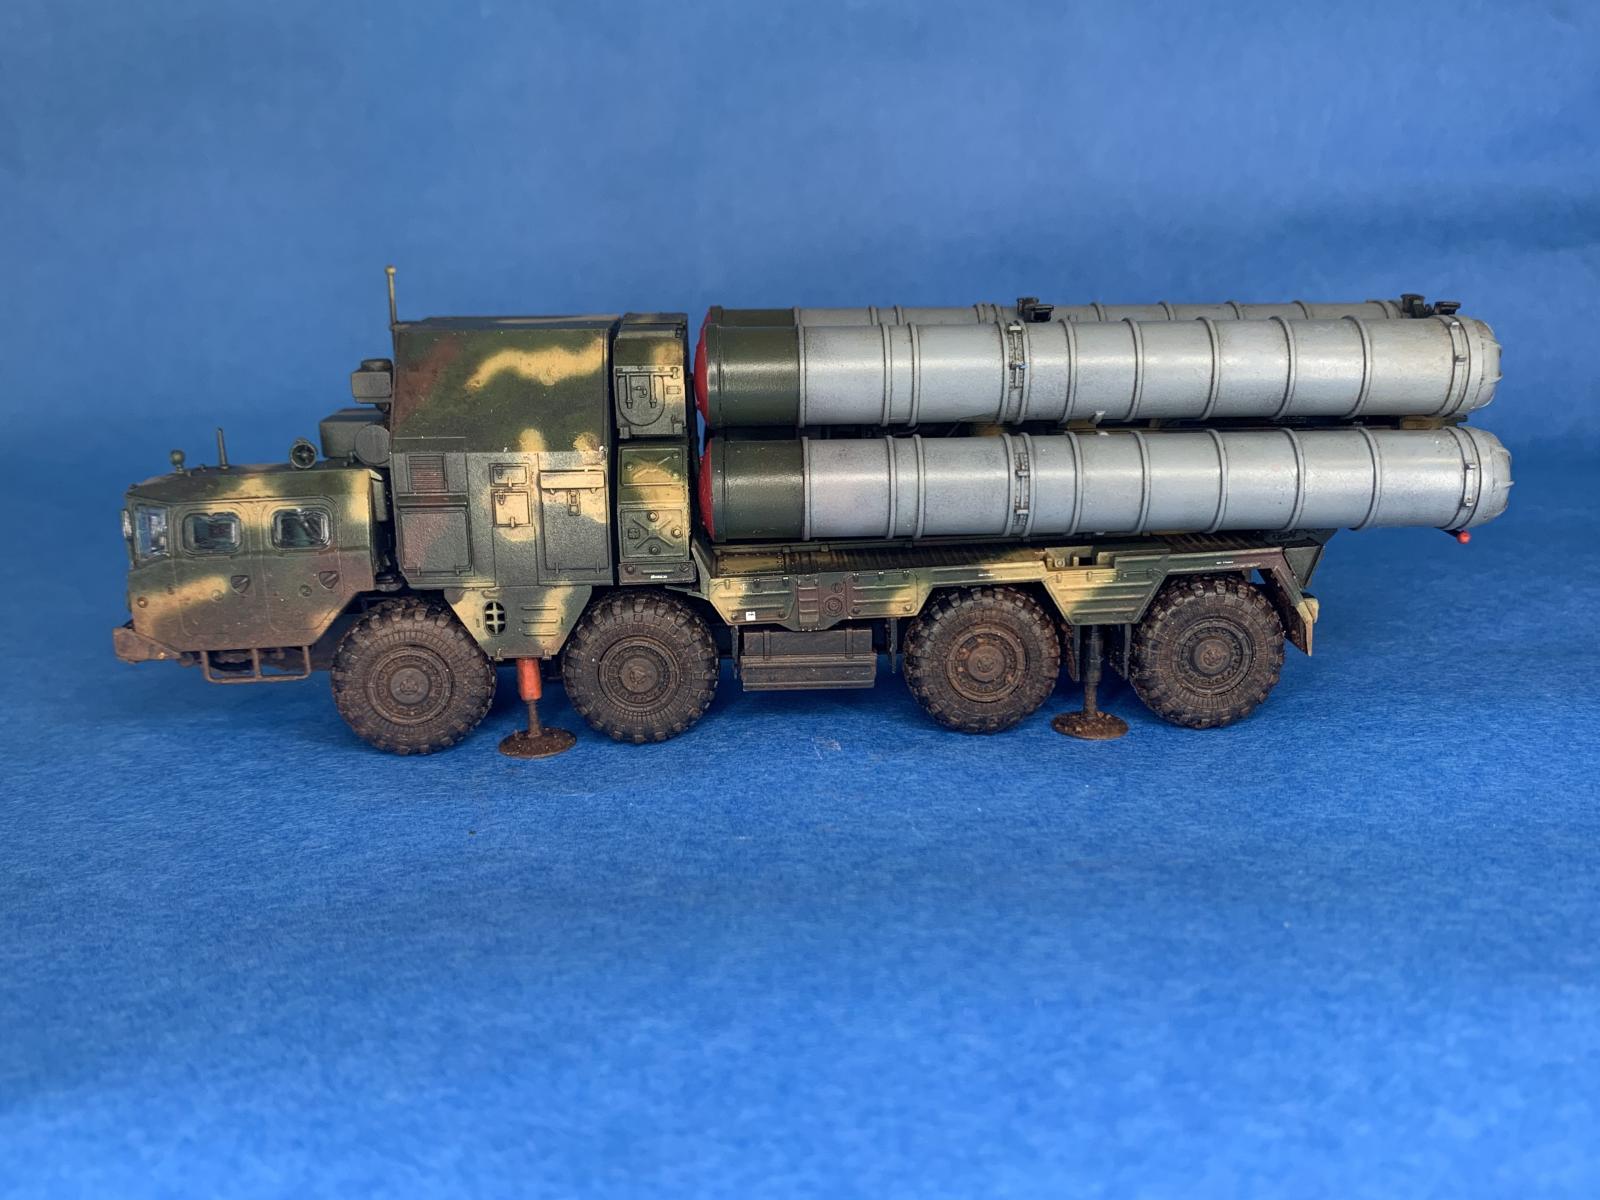
The kit itself totals 95 tan-colored pieces, which I thought was a misprint, but that’s what it is. It comes carefully packed (though two pieces broke off the sprues anyway – however, they were not damaged). The parts are amazingly beautiful though! Hobbyboss used slide mold technology to make this kit, which resulted in a reduced part count (the chassis, cab, trailer, equipment container and missile canisters are molded in one piece, for example). Altogether there are six sprues, eight vinyl tires, and three standalone pieces (crew cab, equipment container and chassis). One of the sprues, which is clear, has the wraparound windscreen, a side window, and the headlights.
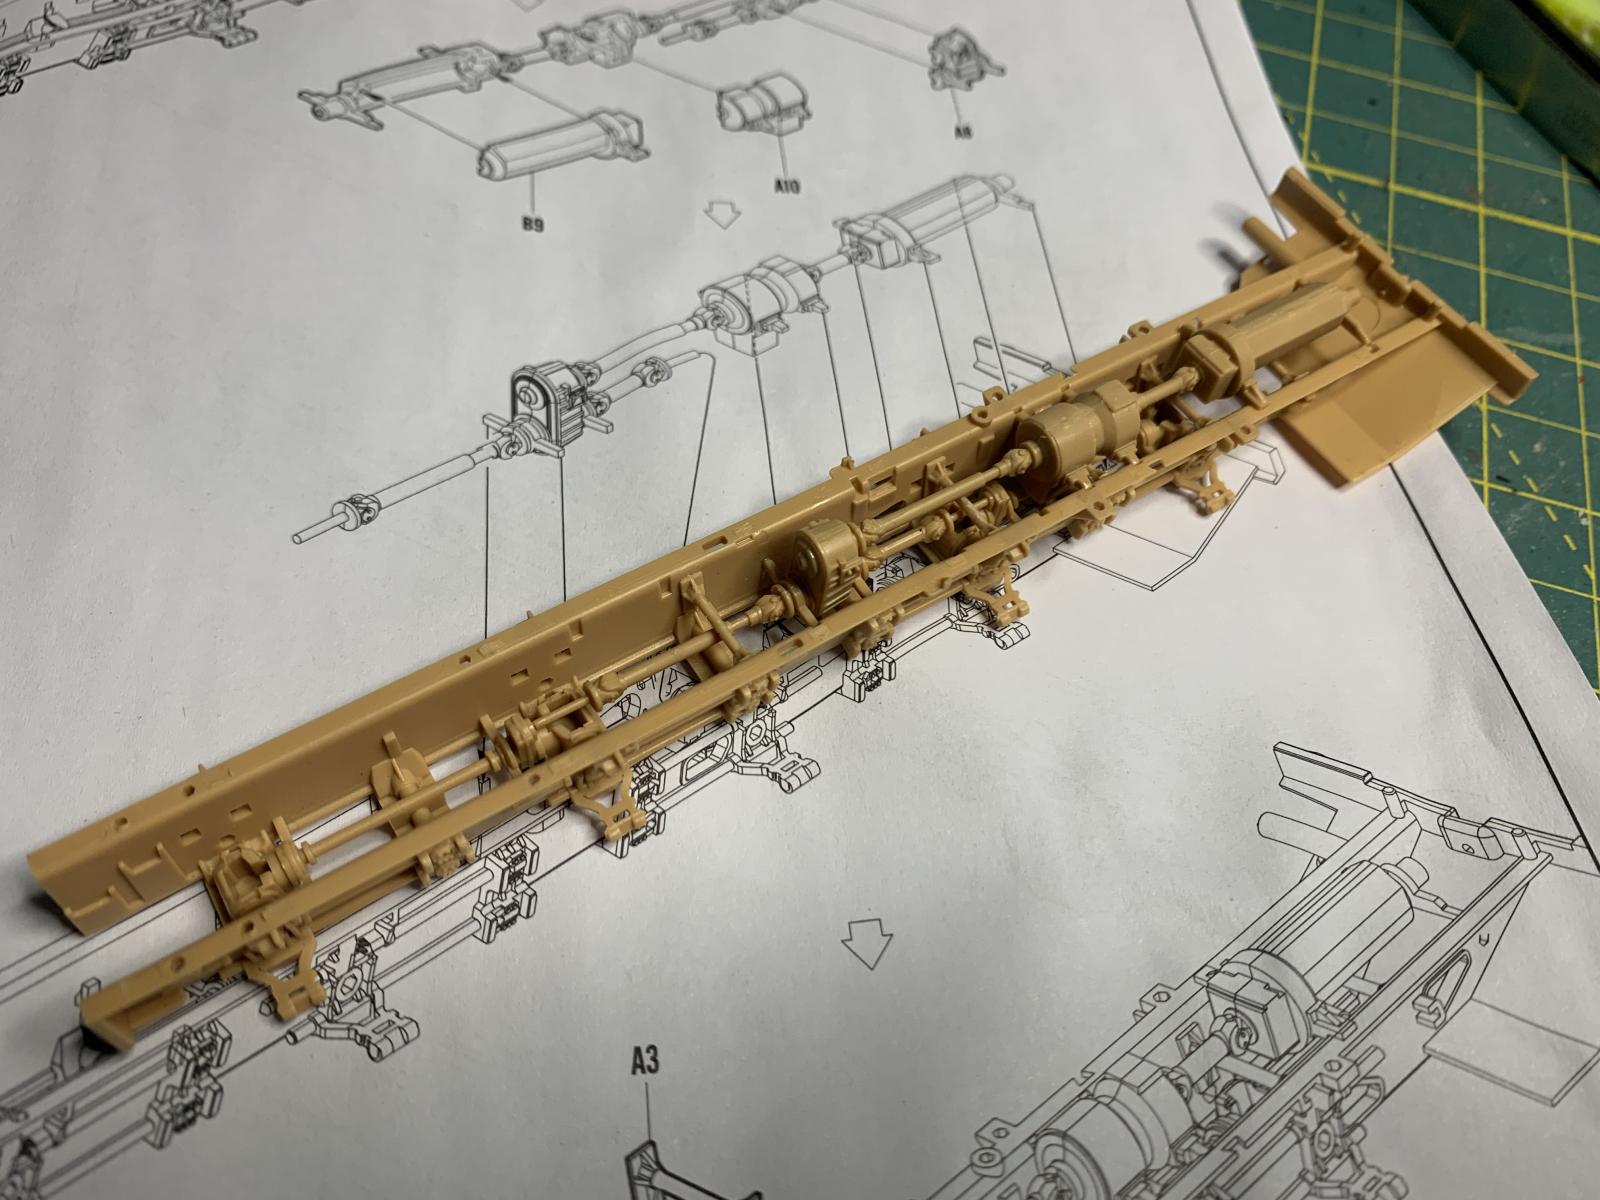
Construction begins with the chassis, which is where the bulk of the parts go to. The chassis is very detailed and has everything from the drive shaft, linkages, axles, and even shock absorbers. While detailed chassis are the norm for armor, I’ve never seen this much detail for a 1/72 kit, and it’s quite impressive. The parts almost snap together, and in some areas, like the wheels, equipment bay and missile canisters, they actually do snap together. With this much detail, it’s tempting to paint the components separately and put them together but the tolerances on this kit are so tight it’s advisable to put the bit together and paint it later. Careful planning will help to make sure you don’t end up switching from building and painting too often.
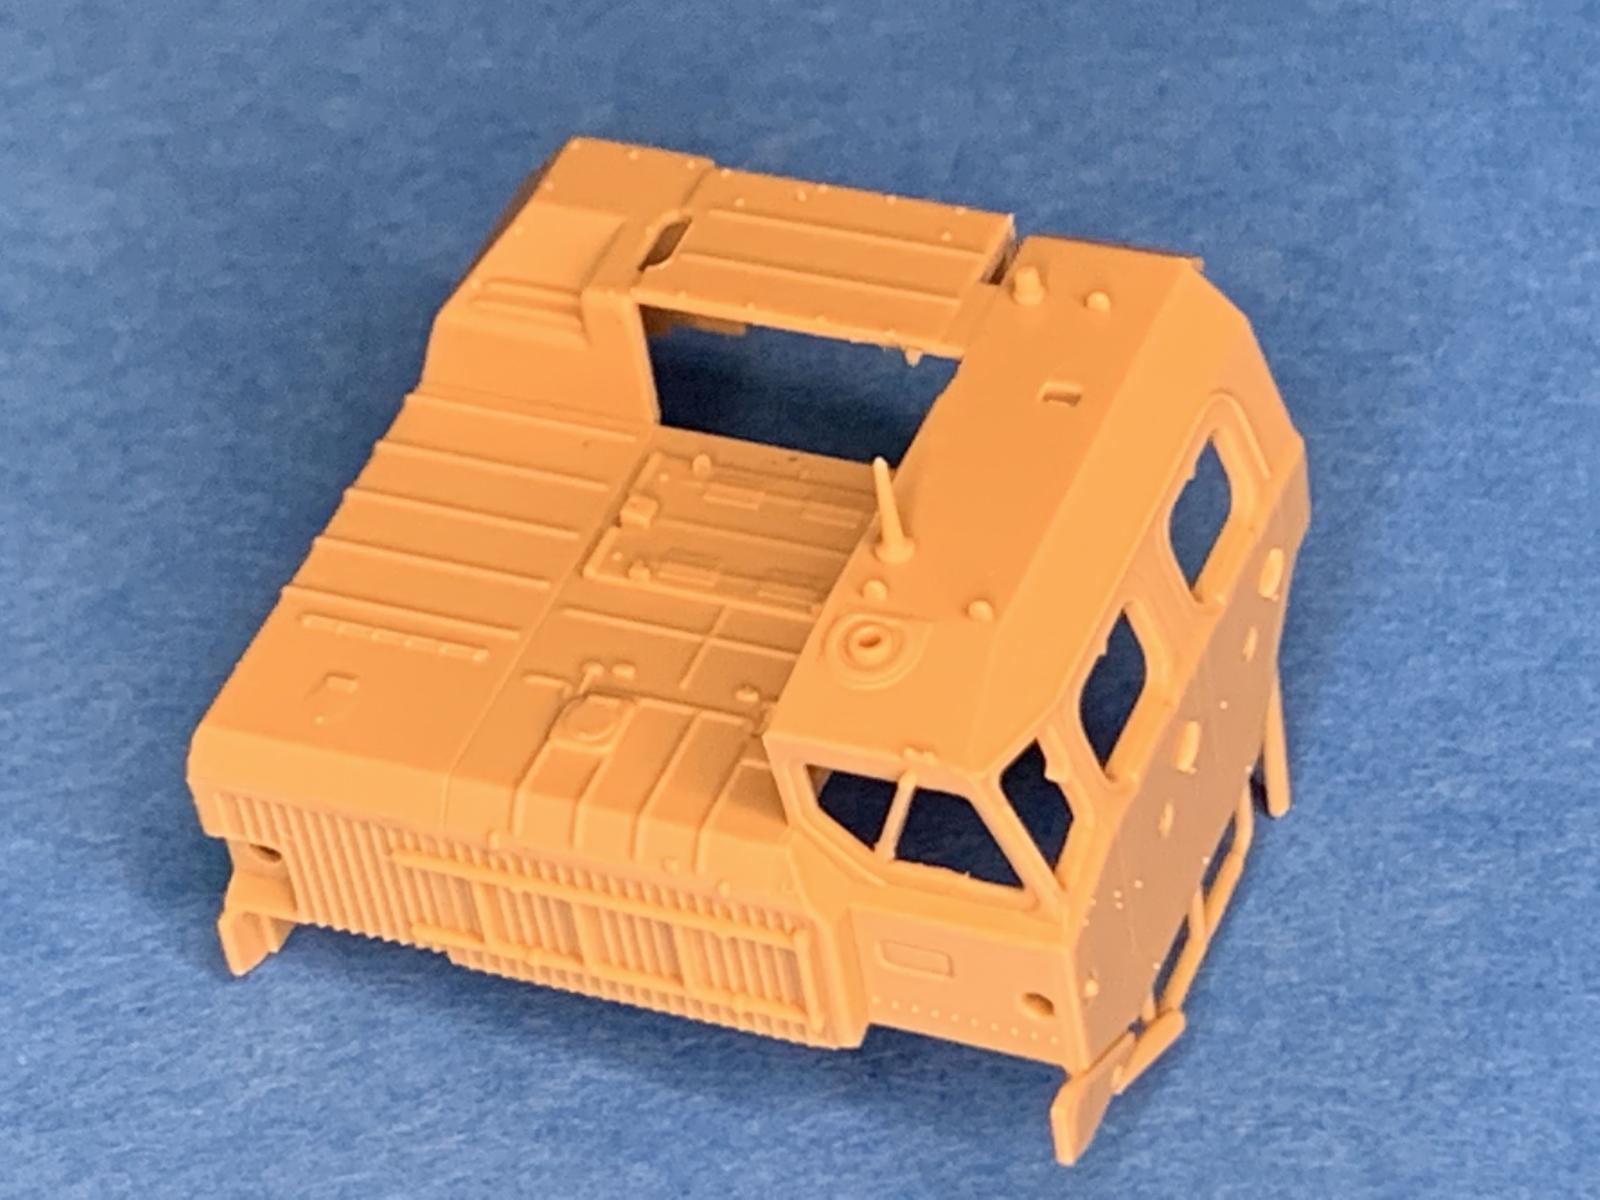
The crew cabin has two seats, a steering wheel, handbrake and instrument panel (decal gauges are provided). It is quite simple, but as the doors do not open and not a whole lot can be seen through the windows, is quite sufficient. The instructions do not detail the color of the crew cabin, but it is the same turquoise used in Russian fighter jets.
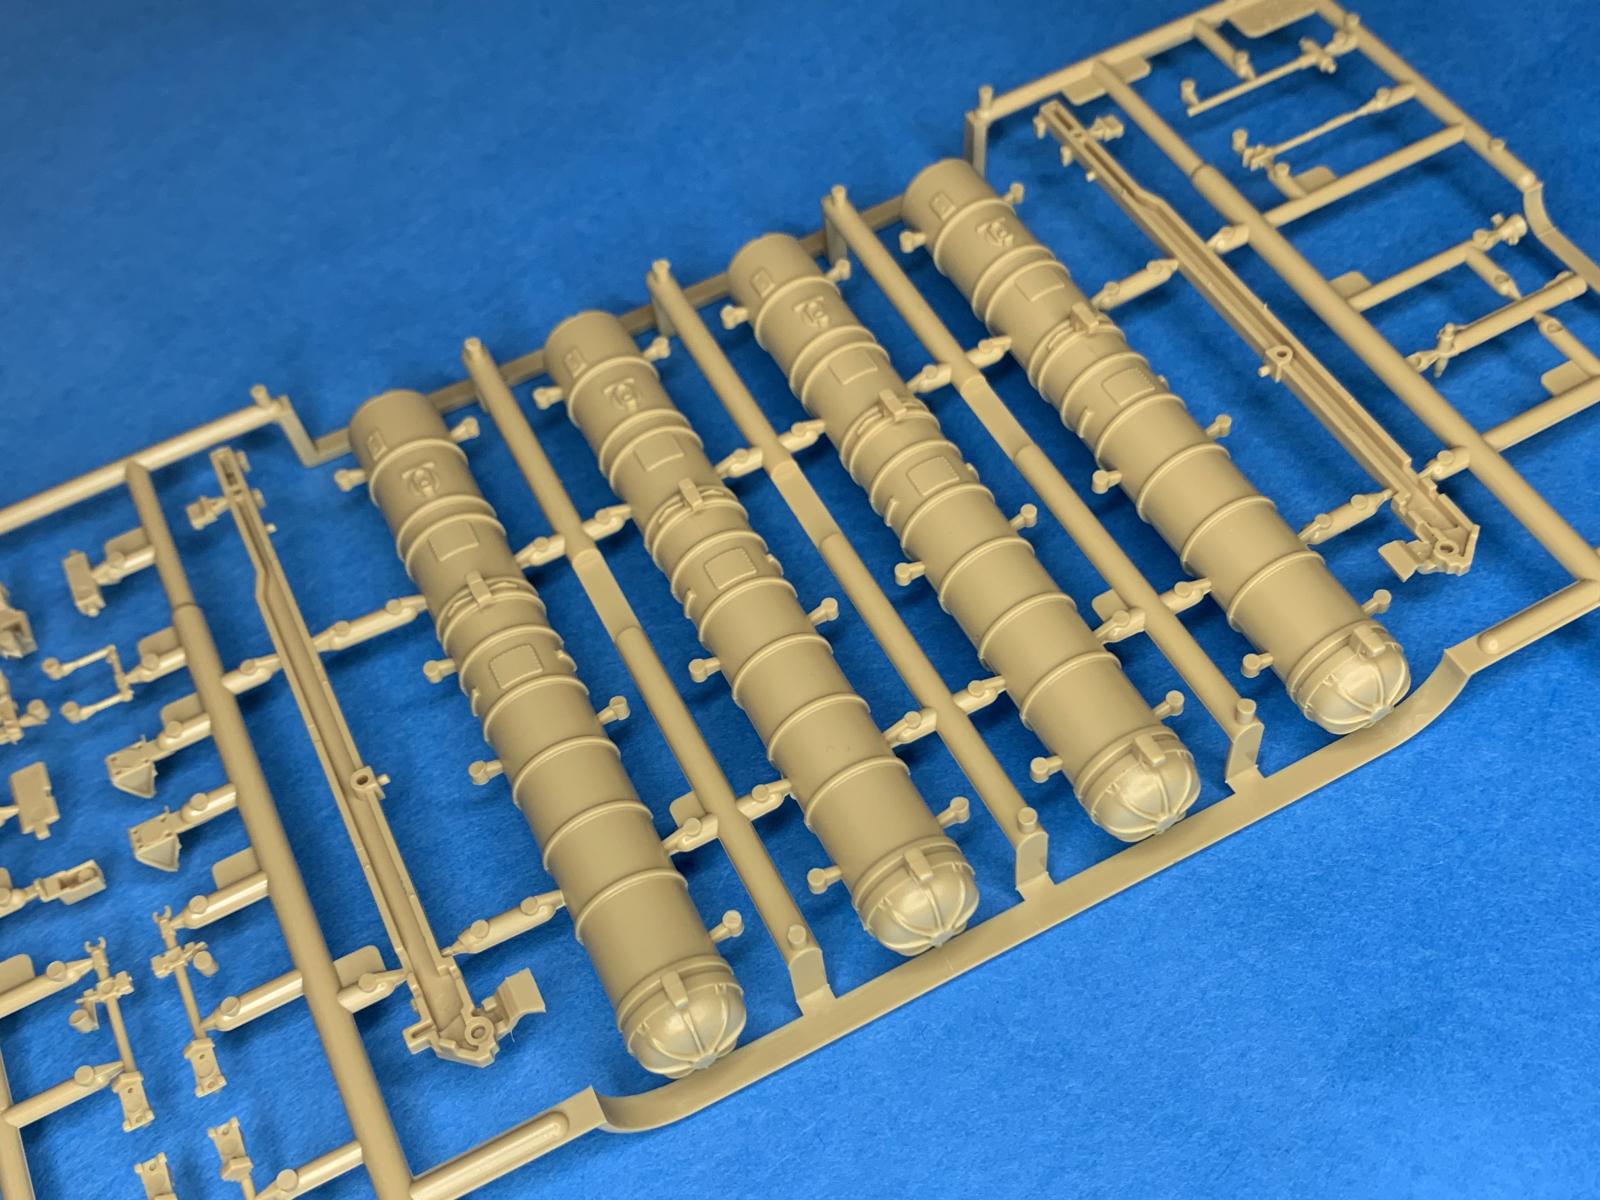
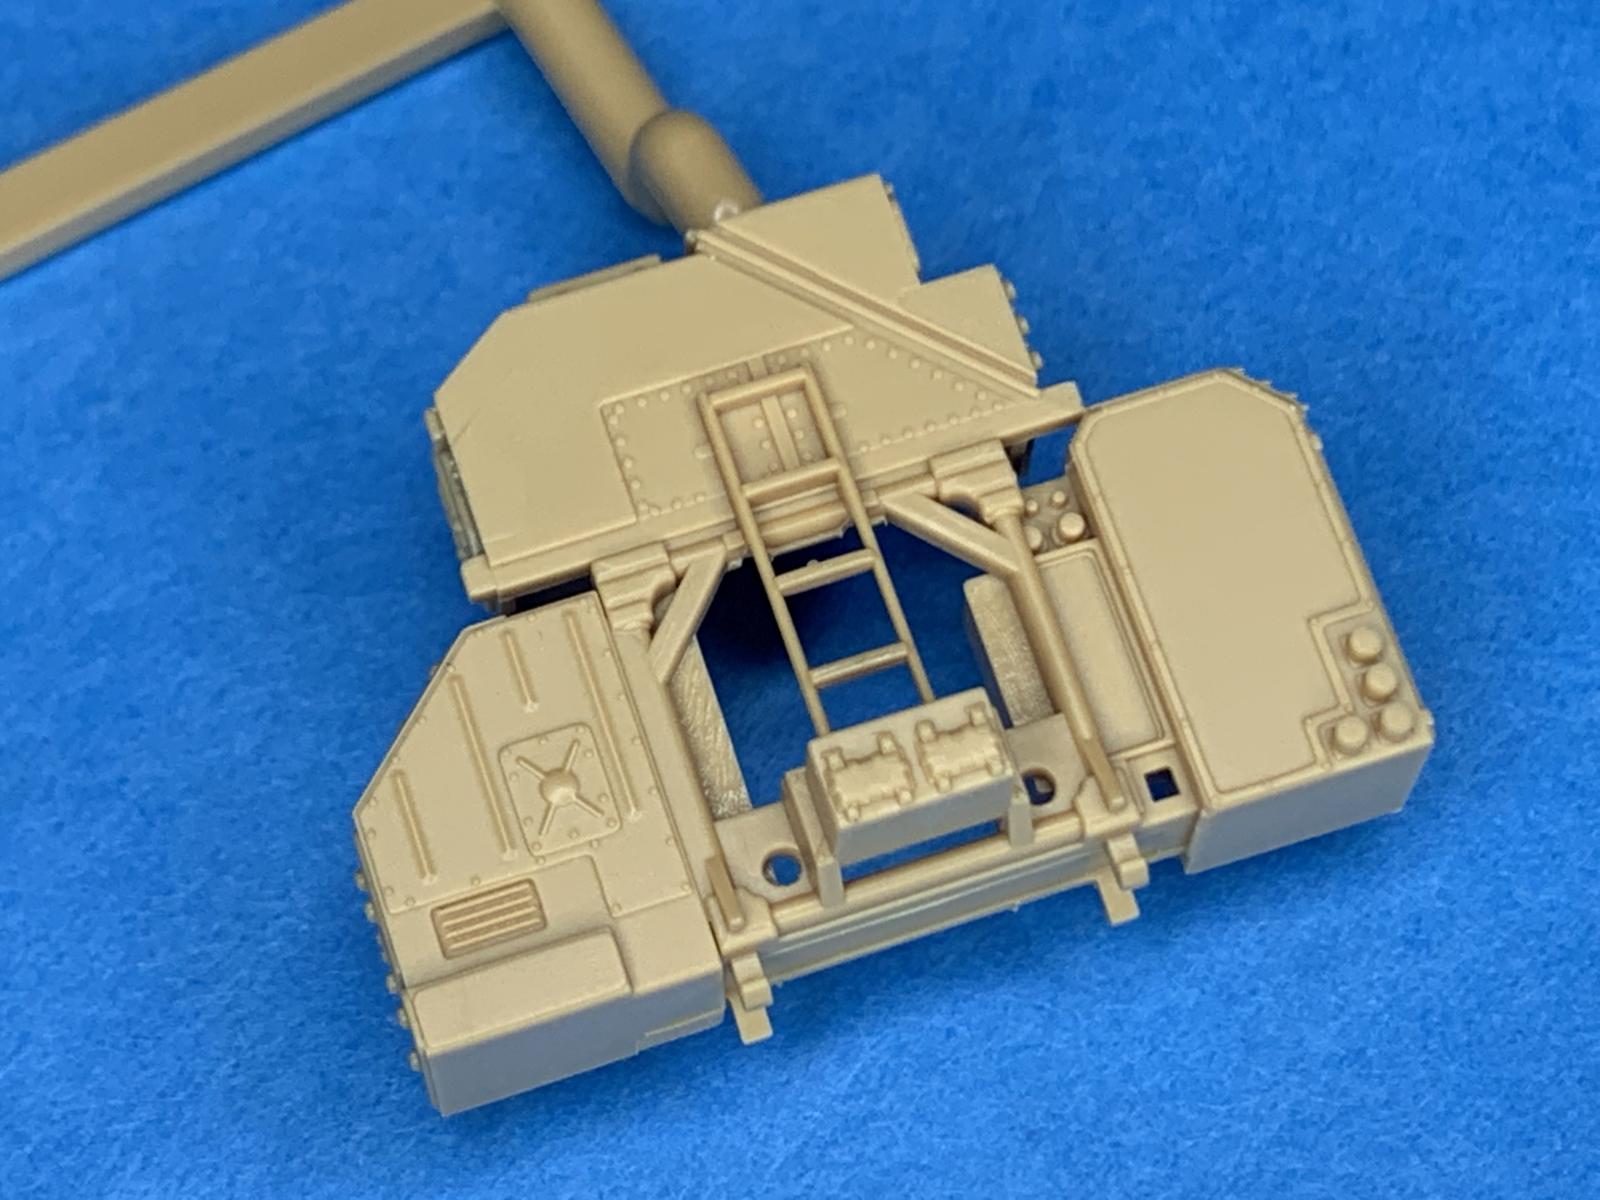
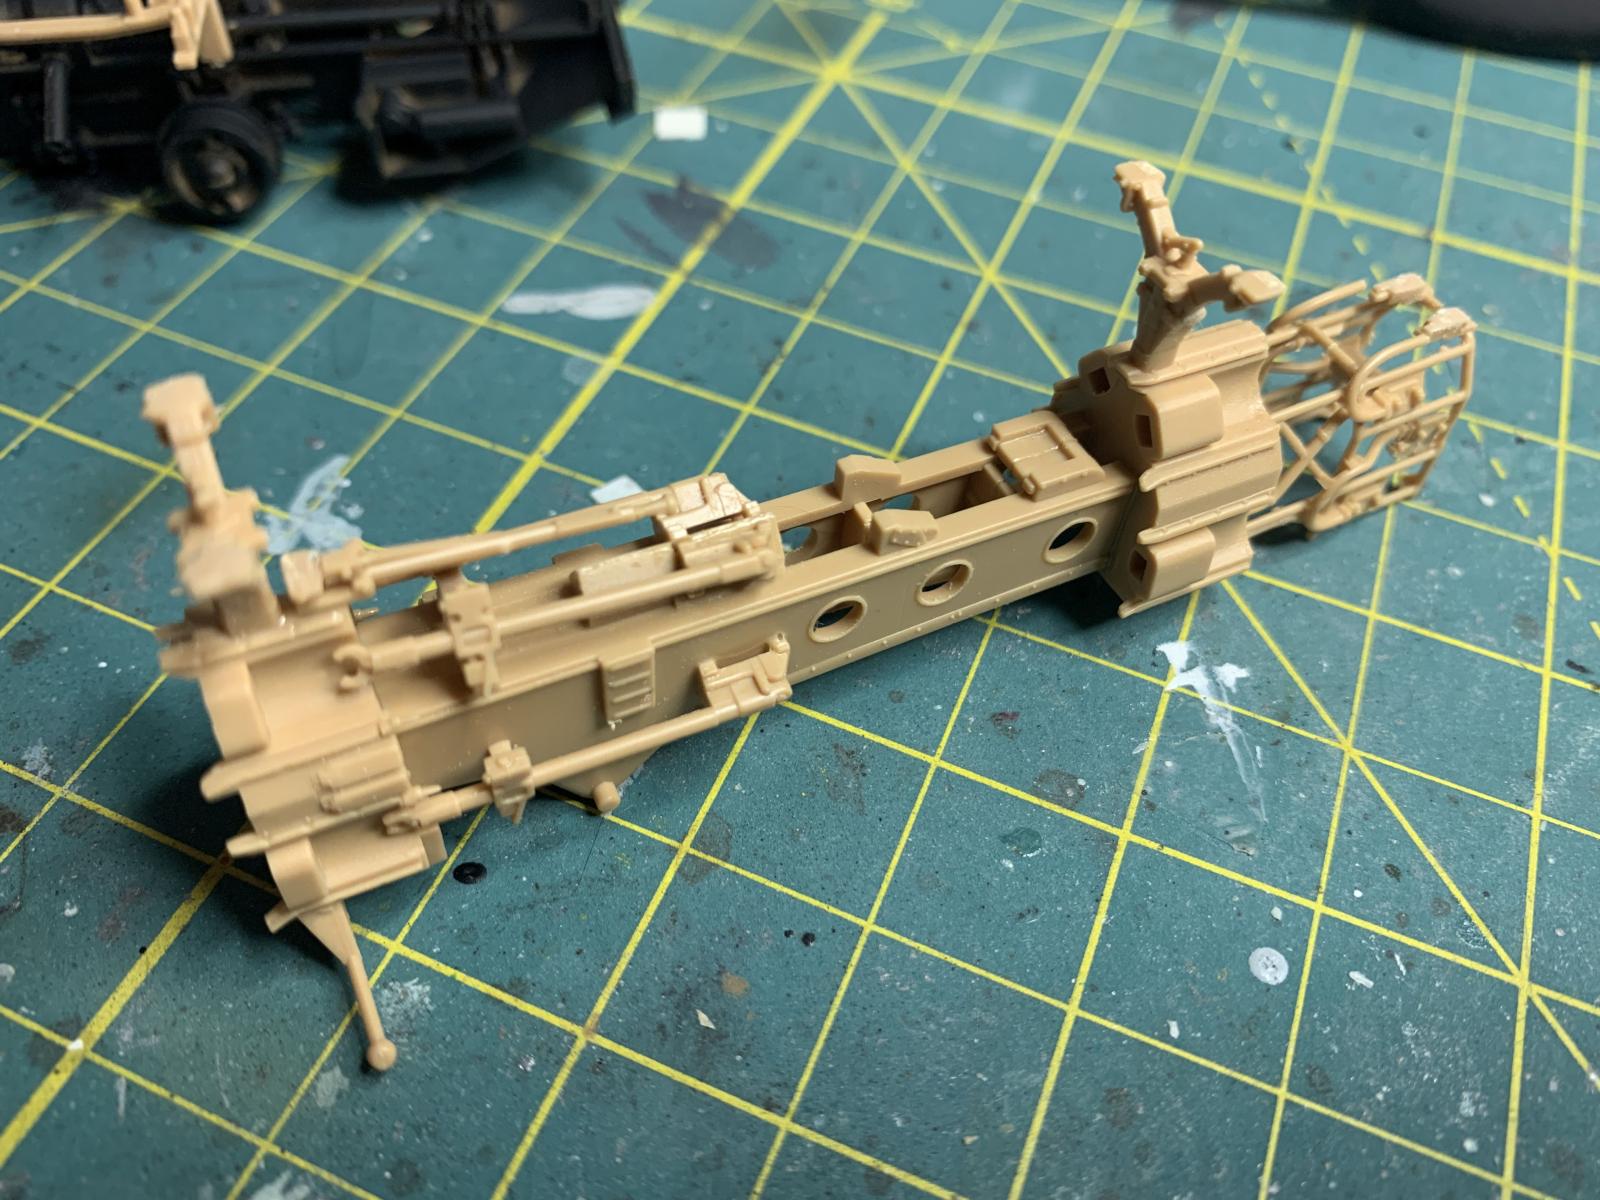
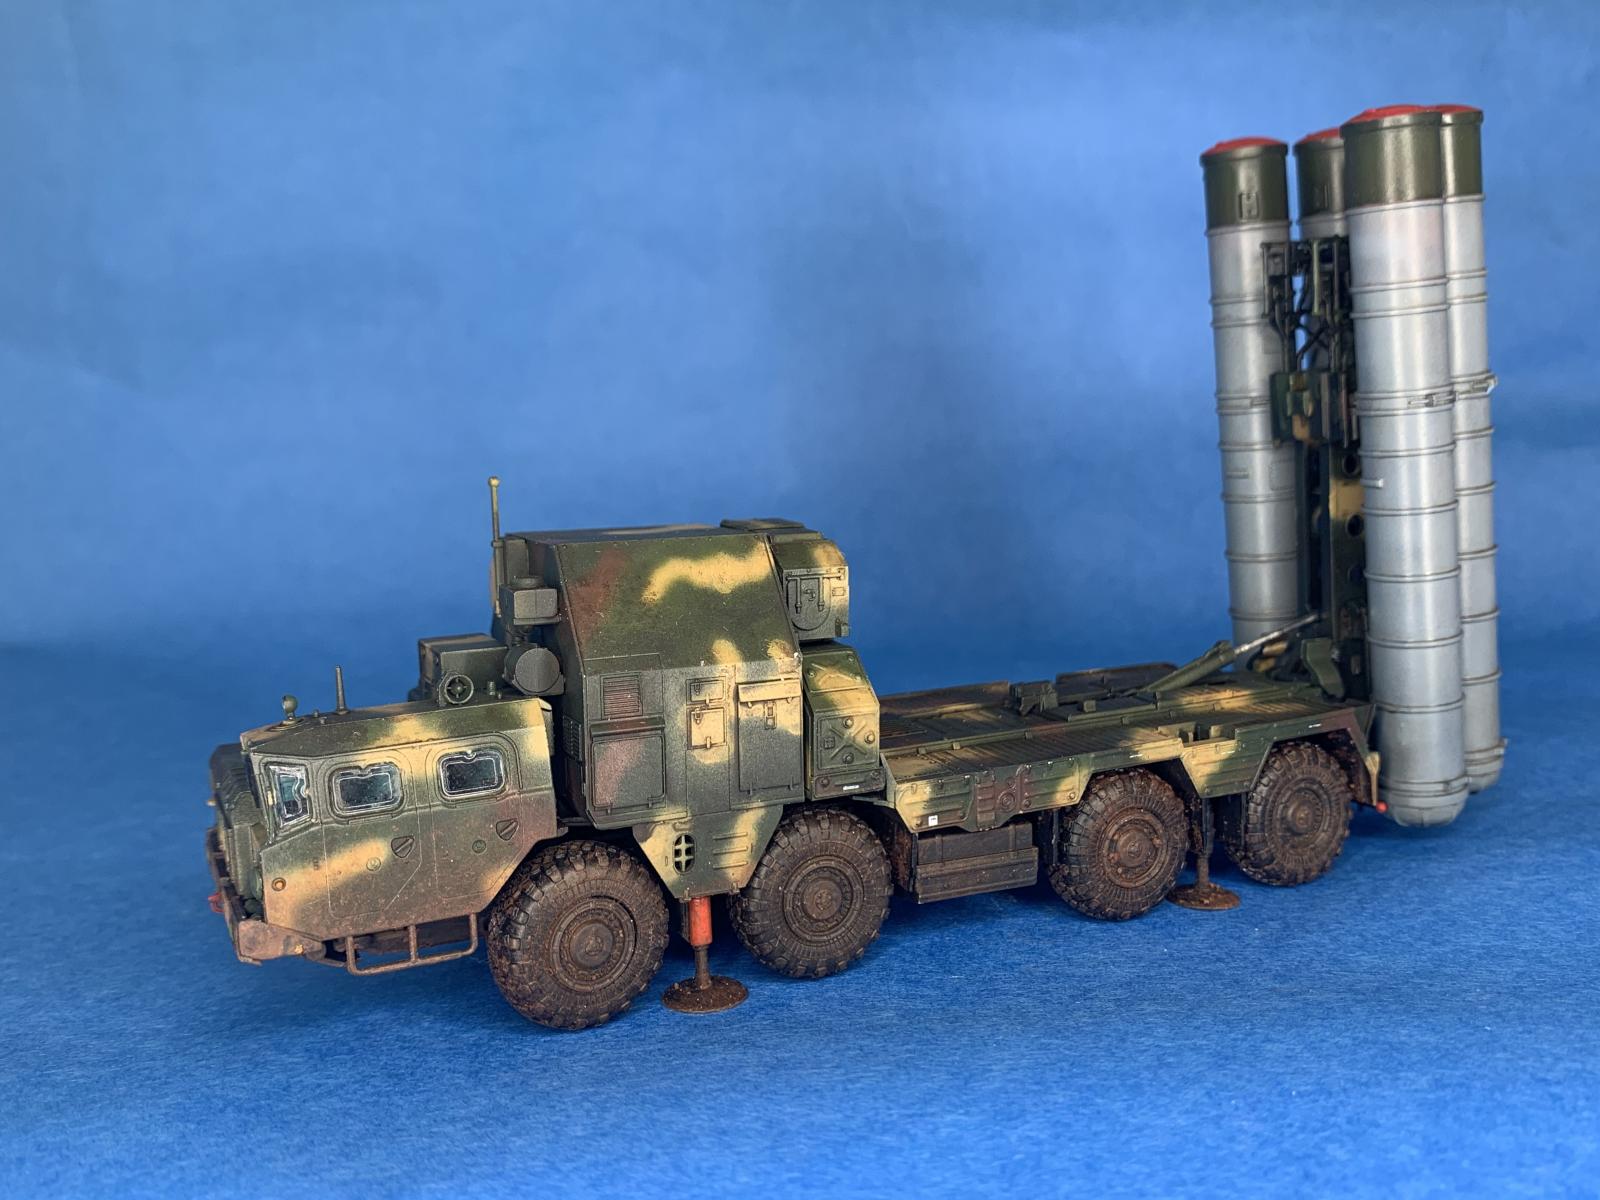
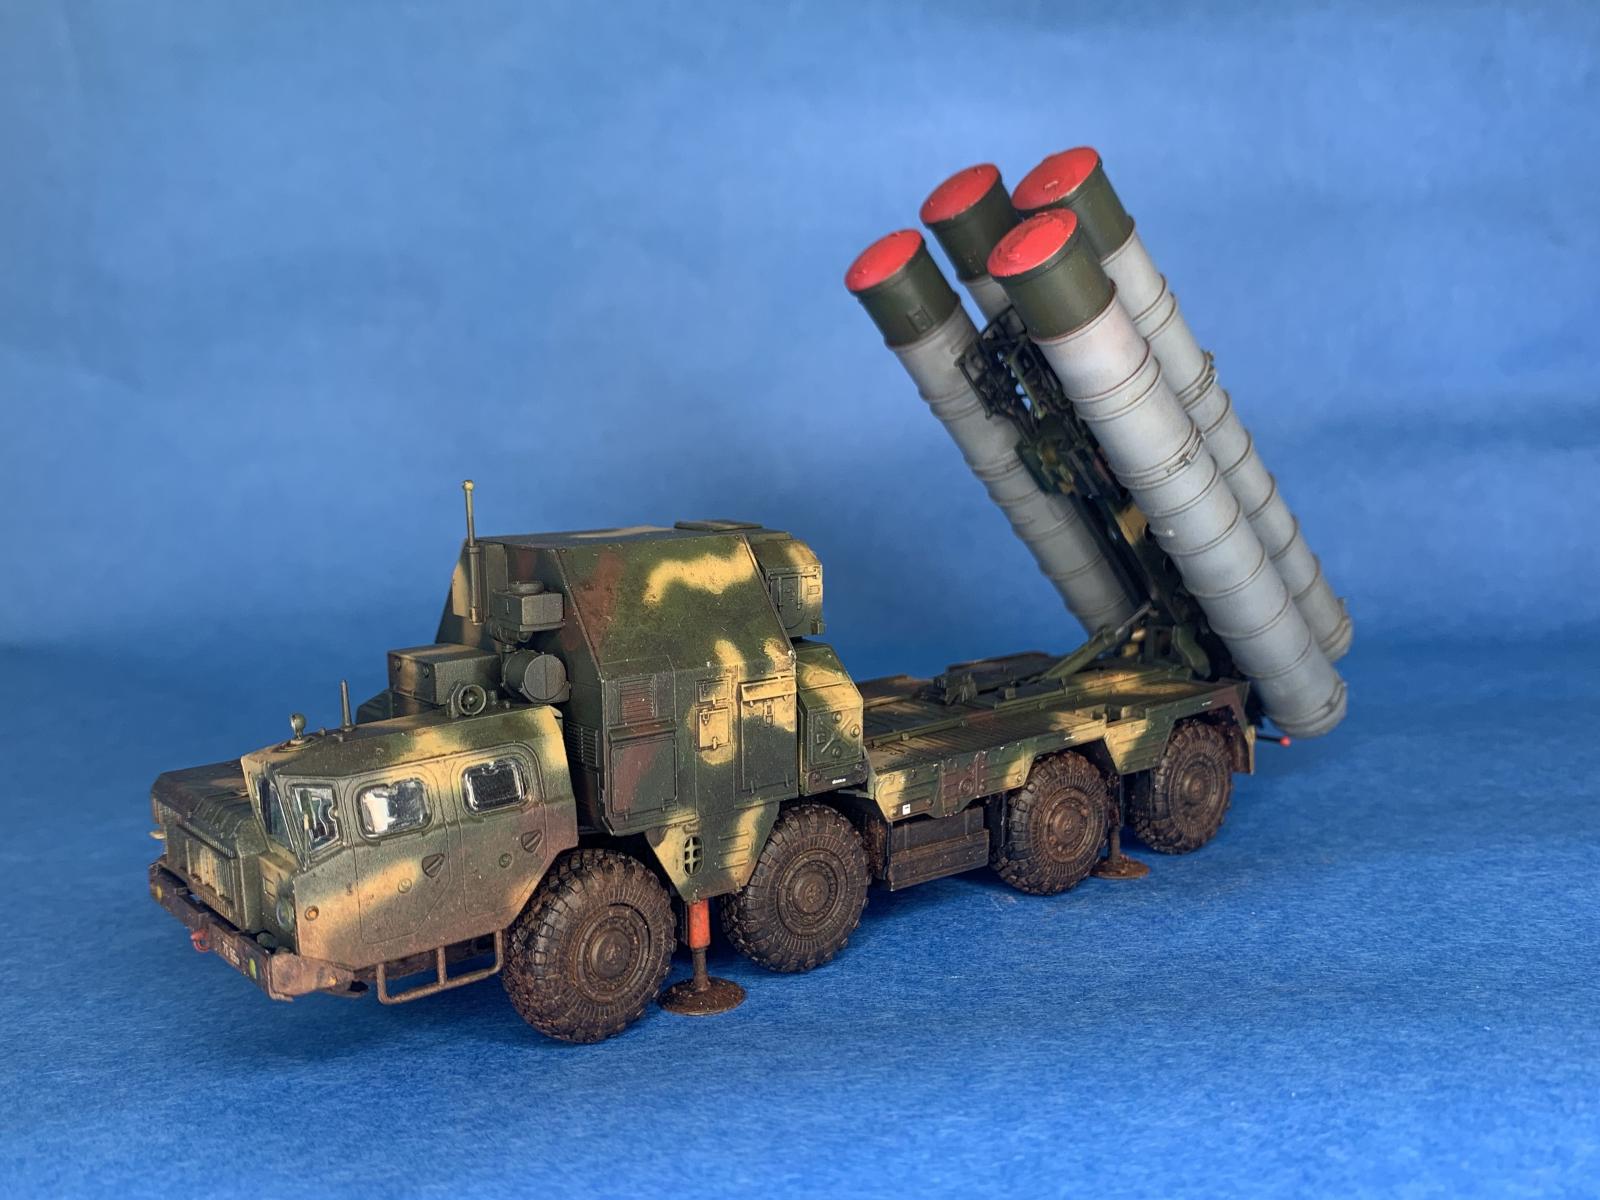
Take care to put the erector together carefully, as patient assembly and gluing will let you get away with making the launcher movable. The launcher itself also has few parts, and the front of the launcher, with all the cabling, is molded in two halves that look the part in scale. You do need to sand the attachment points on the missile canisters, as they are a little too thick. The canisters hook on to looks molded on to the erector assembly.
Altogether, I would suggest building the in this order:
- Paint crew cabin and cab components (leaving out the lights and side view mirror)
- Assemble chassis without wheels
- Assemble wheels and lifts
- Paint chassis, lifts and wheels
- Assemble equipment cabins
- Assemble TEL system
- Clean up and paint missile tubes
- Mate equipment cabins and cab to chassis
- Mate TEL assembly to chassis
- Attach wheels to chassis
- Attach missile canisters to TEL
- Attach lights and side view mirror
I found this sequence would result in the least amount of parts falling off or having other components of the build interfere with the painting process as you go along, though I am sure there are more ways to complete this build. Experienced armor builders will probably have a better idea on how to do this.
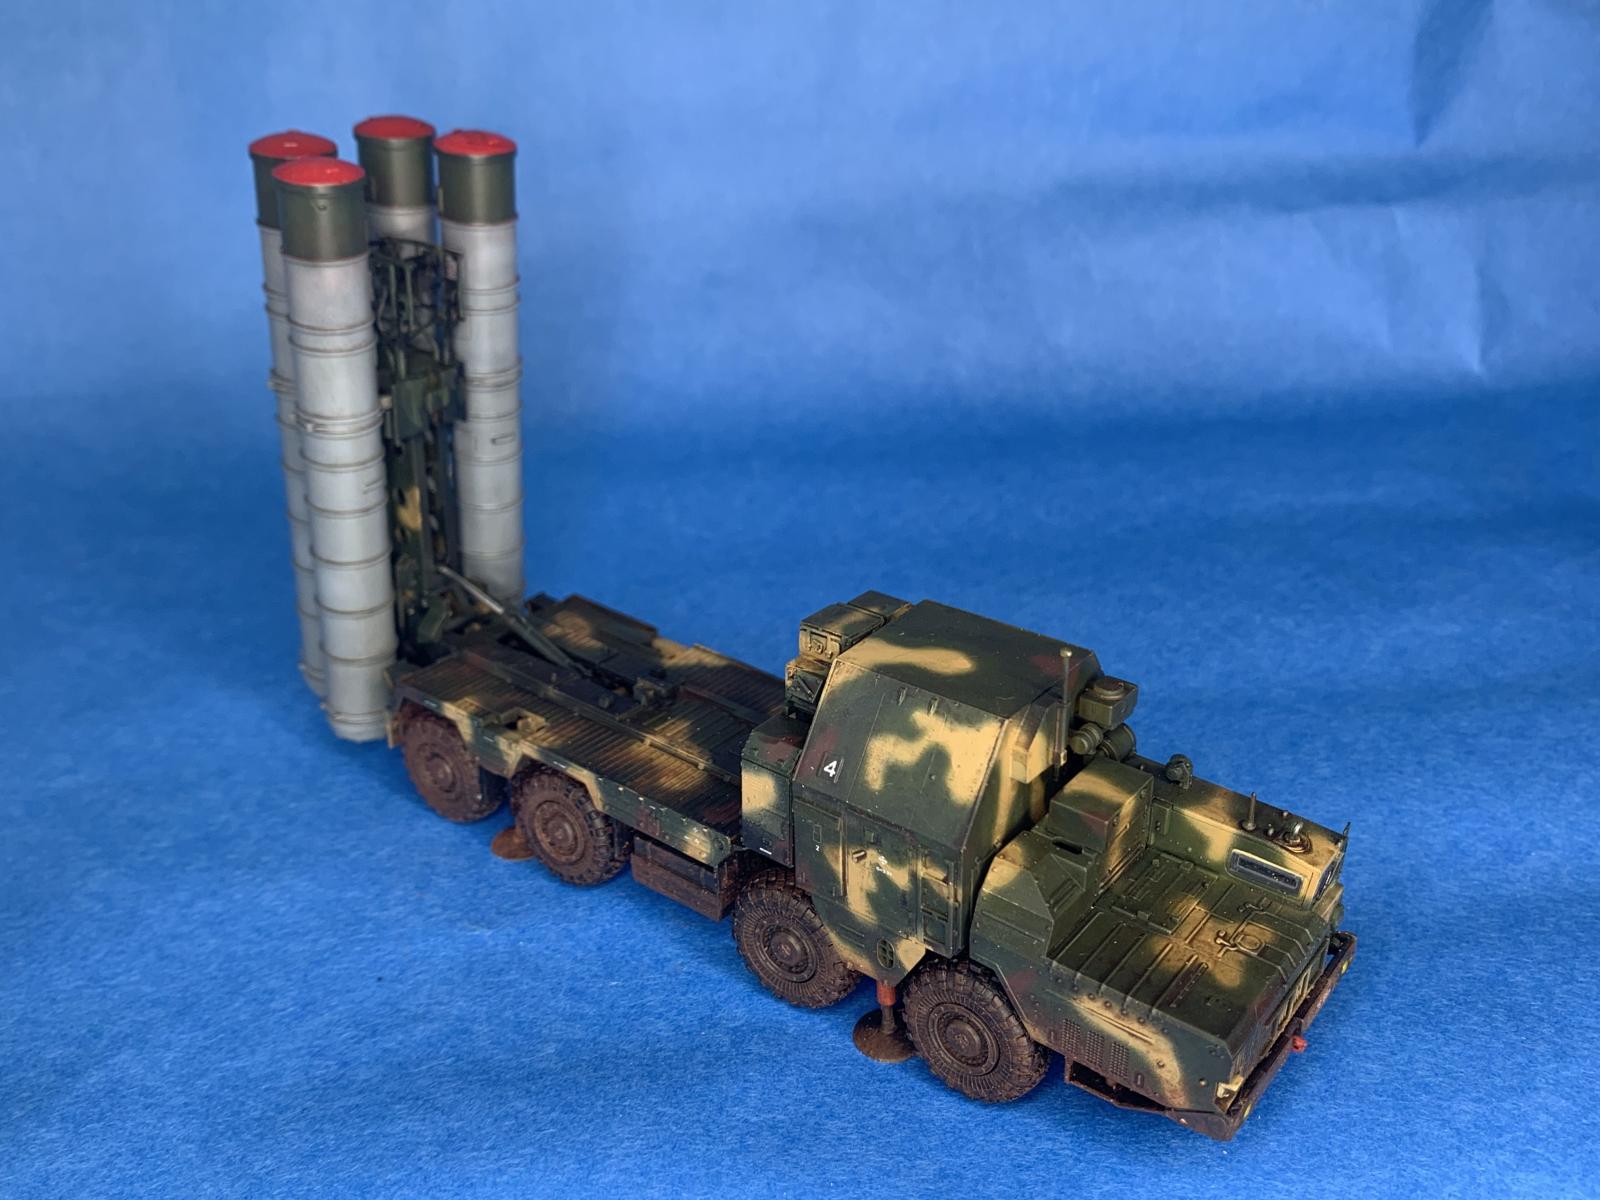
This model comes with 9 distinct paint schemes. For my review, I picked scheme #4, though airbrush issues (or maybe old paint) caused some issues. In hindsight I should have abandoned that scheme tried a different one. This is where the instructions let the model down. Paint schemes show side, but not top views so if you’ve chosen one of the camouflage schemes, you’ll have to do a little more research. The instructions also do not provide instructions on stencil placement, only showing placement for national markings and license plates.
With decals, a final gloss coat and weathering done, I added the final small parts, such as the searchlight on top of the cap and the headlights. This is another area of the kit where it is deficient, as the “plug” style of headlights makes the vehicle look as if it has googly eyes!
Overall, this still is quite a good kit with very few vices, other than what was detailed in this review. The kit may appear to be expensive, but with the detail, fit and ease of build, it represents good value for money and a very enjoyable build. I would recommend this kit for beginners and experts alike. Hopefully, Hobbyboss has the companion radar vehicle for a future release.
Thanks to Model Rectifier Corporation for the opportunity to review this kit.
The S-300PMU in 1/72
While the only game in town for 1/35 builders of the S-300PMU is the Trumpeter kit, 1/72 builders have two other options – the PST kit (72050), released in 2003, and the Modelcollect kit (UA72052), released in 2016. The PST kit is generally accurate, is nicer than most Eastern European kits of that same era, but still require a bit of work to build. Superdetailers will need to do a fair amount of scratchbuilding as there are no aftermarket sets for this kit other than resin wheels. PST also released the “dumb” version of the S-300 (72055), which does not have the control booth located behind the cab, and the radar vehicle (72060)
The more recent Modelcollect kit is certainly more modern than the PST and is more conventional in breakdown. Not as nice as the Trumpeter kit, it will still hold up well and has a few more refined details that are replicated with photoetch. The rivets around the door seem to be overscale. However, Modelcollect has developed the most variants, including the variant with the newer SA-20 system.
Note that Modelcollect and PST kits include the missiles, which the Hobbyboss kit does not.


Comments
Add new comment
This site is protected by reCAPTCHA and the Google Privacy Policy and Terms of Service apply.
Similar Reviews