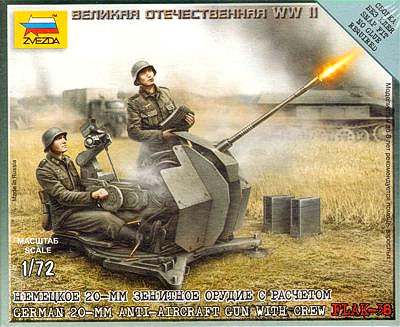
20-mm Flak 38 Anti-Aircraft Gun with Crew
The German 20-mm anti-aircraft gun with crew Flak 38 is part of Zvezda’s “Art of Tactics” war-gaming series. You get 20 dark gray flexible plastic pieces with minimal flash; you also get a game card with games stats for the “Art of Tactics” game. The instructions are very well illustrated with four sequences of assembly; even though there is no number sequence you should have no problem figuring out what goes where. The detail is exceptional and the best I’ve seen in this scale for the Flak 38. The two crew figures are up to Zvezda’s usual high standard and have little flash. The kit is designed for snap assembly and can easily be assembled with no glue.
I was not confident in my ability to prepare and paint this type of bendy plastic, as I am far more comfortable working with regular styrene. I remember working with this type of plastic when I was younger and I struggled to keep the paint from flaking off in large chunks on my Airfix 1/72 soldiers. I took to the internet to search discussion boards to find out the best way to clean the flash and paint this kit. There are several methods and I experimented with a few until I found a way. I also wanted to glue the plastic, as I wanted a permanent bond. Super glues and liquid cements would not bond this type of plastic. I settled on Krylon plastics primer to prepare the surfaces for painting and Loctite all-plastics two part super glue to bond the plastic.
I started with removing the parts from the sprue trees. I found it difficult to remove the flash, as this type of plastic does not sand easily. I followed the advice of my friend Mark and used 1200 grit sand paper to remove the flash; it was a long and tedious process. In the end, most of the flash was reduced; however, if you squint your eyes, you may still see traces of flash in hard to reach places. As a result of the sanding, I distorted the main gun barrel and replaced it with a suitable section of brass rod.
I primed all the parts with Krylon Plastics primer that I got at the local hardware store. The primer is intended for plastic lawn chairs and other outdoor plastic items. It sprayed on milky white and dried in about 2-3 hours until it was no longer tacky. Beware that this primer can still be rubbed off the plastic Zvezda uses, so handle with extreme care. I then sprayed all the gun parts Tamiya acrylic German Gray. I dry brushed, applied a wash, a little rust, and finally some random paint chips. Next, I painted the gun barrel a dark metallic gray. Finally, I painted the gun’s base. The base is actually groundwork with the gun’s feet and a spent cartridge molded onto it. I painted the base an earthy color and then picked out the gun’s feet in German Gray and the cartridge in dark metallic gray.
Now that the painting was completed, I glued all the components with Loctite two part plastic super glue. The Loctite system includes a marker pen and super glue; first you mark the two bonding surfaces with the marker pen, then you apply the super glue. The plastic actually melts and forms a solid bond similar to liquid glue and regular styrene. The gun was now finished and waiting for the crew.
I chickened out and gave the two crew figures to my friend Mark to paint. However, we lost one of the crew member’s arms; we looked everywhere, but the carpet monster won this round. In the end, we had to order a second kit to finish the review. My friend Mark Igglesden did a great job painting the crew. The Zvezda figures are works of art and sculpted with very fine details.
I now quote my friend Mark on his experience with the gun crew:
"A major problem in working with soft, flexible plastic (apart from paint resistance) is getting rid of mold lines. Zvezda's figures are beautifully sculpted and cleanly cast but there are still lines that need to be dealt with. I've read about different methods but this was the one I used: using a sharp, new knife blade, I sliced off as cleanly as possible any raised mould line plastic etc. The goal here is not leave any "furry” bits on the figure, though these are somewhat inevitable in tight corners. Next, I basically polished the seams with 1200 grit sand paper until any last bits of plastic were eroded. Not the speediest method but the one that has given me the cleanest results so far."
"The crew figures were painted with Vallejo Model Colors and represent the late war all-Feldgrau uniform. Extra terrain in the form of Woodland Scenics ballast (goundwork) and Army Painter grass tufts was added."
Once completed, Hans and Dieter were then joined to the gun and its base.
Although it took longer (because of the parts cleanup, paint experimenting, and the lost arm) to complete this build review, I found the experience very rewarding. I learned new skills and techniques and no longer fear working with this type of plastic. Whether you’re a gamer or a modeler, you will enjoy Zvezda’s Flak 38. It turned out to be a real stunner. I recommend the kit without reservation.
I would like to thank Zvezda, Dragon USA, and the IPMS USA reviewers’ corps for the opportunity to review and build the Flak 38.


Comments
Add new comment
This site is protected by reCAPTCHA and the Google Privacy Policy and Terms of Service apply.
Similar Reviews