
1992 Mazda Miata
Introduction
I remember when the Mazda Miata was introduced. I actually went to the dealership to check them out and I was a big fan of them. The Miata blended the style of a 60's British sports car with the reliability of a modern Japanese import. The kit was first introduced in 1993, molded in red, and this is the first reissue of it, so it had not been available for nearly 25 years!
Construction
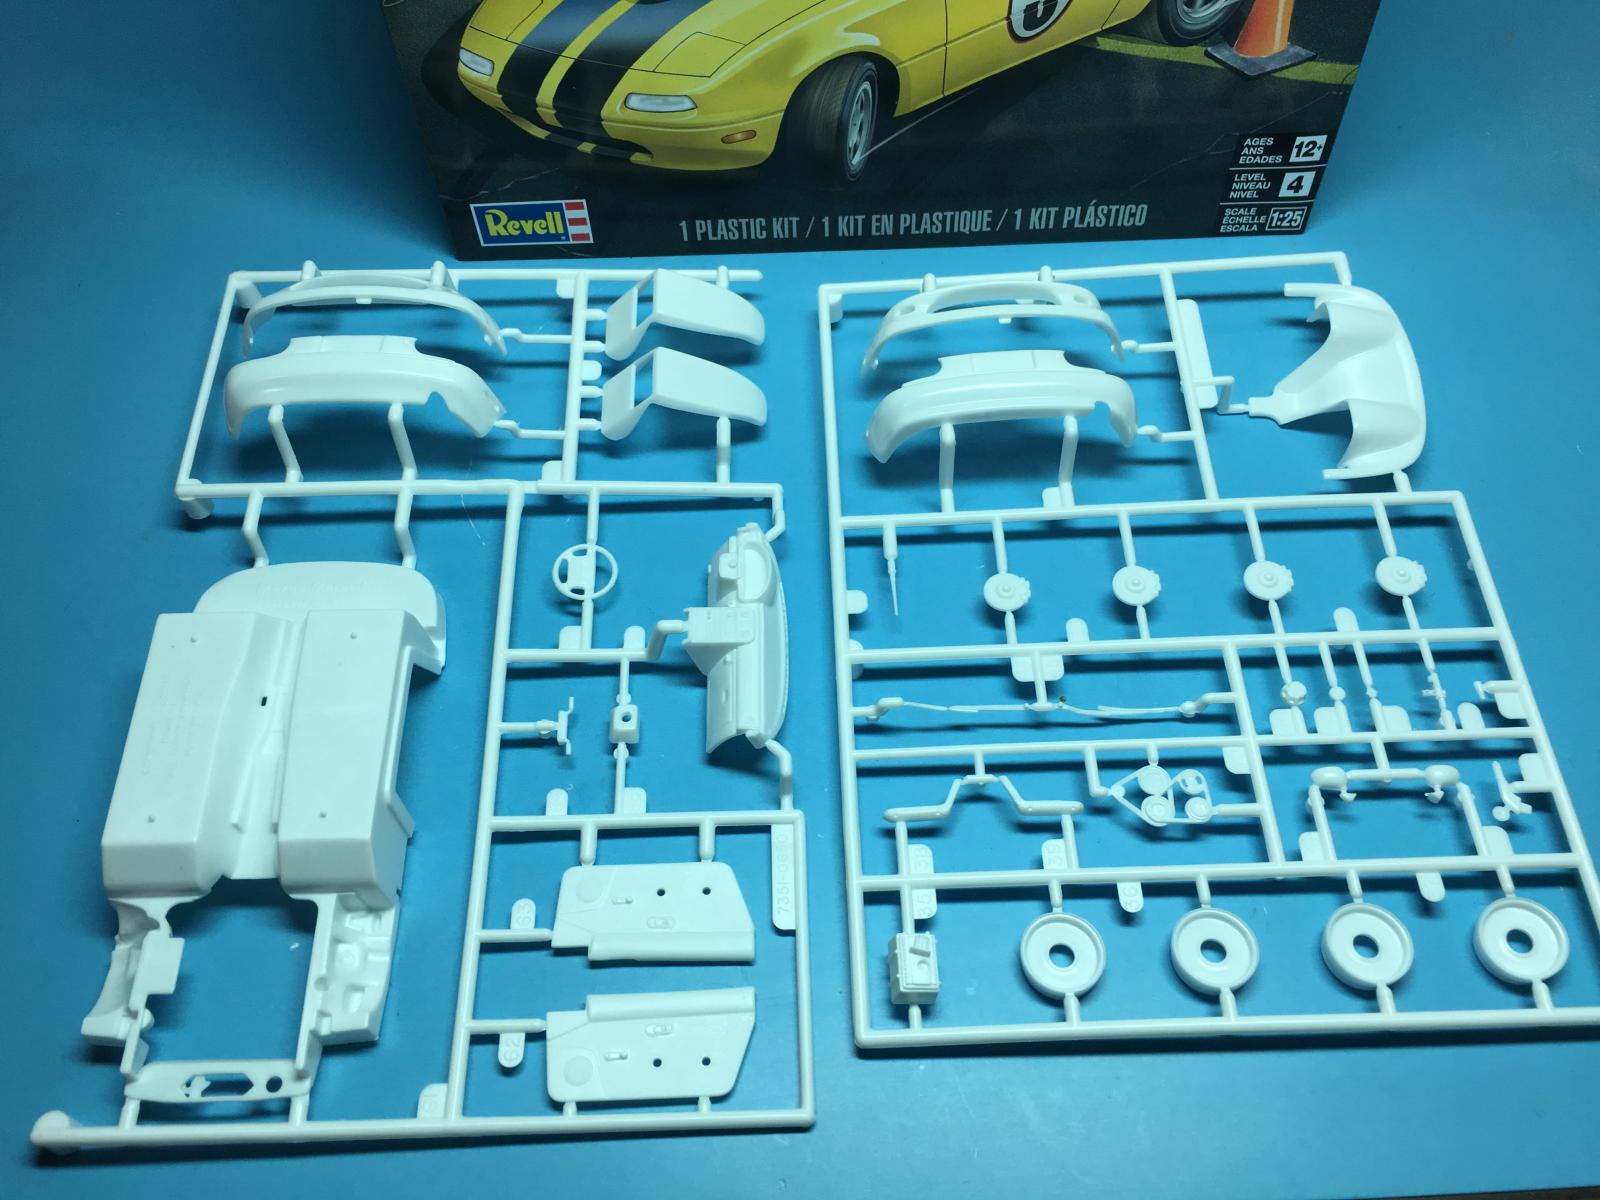
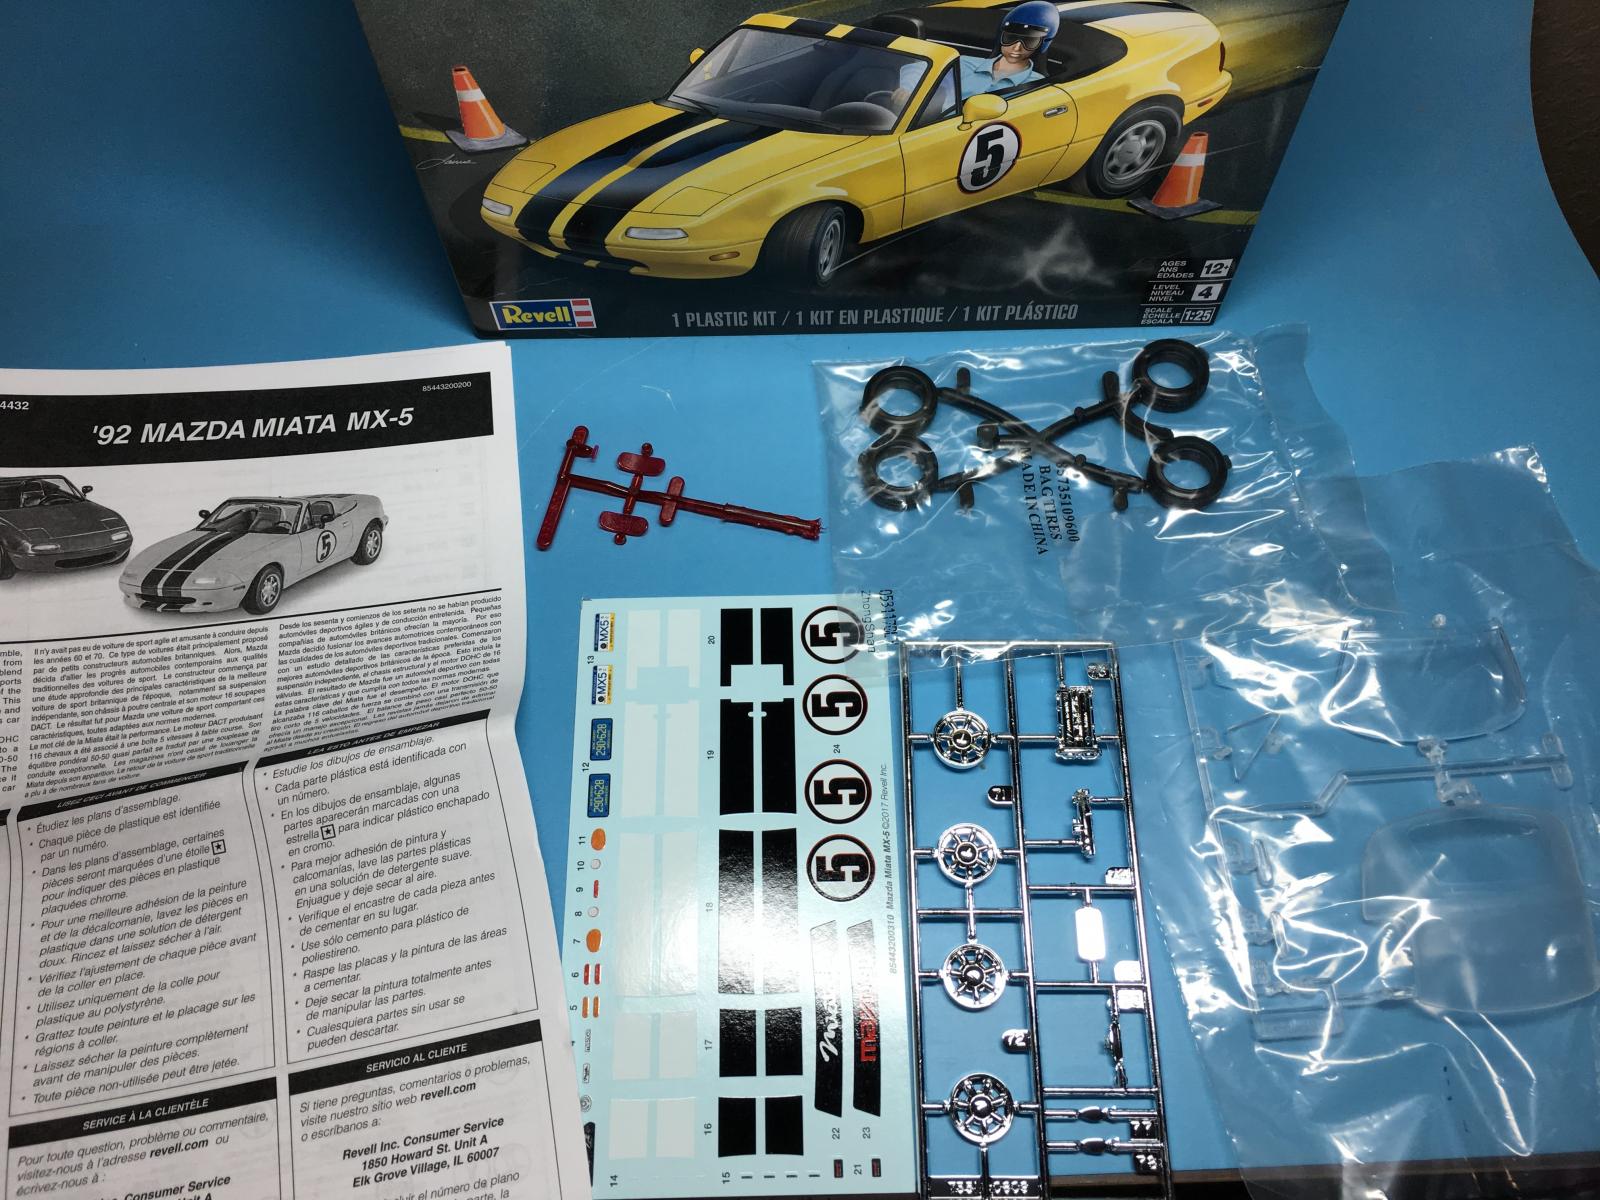
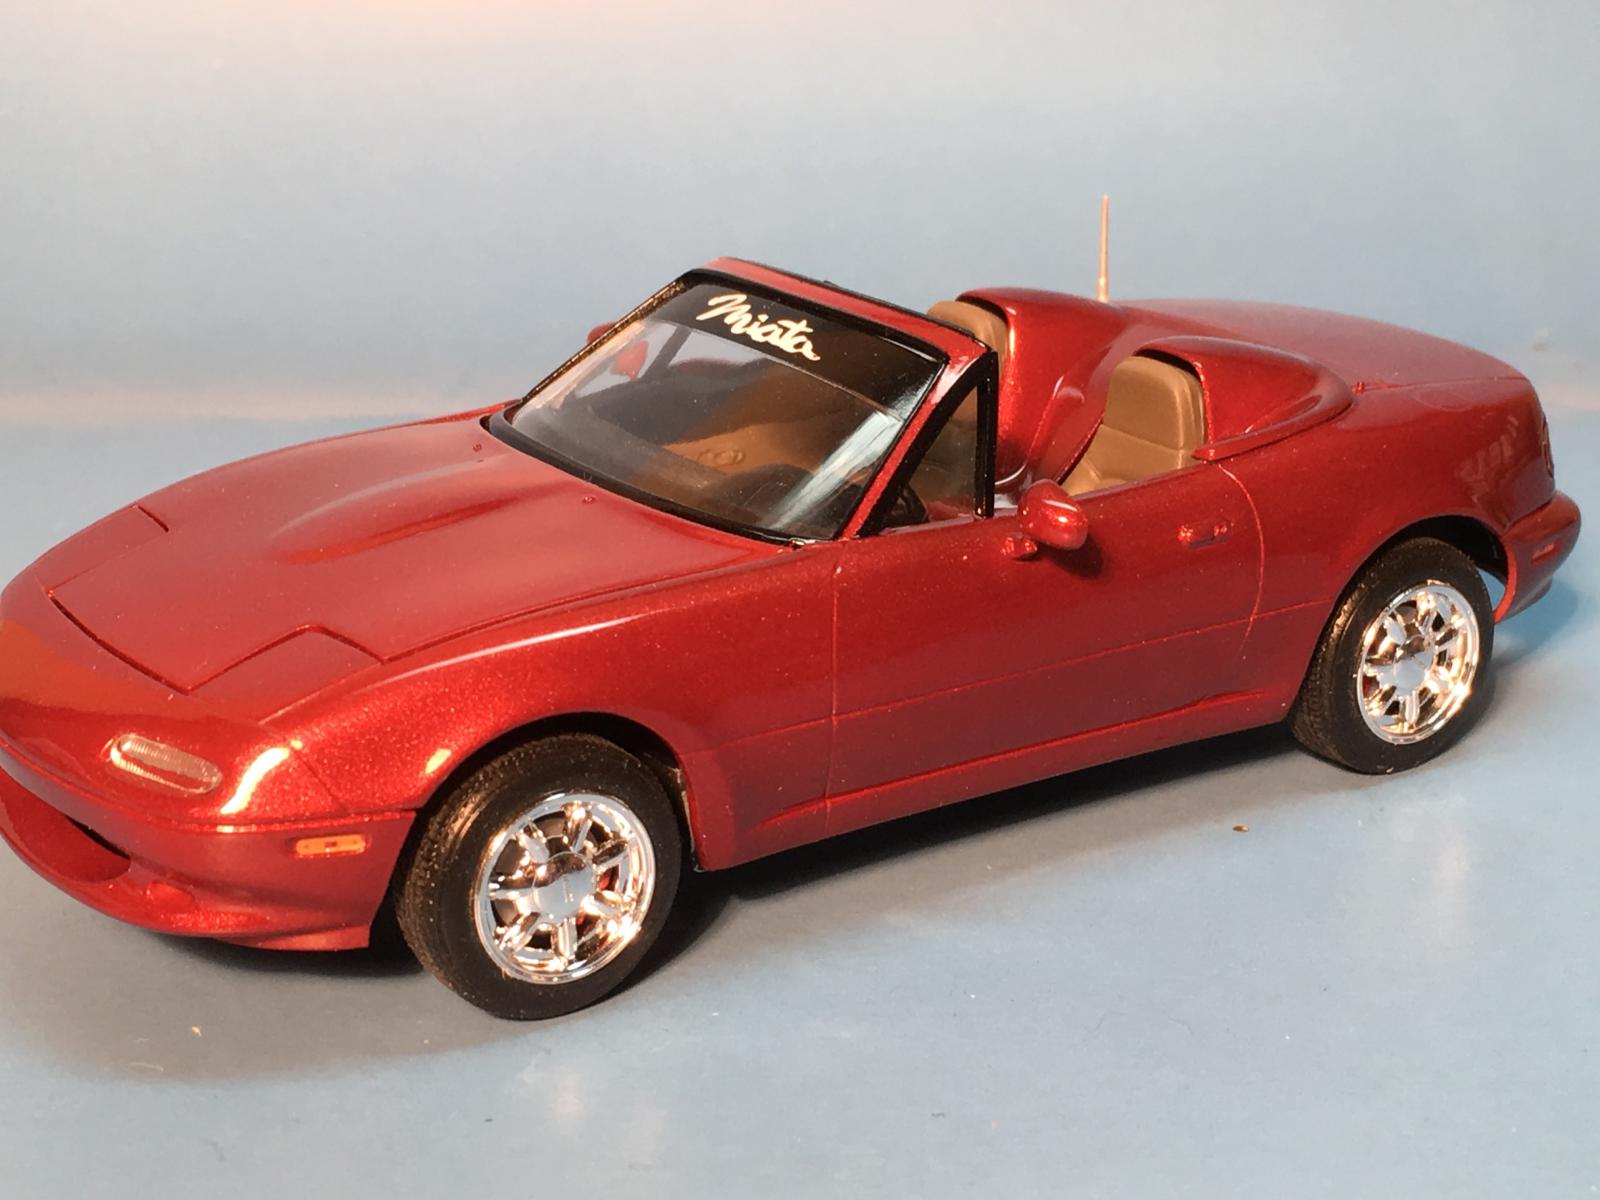
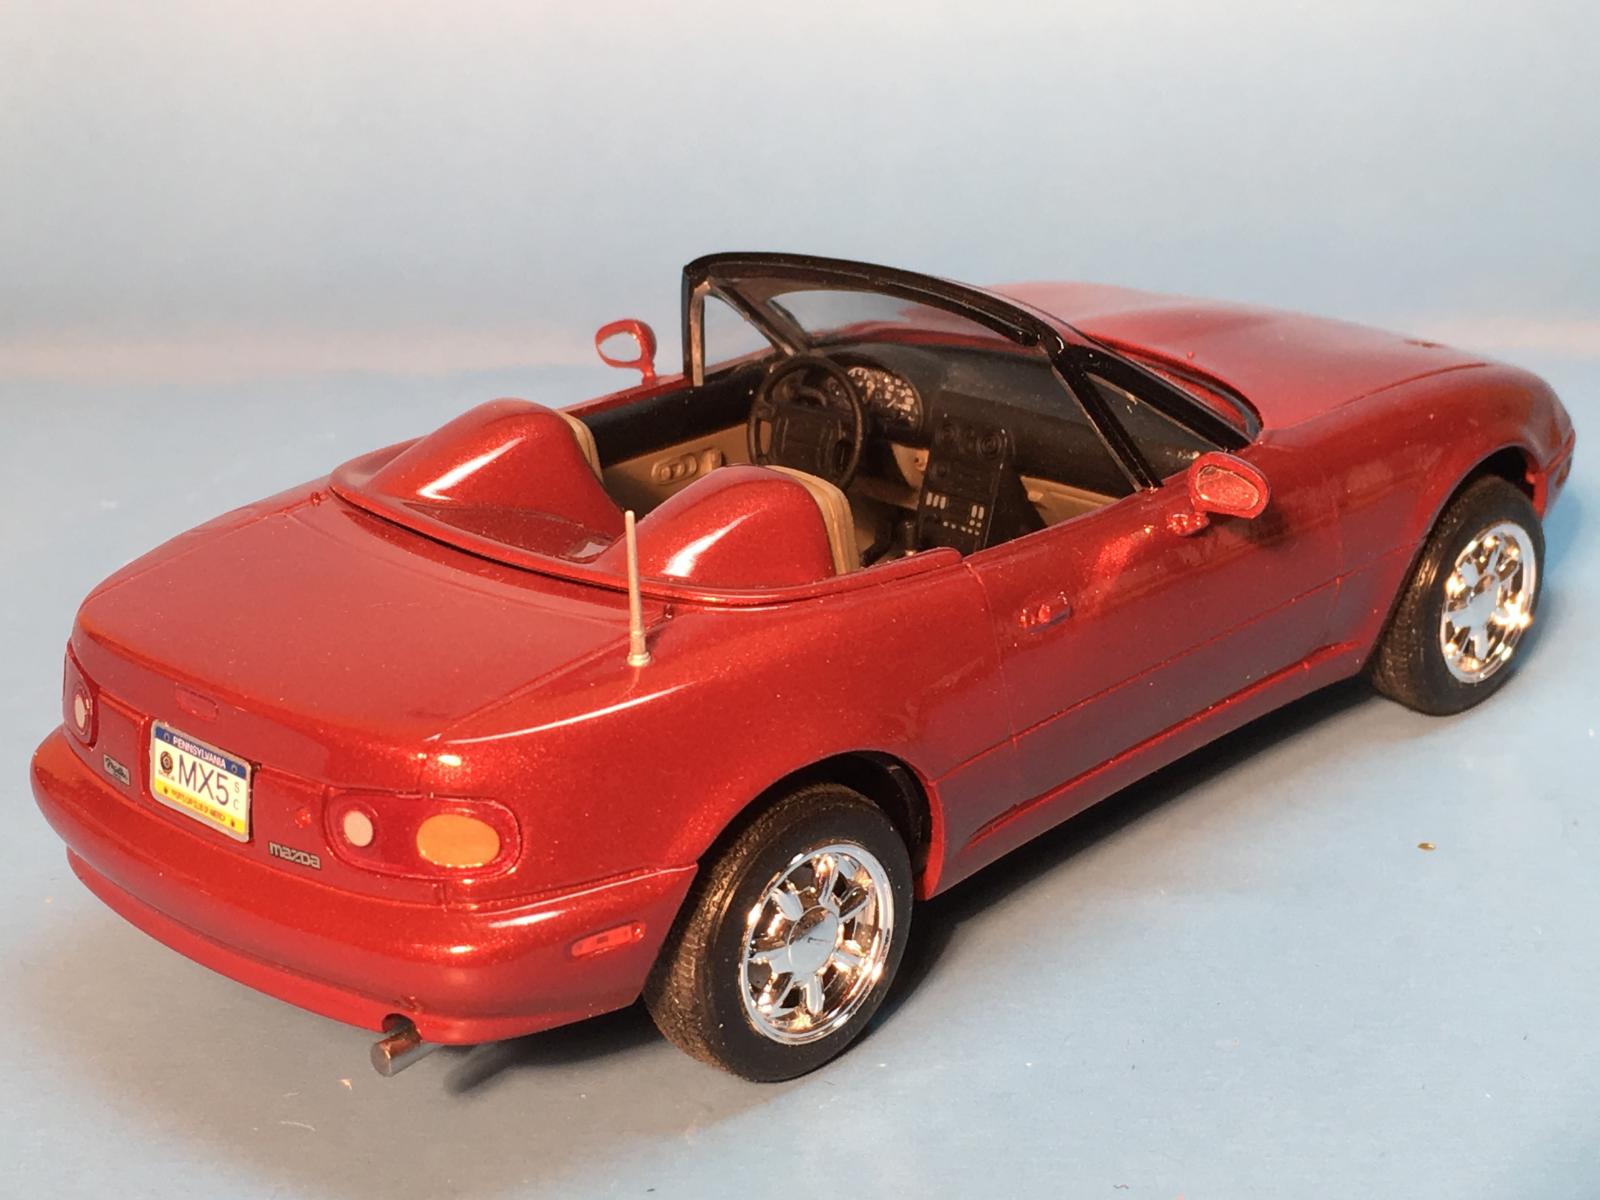
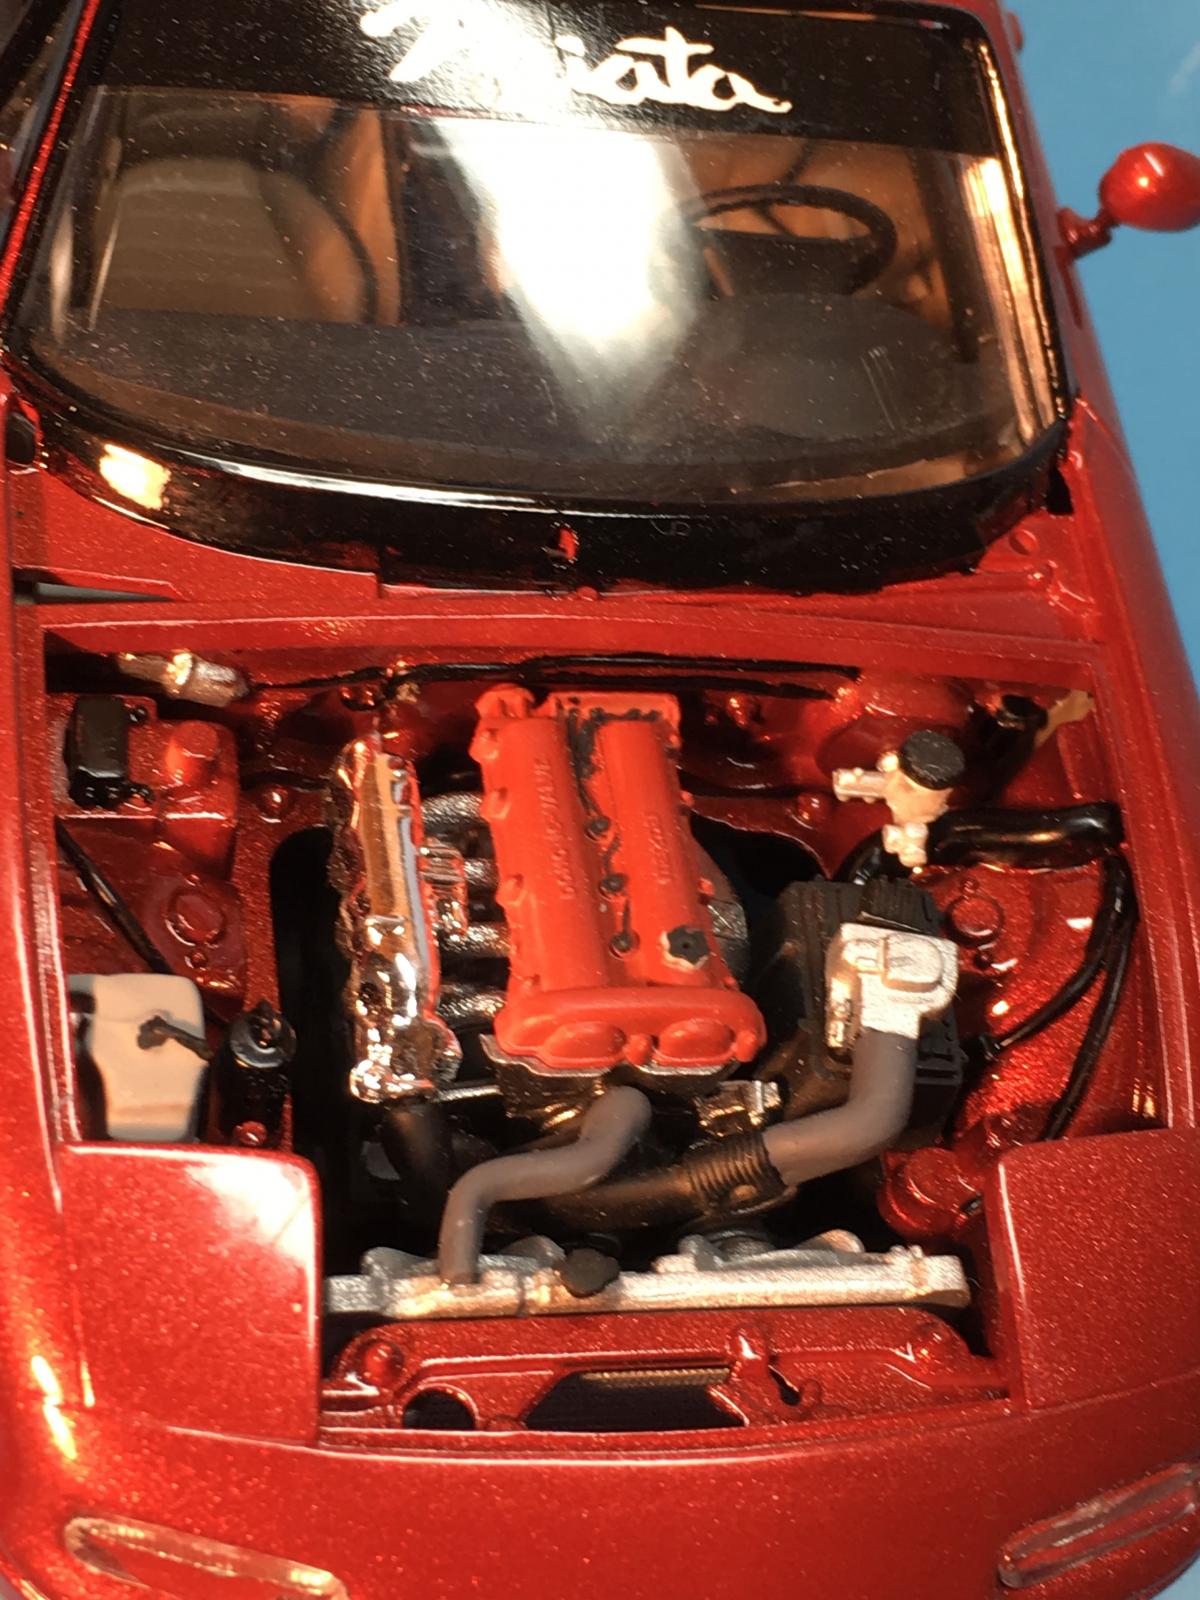
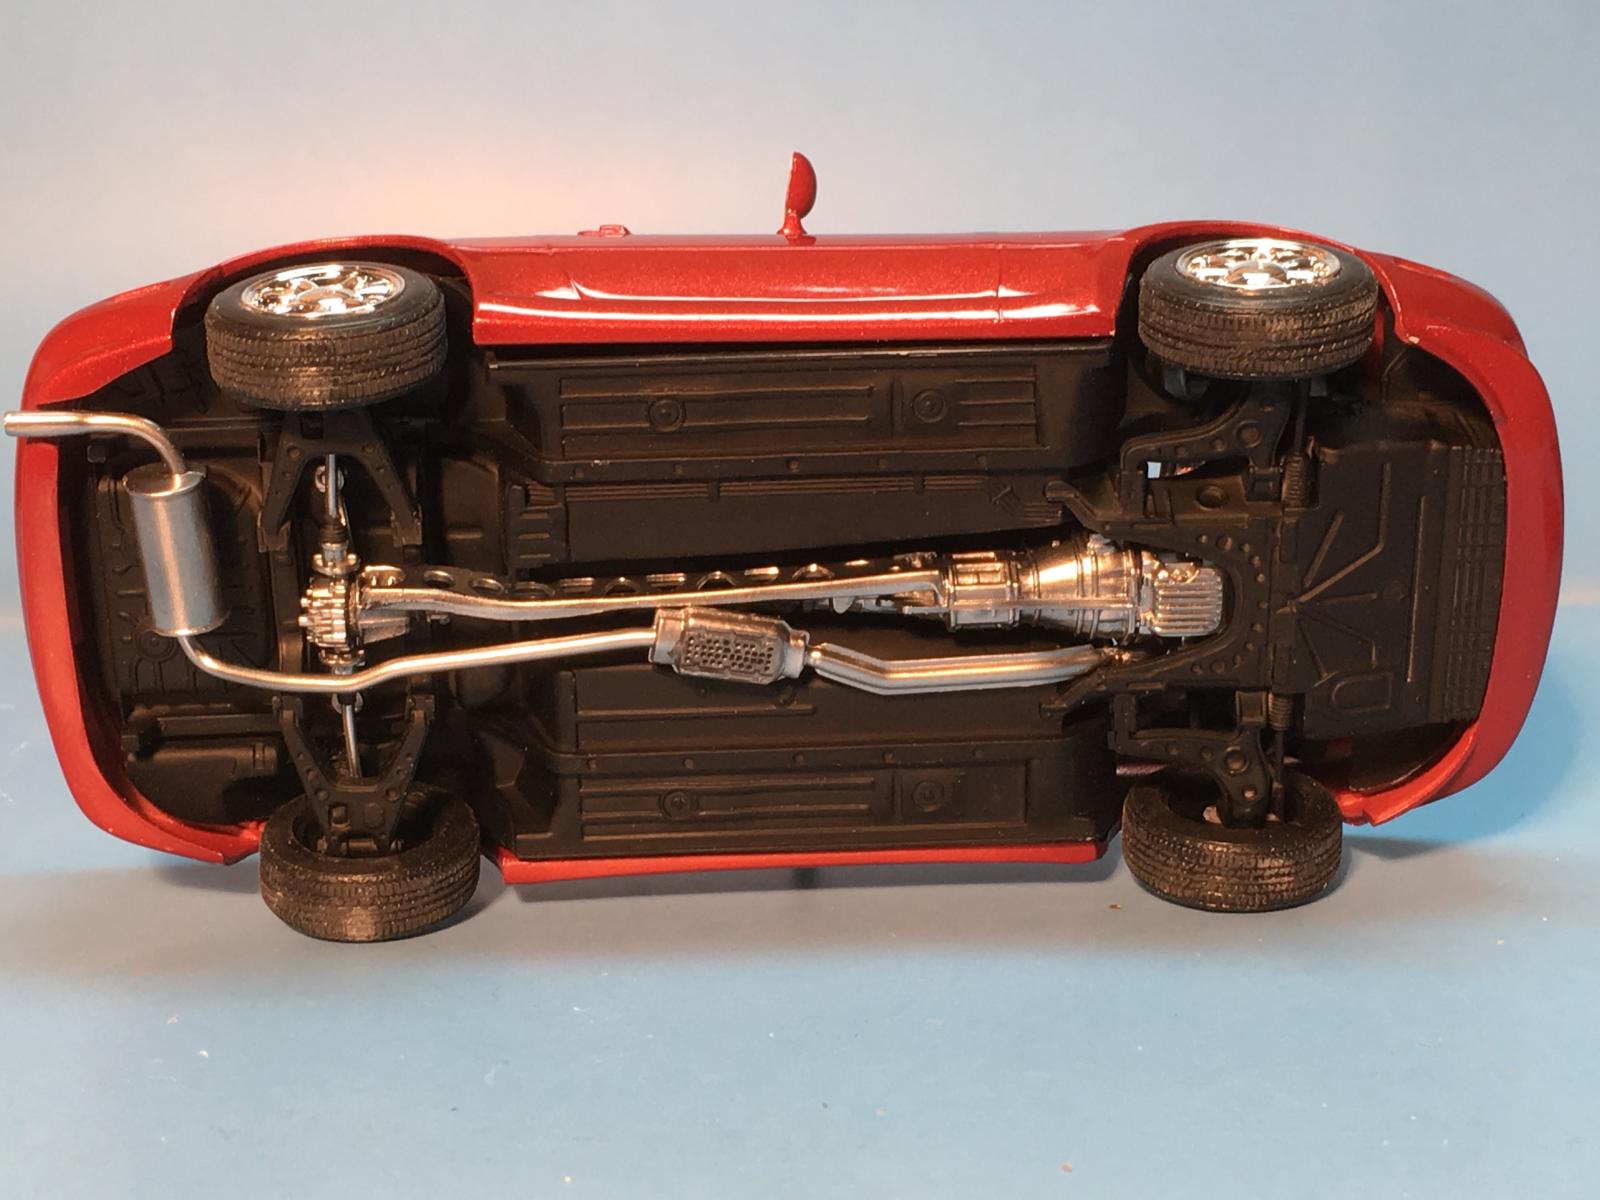
The Monogram/Revell kits tooled in the late 80s and early 90s are some of my favorites. The fit is generally amazing and the level of detail was many levels above the kits of the earlier part of the 80s. This kit includes 96 parts with optional bumpers and tops. Construction starts with the engine and it is comprised of only 11 parts but has good detail. The chassis is next and it's a little different from your normal car kit with independent front and rear suspension. The engine has the drive shaft and front half of the differential on it and it has to mate up to the rear axle.I recommend dry fitting it in place while cementing the rear axle to ensure they line up properly in final assembly. I would also recommend dry fitting the chassis to the body when installing the front springs to ensure they line up properly. The interior is straight forward and includes part of the engine bay so you will have to mask it carefully for painting. There are optional front and rear bumper covers, stock or racing, as well as three options for the top. Top up, top down and racing (which is what I chose), the up top has the window in it and will need masking before paint.
Everything was fitting like a glove until it came time to mount the interior to the body. The windshield fits precisely in the body, but it is a bit too tall and interferes with the dashboard. In my case the windshield was already epoxied in place so I had to take the front of the dashboard down with a sanding stick. In hindsight it would have been better to remove 1/8" or so from the bottom of the windshield before securing it to the body. Test fit carefully when you get to this step, the car will sit high in the front if left as is.
The wheels are called for in step 12 but I mounted them prior to cementing the body and chassis together because the fit was a bit loose and I wanted to make sure the model sat on all four wheels as the cement dried, so I cemented the wheels on and placed a couple of large paint jars on the chassis to keel everything level. The body to chassis fit is tight and almost does not need cement, but I used epoxy to make sure it would not shift or move.
Summary
This kit holds up very well despite being first released in the early 90s. Only a couple of very minor fit issues, but nothing too difficult. I want to thank Revell for providing the kit and more importantly, reissuing such a cool car after 25 years.


Comments
Add new comment
This site is protected by reCAPTCHA and the Google Privacy Policy and Terms of Service apply.
Similar Reviews