
1950 Oldsmobile Club Coupe
Rockets Away! Revell’s new kit of what was essentially the first factory muscle car is a welcome nod to us “longer-lived” modeler-folks who can recall the marriage of GM’s first OHV V-8 and Oldsmobile’s clean styling as being either our first cars or someone in our family’s. The phrase “Not your Father’s Oldsmobile” comes to mind and no…this one wasn’t…exactly…but my Dad did have a ’51 Eighty-Eight which – even as a ten-year old – I recognized would go like the proverbial scalded ape.
Construction is typical Revell with no surprises, but there are a couple ways to make it easier. The first is not installing the engine into the frame until Step 2, because the steering box is difficult to put in place while getting one’s hands – or tweezers – around it. The socket for the steering box is just a recess in the left side of the frame without a positive locating aid. I recommend installing the front suspension (part 31) first, the steering box (part 87) second, and then mounting the engine in place. I used Gunze Sangyo H59 IJN Green for the engine color – it’s a pretty good match. Installing the exhaust can be made easier if the holes in the manifolds are drilled deeper to accept the pins on the exhaust’s upper ends.
When the front and rear radiator halves were joined, there was a pretty good seam there which needed filling. Installing the lower radiator hose at the same time the radiator was put in place took a little time and fiddling blindly.
The front and rear wheels have different hubs, with the bearing grease seal covers on the front ones. If you’re planning to put hubcaps on your model, it won’t matter where the wheels are mounted since they’ll be covered up.
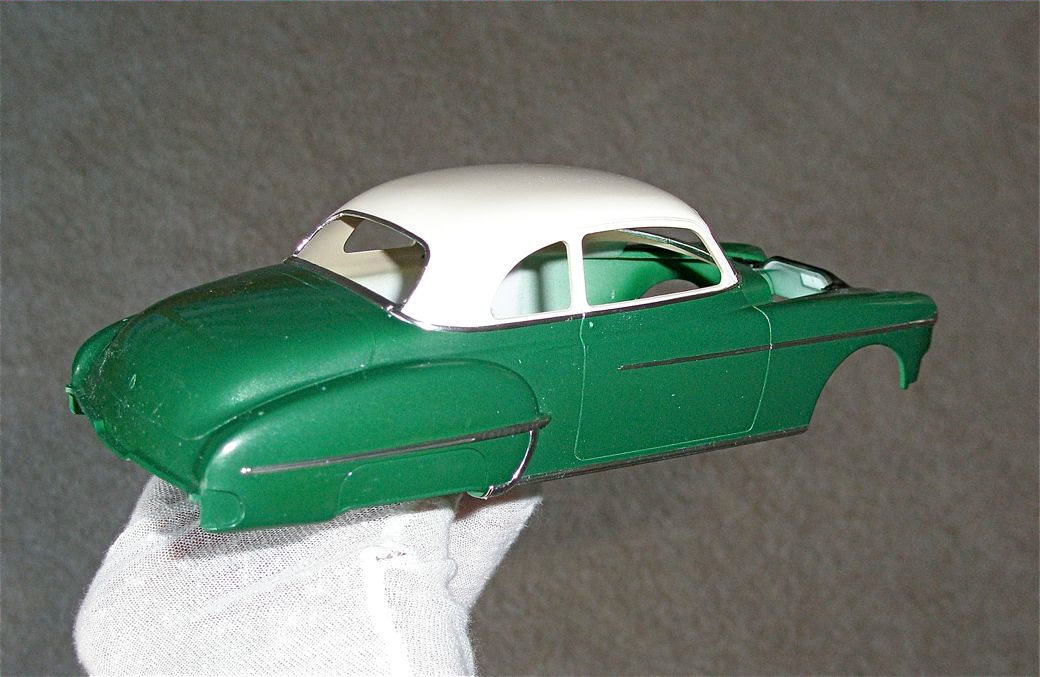
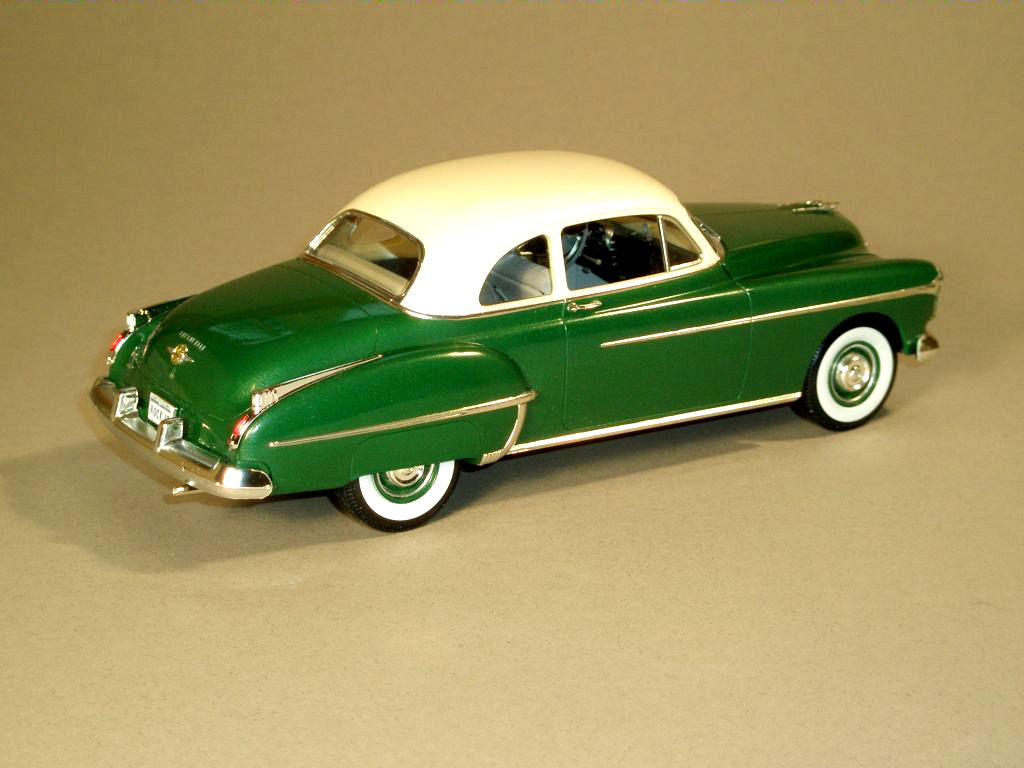
The Club Coupe’s interior featured basically two shades of gray, with a Flint Gray Metallic accent panel on each sidewall and the center section of the instrument panel. I used Tamiya acrylics: XF-19 for the light gray, XF-54 for the dark gray, and X-10 Gunmetal for the accent...that latter turned out to be too dark, but I left it as is. Using Bare-Metal foil for the trim on the doors made them look pretty nice. For the cowl, headliner, package shelf, and upper interior trim color, I used Gunze Sangyo H336 Hemp. To replicate the Pine Green metallic body color, I mixed equal parts of Tamiya X-13 Metallic Blue and X-4 Lemon Yellow. The cream top is one part Tamiya X-6 Orange to eighty parts Tamiya X-2 White. The chassis and underhood areas were painted with Tamiya X-18 Semi-Gloss Black, with a few accents of other black paints on different spots here and there (like the battery, etc.) just to avoid an overall monotone color and add interest.
I covered the chrome areas on the body shell with Bare-Metal “New Improved Chrome” foil which worked great, including the difficult compound curves of the stone guards at the lower forward edges of the rear fenders.
The decals were a little out of register and those for the instrument panel needed some trimming to fit where they were supposed to...just trimming off the edges of the clear carrier film worked pretty well. The “Oldsmobile” scripts (lettering) for the hood and trunk show the out-of-register problem a little more than I’d have liked. There are three options for paint schemes in the kit, with appropriate decals for each. I question the American Stock Car Racing version whose fender decal notes the date of the Darlington, SC, Labor Day race as “Step. 4” – I think it might be a typo for “Sept. 4”.
The chrome parts were really nice but have the usual tiny bits of flash along their edges common to chrome trees, which needed to be trimmed. The tail lights are handed, with the “88” logo toward the outsides. The instruction sheet shows the upper lenses painted transparent red, but these were backup lights, so I painted them with thinned white to simulate that feature. Below the red taillights – but not shown – were two round red reflector dots.
The car shared a body with Chevrolet and Pontiac, and some reference photos of 88 Club Coupes I found show the windshield had a centerpost and was two-piece. Other photos I found showed the one-piece windshields the kit portrays, so I called a friend who owned a nearby Oldsmobile dealer franchise for…well…forever, and asked him. He told me that in 1950, only the 98 had a one-piece windshield…the Club Coupe was definitely two panels. The kit has a radio molded into the dashboard, and – again – looking at photos, I found cars with no antenna, others with antennas on the left front fender, and others on the right front fender. A website I looked at said that the 1950 models had an embedded antenna wire in the windshield.
Man – this is confusing – I’m glad I build more airplanes than cars. Only Wing Nuts argue over the right shade of Olive Drab and how many rivets there are on a model. Rather than being wrong, I just built the model OOB as Revell produced it. I’ll let other builders decide what’s right and what’s not where the windshield and the radio antenna are concerned.
The box advertised “tampo-printed whitewall tires” but in my kit, I got blackwalls with four wide doughnut decals to apply to them. I tried the decal route and just couldn’t get them to work well, so I masked and painted the tires using a circle template and flat white acrylic paint. I got mixed results with that…not bad, but not super good either…so I contacted Revell, who cheerily sent me a set of tampo-printed whitewalls free of charge within a couple weeks. The whitewalls are narrower than my hand-painted ones and, frankly, I liked mine better because that’s what I remember from those years and is also what’s shown on the box art – but I used the Revell ones for this build because they’re more representative of what the company produced. The photo shows my painted tire on the left and the tampo-printed one on the right. I omitted the Oldsmobile crest decals in the center of the hubcaps.
Marrying the body shell and the frame revealed that there’s something causing an ill fit – I think it’s the forward edge of the dashboard hitting the underside of the cowl of the shell. I could glue the front – or the rear – of the chassis in place, but not both at the same time. I resorted to gluing and clamping the front, letting it cure overnight, and then forcing the rear into place and gluing that. It resulted in the frame’s bellying down in the middle, but it’s only noticeable if you hold the car upside down.
I loved this kit for subject matter and its quality, too – boy, what a sweet build. Many thanks to Revell and to IPMS/USA for the privilege of reviewing it, and special thanks to Revell for producing another car from my favorite era.

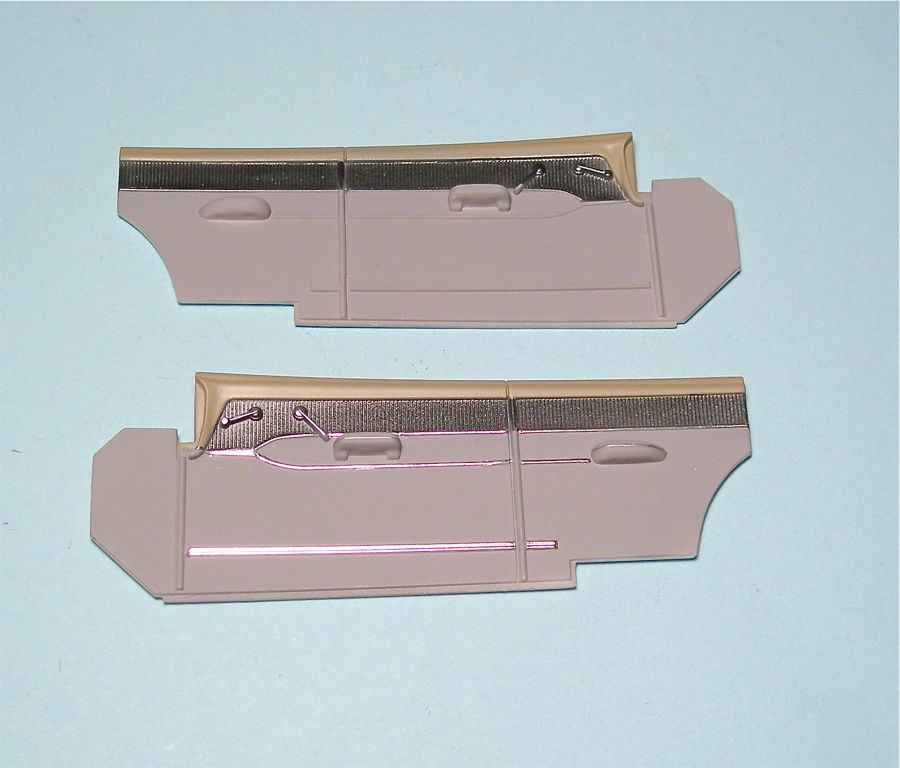
Basic painted door panel; bottom: panel trimmed with foil and silver paint on handles
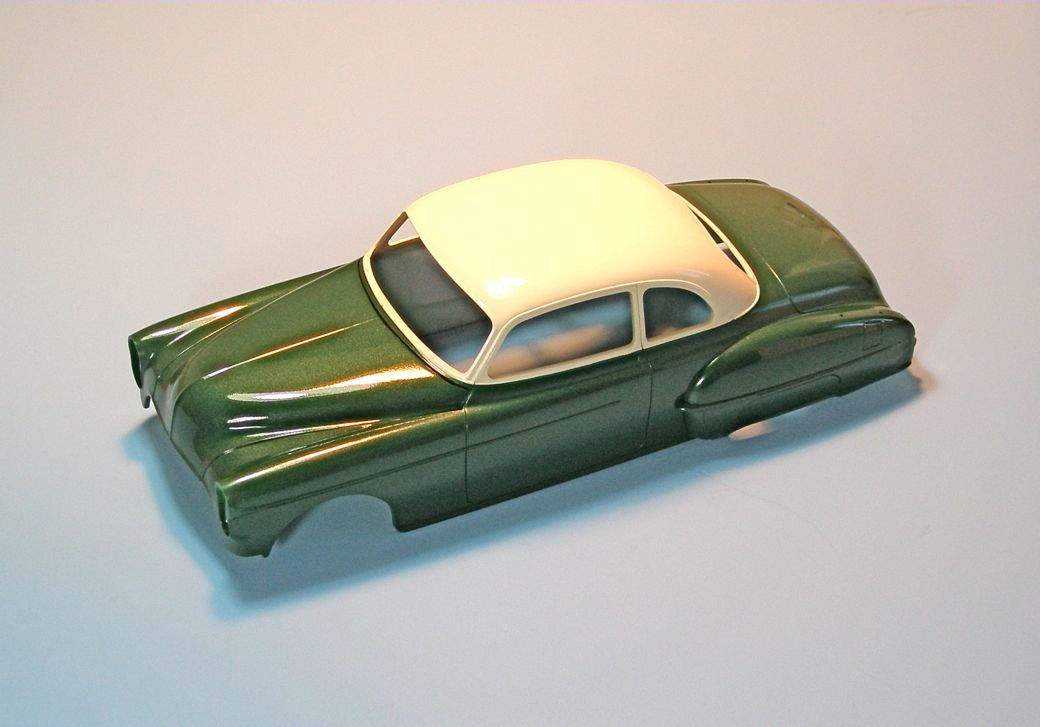
Painted body shell
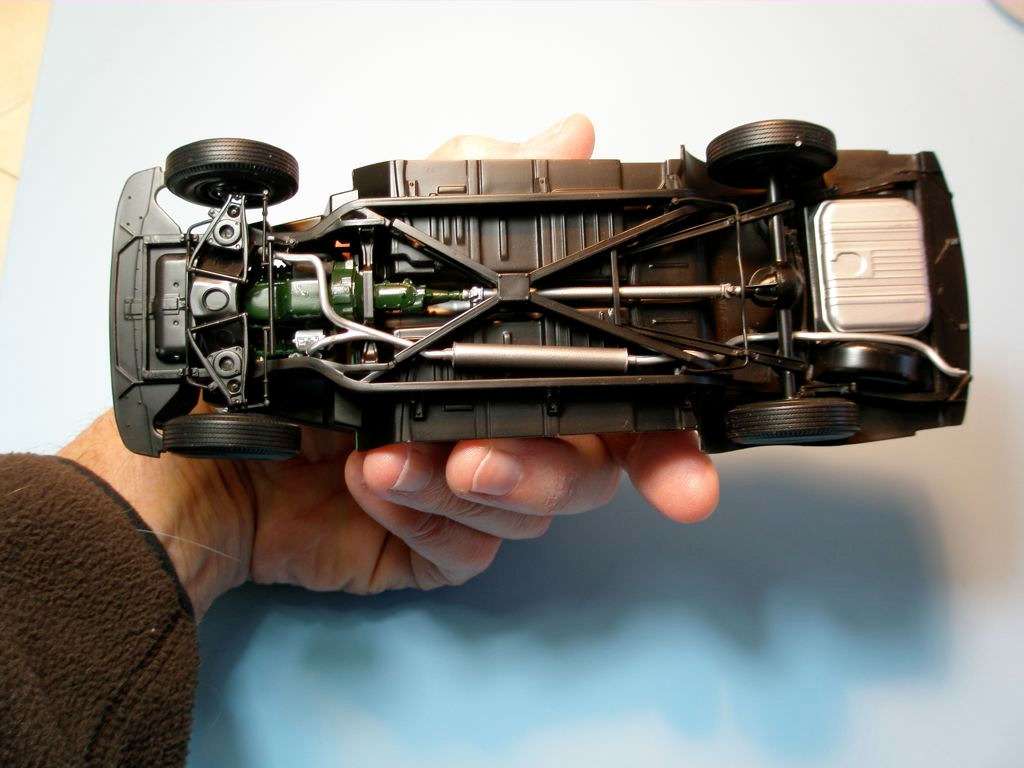
Chassis and frame
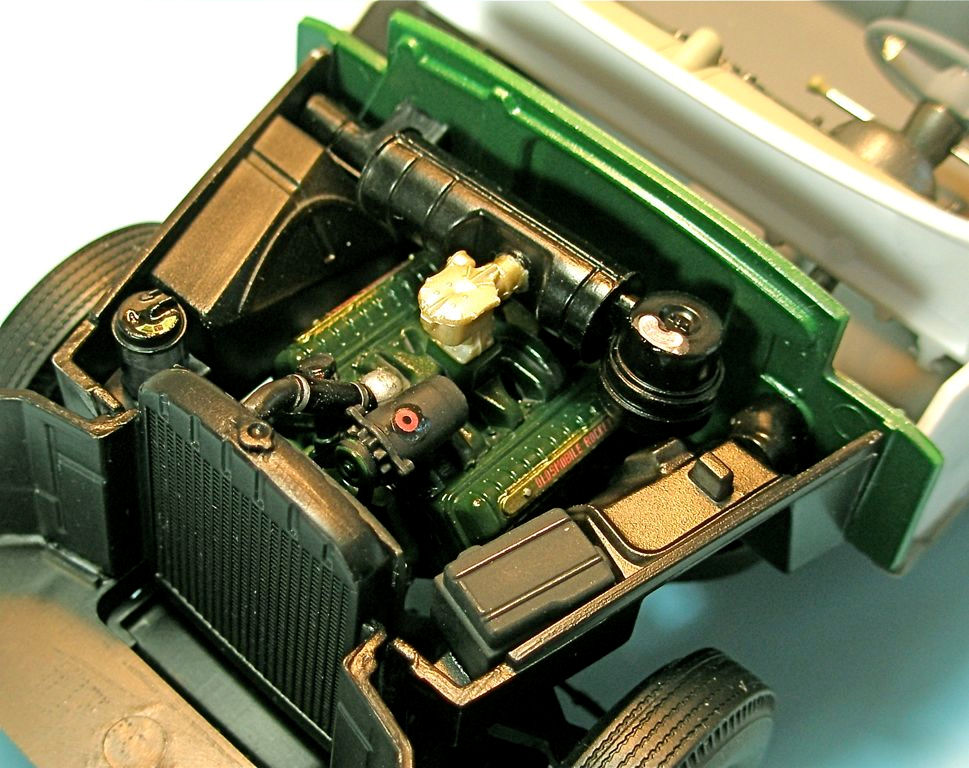
The Rocket V-8. IJN Green used for engine block color
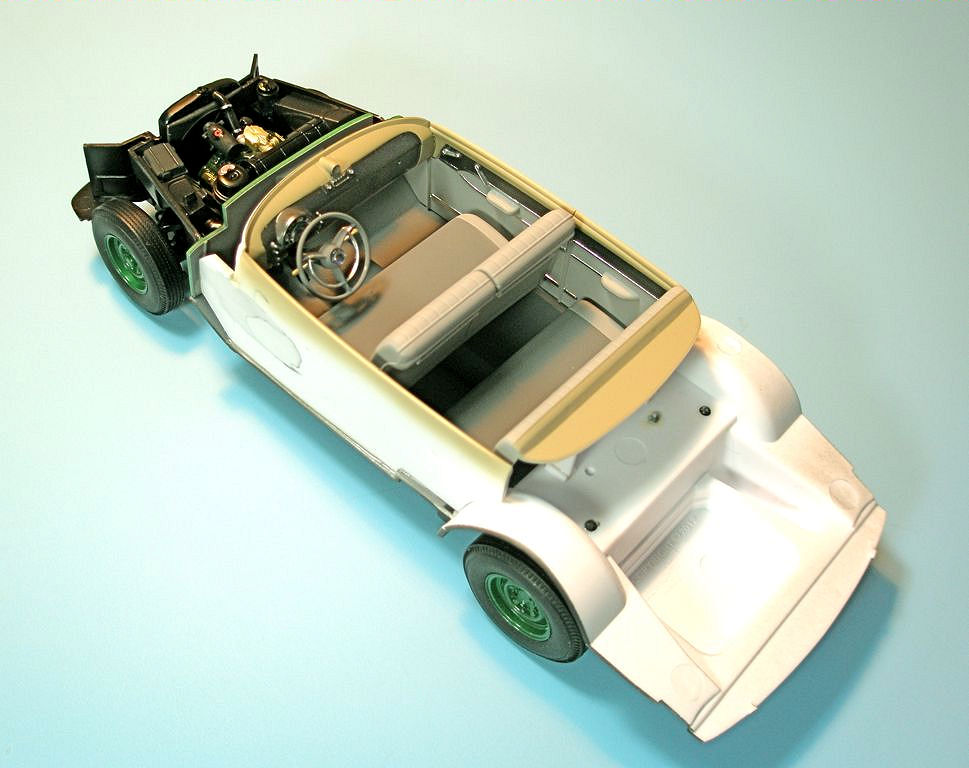
Finished interior
Body shell after trimming with Bare-Metal foil
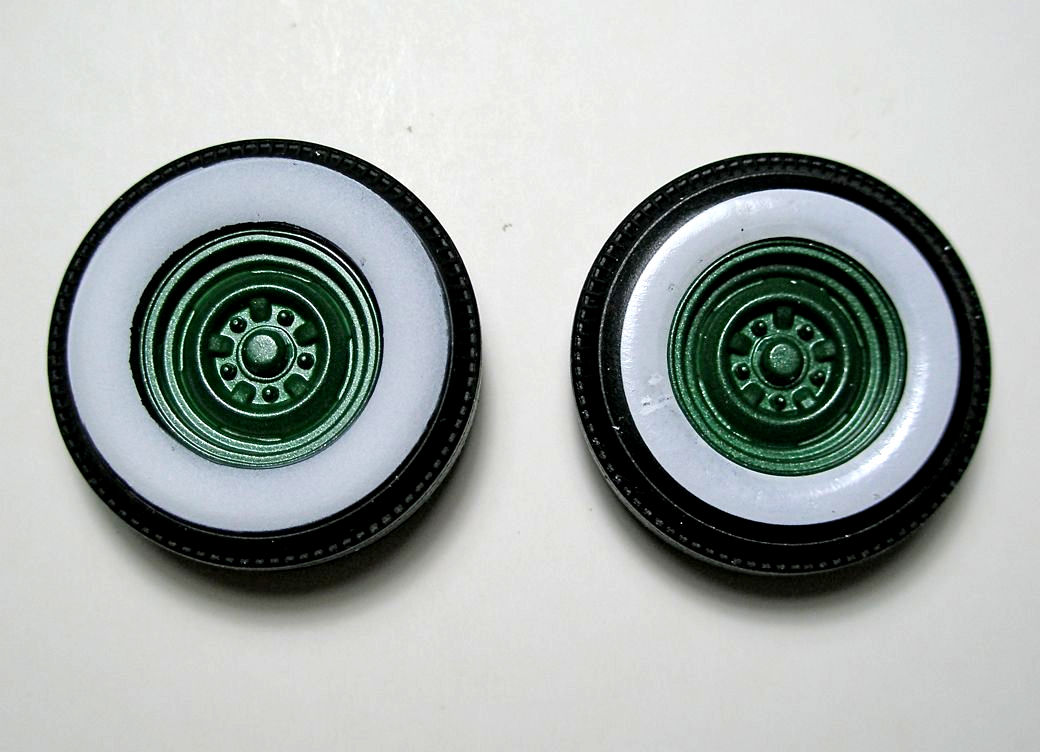
My hand-painted tire on the left compared to the tampo-printed one from Revell on the right

Completed - left front
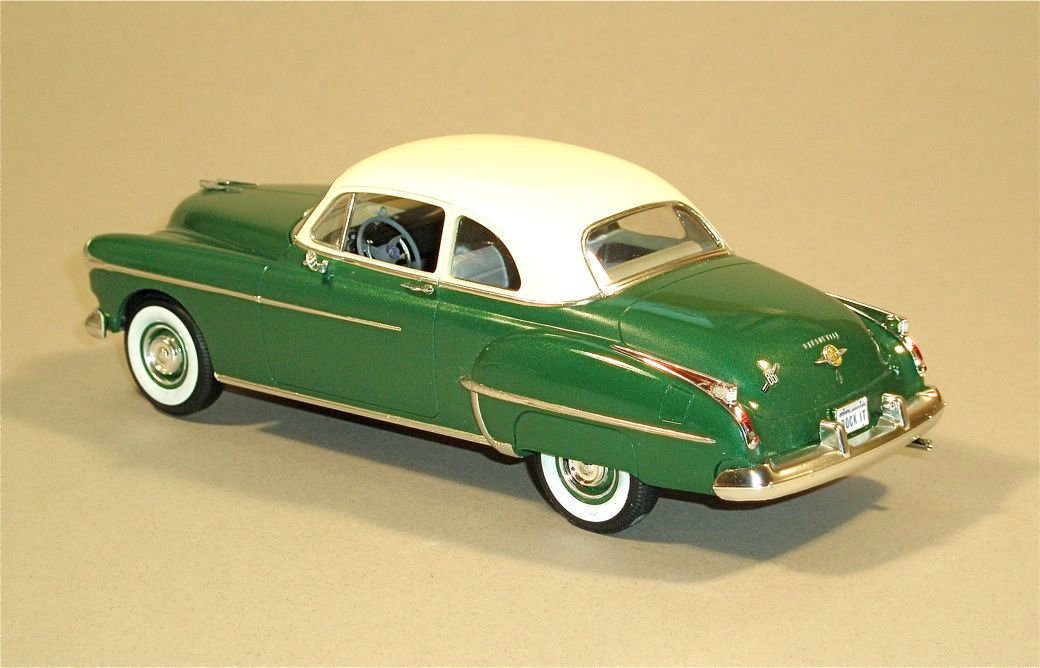
Completed - left rear
Comments
Add new comment
This site is protected by reCAPTCHA and the Google Privacy Policy and Terms of Service apply.
Similar Reviews