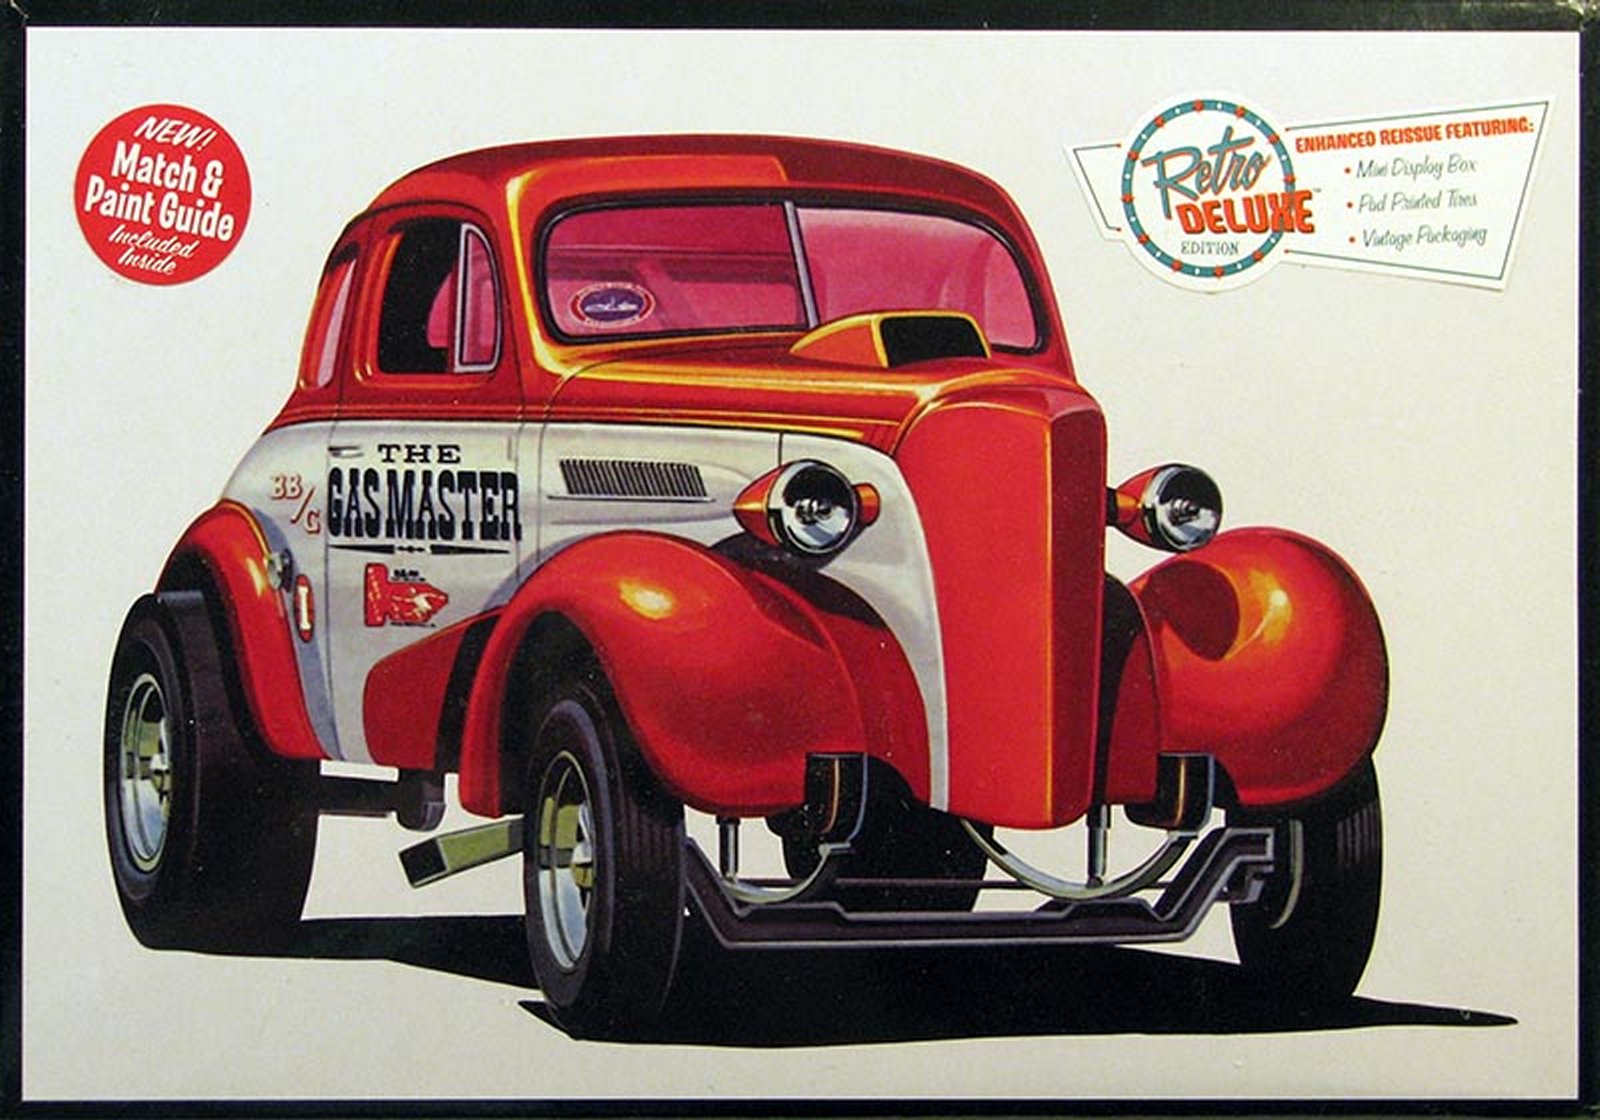
1937 Chevy Coupe Stovebolt
It’s hard to believe that after more than fifty years of modeling, I’ve never built a car before now. But somewhere between “you’re never too old to learn” and “you can’t teach an old dog new tricks”, I found myself with my first car model. I’ve always liked the aesthetics of the 1930s, particularly where technology was applied. Vehicle designers were just starting to appreciate the value of aerodynamics, and automobiles of the mid-to-late 30s were showing that influence, with teardrop shapes replacing flat surfaces and hard angles. Compared to cars of just half a generation earlier, especially two-seater coupes, cars of the late 30s looked fast just sitting still. The ‘37 Chevy was a prime example.
Round 2 Models has been re-releasing classic AMT kits for a number of years, and the ‘37 Chevy Stovebolt kit is something of a gem in terms of options and extras offered in one kit. The modeler has the choice of building one of three body options – a standard stock vehicle, a customized street rod, or a dragster.
The list of optional and/or extra parts is lengthy:
- Choice of engines: stock Straight 6 or 427 V8
- Stock wheels with hub caps, drag wheels, or mags
- Stock bench seat or custom buckets
- Clear or amber tinted windows
- Clear or amber tinted engine cover, or stock folding hood
- Stock white sidewalls or racing slicks
- Standard chrome grille or solid nose
- An extensive decal sheet
Since my interest was strictly in the time period and the look of the design, I opted to build this Chevy buttoned up, so I left the engine out all together. Even by skipping that step, this build presented its share of stumbling blocks and steep learning curves. The first was the age of the kit itself. Its extensive molding history meant that nearly every part, large and small, required clean up of flash or ejector pin marks. This becomes especially problematic with the chrome parts, where in many cases, along with the flash issue, the sprue gates are large or extremely close to the parts themselves. Ordinarily, I would strip the chrome from the parts, sand them, then repaint with something like Alclad chrome. To save time, however, I just carefully sanded the parts as little as possible and touched them up with silver paint. Adequate, if not perfect.
With that work done, experienced car modeler will probably breeze through the rest of the assembly. The parts fit was rough in many cases, requiring some not-so-gentle persuasion to get the parts where they belonged (my ignorance of car modeling, resulting the miss-alignment of some of the parts, didn’t help matters, either). Only one taillight was included (both good news and bad news, since the lens had to be fabricated from a piece of red toothbrush). Many of the “protruding” parts, such as the headlights, door handles and license plate holders, are butt-joined to the body. For the larger of these, I choose to add wire pins to insure a more secure attachment. The detail is spotty (for example, the hood louvers and body detailing are very petite, but the clutch, brake and gas pedals are stumps molded to the floor). The interior, in general, is a bit on the simple side while the exterior is rather nice. But with a one-piece clear window unit that has all the windows closed, most of the interior won’t be clearly visible. Except for the stock hood, the body does not allow for opened doors.
I learned the hard way that painting and finishing cars is nothing like finishing aircraft. Rather than spending the time and money adopting a new automotive painting system, I chose to custom mix a color with Model Master enamels that came as close to GM’s “Regent Maroon” as I could get from looking at photos and color chips on-line (that alone will tell you that I’m absolutely not hung up on color accuracy). I probably spent as much time coating, polishing and buffing the finish as I did cleaning the parts at the start of the build, with only mediocre results. Lets just say that I have a new found respect for car modelers that get those deep, lustrous shines.
All in all, this kit represents a relatively simple build for anyone that knows anything about building car models, but with plenty of opportunity to practice some of those “basic modeling skills”. It certainly offers lots of choices and options.
My thanks to Round 2 Models and IPMS for providing the sample for review.


Comments
Add new comment
This site is protected by reCAPTCHA and the Google Privacy Policy and Terms of Service apply.
Similar Reviews