
1914 Ford Model T Fire Truck
Henry Ford’s Model T revolutionized America. It’s low price and simple mechanics made it affordable and practical for ordinary people to own a car. The flexibility of the Model T’s platform also spawned a host of other applications that allowed businesses and municipalities to make the switch from horse-drawn vehicles as well.
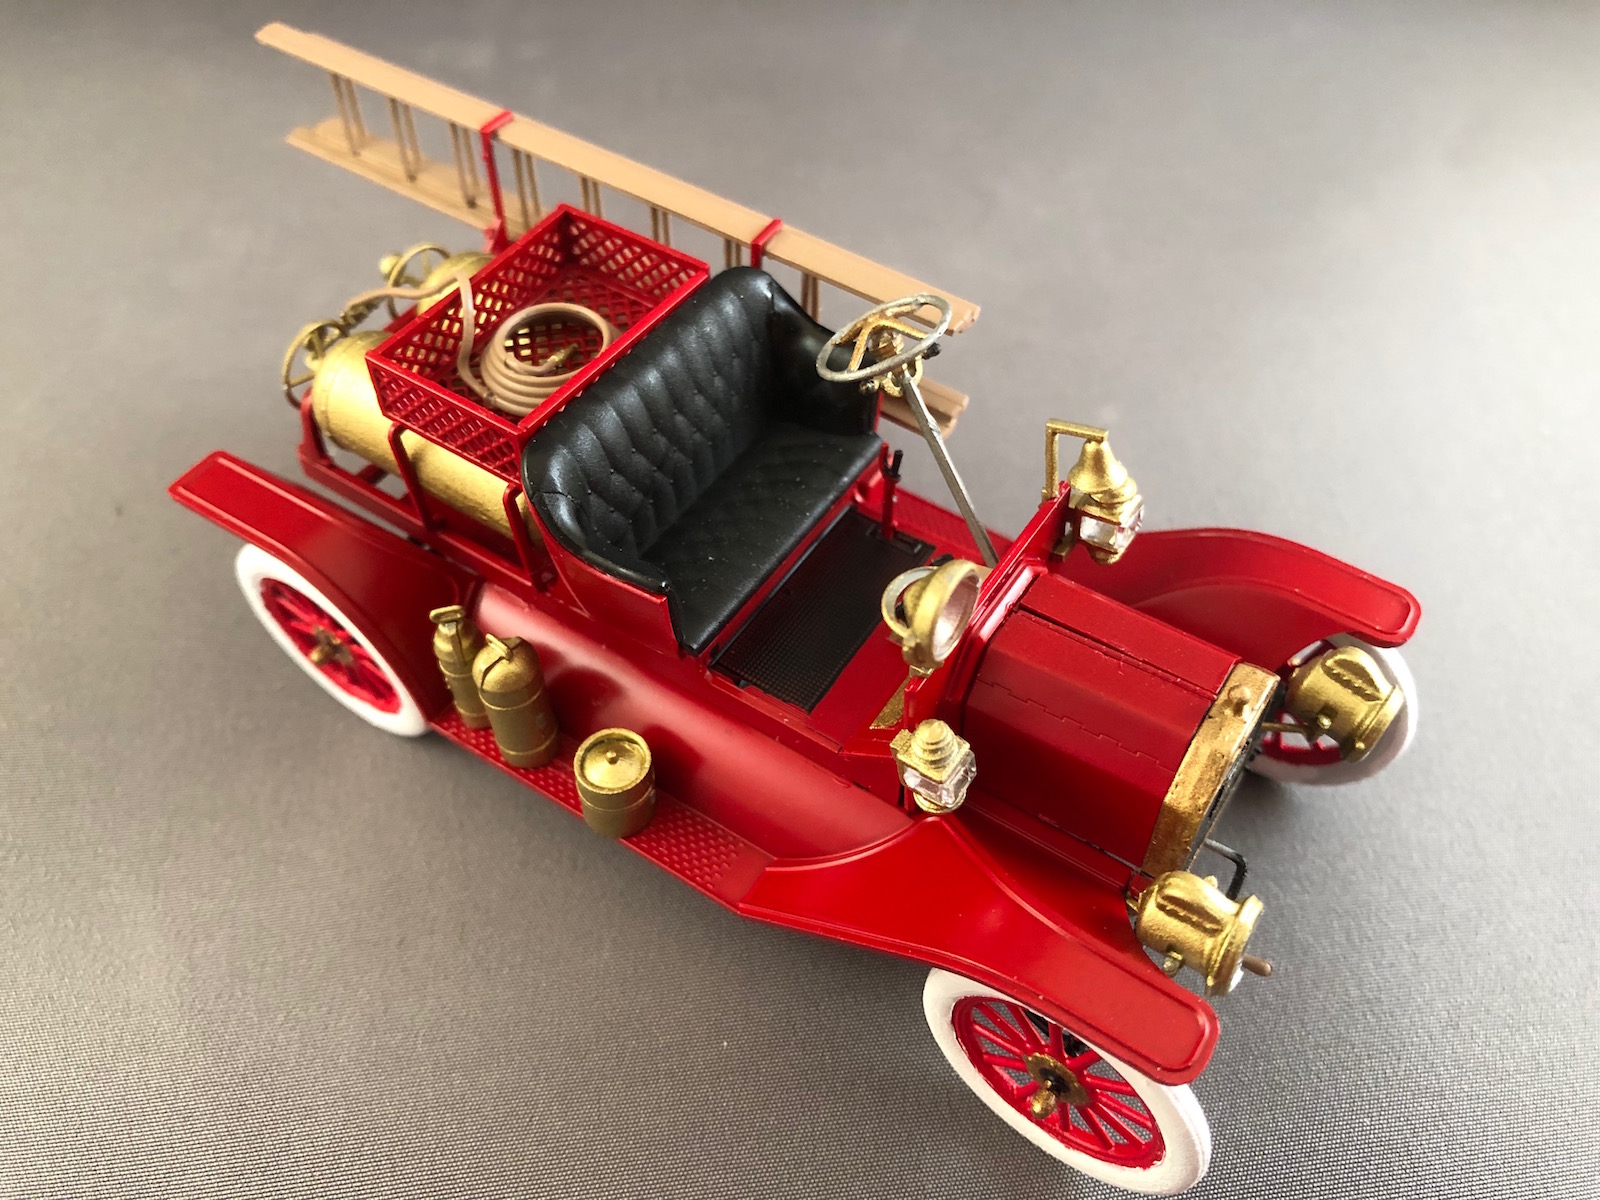
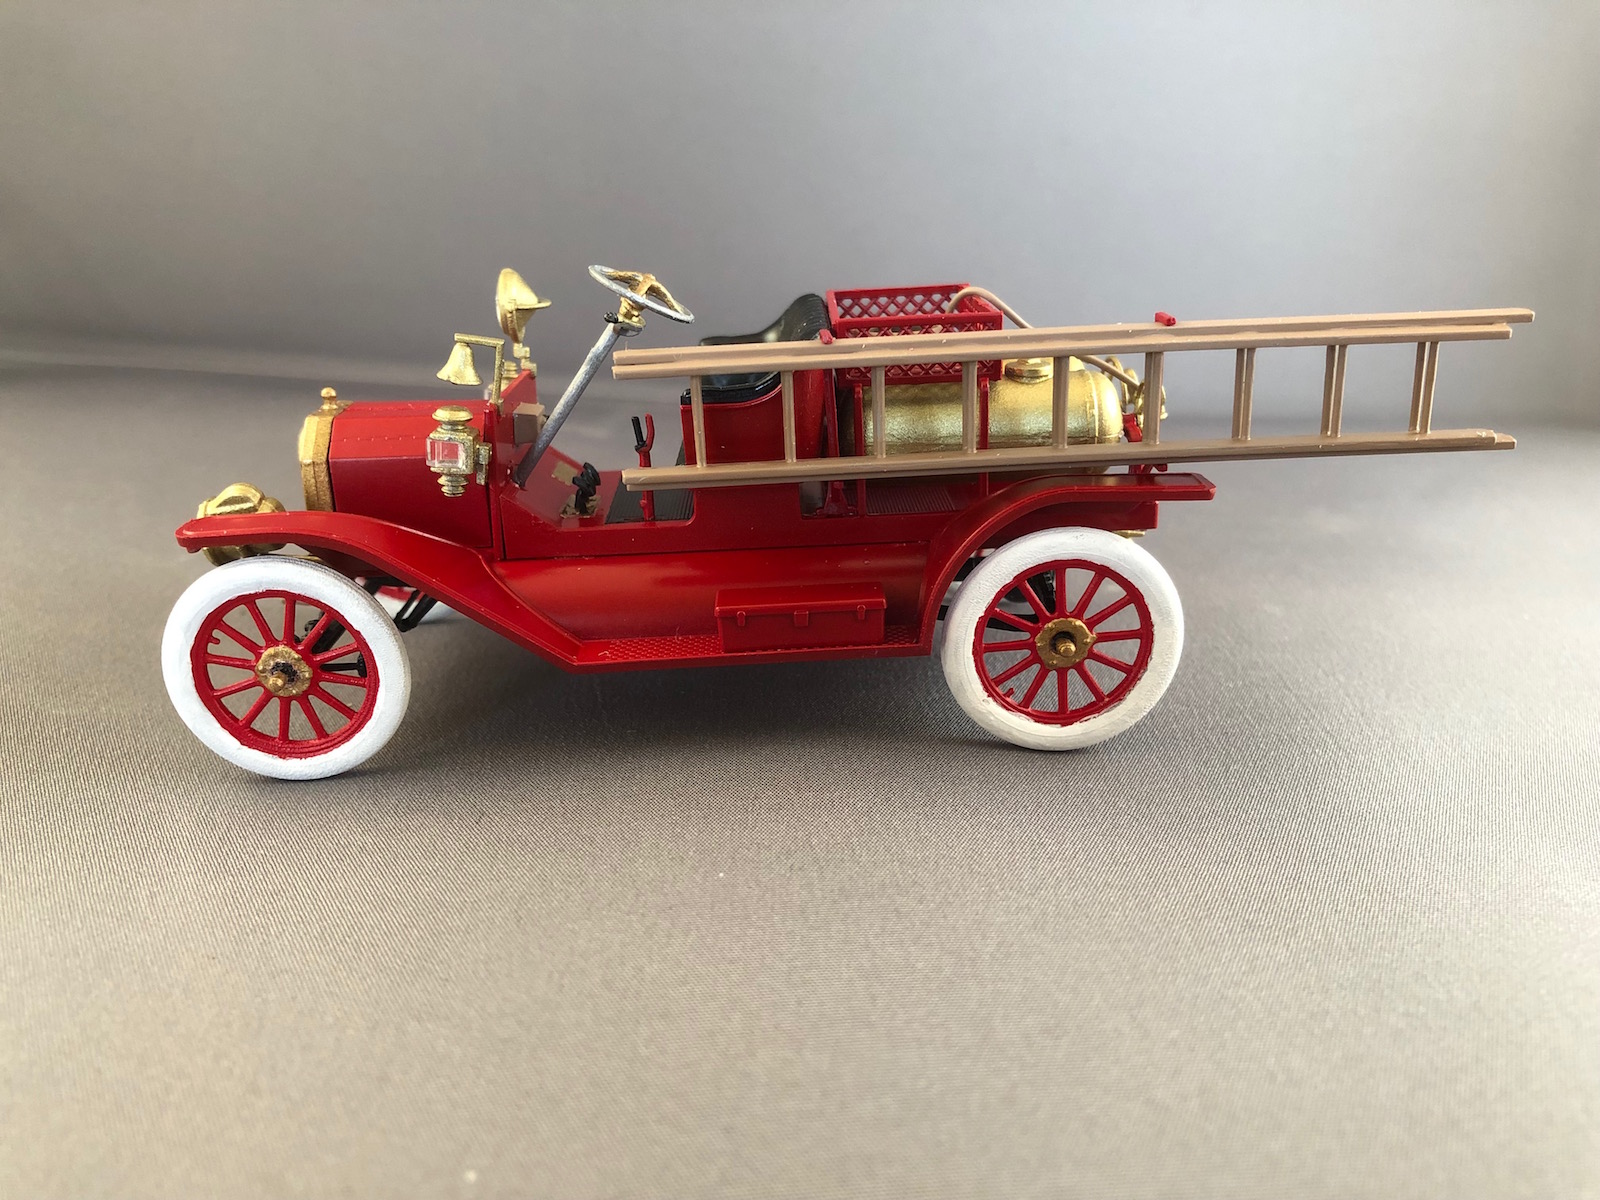
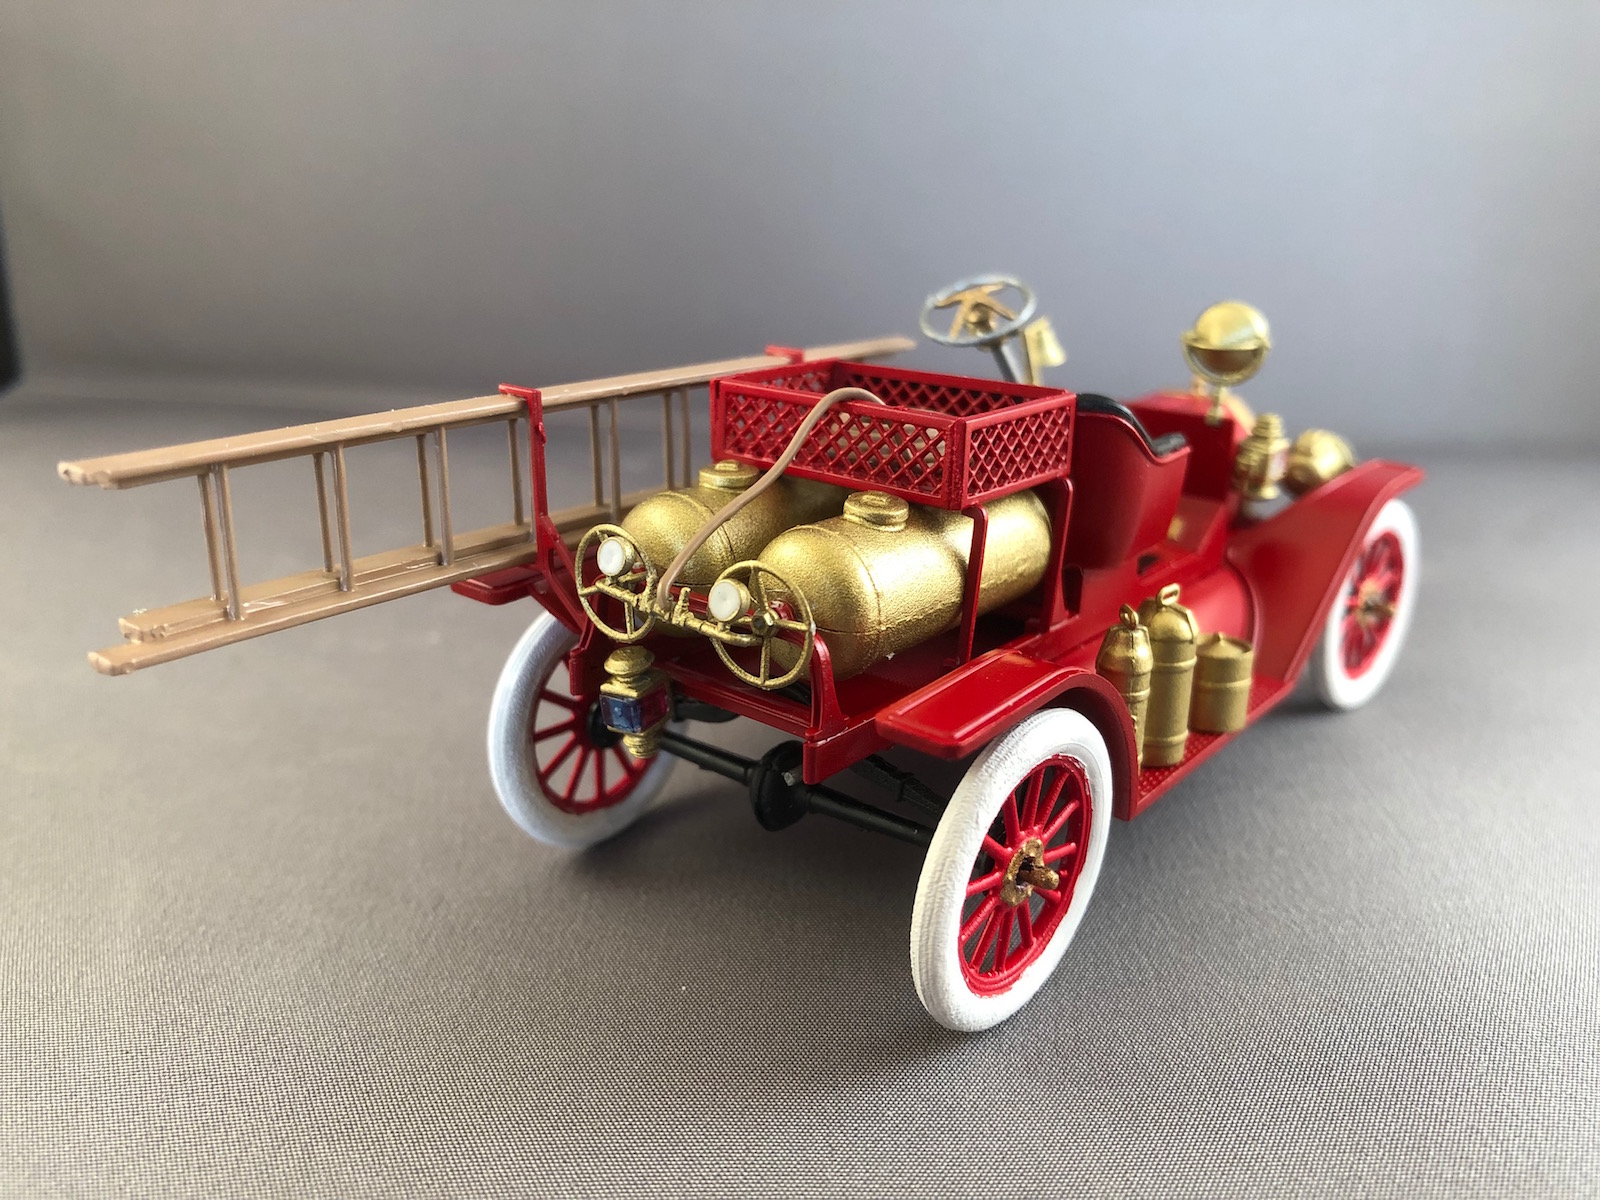
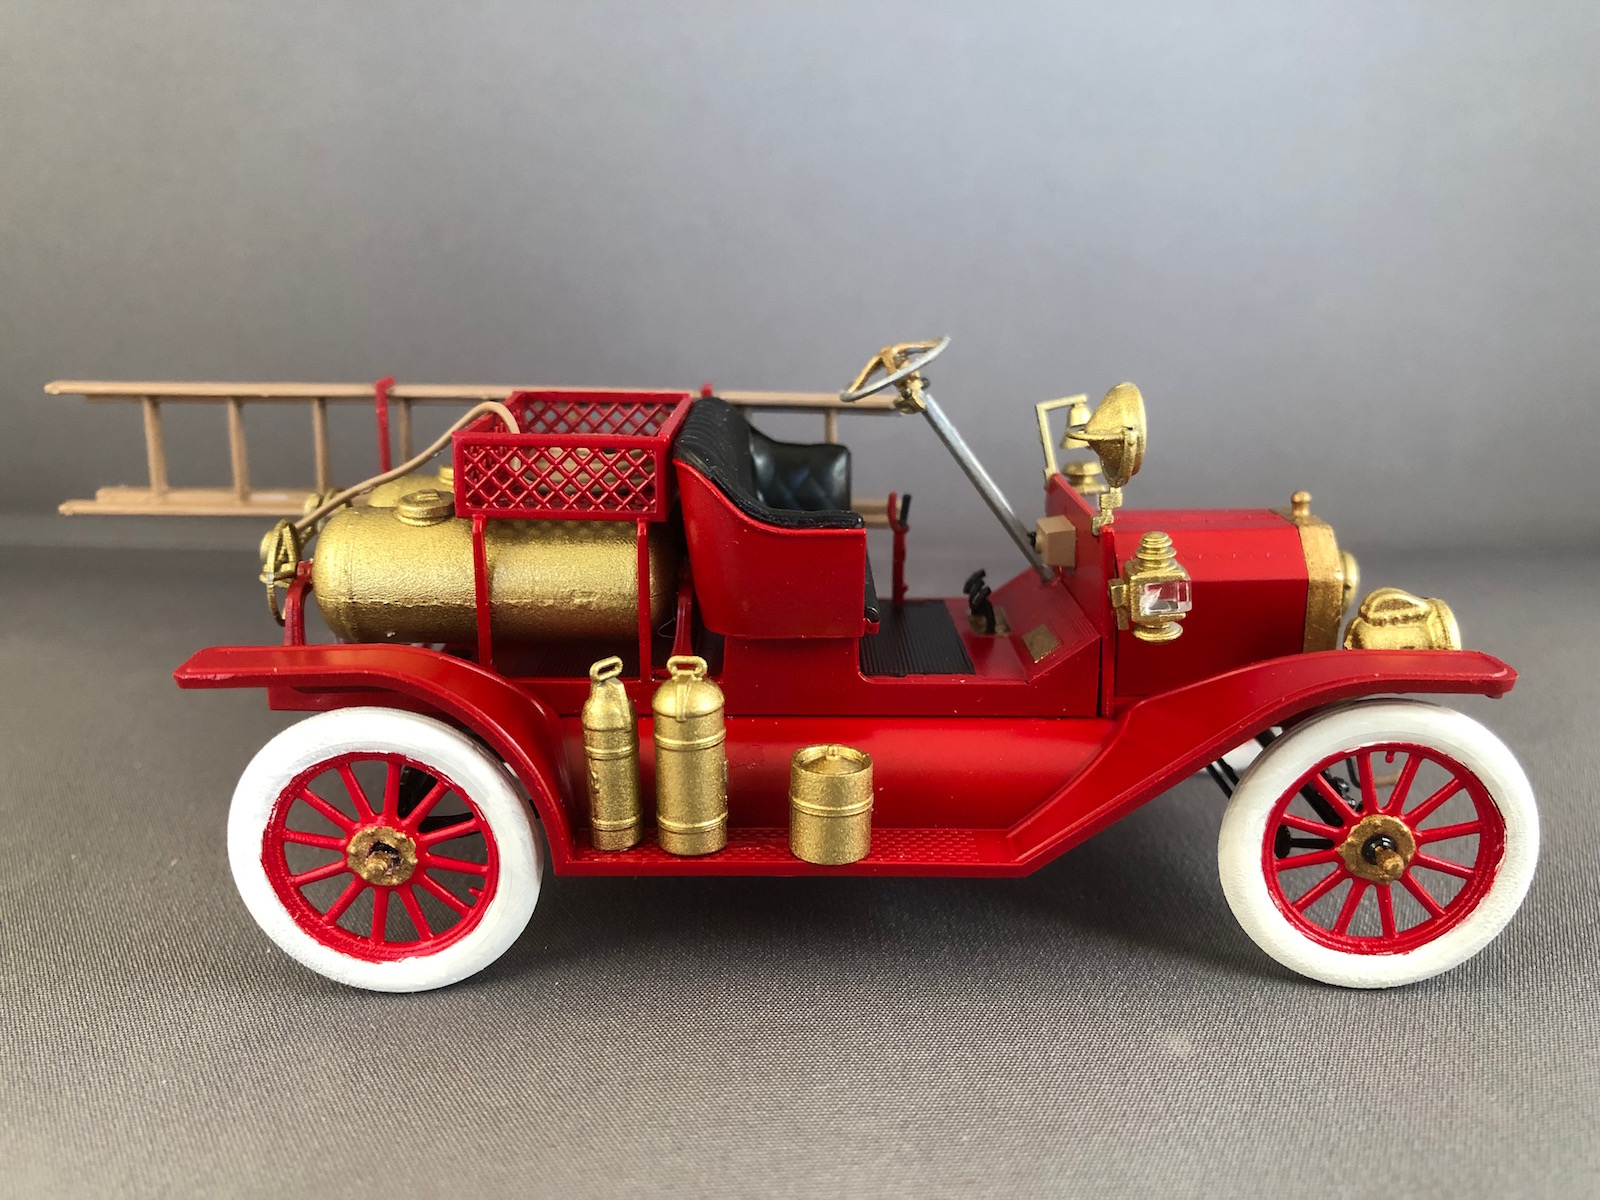
This kit shows a prime example of that flexibility. While the Model T fire truck may not have been capable of supplying all equipment needed to fight a major fire, it did provide a means of getting some basic firefighting equipment to the scene much more quickly, buying critical minutes in emergency situations.
ICM has been releasing a host of Model T subjects in both 1/24 and 1/35 scale in recent years. Again, the Model T’s basic platform allows them to spawn multiple kits off of a core set of tooling, and the result is a bonanza for the hobby.
The kit itself comes in a sturdy cardboard box that does a fine job of protecting the many fragile kit parts inside. There are 110 pieces to this kit, and the sprues also contain a number of other parts that are not used. Aside from a small sprue of clear lenses for the headlights, spotlight and sidelights, the entire kit is molded in gray plastic. There are no decals included in the kit. Molded-in detail is crisp, and there was only a very small amount of flash to deal with on my copy of the kit. Many of the parts are tiny (like the clapper on the bell) or very delicate (like the engine crank and headlight brackets), so great care is required to avoid breaking them or, worse, losing them to the carpet monster.
The 16-page instruction sheet has large, clear diagrams that break the assembly into 56 separate steps. The front and back are full-color, providing some helpful visual references for painting. A list of paint colors with ICM, Revell, and Tamiya paint numbers is provided, and painting callouts appear throughout the instructions.
I used a combination of Krylon, Testor’s, and craft paints that I had on hand for this build. I would have liked a more polished finish for most of the brass pieces, but the end result still looks pretty good. A Molotow chrome pen provided the reflective backing inside the headlights and spotlight.
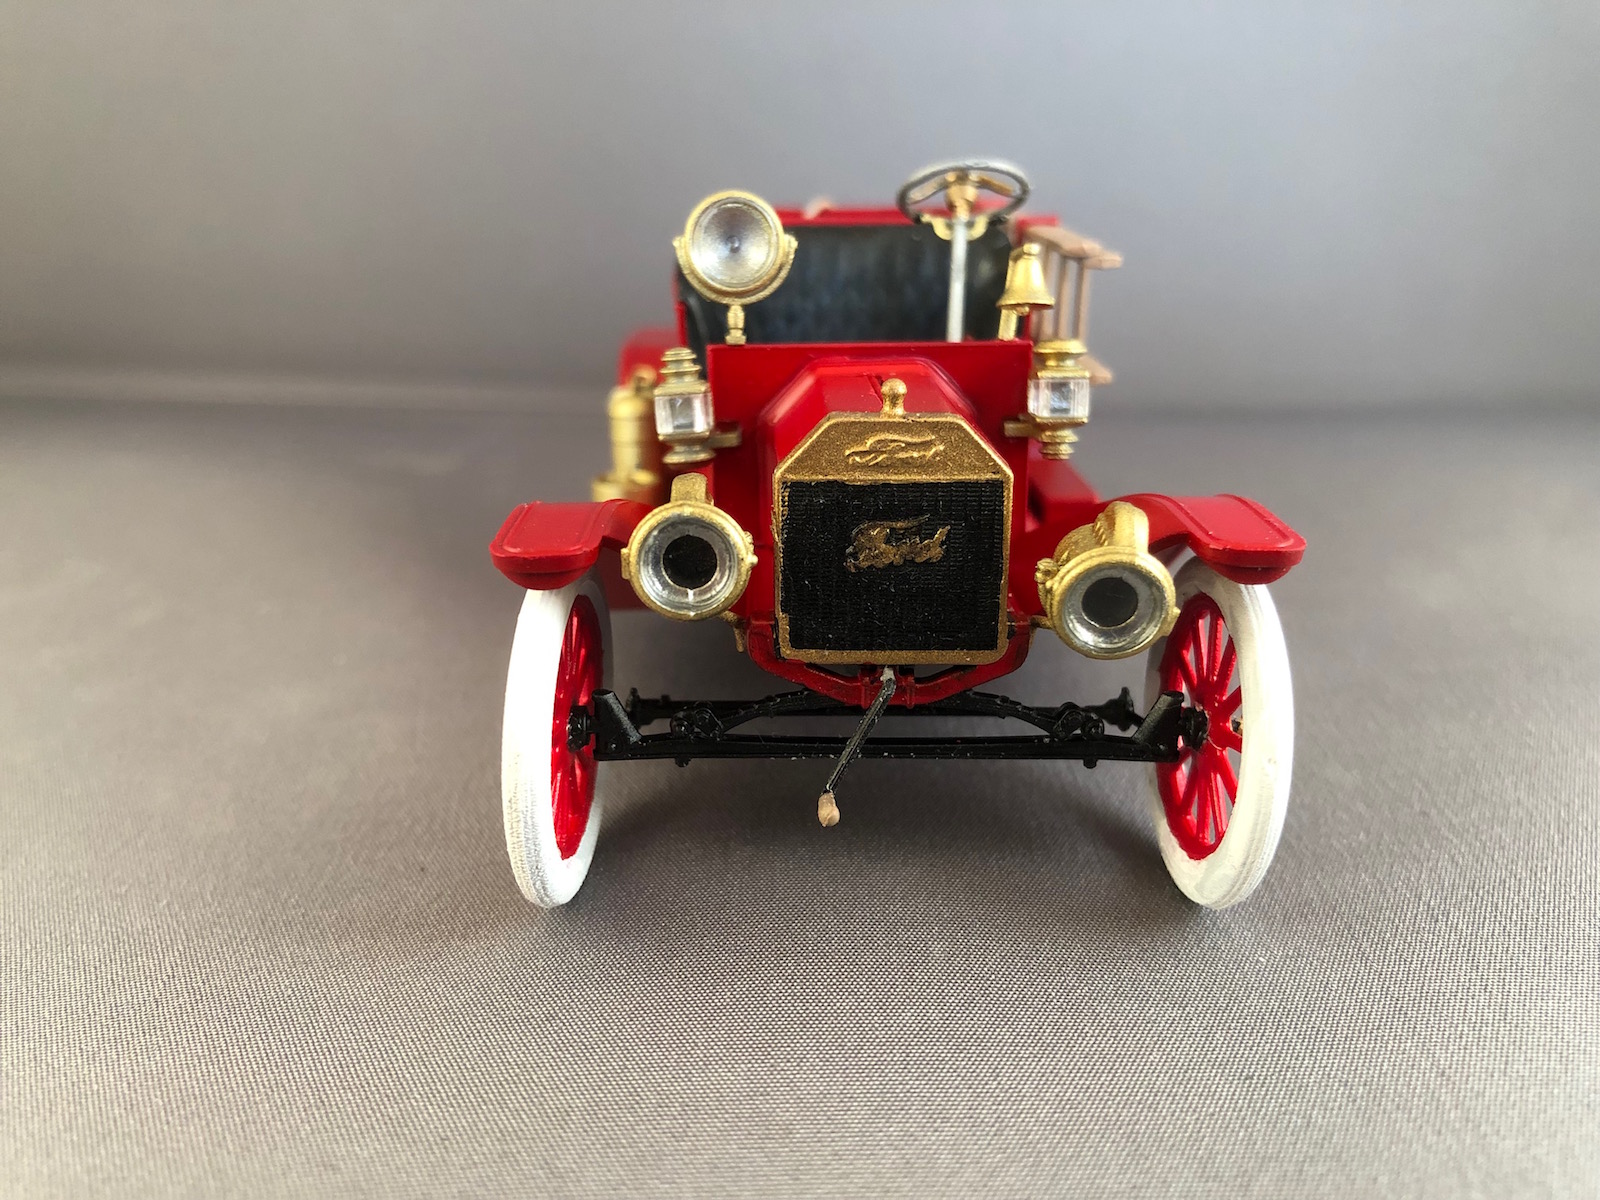
The entire kit builds off of the fender assembly, beginning with the front suspension/radiator and engine, then the rear suspension and tires, followed by the passenger compartment, the water tanks and firefighting equipment, and then the final details. If you’re anything like me, you’ll be picking and choosing the order in which you do certain things to facilitate painting and assembly. I assembled the engine first, since it could be sprayed black as a unit. The 3-piece seat upholstery assembly and the 4-piece seating platform were also assembled prior to painting, as was the “cage” that holds the fire hose and the various water tanks and fire extinguishers.
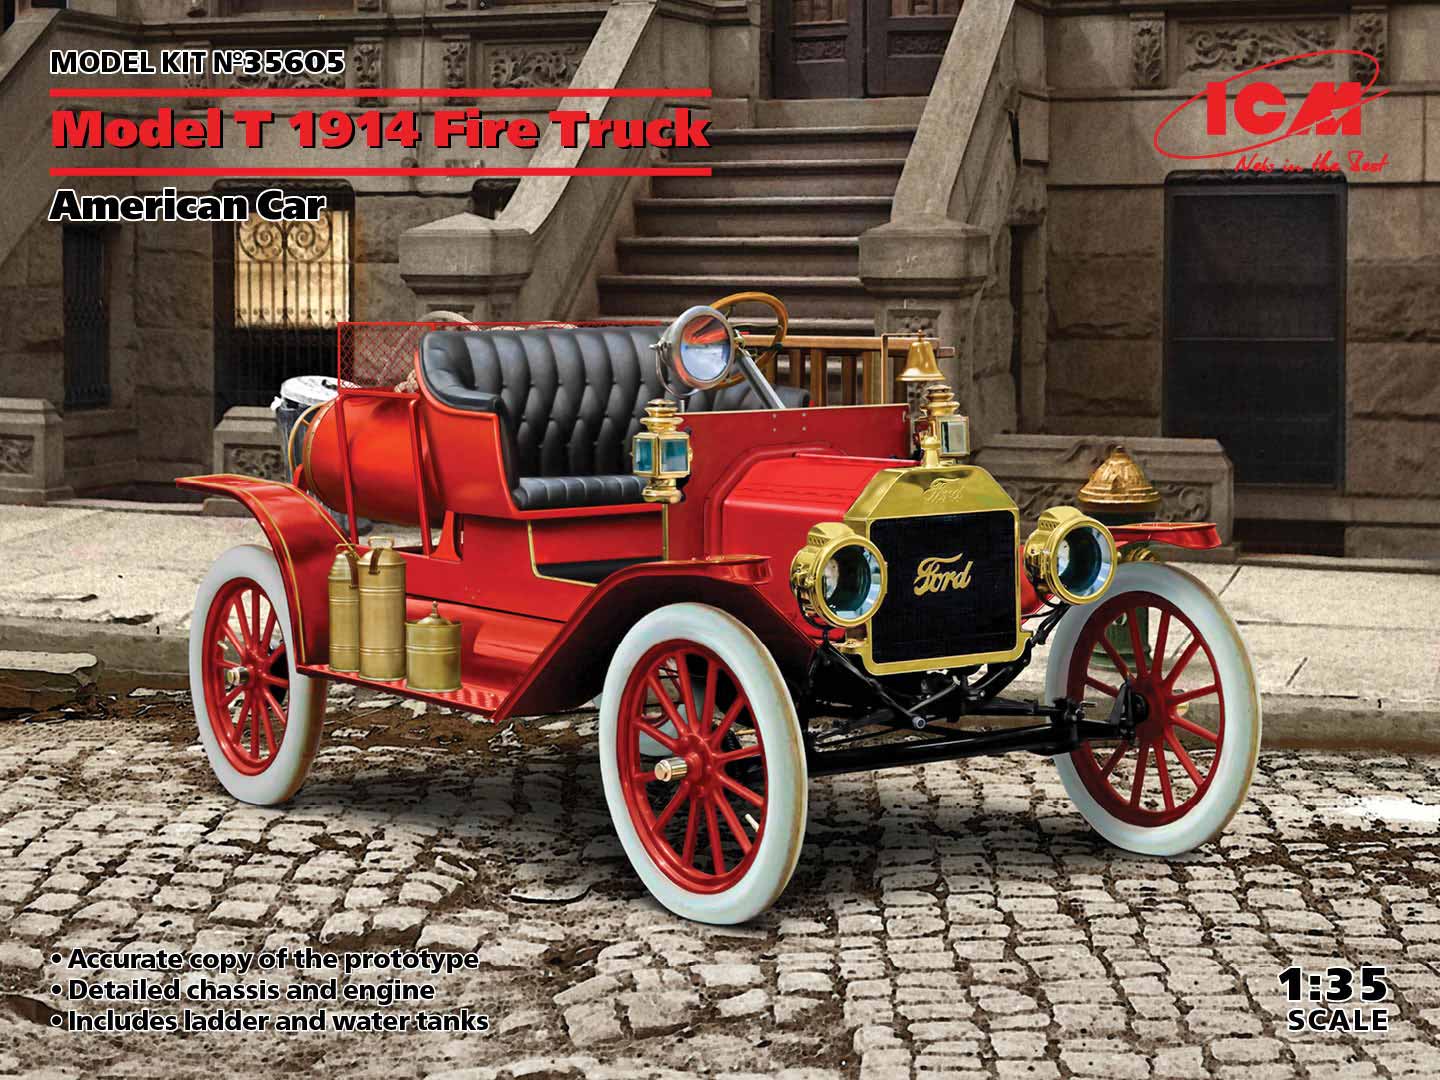
The wheels and tires are molded together, as are the radiator, grill frame, and front suspension. For me this made painting these items particularly challenging. My eyesight is not what it used to be and my hands have never been particularly steady, so painting the brass “Ford” script on the grill and getting a clean edge between the red wheels and the white tires proved problematic.
Assembly went well for the most part, but there were a few hiccups along the way. Some were my fault, while others were caused by the instructions or the kit itself. Some things to be aware of:
- In step 8, it is impossible to get the engine installed if the radiator/suspension assembly is firmly glued in place, as the engine has to slide into a slot under the radiator. It would be better to install them at the same time.
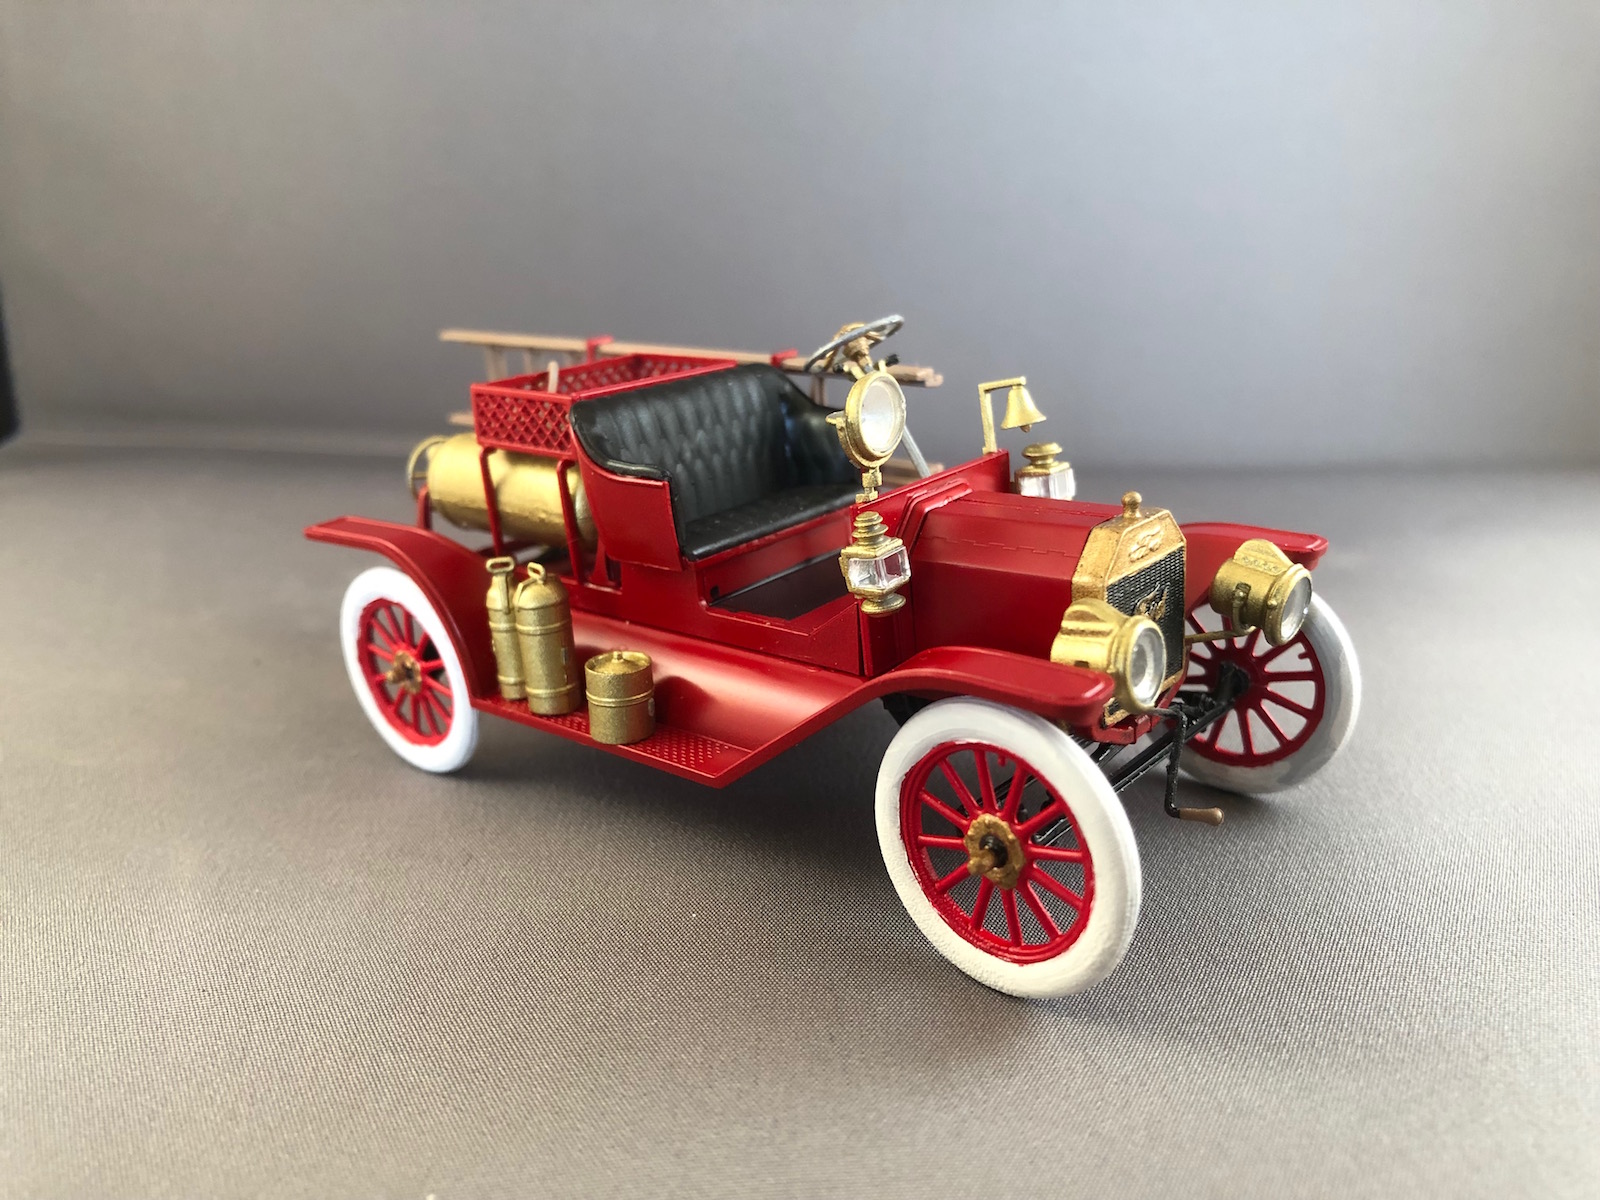
- When assembling the lights (steps 26 and 40-42), pay very close attention to the orientation of the brackets and which side of the light is “up”. I thought I did, but still got some of them wrong.
- Also pay close attention to how the front lights install in step 44. I assumed I knew how they went and didn’t look closely enough at the instructions. They look fine to the casual observer, but if you know how they’re supposed to look, you’ll know mine are wrong.
- Assembling the water tanks and their brackets (steps 28-32) was a nightmare. I did step 29 before painting the water tanks, and that was good. But once the tanks are painted, I would recommend doing step 31 next, then 28, then 32, and finally step 30. I also set the assembled tanks and brackets into place on the chassis while the glue dried so that everything would be sure to line up properly later.
- In step 39, the steering column has a nice big hole to fit into but no way to keep it from falling through the hole or to define the angle at which it should be set. I used a large glob of Micro Krystal Klear to hold it in place: it sets up quickly and dries clear.
The only real disappointment I had with this kit is that while the engine has some nice detail given the small scale, it is impossible to see any of it because the hood must be glued in place. It may be possible to glue the hood halves to the center hinge and then not glue the hinge to the body and radiator, but the resulting assembly might be too delicate to be handled. Also, the hood hinge provides some needed stability for the whole front suspension/radiator assembly.
All in all, this is a very nice kit with lots of detail. I would highly recommend it to advanced modelers with good eyesight and steady hands.
(By the way, ICM also makes this kit in 1:24 scale, which might be more suited for those of us with bad eyes and more than our fair share of thumbs!)
Thanks to ICM for the opportunity to build this kit!


Comments
Add new comment
This site is protected by reCAPTCHA and the Google Privacy Policy and Terms of Service apply.
Similar Reviews