
15cm s.IG.33/2 (Sf) auf Jagdpanzer 38(t) Hetzer
Dragon has recently released five new kits, none of which have been available in plastic before, at least not in the released versions. Instead, modelers would have had to scratch build them or buy expensive resin conversion sets.
This review covers one of the kits; the 15cm s.IG.33/2 (Sf) auf Jagdpanzer 38(t) Hetzer. This Czechoslovakian 38(t)-based vehicle looks unusual, sporting the large-caliber, 150mm field howitzer used on a variety of other (mostly larger) German AFV’s. Just imagine the recoil from that gun when fired from the diminutive Hetzer!
Intended as a replacement for the Grille, only 30 were built, from December 1944. Operational history is scarce, but based on the few images available it was apparently used in combat on the Eastern front.
This is an unusual armored vehicle and promises to build into an unusual subject for German WWII armor fans.
Opening the Box
Combining the s.IG.33 field howitzer, the PzKpfw 38(t) chassis and the Hetzer superstructure was a no-brainer for Dragon – the company has produced excellent kits of all three. This release simply uses sprues already in inventory, with a few new bits added in. As a consequence, the diminutive vehicle still comes in a box stuffed with sprues, and a lot of what you get is not used. Fortunately, there are plenty of quality parts headed for your spares box; gun barrels, machine guns, radio sets, ammunition rounds, etc., etc.
The contents of the box include:
- 10 sprues in soft, light grey plastic, packaged in separate bags
- 2 sprues of ‘link & length’ track in soft, light grey plastic
- 1 sprue of clear parts
- 1 small photo-etch sheet, including mesh for the rear muffler
- 1 aluminum s.IG 33 barrel
- 1 8-page blue and white instruction sheet with 19 steps
The kit comes with three finishing schemes represented using blue-and-white ink three-view drawings, and a small (but perfectly registered) sheet of three Balkenkreuz decals from Cartograf of Italy. These schemes include:
- Unidentified Unit, 1944 (Winter white over late war tri-color)
- Unidentified Unit, 1944 (Overall late war yellow)
- Unidentified Unit, 1944 (Late war tri-color)
The Instructions
This is a ‘fortified re-box’, containing sprues from several different Dragon kits, which sometimes leads to inaccuracies in the instructions. Thankfully, Dragon uses a color-coded system (blue and black) on the parts map and instructions to distinguish between sprues that have the same letters. The issues encountered have been noted below.
The following kits are represented:
- DR6470 - Bison Ausf. H (F)
- DR6429 - Bison Ausf. M (R)
- DR6030 - Hetzer (E)
- DR6290 - 38(t) Ausf. G (D)
- DR6749 - sIG 33 (C, B)
Things to Consider Before Building
This is an open-topped vehicle, meaning that the ‘build it all and then paint it’ approach isn’t the best course to take. The interior, which includes a rudimentary engine, is clearly visible and unfortunately, quite sparse, so you might consider adding some detail from your spare parts bin as I did.
If you choose to use the schürtzen (side skirts) and you want the camouflage to match the rest of the vehicle, the track needs to be attached prior to painting.
You will need to cut out a section of the upper front hull to make way for the sizeable main weapon. Fortunately, Dragon provides a thinned outline of the area to cut, making this task a breeze.
The main gun and its substructure can be dropped in at the very end, after painting and weathering, assuming you’ve left room on the floor of the interior for it – more on that later.
In typical Dragon style, there are a number of build options available to the modeler, so some up-front decision-making is in order.
The Build
Lower Chassis, Running Gear and Fenders
Due to a low parts count, the lower chassis of the 38(t) is a breeze compared to some of the other German AFV’s. That said, Dragon chose a slightly fiddly approach to the assembly of each of four bogeys. Each bogey can articulate into a different position before gluing, presumably to allow for staging the model on an uneven surface. For those of us who simply place our models on a flat surface, this approach doesn’t guarantee that all wheels will touch the ground evenly when set. Consequently, I suggest that you prepare all the parts for Steps 1-3 beforehand, so you will be able to quickly move through these steps and set the completed chassis on a smooth surface to let the everything dry true.
The jack assembly will interfere with the fitting of the schürtzen if not placed perfectly. I suggest that you wait until the end of the build to place the jack on the right rear fender once you know where everything else will end up. Similarly, place the tool box at the very outer edge of the fender (or leave it off until the end of the build) lest it interferes with the upper hull when you drop it into place.
In Step 5, there are two parts (A32/A33 - shown in place at the rear of the hull) that don’t actually get attached until Step 16 – so don’t fret, even though they look like they will interfere with the rear hull in the image.
Interior
Dragon provides a pretty nice representation of an engine and transmission for the model and it actually can be seen from a certain angle when looking into the top of the open cabin. To ensure a tight fit, I suggest that you leave off Parts D37/D55/D56 and K10 until everything else is dry and you are ready to place the assembly into the lower hull. That way the horizontal bars (Parts D46) will remain sturdy while you push everything into place.
The placement of the nicely detailed 4-part chair is shown in a separate illustration in the instructions, but somehow (??) I still managed to place it where it interfered with the main weapon assembly later. As a consequence, I had to cut mine out and discard it when it was clear what was happening. I suggest that you (not) attach the chair or its base until you have the s.IG.33 assembled, when you will have a better idea where things will fall on the floor of the interior cabin.
In Step 10 you assembly a crucial substructure to the main gun that has to be done right or your gun will be crooked later. There is a nice image of the completed assembly in Step 15 you can use as a go-by.
Dragon provides two nice options for storing spare 150mm ammunition on the interior of the upper hull. Unfortunately, there are no clues provided on where exactly to place the two multi-part racks, or how to insure that the racks are parallel. I ended up squaring the racks on a thin piece of card stock and then gluing card with the two racks into the side of the upper hull. The card stock disappeared after painting. Easy peasy.
Dragon includes parts for 10 fuse storage boxes, which is nice, but the instructions have you using 13, so you will have to make a choice on where you want them. I put eight on the upper rear-shelf in the interior where they are most visible and put the other two in the spares box.
15cm s.IG 33
Dragon included an aluminum barrel in the kit, a throwback to before slide molding became de rigueur in their kits. Fortunately, this barrel fits snug into its receptacle, removing my main complaint with metal barrels.
Steps 11 and 12 address the main weapon and everything went together surprisingly well. You’ll have to use a little patience as the hardware that cradles the main gun is a little fiddly and should be assembled slowly, allowing the glue to dry before continuing in some places. Studying some of the other images will help with angles and parts placement.
The Track
Link and Length track is probably my least favorite type of track, far behind my favorite (DS) and individual link Magic Track. The biggest reason for this is that you are allowed very little leeway between the parts that have multiple links, and if you add a little too much sag here or too little there, you don’t have enough individual links to make it smoothly to the next big part – if that makes any sense. Regardless, I muddled through and the track came together reasonably well - the upper portions are hidden by the schürtzen remember!
The Schürtzen and Final Touches
The new parts for this kit include two nicely molded sides to the upper hull (Parts G1 and G2) that protect the interior cabin. The fit is perfect – just make sure you are done with the interior before putting them on since access will be limited from there on out. Fortunately, the main gun assembly can still be carefully maneuvered into place.
If you plan to attach the coiled tow chain at the rear of the chassis, I suggest you do so after the upper and lower hulls are attached and the engine muffler is in place. I had to remove mine (and re-attach it later) because the upper portion of the coil prevented the muffler from seating correctly.
The schürtzen itself is sturdy and fits perfectly. Dragon molded the attachment hardware to the flat panels which makes everything much easier to work with. Even then, I snapped several of panels off handling the model during painting and weathering. You just have to be careful.
Painting and Finish
I decided to paint the sIG Hetzer using a new line of acrylic paint called Mission Models Paint (MMP). This new paint is pretty amazing – I have yet to experience any clogging whatsoever when I use the following mixing ratio: Six parts MMP paint + four parts MMP thinner, with the thinner made up of ten parts thinner to one part retarder (given the catchy name of MMP Polyurethane Mix Additive). I spray this paint at about 12lbs for detail work and 20lbs for coverage.
These paints cost about as much as Vallejo, but they come in bigger bottles so they seem more expensive, and I wouldn’t have tried them if I didn’t receive such glowing reports from my friends about their painting experience. Now I may be hooked (!) They spray on beautifully and just don’t clog, even after an hour-long session, with several-minutes-long breaks. Did I mention these were acrylics?
I still stand by my vast array of Vallejo paints, and between these two manufacturers, I have access to a huge variety of odor-free colors. Plus I can swap my heavy, uncomfortable vapor mask I use with distillate-based paints for a simple painter (particulate) mask. I am sold on acrylics. Now on to the model!
Primer, Pre-Shade, and Hairspray
I started by applying a primer consisting of Krylon Color Master with Durable ColorMax Technology rattlecan (Flat Black) lacquer paint. This is the third rattlecan primer I’ve tried, and I’m glad I kept going because this stuff is a superior product, drying super thin and very tough. Not to mention cheap and quick. Once the lacquer paint degassed overnight, I touched things up back in the paint booth using Vallejo Model Air 71.251 NATO Black, including the tire portions of the wheels, which I will use hairspray on later to assist in painting.
The primer/pre-shade coat gives the plastic and PE some grip for the following coats, and fills in the recesses, creating a shadow effect near the flat surface edges. This will add depth for the subsequent coats to come.
Once the paint had dried, I followed up with a layer of rattle can hairspray on the interior portions of the vehicle to prepare the surfaces for chipping, later, and the rubber portions of the wheels to assist in painting. I use TRESemmé ‘Two Extra Hold’, but I don’t think it really matters.
Interior
I followed the pre-shade and hairspray coats with Vallejo’s 71.132 Aged White, a color I like to use on the interiors of German and Russian AFV’s. I want to lighten things up to highlight the detail, but I think plain white is too bright. Once that was dry, I rubbed off some of the paint to simulate chipping, and gave the entire interior several filter layers of Mig Wash Brown Oils and a pin wash of Mig Dark Wash, both thinned with Mona Lisa.
I used a variety of Vallejo paints for the interior detail including Panzer Aces (PA) 312 for the seats, and PA 336 and 340 for the racked ammunition rounds, finishing the ends with Floquil 300104 Brass.
Once I was satisfied, I weathered the engine and interior using LifeColor 207 ‘Oil’, Vallejo 73.815 ‘Engine Grime’ and Vallejo 73.818 ‘Engine Soot’ acrylics.
Outer Camouflage using Panzer Putty
I followed the pre-shade coat with Mission Models (MM) 011 DunkelGelb as my basecoat and MM 019 DunkelGelb Late 1944 for my post-shade coat.
After about ten minutes I went to work with Panzer Putty, a great little product that I picked up last year. The putty has some particular traits that make it perfect for a job like this, especially with so many protuberances poking out all over the place. For one thing, Panzer Putty has zero adhesion to the model, it only sticks to itself. Secondly, it settles down tight using gravity in about 15 minutes, leaving no gaps.
Once the putty was where I wanted it to be, I laid down the second and third camouflage coats using the MMP 009 Olivegrun RAL 6003 and MMP 012 Rotbraun RAL 8017. Once the second camouflage layer of paint was on, I lifted the putty off in one piece and took a look – everything came out pretty well - the lines were sharp and there were no broken model pieces to be found.
Once the putty was off, I airbrushed Vallejo Model Air 71.042 Cam Black brown along the edges of the hull to give the nice lines of the Hetzer a little more definition. I then hand-painted the jack block using Vallejo New Wood, and the toolbox using Vallejo German Grey.
Decals and Weathering
With painting completed, I hand-brushed Future (acrylic) on the areas that would receive decals to give them a smooth surface to set up on. I then applied the decals using the Red and Blue Micro Sol/Set system without any problems, following that with an additional overall layer of Future to seal the decals and set the model up for washes.
I started weathering with an overall pin-wash using a 10:2 ratio of Mona Lisa thinner to Mig Dark Brown Wash out of the bottle. I focused on the wheels and panel lines, as well as the main weapon. I find this mixture perfect when applied to a glossy surface – the detail pops and the wash leaves no smudges.
I then applied a rust filter to the muffler using Mig Dark Rust oil paint, and a black filter to the jack using Mig 110 Black oil paint, both heavily thinned with Mona Lisa.
Once the oil-based products had a chance to dry, I applied a ‘road-dusting’ coat consisting of Vallejo Model Air 71.027 Light Brown, followed by a coat of Vallejo Flat Varnish to kill any shiny spots still remaining. I cut each of these 50/50 with Vallejo Airbrush Thinner and a few drops of Liquitex Flow Aid to improve flow.
The last touch was to go over some of the edges and the weld seams with a graphite pencil and Uschi Chrome Metal Polishing Powder.
Conclusion
Building this kit was a challenge, partly due to fit problems (some self-imposed), but mostly due to the open-top nature of the subject which naturally stretches out the project. Dragon kits are amazing, however – the detail, the design, and engineering, opening hatches, slide molding - Dragon produces some of the very finest models in the industry, and that’s what keeps me coming back for more.
I’ve developed a real fondness for (both) 38(t)-based armor, as well as the s.IG.33 field howitzer, and Dragon is my go-to company for these little gems since they produce such a large variety of both. This little open-topped Hetzer will be a unique addition to my model case.
I would like to thank Dragon Models for providing this kit for review, and to IPMS USA for giving me the opportunity to review it.


Main Hull cut out

Closeup of interior compartment
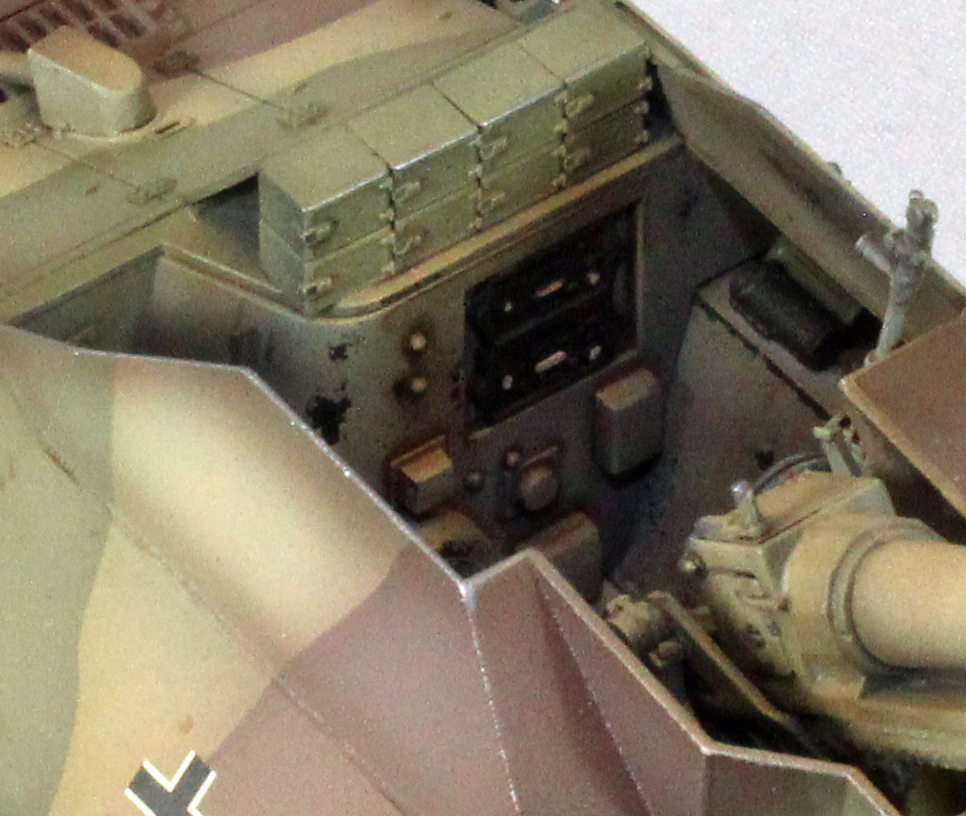
Closeup of interior compartment

Closeup of interior compartment

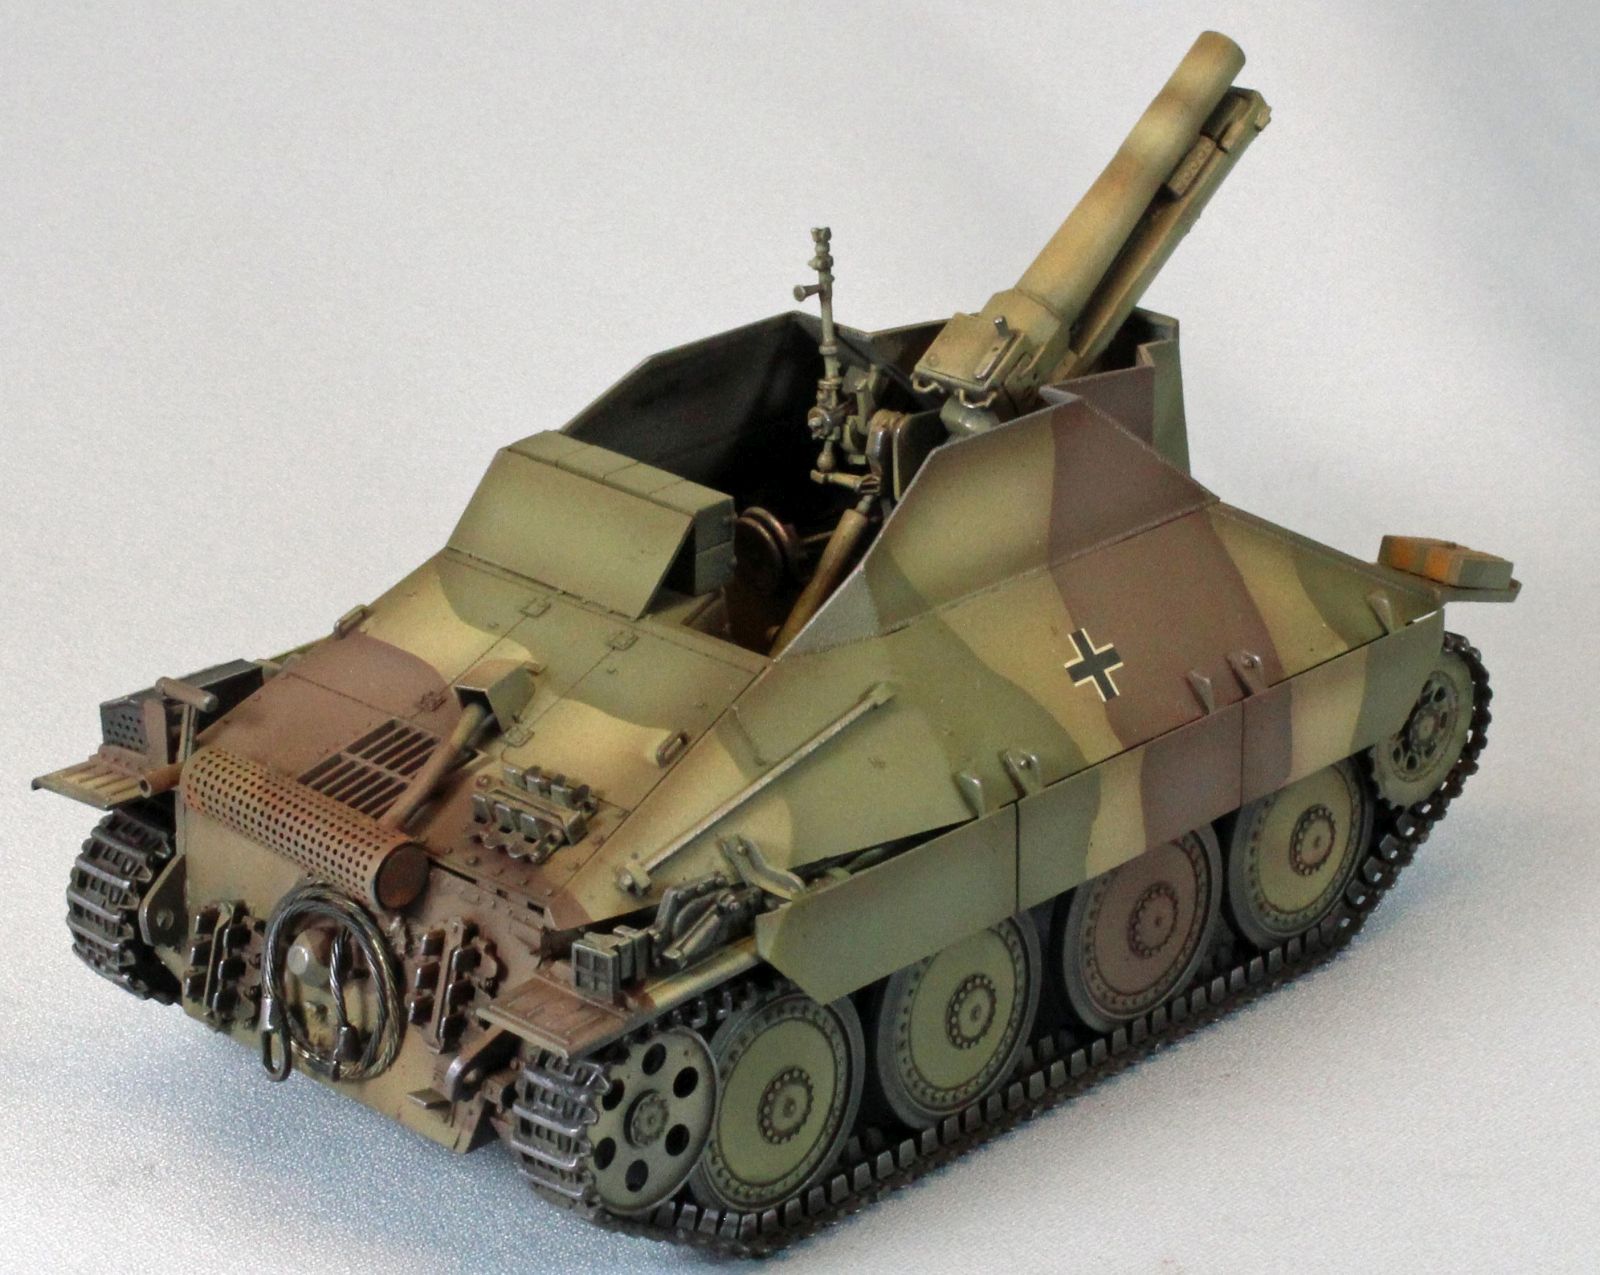
Front view of finished model
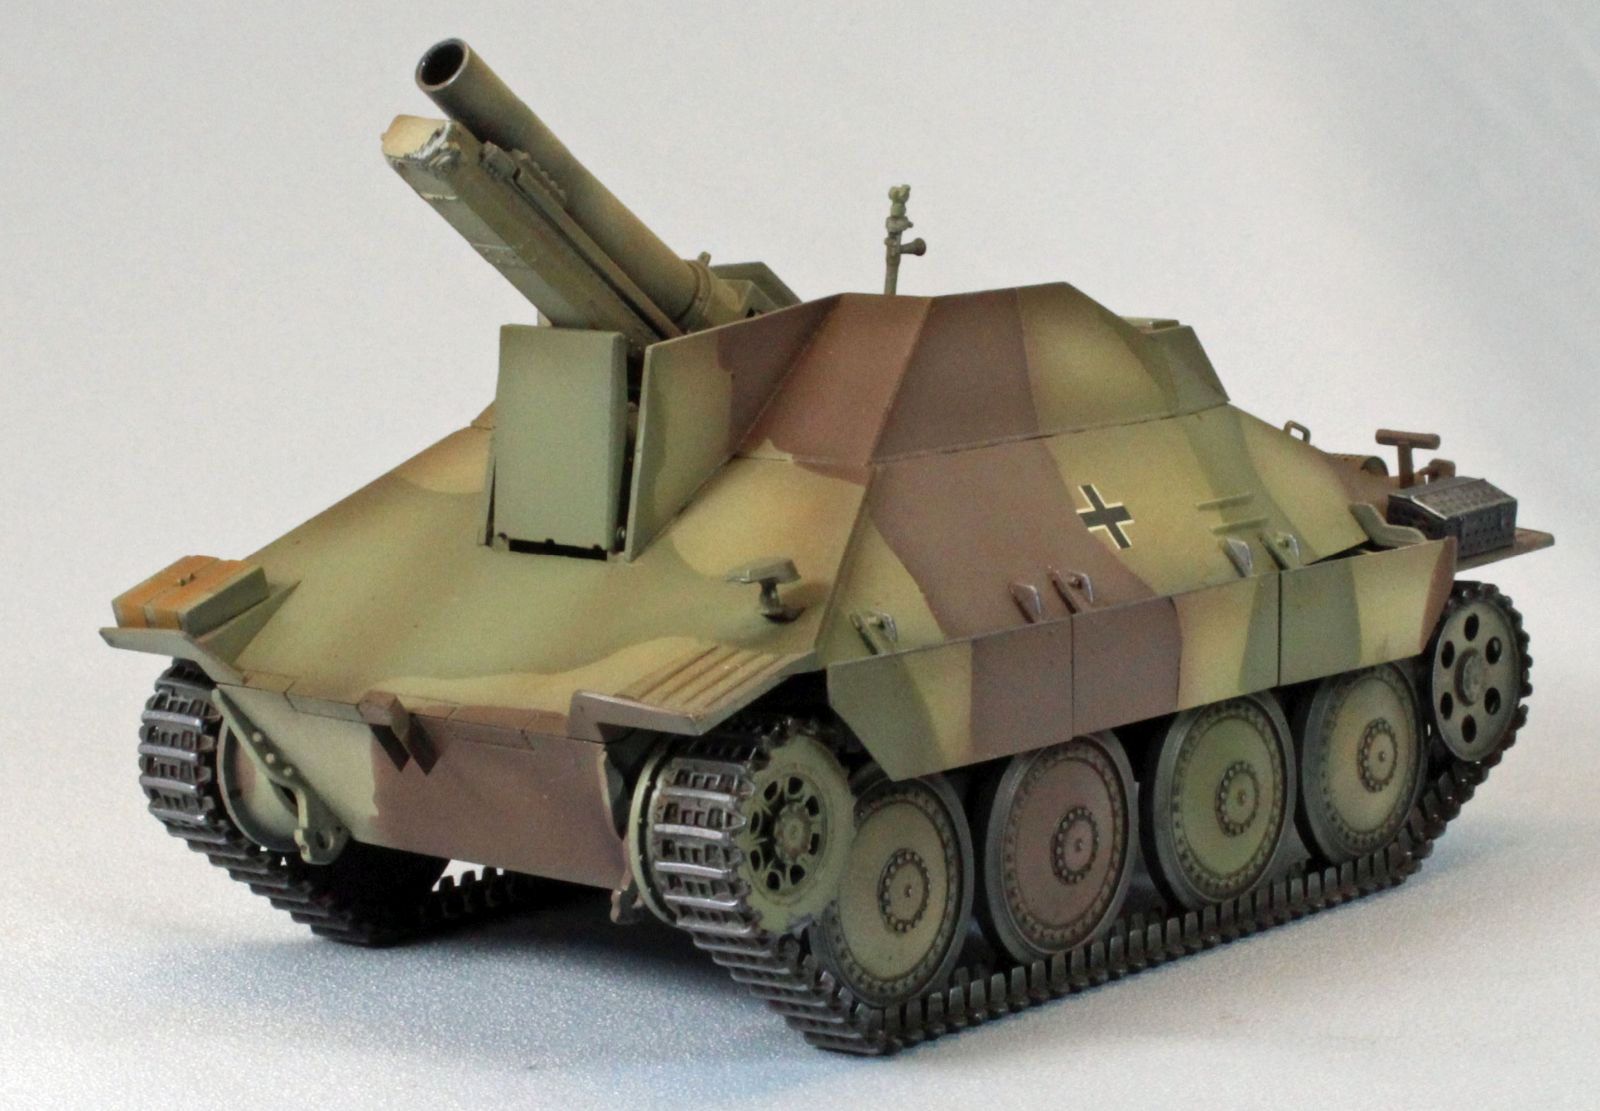
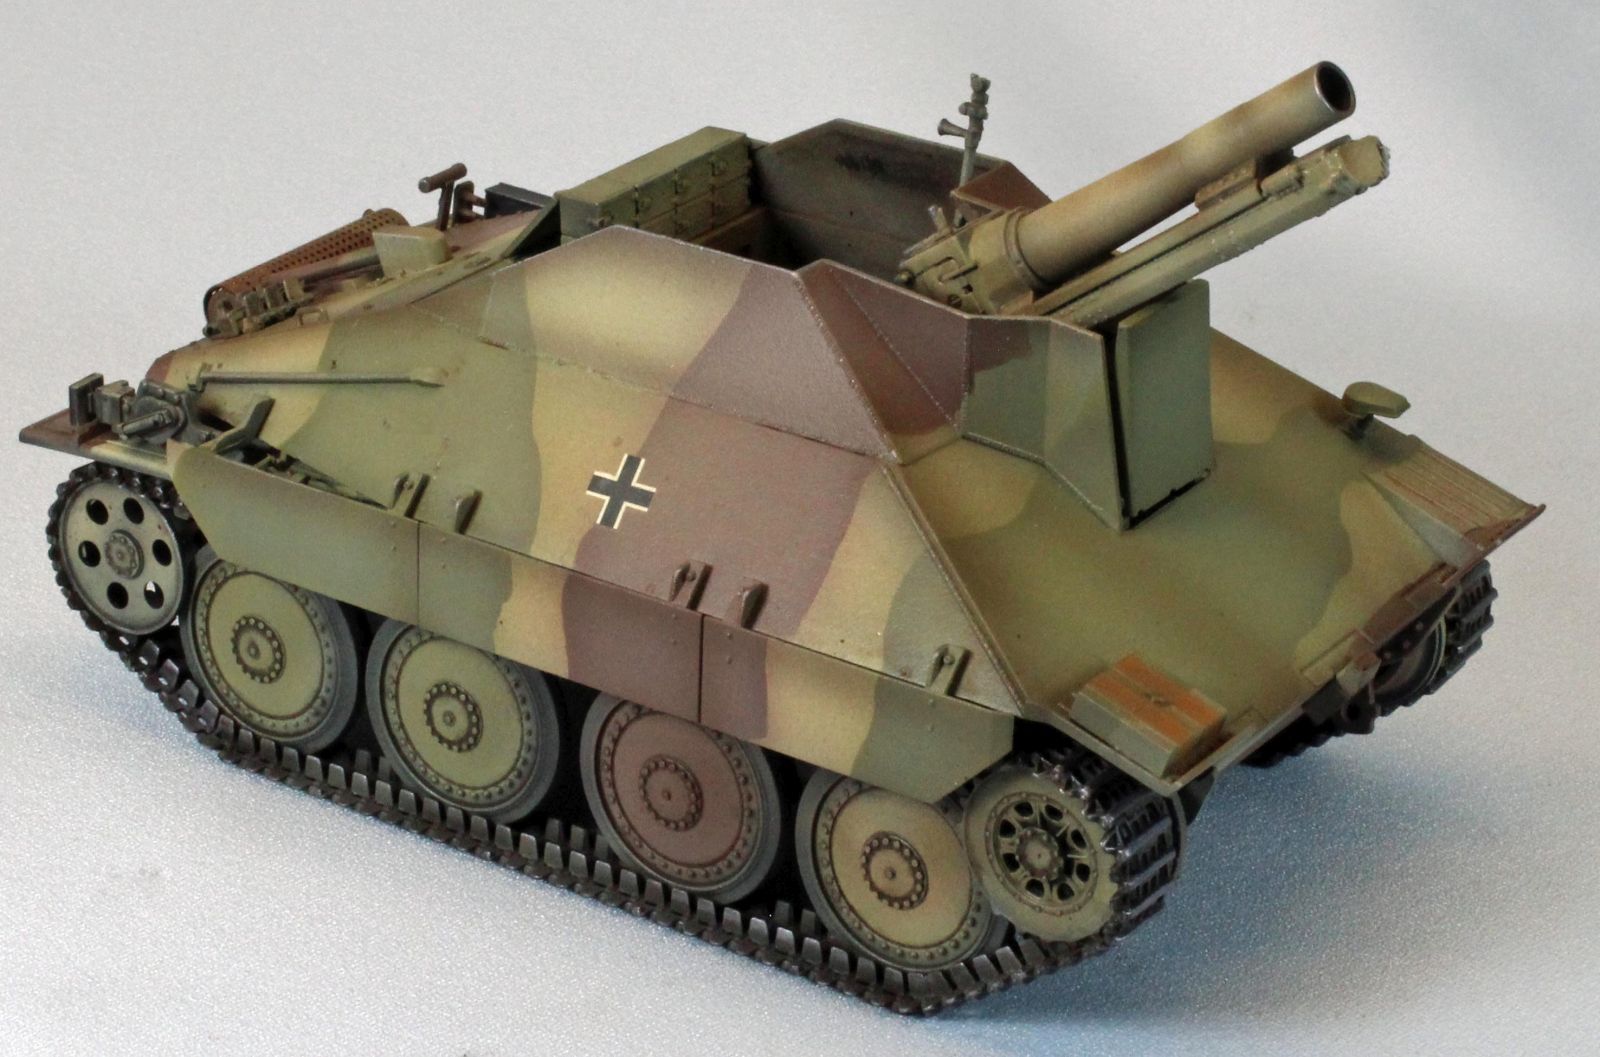
Front left view of finished model
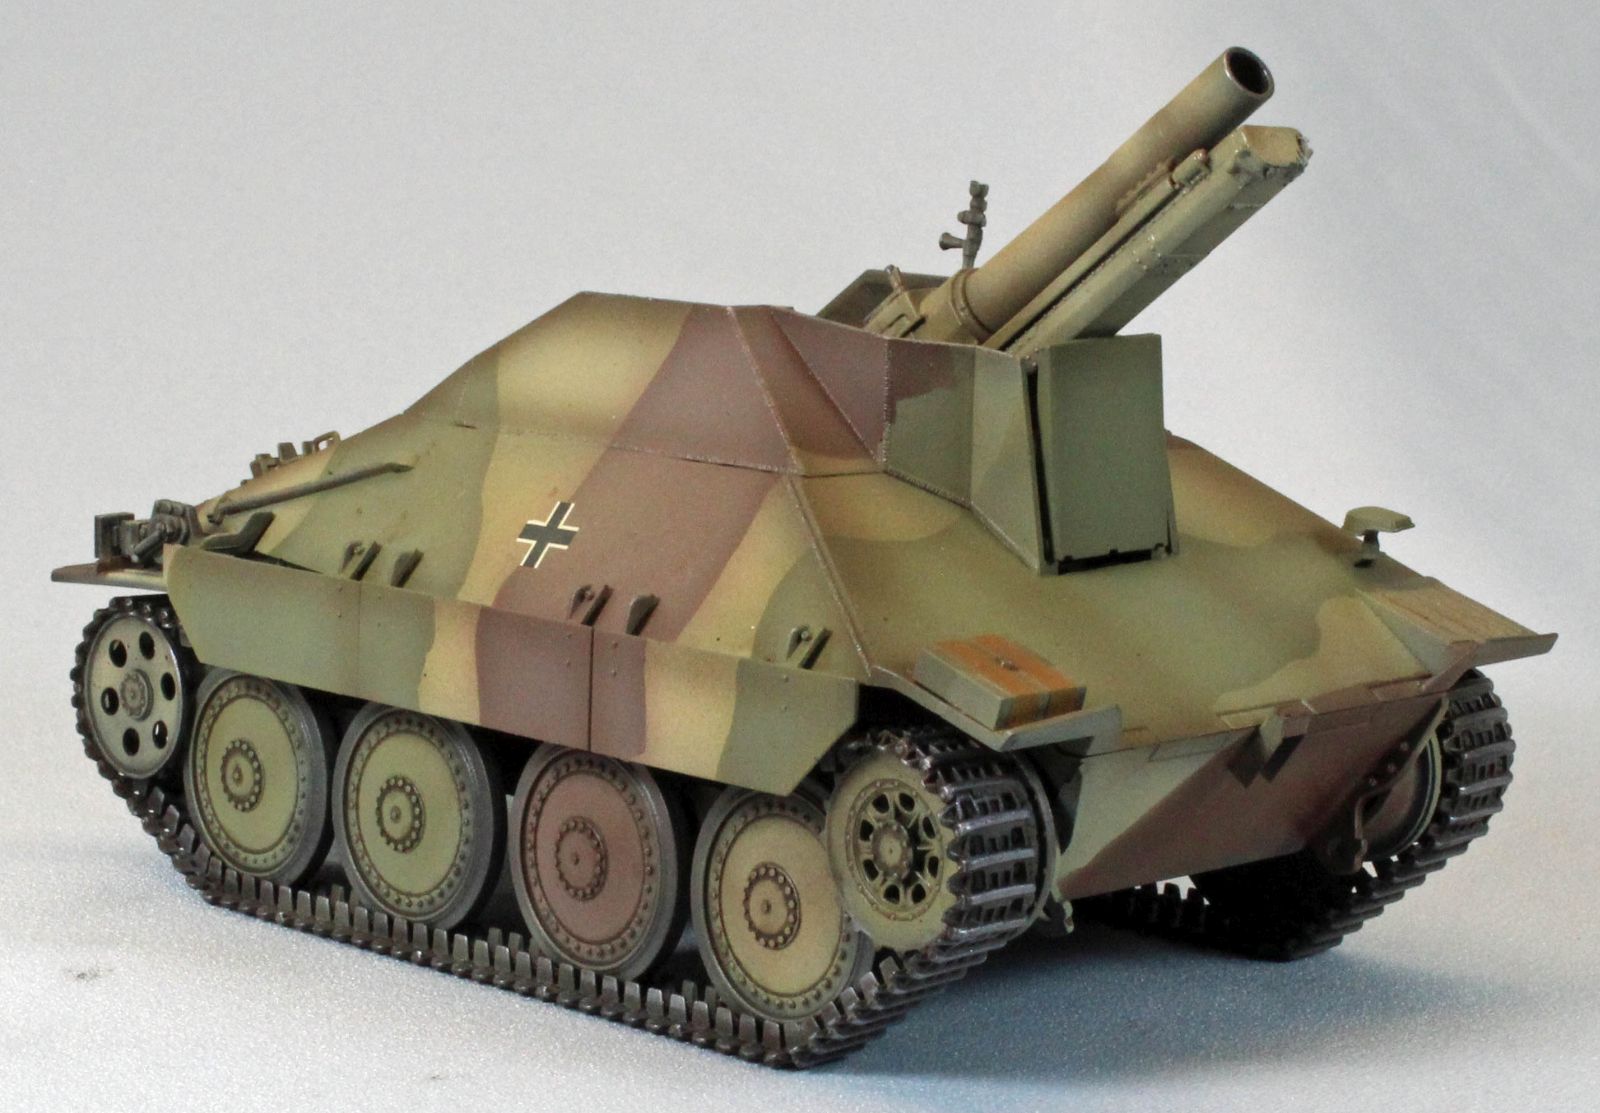
Front left view of finished model
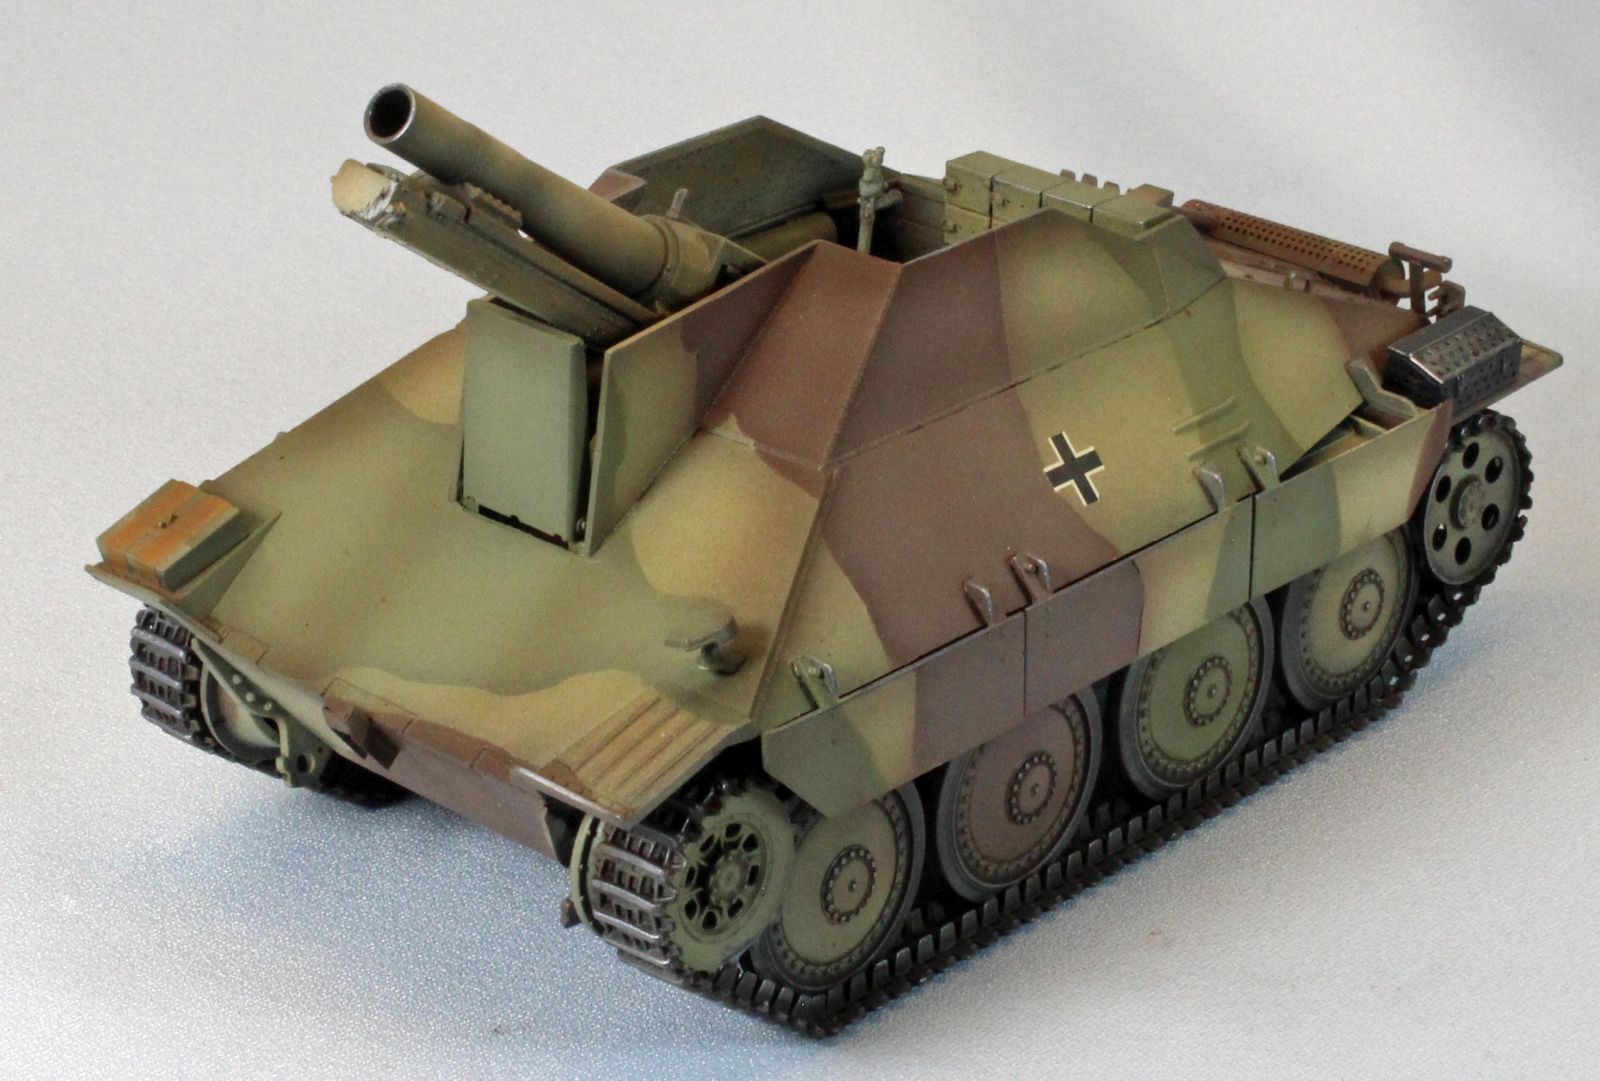
Aft left view of finished model
Aft right view of finished model

Aft left view of finished model
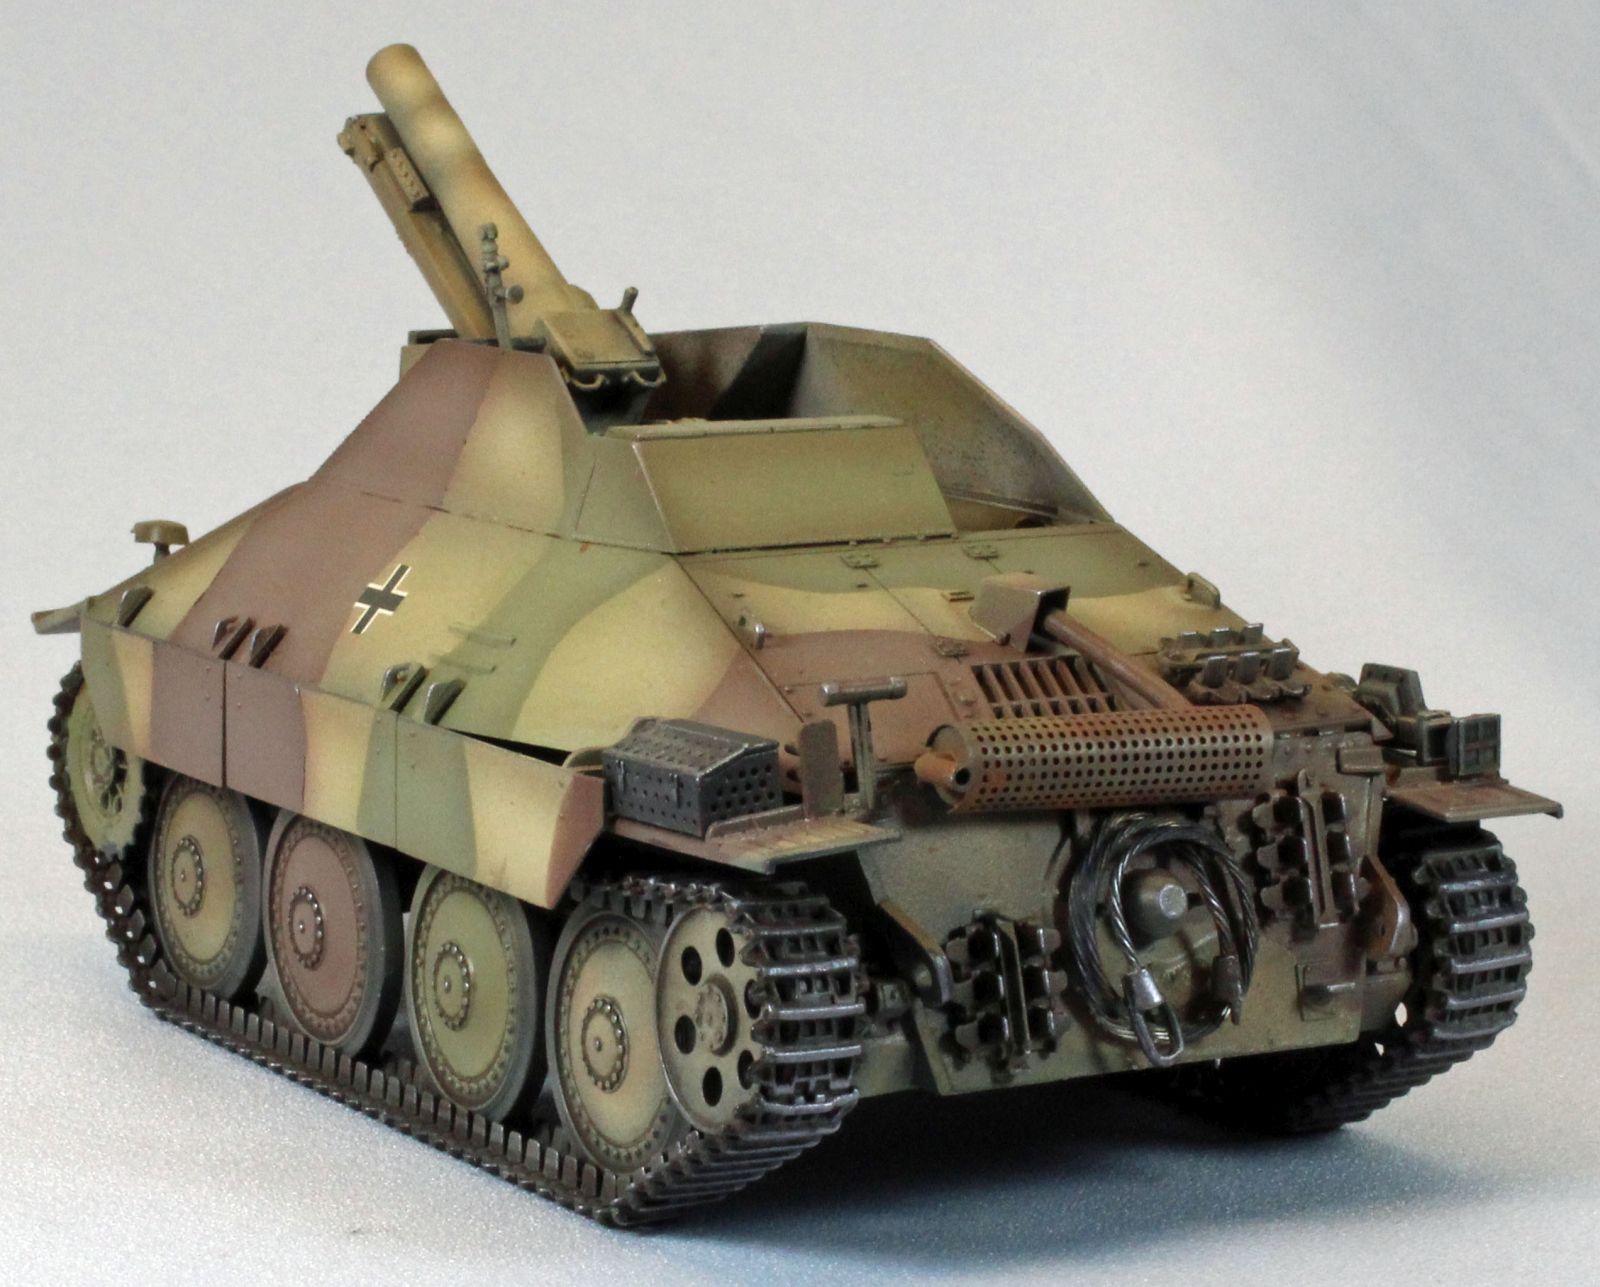
Aft left view of finished model
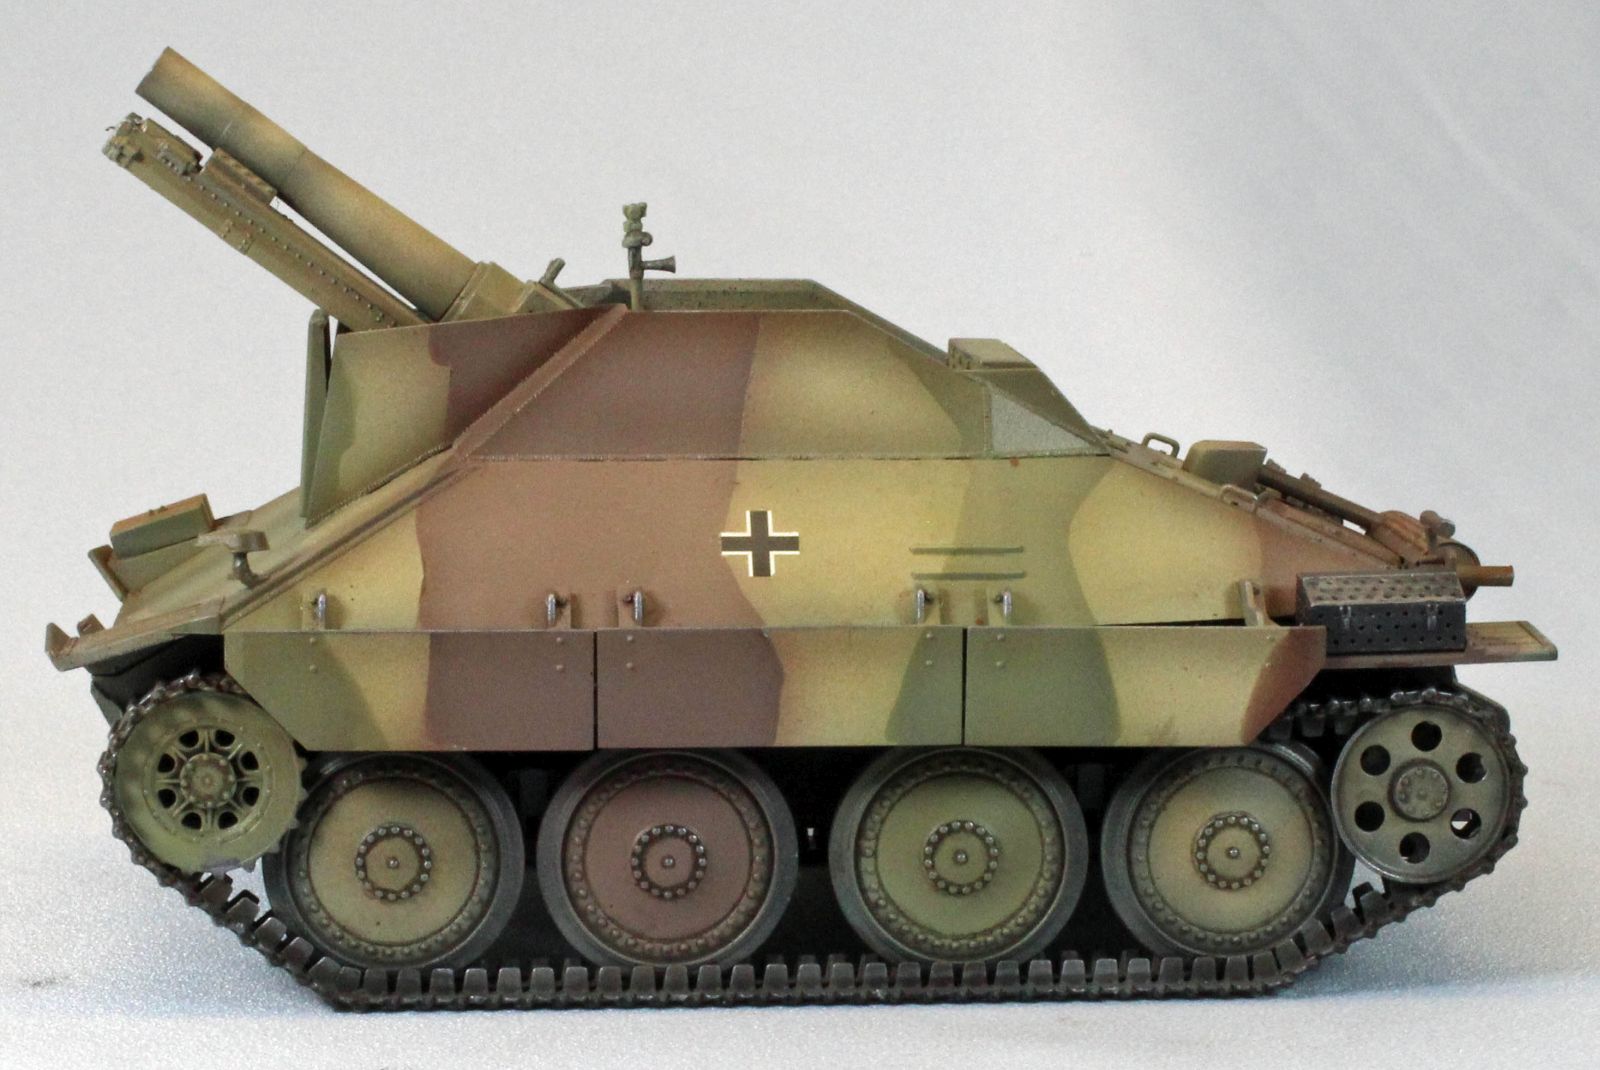
Left side view of finished model
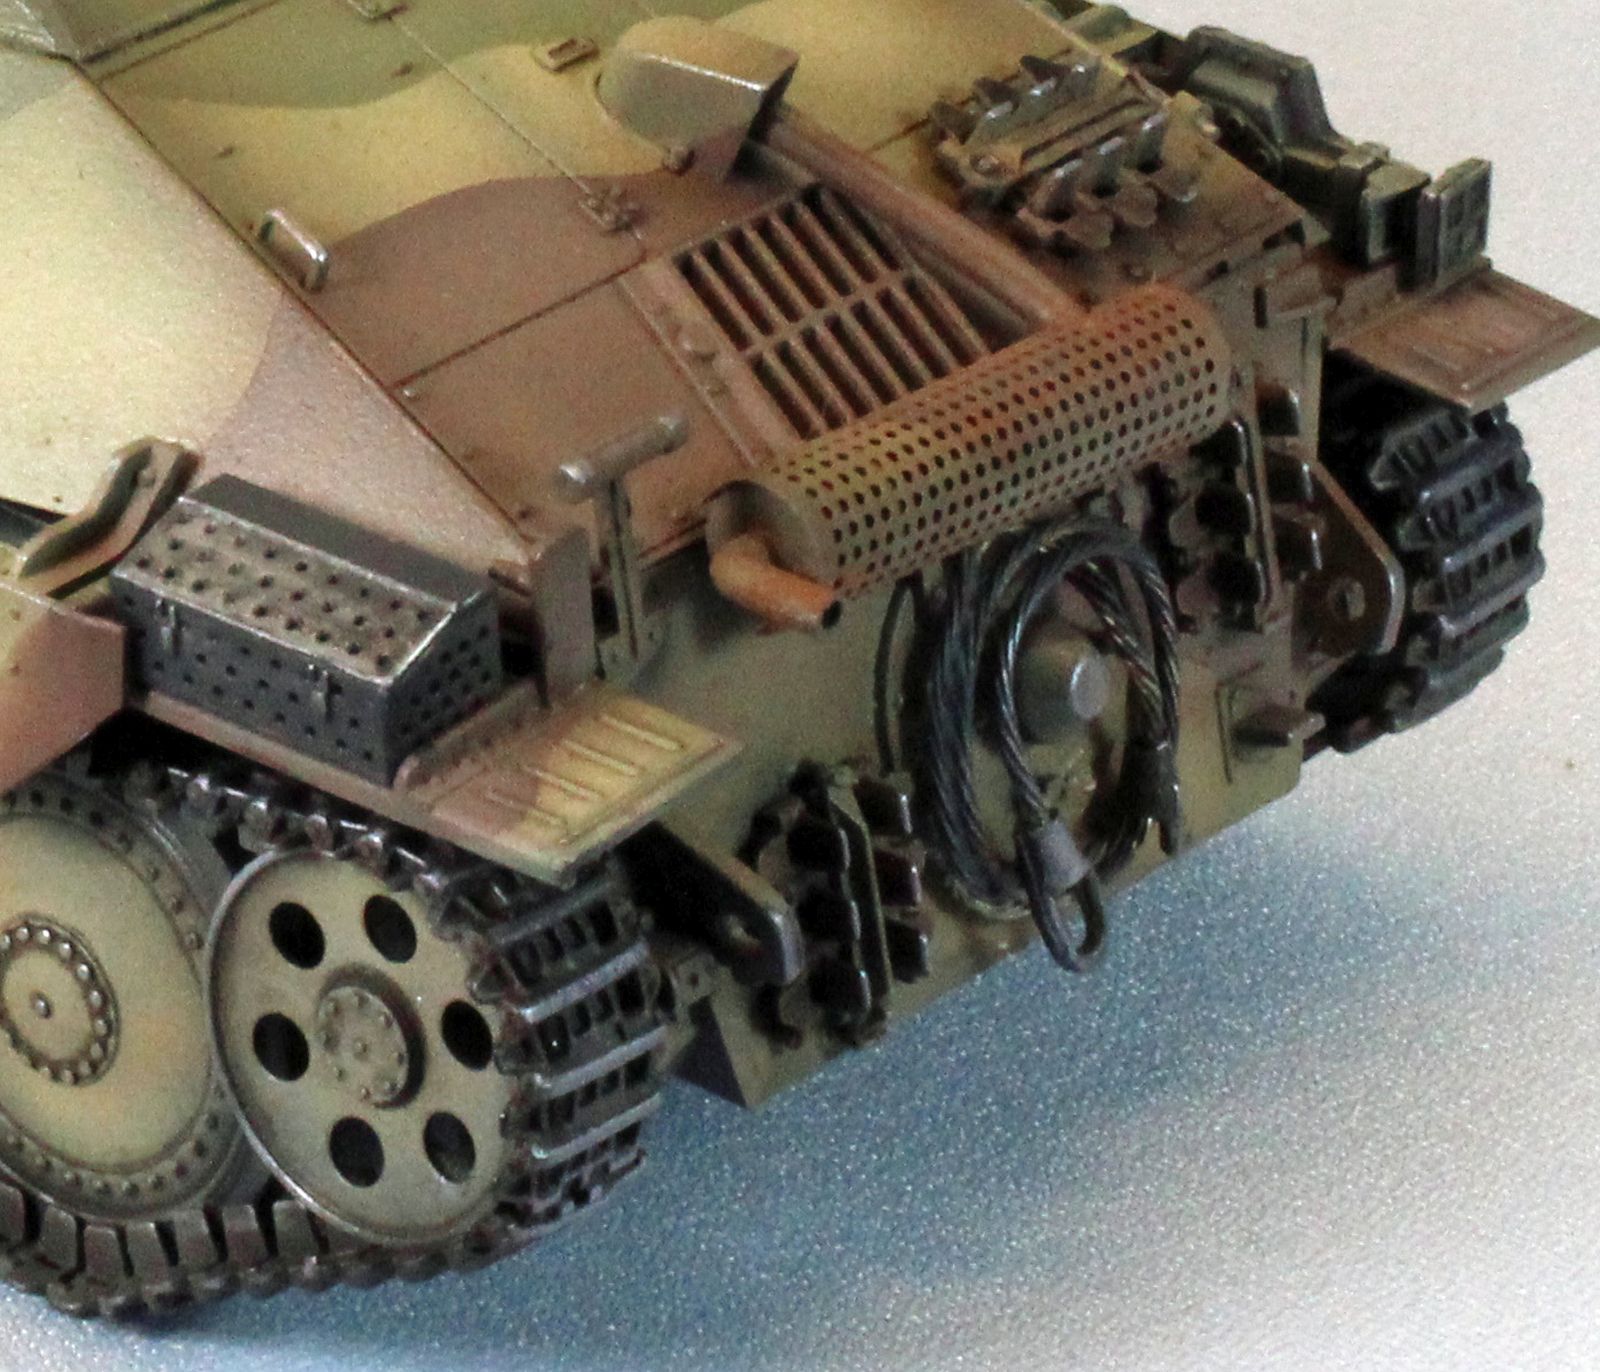
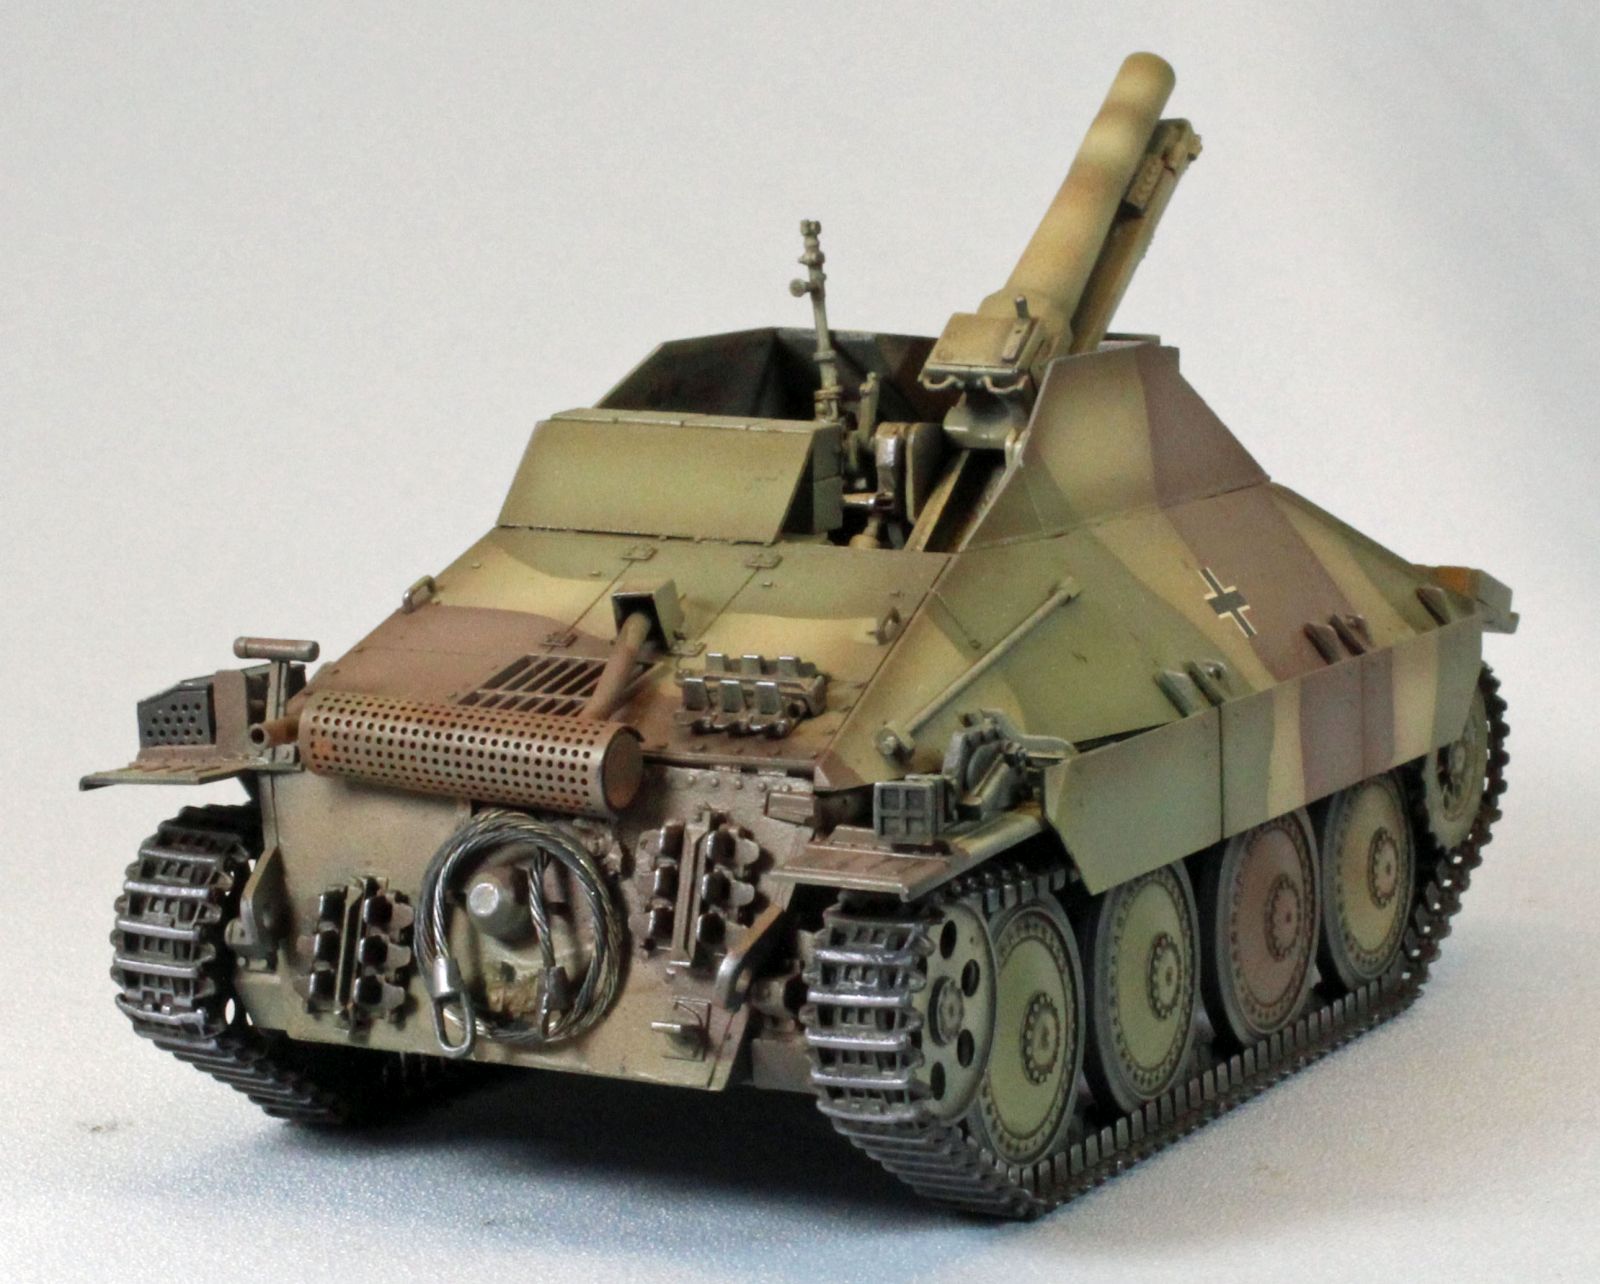
Closeup photo of rear of model

Aft view of finished model
Front right view of finished model
Front right view of finished model
Aft right view of finished model
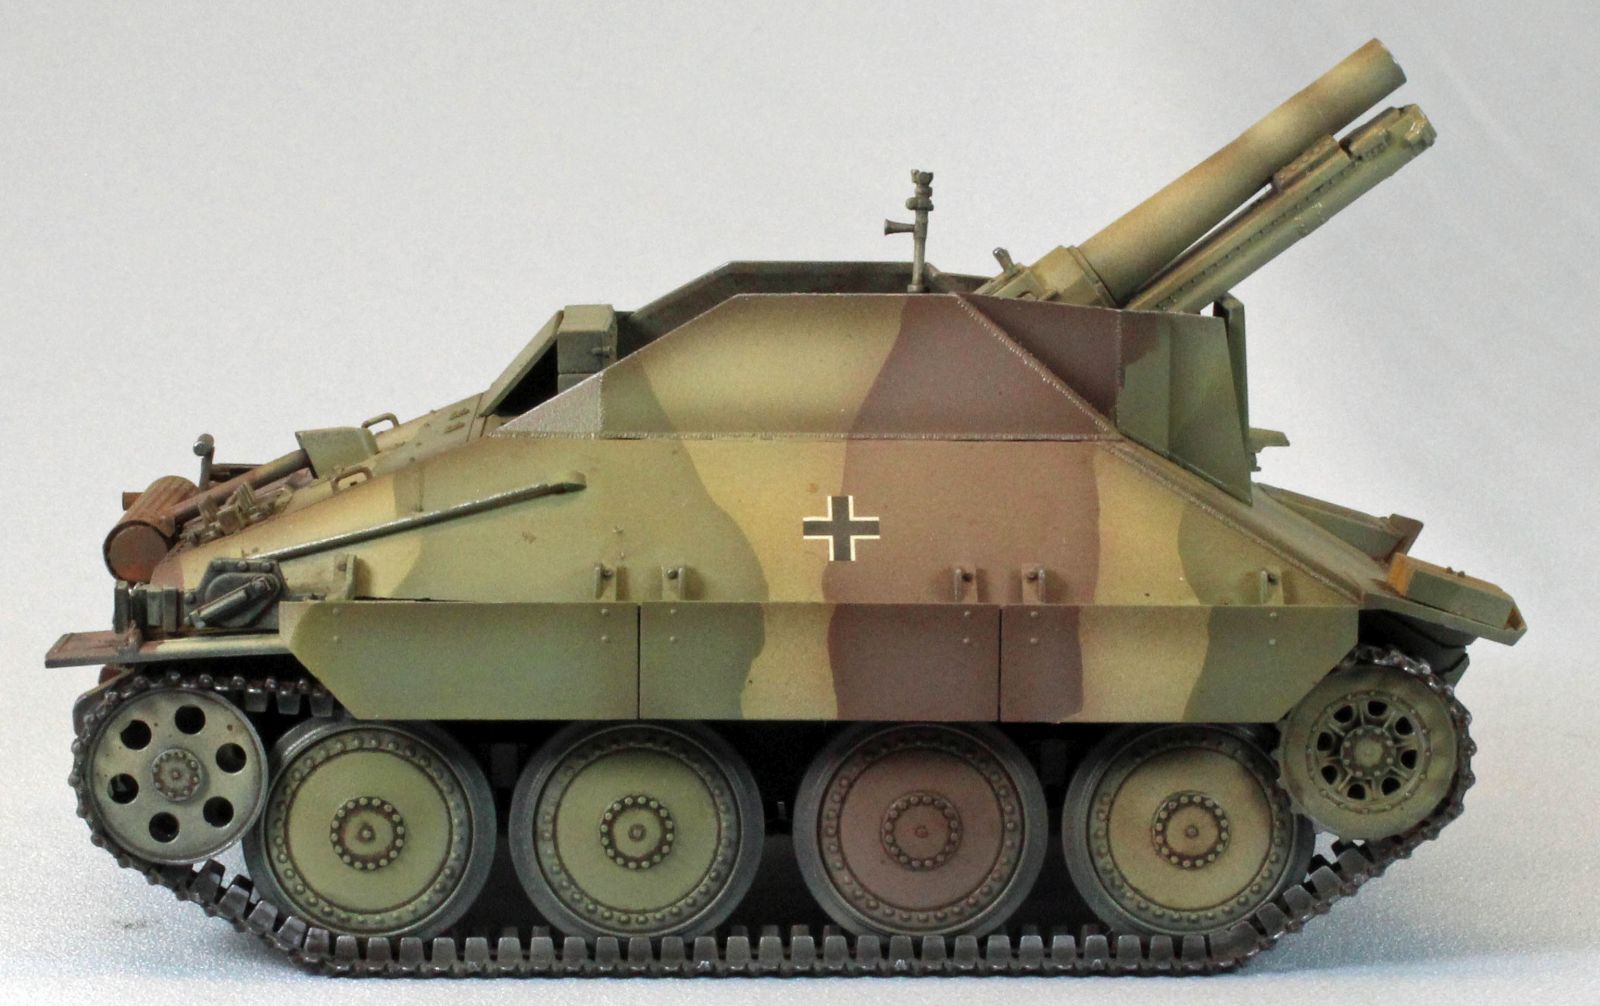
Right side view of finished model
Reviewer Bio
Eric Christianson

Eric Christianson is a father to two boys (Reed and Dean), the President of the Seattle Chapter of IPMS, and a long-time Little League umpire. He is also a devoted husband and companion to a wonderful woman named Jackie who enthusiastically supports his passions. Recently retired as a programmer, his home office has been scratch-built into ‘a perfect model room’. Modeling since he was a boy, Eric mostly builds armor these days, but still dabbles in 1/32nd aircraft and other types of models from time to time. He also enjoys presenting seminars on weathering and technique at local shows. Many of Eric’s kit reviews can be found on the IPMS USA website.
Comments
Add new comment
This site is protected by reCAPTCHA and the Google Privacy Policy and Terms of Service apply.
Similar Reviews