

Chris Vandegrift
Reviews By Author
|
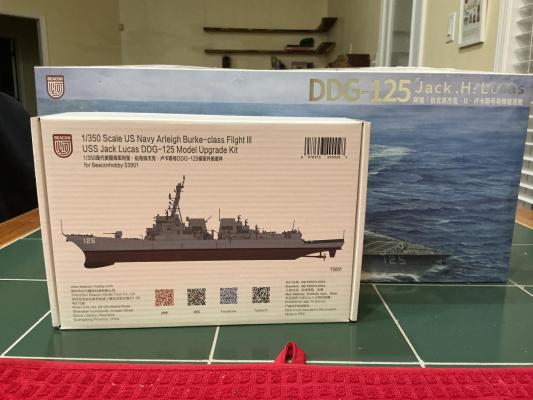
DDG-125 Jack H. Lucas with US Navy Arleigh Burke Class Flight III USS Jack Lucas DDG-125 Upgrade KitPublished:
For a hobbyist like me, there’s nothing more exciting than opening the box from a new manufacturer. The anticipation of learning what they did differently, how the plastic cuts, what level of detail did they achieve and myriad others questions we all banter back and forth are answered when you open the box. The new Beacon Hobby multimedia ship kit of the Jack H. Lucas and their associated upgrade kit is the subject of these very questions. This appears to be Beacon Hobby’s first ship kit as far as I could see. They came out swinging with this release by not only launching the Arleigh Burke flight III ship, but an upgrade kit designed and produced by the manufacturer. This was really exciting for me because I expected everything to fit and be designed to mate up exactly. I can tell you… more |
|
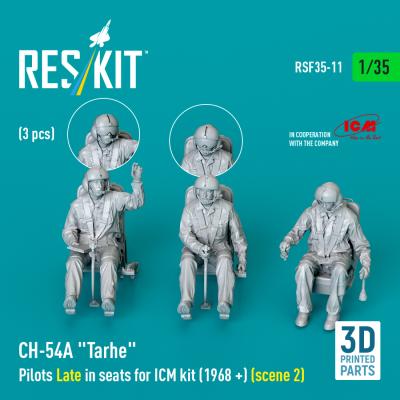
CH-54A "Tarhe" Pilots Late In SeatsPublished:
Working on these makes me want to buy the kit just so I can add the crew!! ResKit is doing some crisp lines, creases, and detail work. The resin comes off the supports cleanly without risk of breaking or chipping. The attachment points are very fine and placed in inconspicuous places, behind the legs and the back of the helmet for example. Another thing I’ve noticed in my ResKit reviews of late is that the resin is very easy to sand. It takes almost no effort with some 400 grit wet-sand paper to clean these up without a trace of the connections. The instructions are easy to interpret and include a color chart in a neutral choice of green, grey, and khaki. These skycranes have seen all kinds of service so I expect many modelers will identify their uniform of choice. Both… more |
|
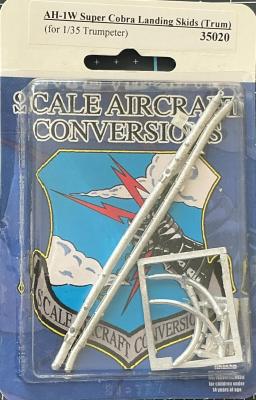
AH-1 Super Cobra Landing Skids (Trumpeter)Published:
This kit is a direct replacement of parts for the Trumpeter Super Cobra. The parts have some very nice details on them. They were also well contained in the packaging, resulting in them arriving without even the long skids being bent. The overall level of cleanup is very minimal, and the molds are set along the designed weld lines or oriented with elements of the skids or supports so they don’t require cleanup. For instance, on the skid mount, the parting line on the white metal matches a weld line on the full-size component, so no cleanup was required due to the minimal flash present. I applied some white primer to help show the lines of the SAC gear so that the detail was more evident in the picture. Many thanks to SAC and IPMS for making this kit available to me for review.… more |
|
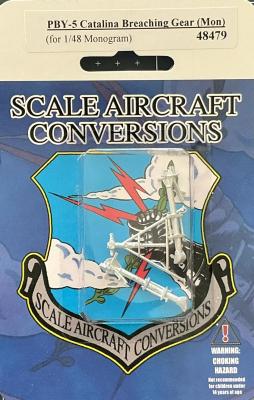
PBY-5 Catalina Breaching GearPublished:
This accessory kit contains three direct replacement pieces for the Monogram Catalina kit. There’s one piece of the breaching gear that isn’t included with the kit. That is the strut for the rear tail wheels. You will have to use the kit part for this. The level of detail is nice and representative for a 1/48 scale kit. The gear itself in real life is relatively simple, meant to be attached in the water. There was a little bit of cleanup to be done and two pieces of long, thin flash from the molding process had to be cut off. General flash on the parts was minimal and they cleaned up easily. I didn’t note that the tail wheel support was extremely soft until after I started working on it. Just scraping flash off with the #11 Blade caused it to bend. That was a quick… more |
|
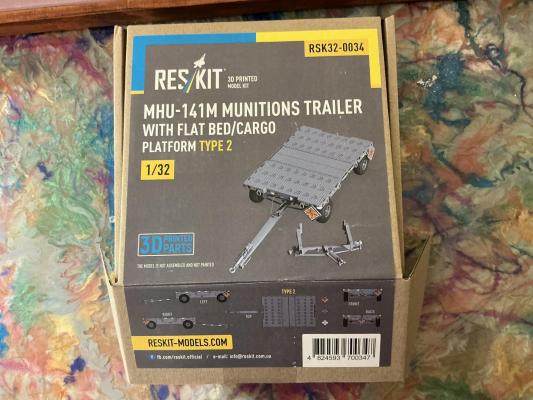
MHU-141M Munitions Trailer with Flat Bed/Cargo Platform Type 2Published:
ResKit has obviously spent some time designing their packaging to make a visual impact both from the outside of the box and then when opening it. The parts are capped on top and bottom with foam and each resin print has a cage around it in addition to major pieces also being in small plastic baggies. I assume the baggies are to catch any parts that might inadvertently come off during shipping. All the parts are finely detailed, and the only place I could find layer lines was on the very ends of the cargo platform, and they barely showed up under primer. It took me roughly 2 hours to detach all the parts from the print supports. The main cargo bed was definitely tricky to detach. I worked from the outside, meaning the longest supports, to the inside one layer at a time. I was able to… more |

|
UH-60M Black HawkPublished:
What really drew me to this release was the Aussie option! The Australians started getting the UH-60M in 2023, and traditionally they use it for long-range search and rescue in the Outback and over the ocean, making for some unique configurations. Academy has a long history with the Black Hawk mold, and they’ve taken full advantage of its popularity with new parts. In addition to the A60-001 import model, Academy has everything in this box to fit out a full Australian import version of the Black Hawk. Builds of the M seem few and far between, so I’ve tried to hit a lot of detail in this review for the competitive builder. For everyone who wants instant gratification, let’s start with the pros and cons, then transition to the details! Pros
|
|
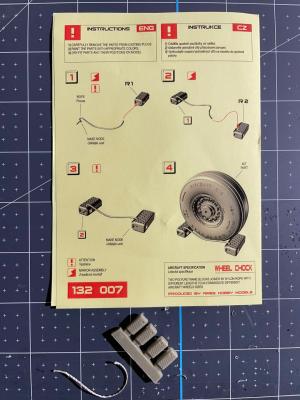
Universal Navy Wheel ChocksPublished:
Here’s a review coming to you from all around the United States! It turns out that this set toured the US for a year before actually arriving at my doorstep. Seems our Postal Service just couldn’t chock the wheels of that truck…So I was extremely happy and surprised to receive this Wheelliant product. On initial inspection the detail looks like it will show well in close-up photography. In addition to the diamond pattern on the chocks the lateral lines are very finally crafted and show no signs of residual material in the grooves so they look very crisp. Turning over the info card you’ll get a surprise, a large set of instructions that’s easy to follow and red as it’s not printed in size 2 font like many are prone to. I thought this was a definite benefit, no matter how… more |
|
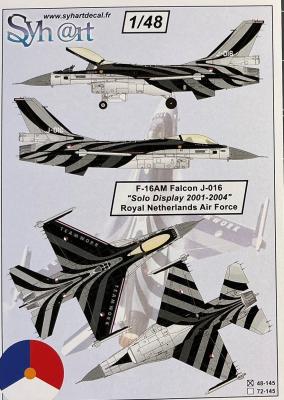
F-16AM Falcon J-016 "Solo Display 2001-2004" Royal Netherlands Air ForcePublished:
A great surprise upon opening these decals is finding a set of masks as an alternative to the decals themselves. Then the secondary surprise was finding out that you’re provided enough information to do either the 2001/2002 early type or the 2003/2004 late type Demo scheme. This isn’t obvious from the cover sheet for the decals so it was definitely nice to find in the package. Someone who really knows the display teams would probably recognize the different schemes by year without needing a reference on the cover page. The decals are for the early type and the masks are for the late type. The decals on what I’m learning are a classic dark blue and white background for Syh@rt, making them stand out clearly. All of the decals for the paint scheme are in the gloss black striping. The… more |

|
The Battleship USS CaliforniaPublished:
Right off the bat the 2 inserts are going to grab your attention! The color Sheet C is a large 16”x23” profile and top view of the ship as she was in 1944. Additionally, it has a profile showing the armaments for 1944 as well. This color version is obviously to reflect the camouflage scheme and will be the perfect reference for painting. The flip side of this is sheet D, the planes arrangement on the stern deck, which includes 3-view and technical data for the OS2U Kingfisher and SC1 Seahawk aircraft. Sheet A & B is black and white views of the ship. Sheet A provides armament arrangement and an uncluttered view of the hull without superstructure. It’s an interesting view but it’s duplicated from the profile view so it serves mostly to fill out the page. All 3 views on Sheet B… more |

|
F/A–18F Super Hornet BuNo 166673 "Vandy One" VX-9 "Vampires" - US Navy 2023Published:
It’s really unique to open these up and see the dark blue and white background to the decal sheet. It sets the individual decals off and honestly, I think it makes the numbers easier to read. When you look at the individual decals, what caught my eye right off the bat was how well the placards look. The lettering and lines have a bright silver metallic look to them that I don’t see in other decals. Printing on the smaller warning decals is crisp and readable at what looks like size 2 font. The registration on all the colors on my sheet looks perfect, no issues. The decals overall are very, very thin. You can hardly feel them on the sheet. When applying them be careful not to let them curl over on themselves. Apply right off the sheet to the aircraft, if possible. Another thing that… more |