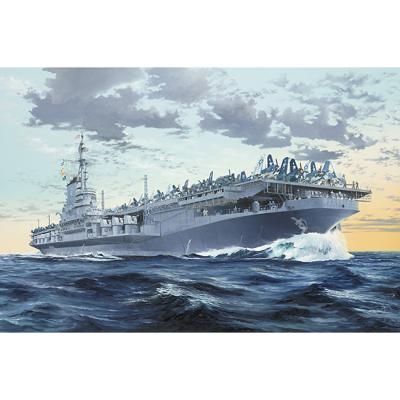
USS Midway Pt 1: Hangar Bay Deck
Intro
Shore Patrol is mustering everyone back to the ship, time to start our 2nd leg of this journey...In this review we’ll install the flight deck, all the armament and ancillary pieces from part 1, build up the hangar deck walls, and fit out the ship with railings, ladders, and nets. This is a really extensive, and sometimes repetitive part of the build. There are probably several ways to do it, I have a different approach in mind for the next one I build as a matter of fact. So let’s see how it came together.
Bow
Overall the bow went together rather nicely. I was worried about how the deck above it would fit. These two assemblies are done separately and then joined together with 6 struts on top and 2 on the bottom. Given the upper deck isn’t done until step 10 the supports on the bow are dry by the time you join them together. As it turned out, no need to worry, the two sections snapped in place with no issues. The deck equipment on the bow will be shadowed by the top deck. Double check to make sure you didn’t miss anything as it will be very hard to install later. One of the niggling things about the instructions is the overlapping lines indicating part placement. They play tricks on your eyes. I highlighter or pencil is a handy tool to have to make sure parts are placed correctly. Trumpeter gives plenty of chain. Unfortunately there are no hawse holes in the deck. Drill these out if you don’t want the chain to end on deck. If you cut a half link it could be glued to the hawse cover and look pretty good given how shadowed this area is.
Before installing the top deck in step 13 make sure to install the PE if trying to fish it into a 10mm gap later isn’t your thing😉 All the other PE is at risk of being caught on something during the build. This section is fairly well protected so it seems like following the instructions for PE installation would work out ok in this case.
Stern
This is a relatively simple section but don’t be fooled. The alignment here on the hatches and the planks is key to a good looking outcome.
On my model parts T1 and T2 sat above the deck when Q7 and D2 were assembled. I ended up needing putty in an awkward location to close the gap as the cement had already dried when I realized it. Dry fit these parts ahead of time and trim the inside of T1 and T2 if needed to make sure these 2 doghouses align with the deck.
The second area is the plank that hangs from the top deck with photoetch rails. I would suggest leaving the fitted assembly laying upside down so the planks don’t sag. Mine pulled away from the upper deck because the photoetch wires won’t support any load of course (not a model problem, just a best practice for assembly).
When installing the walls the instruction indicate starting from the bow and working backwars. I extended this direction to include the stern assemblies from step 12. This way if there’s any fit issues once 4 different wall sections are connected there are multiple ways to fit-up the parts by trimming one of the other.
Hangar Deck
The deck itself fits tight to the hull. It only needed putty in two places, on each side of the bow where the deck changes elevation in three dimensions and steps down. Pay attention to the elevation of deck to hull horizontal surfaces. If the elevations are off it’s a real bear to do any filling or sanding due to the raised detail all along the hangar deck edge.
Steps 6, 7, & 8 cover all the fittings and armament installation along the deck. The parts are nicely detailed and where there are sprue gates to be removed, they can almost always be faced toward the wall so any shadow left there will never be seen. There are a couple of slightly confusing parts of the instructions in these steps. In step 6 one of the holes for part X1 wasn’t there. Once I realized that it was easily corrected. In step 7, starboard side, part X1 and the deck detail gets covered by part E2 later in step 20 so, check the fit here before completing step 7 to avoid some rework later. If you’re like me and confused about how part Y4 sits against the deck just look ahead in step 8 to the boat assembly in the bottom right corner and it shows them leaning back so there is 2-point contact with the deck. Also in this step note the boat is shown assembled toward the stern but installed facing toward the bow.
Installation of the elevator guides and supports in step 7 is probably best left up to the modeler as to whether they are installed at this point. It takes quite awhile to install the hangar walls so there will be a lot of time with these hanging up into empty space with a high risk of getting broken back off. I hope my decision to wait on these works out ok and there wasn’t a reason to do this now...we’ll see how i do in part 3 lol
In step 8 the only issue I had was with the installation of part W2. These reels are designed to sit on their side, Trumpeter has even etched a small triangle in the deck to indicate where they go. The problem is they stick up over part 27, the quad bofors shrapnel guard, and thus look like they are installed wrong even though they aren’t.
Walls
This area of the ship is going to be the highlight of the build when completed! Lots of detail for the size of the space. It only comes at the expense of a confusing set of instructions from step 14 through 23. I recommend a highlighter and a fine point sharpie here to keep organized. Two things caused this complexity for me, 1) Trumpeter switches from referring to the wall part number to a “section” part number similar to a method used on engineering drawings, and 2) they mix the assembly of sections together so there are multiple assemblies on a single page. You will be putting together 8 wall sections that have very similar parts on them. When the assembly of a section goes over to the next page the reference to which wall part number is being worked on is no longer listed. That last issue also happens as a wall is being assembled on a single page, as the pattern they follow on the page is a zig zag pattern, so you must pay attention to which wall you are working on at any given time so as not to try and install the wrong parts. I used poster tack to prop the wall up at an angle for ease of assembly. Next time I think at least dry-fitting the parts with the wall dry-fit to the hull would be a benefit as well.
One more watch-out, in step 23 the large skiff is installed. The instructions are very unclear as to where it goes, the arrow ends under a section of the image so you can’t tell where it lands (pun intended lol). Later in step 27 there is a view where it appears the skiff is glued straight to the hull under the walkway. It was very awkward to fit the boat here and needed better engineering.
Trumpeter is great at calling out the order of operations. If there is a specific order of installation, they either call it out as “install first” or “install last”. All the vertical trusses, hose reels, raised details and vents will make this an interesting area. I totally appreciated the detail and how well the parts, including the wall-to-wall joints fit together. When assembled there are no obvious seems or any need for filler. When you’re done, you’re done, and ready for paint.
Railings, PhotoEtch, & Miscellaneous
Photoetch railings all fit perfectly, even between gun tubs. No issues with bend locations along the hull. Here’s my favorite PE part...there are 2 microscopic props for the skiffs! Guess what, they fit too! And I managed to shape them and install them, and you can tell they are there! For the tiny ladders Trumpeter uses an angled top step that seems to help when bending the stairs with fine tweezers or a #11 blade. The baskets require a unique rolling method to assemble them. They look the part once you get the pattern down. For part Y20, the outside circumference of the base has to be sanded all the way around to get these to fit in the recesses along the walkways and deck. Take care of this before you get glue on the deck trying to force them into place. I mentioned skiffs earlier. These have deck planks that can be picked out with some paint and weathering making them a nice highlight along the hull.
Liberty Port
Time for another port call... This was a very labor-intensive session to build up the hangar bay deck. Lots of repetitive steps building wall sections and installing all the armament and fittings. Take your time, double check part numbers, clearly identify wall section codes, use the enlarged views Trumpeter has in multiple steps to keep the build flowing smoothly without rework. Till next time, when we go over the lifeblood of a carrier – the flight deck and island! Until then, calm seas and fair winds.
Reviewer Bio
Chris Vandegrift

When Chris isn't modeling he's restoring old cars or doing home remodeling in his spare time. Both have helped improve his modeling. "Having learned to paint cars, quite a few of those techniques apply to priming and painting my models," he says. Chris used to build aircraft exclusively, but has expanded into ships, science fiction, armor and cars. A member of multiple IPMS clubs in Ohio including Akron's Ed Kinney Chapter, Wright Field and Cincinnati Scale Modelers, Chris started building models when he was about 7. Chris lives in Cincinnati Ohio; a Mechanical Engineer by trade, he's the head of Operations and Engineering for a company that makes pumps. He's been married to his wife Jane for 30 years; they have four kids ranging from 20 to 34.


Comments
Add new comment
This site is protected by reCAPTCHA and the Google Privacy Policy and Terms of Service apply.