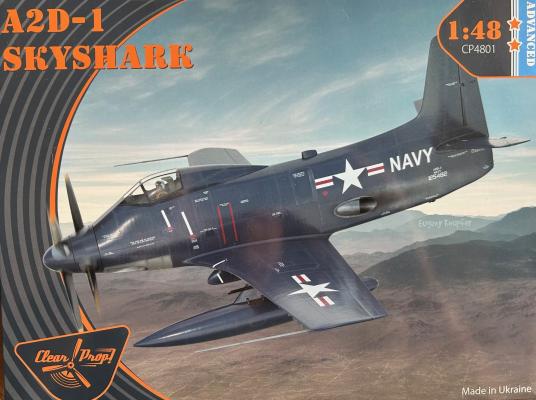
Douglas A2D-1 Skyshark
I am constantly impressed with companies in the Ukraine who still produce under the extreme situation of kinetic war. Clear Prop is not the first model I have purchased from them, and the kits have been, without question, some of the finest available on the planet. The Skyshark is one of those… I consider it an honor to review this kit, and express extreme gratitude to them for providing IPMS USA with this new release.
The Skyshark, as a prototype aircraft, eventually succumbed to fiscal and technical pressures, (there’s that old “jet aircraft” thing with it’s fuel guzzling at the time) and has always been a fascinating subject to me. The counter rotating board-shaped propellers, centerline thrust twin engines, and the promise of carrying even more than it’s extremely successful radial engine cousin, the Douglas Skyraider, cool factor is high. With nine outboard weapon pylons, two inboard wing pylons just behind the landing gear, and two heavy stores pylons just outboard of the main wheel wells, the Skyshark makes for a potentially enticing visual presentation when loaded up. As it is, it looks fine without any ordinance.
First Impression
This kit is a bit complex but not daunting. Four marking options (all gloss dark sea blue), Exterior detail is absolutely astounding; the fine and scale-like rivet detail stands out, and even under several thin coats of paint looks great. NO trenches here! The builder can also assemble the model with gear up and an extended dive-brake, for which all parts are included except a pilot (it was not used in my case anyway). Clear parts are strong and clarity is perfect; the kit plastic readily accepts liquid cement bonding. The enclosed PE fret has instrument panels, cockpit side panels, landing gear extension/retraction arms for the gear doors and landing gear parts, seat parts, and tail gear details for the dive brake. Areas to be aware of are listed in the next paragraph. Load includes two massive external tanks much like used on the Skyraider.
Details abound within this model; I had previously purchased a Skyshark kit prototype (non-blue paint scheme) when it came out to review the SAC gear provided to IPMS a while back when the kit was first released. One side note: I purchased and used a SAC gear set on this review build… My previous experience was the plastic gear in the kit needs the additional reinforcement as it is VERY scale in size and didn’t handle abuse very well. That means me.
If you build the kit with extended wings, SAC also provides metal wing fold points, highly recommended to use them. However, with extended wings, I learned from painful experience that even with the SAC extended hinge inserts, a more robust solution is required, as if you try to hold the model by the outer wings the joint will fail even with metal hinges. (This ended my first build due to frustration when the 95% completed build wing snapped off the glue joint in my hand, dropping the rest of the constructed model to the floor and scattering parts everywhere. Personal decision not to continue, it sat on the SOD for about a year before tossing).
On this review build, experience was helpful in that I used some evergreen tube to extend the wing spar hinge points out about one and one half inch into both the internal wing structure and the outer wing structure past the hinge line; this effectively strengthened the wing enough for handling. It only took two minutes per wing to drill the hole through the spar points on each side to allow the tubing to be slid in and the wings cemented firmly in place. Easy fix!
From previous experience, I knew the decal instrument panel and side panels for the cockpit were extremely fine and well done, but I decided to add a Quinta Studios (Ukranian producer of 3D printed cockpit sets) specifically designed for the Skyshark. The only problem with this was I learned the later prototype side panels in the kit are radically different than the initial Skyshark items, which meant “revert to the Clear prop side panels”. The main instrument panel also is different in layout without a radar screen on the Quinta item, which meant I needed to modify the Quinta panel to accept the CP radar screen. Easy to do and final result looks great.
The seat has PE ejection handles and seatbelts; this is where the Quinta 3D offering was also used, in the form of seat harness included with the set; this neatly tidied up the seat with a finished look.
Next up were the intakes and exhausts; you will need a strong flashlight to see them in the finished build, but “They are there!)Make sure you paint first and construct the parts correctly, offering them up to the fuselage halves, as they are truly handed and If you put the wrong one on the wrong side before checking, the fuselage will not fit together.
One word here; if you are a “parts number only person, be aware there are a few parts mis-labeled on the instruction sheet; a small detail for the old guy, “Why do these look wrong?... oh, that’s why” but for the new-to-the hobby modeler it can be frustrating.
All control surfaces are separate and can be installed as the builder wants them. In my case, simple and less “Sticky-outy” on the flaps was chosen. The tail gear is industrial, and kind of cool-looking, I had a missing part in the form of the aft gear well wall, and could not locate a part for it on any tree, so I scratched one from sheet styrene, easy fix.The tail gear used a SAC strut extension and tail wheel for strength.
I only needed a bit of filler on the panel in front of the windscreen; one recommendation here is to NOT install all the outboard bomb racks until the model is painted and decaled; there is no way to get around this unless you are a masochist and love to cut up itty-bitty decals from one big decal (NAVY) and try to get it to fit between the racks.
I installed the gear and wheel covers in open positon using the PE with little problem. You WILL need tweezers. Wheels and tires are separate; careful painting and assembly (put the brake pad stacks toward the tail) and they fit nicely on the SAC gear once you drill out the axle holes.
Painting
I used my usual Rust-oleum Self-etching primer (SEP) on the model. It is thin and doesn’t cover the details, PLUS I never have a problem with paint pulling up on a model with this as a base. There is one popular paint line I no longer try to use that even SEP can’t help with paint adhesion, but it’s great for those of us who have switched over to the low-adhesion but “Safe” (I dislike that word… smacks of fear) for users.
Using a Hataka acrylic was the option I had for dark sea blue in my stash; it was out of a U.S. navy set that I purchased about 10 years ago (where does time go). I had to add black to it to bring it closer to what I envision as Gloss Extra dark sea blue as utilized on naval aircraft of the period… I’m pleased with the result. A coat of future and decal party ensued.
I have to give a great big plug to CP’s choice of decal suppliers for their kits. These decals (1) removed from the backing easily after a five-second dip, (2) had GREAT color saturation on all pigments, and (3) EVERY ONE OF THE WHITE STENCILS is readable under magnification. They went on well with just water as a preparation, were easily manipulated onto the surface, and I only had one or two try to fold over but was able to quickly recover without tearing. These things are thin and durable, and the results on the model speak for themselves… I only damaged one star and bar red stripe slightly while using a #11 knife to tweak out a bubble, but these decals settled down and did not require any setting solution over the detail. Future coat for protection was provided, but the semi-gloss of the decals went well on the glosscoat even without it.
The final run was to attach the props to their spinners after painting, and I didn’t use any gloss on the prop or the markings because usually when I have worked on real props the manufacturer decals are stickers and the pitch/datapoint blocks are stencils.
I started to drill out a set of spinner counter-rotating capable axle works for the counter rotating props, but gave up due to time. The kit just has you glue spinners and props in place, and didn’t provide any provision for a central driveshaft on the spinners or firewall. I don’t need the toy effect for now (but it would be a cool motorization project for someone with great 3D skills).
The next thing to do was attach “all dem” fragile bomb racks with liquid cement applied carefully so as not to destroy the finish. There are NINE on each outer wing… impressive load. I’m considering using a “Tiny Tim” rocket on one inboard heavy stores rack and a tank (the kit has two) on the other side. The rest will probably be HVAR’s from all the Eduard P-51’s I’ve got stashed. We’ll See.
I’m calling this one done. I really like the final product, and Clear Prop have obviously done a great job on this kit and the others I’ve built from their line.(F-82 comes to mind). Thanks again and Congratulations to CP for hanging tough in hard circumstances, and I look forward to future endeavors. Thanks also to the Review Corp leadership for letting me take this kit under wing…


Comments
Add new comment
This site is protected by reCAPTCHA and the Google Privacy Policy and Terms of Service apply.