CH-47A Chinook
The Chinook helicopter needs little introduction and has been a mainstay transport of many armies, air forces and navies around the globe.
This Hobby Boss kit represents the first operational aircraft, which I understand only the United States used. The C-47A Chinook helicopter served in the Vietnam conflict.
Trumpeter is Hobby Boss’ parent company and I was curious to see if this Hobby Boss 1/48 scale CH-47 “A” model was similar to the Trumpeter 1/35 scale “A” model. I was able to look over the instruction manual for both online, as well as a parts review and breakdown on Hyperscale. I would go as far as to say that this is a scaled down version of the larger Trumpeter kit. The instruction manuals and parts breakdown were virtually identical. The only differences I could see was that the 1/35 scale Chinook came with photo etch cockpit seat belts, white metal undercarriage legs and rubber tires. In the 1/48 Hobby Boss kit, there were no photo etch seat belts provided, which was a shame. The tires were molded with the wheels and the landing gear legs were plastic. The last two items were most adequate in plastic.
Both kits suffered exactly the same sink marks on both front and rear rotor head cowling sides from an internal bulkhead. Surprisingly there was some flash on quite a few parts that one shouldn’t see on a newly tooled model.
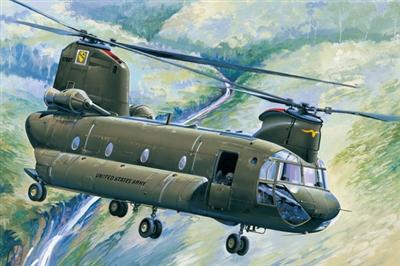
The model was beautifully packaged in a sturdy box, with a colorful rendition of the Chinook flying over what looks like a tropical (Asian?) type landscape. Each plastic sprue was protected in its own plastic bag. One smaller sprue was also wrapped in a foam sheet to further protect delicate items. Two separate clear sprues were provided in their own bags and a third bag contained the clear nose/canopy section. A small photo etch fret contained engine screen and vents.
The instruction manual was well laid out with clear building and painting steps. I questioned some of the color call outs and did my own research. A separate glossy, color page showed painting and decal placement for two different helicopters.
Construction naturally started with the interior. The cabin included quilted walls and ceiling. The floor showed nice raised and recessed detail. The cockpit was very well appointed with raised details on the center console, instrument panel and overhead panel. Three decals took care of the dials on the instrument panel, which conformed to the raised and recessed detail with a little help from Micro-Sol. I painted all the panels Tamiya tire black and carefully picked out all the switches, circuit breakers and warning lights with silver and red Sharpies. For what could be seen through the “glass”, this was more than adequate.
Most of the interior parts could be painted while still attached to the sprue. I painted it all Model Master dark ghost grey. The cabin floor and rear ramp typically had non-slip areas and I painted them with Tamiya tire black. There was no mention of these in the instructions, so research again was helpful. While the instructions called for Khaki, I had seen pictures of Chinook cockpit seat cushions in a red color, so I painted mine with a dull orange/red color to add a little contrast. No retractable seats were included that quite often lined each side of the cabin. This, and no photo etch seat belts for the cockpit seats were a little disappointing, especially for the price of this model. I sourced a set of Eduard photo etch belts from my stash for the cockpit seats and moved along with construction. Eduard released a number of photo etch sets in November for this chopper, but I had already closed the fuselage. I did use their canopy masking set, which surprisingly had some fit issues.
Building of the cockpit proceeded quickly with good fit of all parts, followed by two bulkheads right behind the cockpit that contained electronic equipment shelves (left side) and the heater (right side) between them. All these parts were built onto the full-length floor. Three fire extinguishers were painted and glued to their mounting brackets, one in the cockpit and two in the cabin.
The fuselage halves needed several holes drilled out, and the cabin windows were inserted. Here the modeler has a choice of using domed or flat “glass” in the second last cabin windows. Referring to the painting diagrams showed the domed windows in this position. There were extra domed and flat windows provided for different configurations. A number of photo etch screens were super glued in their spots on the fuselage halves and fit great.
The two fuselage halves were glued together, trapping the quilted cabin ceiling, floor and cockpit inside. The cabin floor was bowed up a little, so I glued it to several ribs between the floor and belly on one fuselage half. The fit of the fuselage was fine, although the belly center seam was tricky to eliminate. A separate belly plate would have made life easier, plus it would have kept all the nicely molded panel line detail intact. Nevertheless, careful seam sanding reduced the amount to panel line repair work. The roof seam was hidden by the separate transmission shaft fairing – Nice!!
With the forward fuselage together, I turned my attention to the separate rear fuselage. More photo etch screens were provided for all the inlet, outlet and cooling vents. Both halves fit together well and seated snuggly onto the forward fuselage along panel lines. A quick swipe with Tamiya Extra Thin cement along the panel line and this part was finished. The only sanding needed was along the belly seams.
I assembled the front and rear rotor head disks, actuator rods and shafts. All fit very well, although some of the assembly steps were a little confusing as to how to line it all up. Both front and rear, complete rotor assemblies was removable making the model easy to transport.
The rotor blades included the typical sag that the real blades exhibit. Each individual blade was sandwiched between the upper and lower rotor hub assemblies along with a drag actuator rod for each blade. The completed assembly was quite strong, but created some careful seam clean up.
The wheels came in two halves and showed a faint tread pattern. Interestingly, Hobby Boss included twin wheels on the rear undercarriage legs. I understand this was only found on the prototype and not the operational aircraft. I could be wrong, but, I cut off the inside axel and just used the outside wheel.
Two fairly nice engines were assembled and included three separate pieces to represent hydraulics, plumbing and other hardware. A separate upper cowling could be glued open to display each engine, but I wanted my engines buttoned up.
The last of the photo etch screens adorn the engine cowlings and air inlet covers. Some of these required multiple bends to fit their openings. I found super gluing one edge first and working along or around each screen to secure it in place worked best and produced a good result with no gaps between the screen edge and the plastic.
The one piece nose/cockpit window was attached and the fit was good.
With the helicopter built, I painted it Tamiya XF62 Olive Drab, followed by selective fading to show fading and wear. A gloss coat followed in preparation for decal application.
The decals looked quite nice on the sheet and were in register, however, all included quite large carrier film around the edges of each decal. I trimmed the carrier film away from the walkway decals so they would conform to the edges of the transmission shaft cover. Nevertheless, they were strong, allowed me to manipulate them into place and reacted well to Micro-Sol. Another gloss coat sealed the decals.
I used Tamiya black wash to highlight the panel lines, which showed nice panel and rivet detail. Several flat coats completed the painting.
Final assembly included attaching antennas, the remaining landing gear parts and wheels, windscreen wipers and pitot tubes. Two retractable landing lights were provided and both had a little flash that needed removing. I could not get them to fit cleanly in the closed position and glued them in the down position. It would be easier to attach these lights retracted before the fuselage was assembled.
The upper and lower rear hatches were glued in place and fit fine.
I strung fine fishing line along the left fuselage side antenna masts – I am not entirely happy with the result and I understand that there are a few too many masts. I will readdress the amount of antenna masts and restring them at a later date.
Finally, the front and rear rotor assemblies were placed into their housings and I called this Chinook done!
I enjoyed building this versatile helicopter and it looks great sitting next to my Hobby Boss MV-22 Osprey.
I would recommend this kit to modelers with some experience working with photo etch, as well as dealing with a couple of tricky assemblies and seam work.
I would very much like to thank MRC/Hobby Boss and the guys at IPMS USA for letting me build and review this nice model.
Similar Reviews

Belly

Cabin Floor & Electronics Bay

Cabin Interior

Cockpit Seats & Center Console

Cockpit windows

Electronic bay

Engine Pods & Screens

EnginePods, Cooling Vents & Inlet Screens

Front Left Side

Front Left

Front Rotor Boss

Instrument Panel

Left Fuselage Side Antennae Masts

Nose Antennae

Rear Left

Rear Rotor Head

Right Cockpit & Heater Inlet

Right Side

Rotor Head

Comments
Add new comment
This site is protected by reCAPTCHA and the Google Privacy Policy and Terms of Service apply.