Bristol Beaufort Mk.1A (With Tropical Filters)
ICM continues to pump out high quality model kits for us eager, plastic hungry modelers around the world! This is the second release of the Bristol Beaufort and represents the Mk.1A with tropical filters. These filters mounted on top of the engine pods and were used in hotter/dustier Mediterranean and North African environments. The downfall was the larger filters increased drag and reduced the cruising speed by about ten mph. The Mk.1A was an improvement over the Mk.1 incorporating a new machine gun turret and an ASV radar for torpedo bombers to search for surface targets. The Beaufort and her crews were relatively forgotten and unsung heroes of the Second World War.
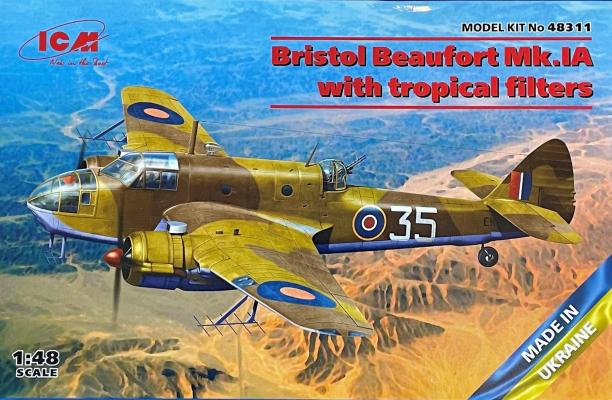
The model is presented within ICM’s standard well thought out box. A nice rendition of one of the versions offered emblazoned on the box lid. All the grey plastic sprues were contained within one plastic bag. The clear parts were found in their own bag. An instruction manual and decal sheet were protected in the bottom of the box. The manual was laid out in the same format that I had become familiar with building several other ICM kits. It included a parts layout and a canopy mask template.
Construction follows a logical pattern, and indeed, a good deal of thought went into it. In the first steps much of the interior could be built and then painted the same color. ICM provided a list of recommended paint colors to paint the Beaufort in several different manufacturer’s colors. The suggested interior color callout was US dark green, which I questioned. From internet references and my knowledge of British aircraft, I believed the color should be British interior green and that is what I painted mine.
Much of the cabin area was hidden when the fuselage was closed, so I didn’t spend too much time detailing it. The cockpit, however, was highly visible under the crystal-clear canopy. The cockpit detail was rather basic with decals representing the instrument panel dials, representations of the throttle and pitch levers, but no switch detail. I added a Kelik 3d printed decal set and Eduard seat belts, both of which really improved this area of the Beaufort.
I followed the flow of the instructions for most of the build, except I left off the canopy “glass” until I had the complete aircraft built and sanded. The fuselage halves mated with no problems. Don’t forget to open several holes. Two cabin bulkheads included forward and rear wing spars that slotted firmly through each fuselage half and aided in a precise fit of the wings to fuselage. It was suggested to fit the tail wheel between the fuselage halves as there were lateral support pins to help strengthen the strut and keep it in place. I followed this and subsequently broke the tail wheel off. I reattached it after drilling and inserting a length of wire through the center of the leg for strength.
The wings themselves fit together nicely. Two different inboard, trailing edge styles were provided, and it was here that I made the decision as to which marking option I wanted to model. The painting and decaling pages showed which to use. As I chose the first option, I used parts numbers C26 and C27 with semi-circular trailing edges. These parts fit perfectly and resulted in the joint looking like the rest of the surrounding panel lines. I attached the ailerons but left the separate flaps until later. They could be assembled up or down.
The tail planes and elevators also went together with no issues and fit to the fuselage well.
I tackled the main landing gear next, and, in my opinion, a razor saw and extremely careful handling was an absolute must. The legs and cross members were cut from the sprue and cleaned up. The components all fit very well and resulted in a realistic and sturdy gear assembly. The only parts I snapped were braces that curved around the front of the gear legs. One of these was already bent on the sprue and snapped as I tried to straighten it. The main wheels were in two halves, adequately detailed and fit nicely together. I left these separate until the model was completed.
The two Bristol Taurus radial engines were little models in themselves. Two rows of cylinders were accompanied by an exhaust collector ring that was held in place by three support rods attached to the front of the engine housing. Each row of cylinders had separate exhaust pipes (two per cylinder) that butt joined to the rear of the collector. At the rear of the engine, a single piece containing the air intake pipes was attached to the cylinders. This part also acted as the joining member to the front of the engine/wheel well cowling.
The instructions showed attaching the propellors to a short axel that fits inside the first row of cylinders. I glued the axel inside the engine so I could fit the props later. This also made it easier to deal with the engine cowling. These were in two halves and quite nasty seams had to be repaired, as well as judicious sanding around the straps that I understood kept the cowling together. I did the best I could with cleaning these up and used my razor saw to scribe the lost strap detail back onto the cowls. I also noticed looking at a picture supposedly of Beaufort Mk. 1A “Q” at Luqa, Malta, that I was building, the kit cowls appear to be representative of a later Beaufort Mk II. I believe the cowls should have a smaller diameter opening at the front of the intake. There are replacement/corrected cowls available, but I used what was provided in the kit. The box top picture also showed what appeared to be the correct intakes.
With the fuselage sanded, I attached the cockpit and nose greenhouse canopy. There were four parts and each fit reasonably well. I did end up with a small step where the main cockpit canopy met the fuselage sides, which I also noticed on other builds on the web. I really don’t know why this happened, but I wondered if the pilot’s armored seat back may have interfered with achieving a flush fit. The side, clear panels fit fine, but were a little fiddly to get and keep in place. I left the forward nose piece off for now, as two Vickers machine guns needed to be inserted and I didn’t want to break them. All the “glass” was masked with Eduard canopy masks, although the set I had did not cater for the gun nose or the later rear turret. I masked those using the ICM masking template, which worked very well. See my picture of how I cut them out.
I plugged up the main entry hatch and taped over the open nose, torpedo bay and wheel wells in preparation for painting. I used Mr. Hobby Color and Tamiya colors to paint the hard-edged camouflage scheme. The engine cowls were painted in camouflage colors up to the forward straps and beyond that were painted brass to replicate the bare metal that surrounded the exhaust collector. As mentioned earlier, I was building an aircraft based at Luqa, Malta. The nights were so dark that ground crews painted the leading edges of the cowls white so they could be seen a little easier while operating on the ground. These white leading did accentuate the overly wide cowl opening. A gloss coat finished this part of the painting process.
ICM’s high quality decals performed flawlessly and they laid down into panel lines and curves with the help of a little Micro-Sol. Another gloss coat followed to seal in the decals and I ran a Tamiya black wash through the panel lines.
I attached the main landing gear legs prior to applying a final flat coat to give the aircraft something to stand on.
Final assembly involved only a few parts, including the wing and nose mounted ASV radar antennas. Like I did with the landing gear, I used my razor saw to cut the parts from the sprue. Extreme care was needed not to damage or break these fragile, soft plastic parts. I had pre-drilled holes in the wings to accept the antenna mounts. The complete assemblies were quite strong in the end.
Two antenna masts were glued to the cabin roof and I strung fishing line to replicate an arial. A DF loop areal was enclosed in a clear aerodynamic bulb and mounted on the roof. The two main wheels were also glued to their axles.
The main cabin hatch was in two parts. The upper part, when open, slides up inside the cabin, while the lower half is removable. I glued the upper part inside the cabin and the bottom half rested against the Elson toilet and rear bulkhead. A support bar was attached across the lower hatch opening to which a Vickers .303 machine gun was mounted.
Two Vickers .303 machine guns protrude through the nose of the Beaufort I was building and these both slotted in nicely. A cross member connected the rear of the guns. After making sure the inside of the cockpit canopy was free from dust, I glued the nose canopy in its place. The fit was quite nice.
The hydraulically driven rear twin, Vickers .303 machine gun turret assembly was slotted into the cabin floor along with a retaining ring that the turret canopy was glued to. All components fit perfectly, although slotting the assembly into the cabin floor was a little fiddly.
Turning the model over, I attached the landing gear doors and the torpedo/bomb bay doors, as well as the landing flaps. Interestingly, the forward and aft doors open inwards to accommodate the torpedo and no doubt reduce drag from the torpedo bay doors hanging open during flight.
The last building steps within the instruction manual dealt with the Mk. XII torpedo and its trolley. I built both early in the build but wanted to treat them separately in this text. The torpedo was faithfully produced and parts were supplied to build one with large wooden fins. These fins were designed to flatten the torpedo’s plane on entering the water so it would run at a shallow depth and, hopefully, ensure a hit against the hull of a ship, instead of it diving too deep.
The trolley was a little model in itself! It was a little fiddley, but fun to put together. I had intended to store the torpedo on the trolley instead of in the belly of the aircraft, so it was a very nice addition.
I enjoyed building the Bristol Beaufort. It was another great kit from the Ukraine, and will look great sitting next to its successor, my Tamiya Bristol Beaufighter.
I would recommend ICM’s Beaufort to more experienced modelers, due to the extremely fragile parts throughout the kit, like the landing gear legs and ASV radar antennas. I could only knock the model in two places – the sparse cockpit and the shape of the front of the engine cowls. Both of which were minor and certainly did not detract from the finished product.
I would like to the ICM and the IPMS USA for the privilege of building and reviewing this fine model.

Exposed Engine and Tropical Filter

Exposed Engine and Tropical Filter

Interior with Eduard Panel and Belts

Interior Kelig 3D and Eduard Panel and Belts

Masking Template and Plastic Sleeve

Crew Hatch

Engine Nacelle and Landing Gear

Finished Left Side

Finished Rear

Finished Right Side

Finished

Finished

Antennae

Rear Gun and Toilet

Landing Gear

Masking

Torpedo

Torpedo Trolley

Torpedo on trolley

Torpedo bay

Finished

Finished

Comments
Add new comment
This site is protected by reCAPTCHA and the Google Privacy Policy and Terms of Service apply.